Getting Started
Welcome to the GPT Chat extension documentation.
The GPT Chat extension is a chatbot for a Magento 2 store to keep your costs on customer support low. Use it for the following tasks:
- 24/7 customer service
- Increased customer engagement
- Reduced workload for customer support
The GPT Chat is a cost-effective solution that can handle a high volume of customer queries without incurring significant additional costs on hiring additional customer support staff.
With the chatbot handling the basic queries, the customer support team can then focus on more complex issues that require human intervention.
Go ahead, dive in!
Firstly, please, find our extension in My Downloadable Products section of our store.
Learn how to install extension, and proceed with Quick Start, which will guide you to setup general rules.
How to install the extension
- Backup your store's database and web directory.
- Login to the SSH console of your server and navigate to the Magento 2 store's root directory.
- Copy the installation instructions from the page My Downloadable Products to the SSH console and press ENTER.
- Run command
php -f bin/magento module:enable Mirasvit_Core Mirasvit_Chatto enable the extension. - Run command
php -f bin/magento setup:upgradeto install the extension. - Run command
php -f bin/magento cache:cleanto clean the cache. - Run command
php -f bin/magento config:set oauth/consumer/enable_integration_as_bearer 1to enable integrations. -
Deploy static view files
rm -rf pub/static/*; rm -rf var/view_preprocessed/*; php -f bin/magento setup:static-content:deploy
Quick Start
Our GPT Chat extension is a simple yet powerful extension that requires just to add the data on your products. All general settings are predefined out-of-box.
The first things that you need to configure are:
- activation of GPT Chat in Magento admin
- getting the Chatbot Key on chat.mirasvit.com
- activate Magento API integration
- uploading data on your store to the bot
- adding the Chatbot to Magento store frontend
This is enough to have a good start. Refer to corresponding sections of the manual to know more.
Activation of GPT Chat in Magento admin
In your Magento admin navigate to Stores > Settings > Configuration > Mirasvit Extensions > GPT Chatbot > General Settings.
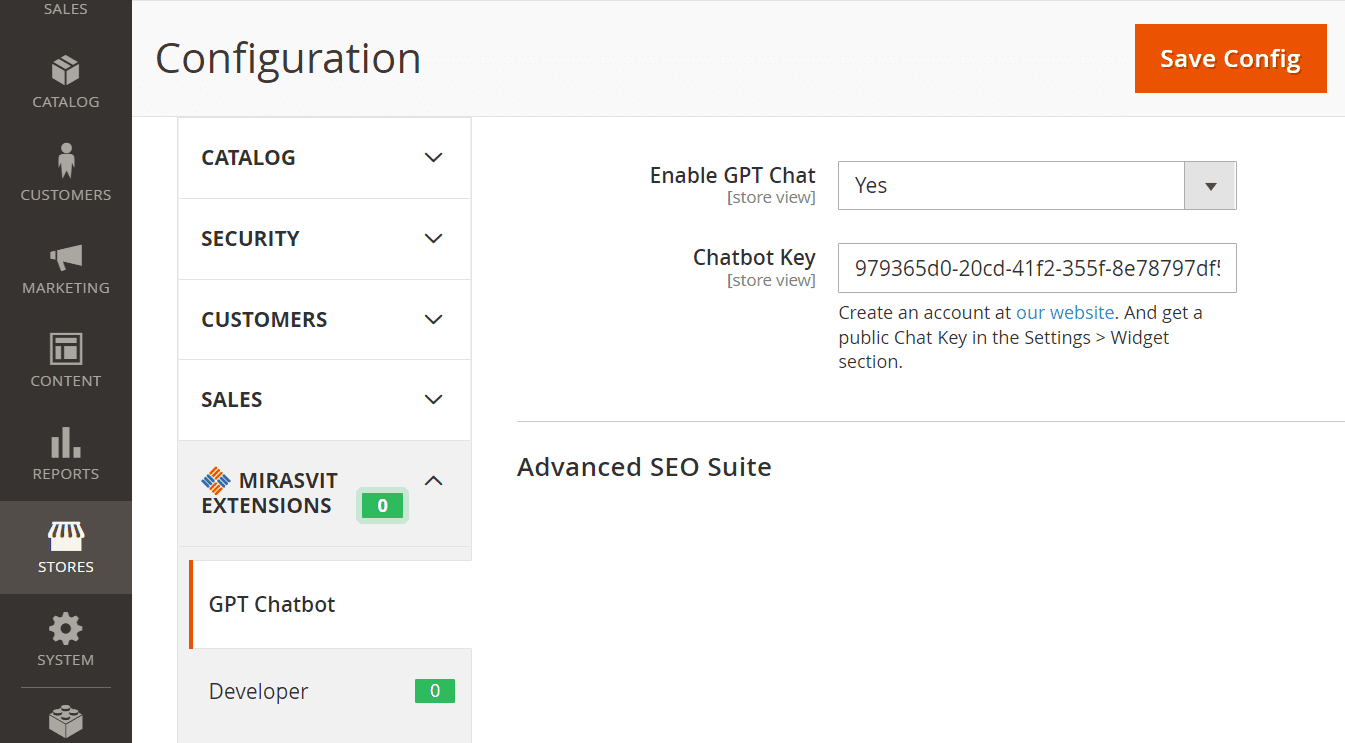
Activate the GPT Chatbot by setting:
- Enable GPT Chat to Yes
- Chatbot Key. Paste here the key you have obtained at chat.mirasvit.com. Refer to Get Chatbot Key page
Upload the data on your store to the Chatbot
Configure the chatbot language and welcome message
On chat.mirasvit.com navigate to Settings > ChatBot. Set the following:
- Language. Specify the language for the bot to use in conversations by default.
- Company Name. Provide the short name of your business.
- Bot Invitaion Message. Write down what the Chatbot should say in its first welcome message.
- Base Prompt. Provide a set of general guidlines for the bot to use in its work.
For example: "You are a chatbot. You assist with tasks regarding Magento Luma products and services. You are part of Magento store team. Tell "We" when you refer to the store. We sell a wide range of active wear for men and women, bags, training videos, and other products.** - Tags Prompt. Specify tags for the Chatbot to better navigate through the data of your store.
Add tags one per line like following:general // all questions regarding our store, customer tickets, purchase conditions - Fallback Message. Write here a message that will be used in case the bot can't answer the customer's question.

Upload information on your store
On chat.mirasvit.com navigate to Documents > New Document. Provide here the data on your store and your products, services, customer support, etc.
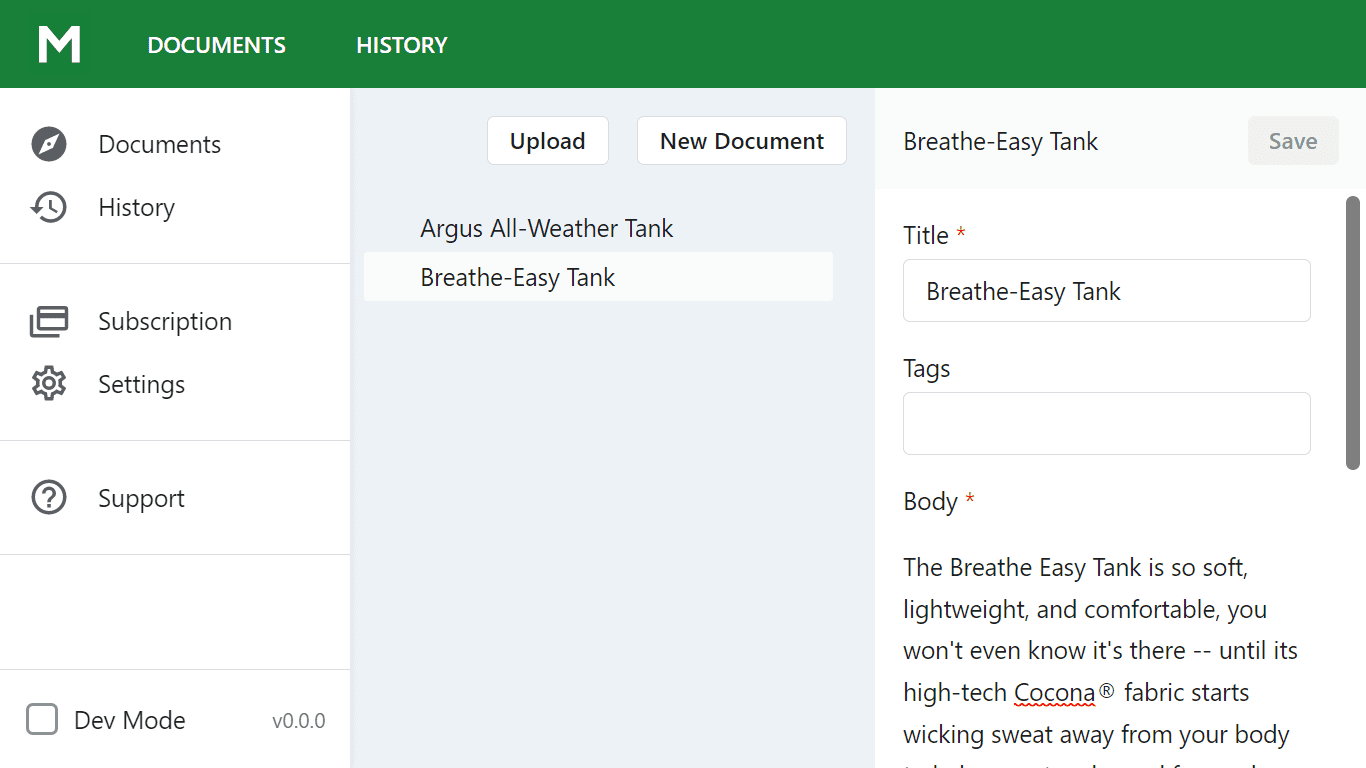
Specify the following:
- Title. The title of your document. This is a mandatory option.
- Tags. Provide tag promts for the chatbot. The field is optional.
- Body. Provide the data on your product or service. This is a mandatory option.
- External link. Specify an URL the bot can use to add to its reply. The field is optional.
Activation of API Integration in Magento admin
Run command php -f bin/magento config:set oauth/consumer/enable_integration_as_bearer 1 to enable integrations (if you have not run before).
Flush the Magento cache in order to get the Integrations menu in your Magento admin.
In your Magento admin navigate to Stores > Extensions > Integrations.
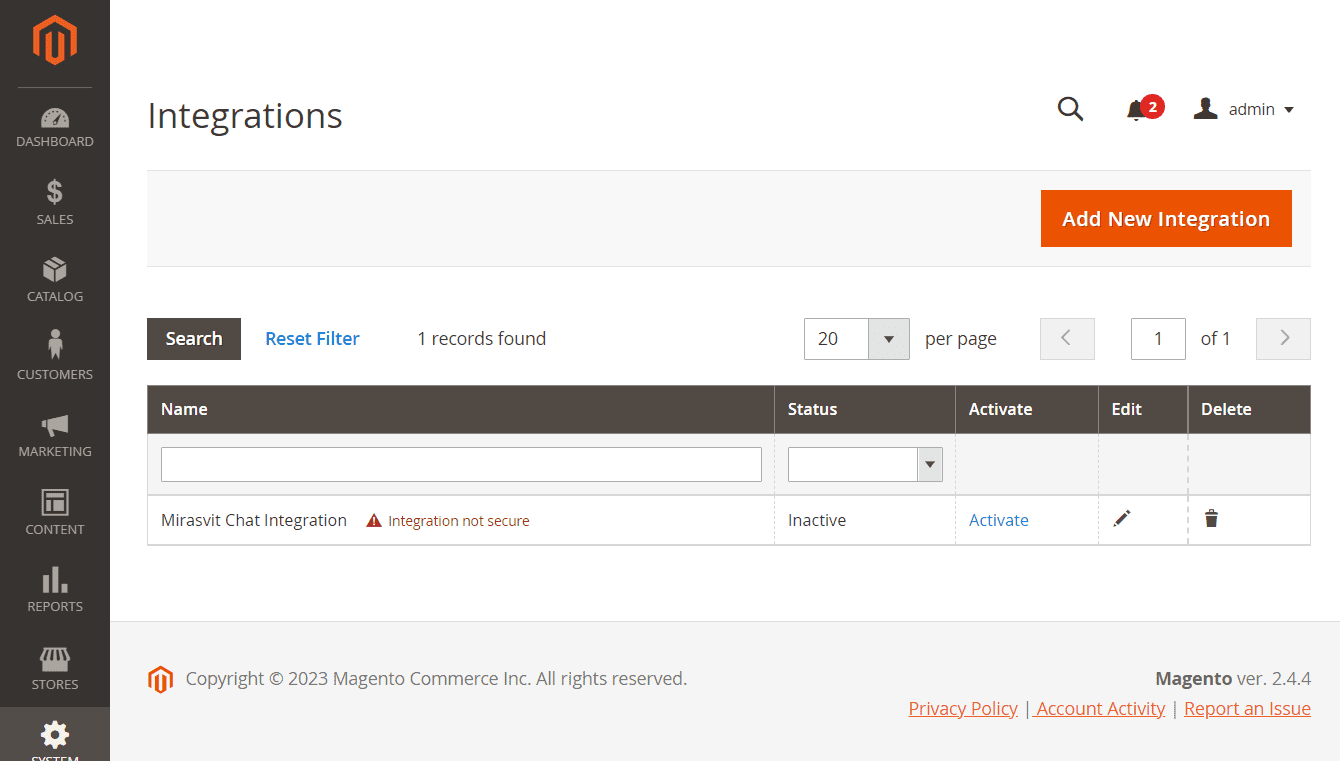
Activate the "Mirasvit Chat Integration":
- Click the link Activate
- In the login form, login to your account on chat.mirasvit.com
Add the Chatbot to Magento store frontend
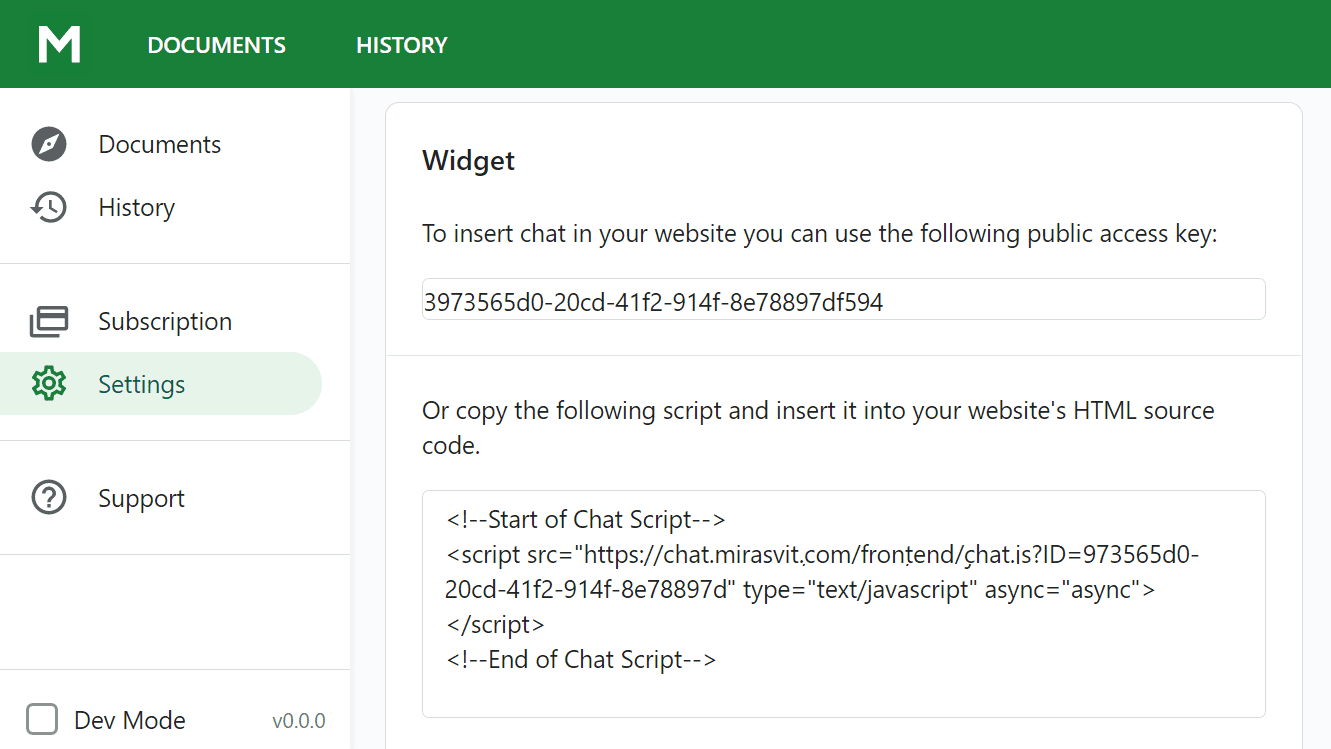
On chat.mirasvit.com navigate to Settings > Widget and copy the script provided.
The script looks like the following:
<!--Start of Chat Script-->
<script src="https://chat.mirasvit.com/frontend/chat.js?ID=2dd11c-763a-4d78-b2ac-0ab153eea4" type="text/javascript" async="async"></script>
<!--End of Chat Script-->
Paste this script into the Magento frontend theme for the chatbot to be available on your store frontend.
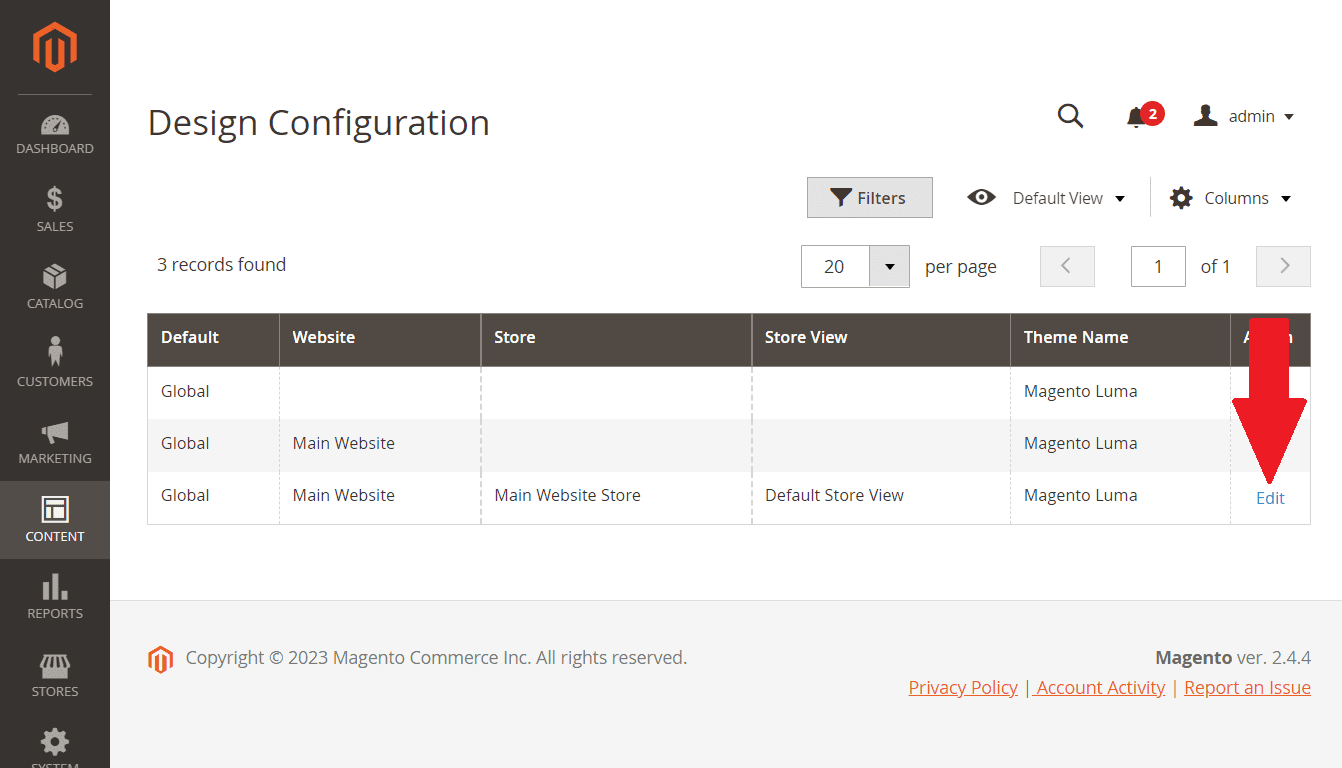
In your Magento admin navigate to Content > Design > Configuration. Locate the line with the Default Store View and click Edit to modify your current frontend theme.
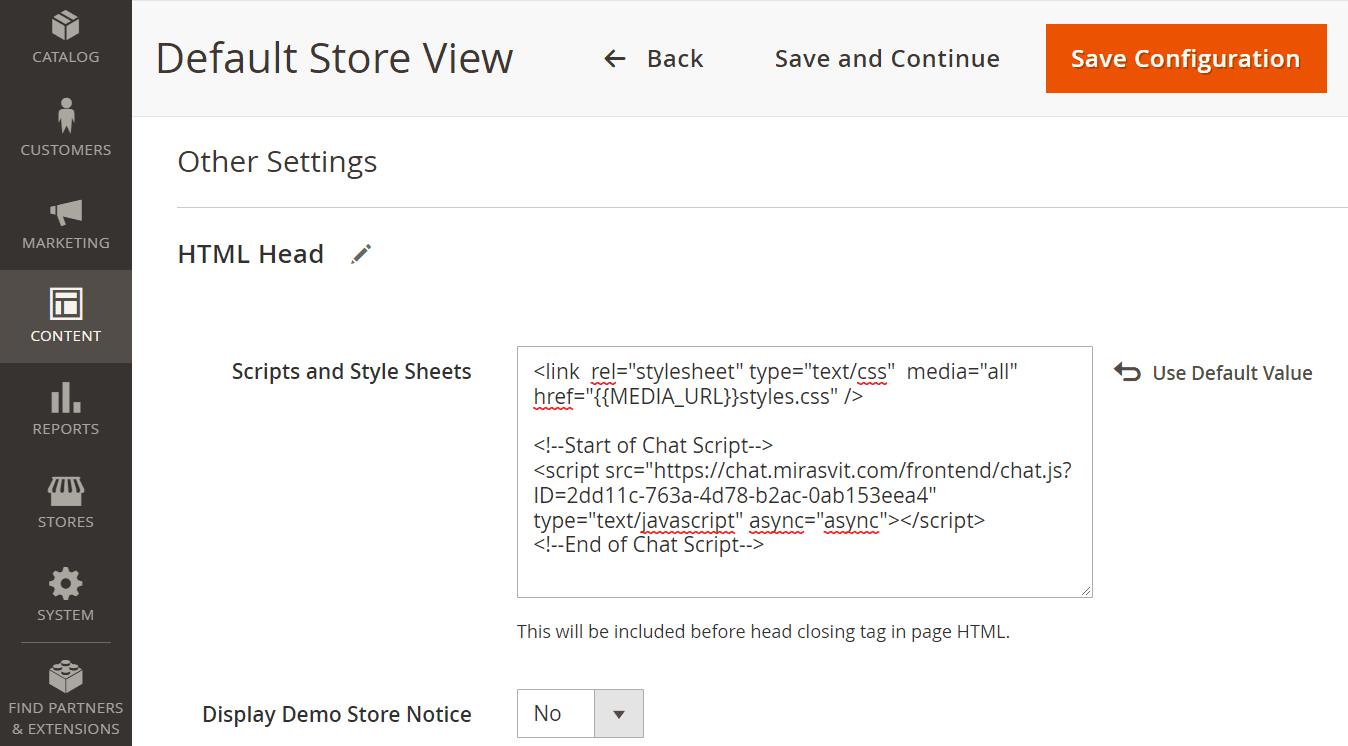
On this page locate the Other Settings and expand the HTML Head section. Place your script under the Scripts and Style Sheets input box. Click on the Save Configuration button.
Flush the Magento cache.
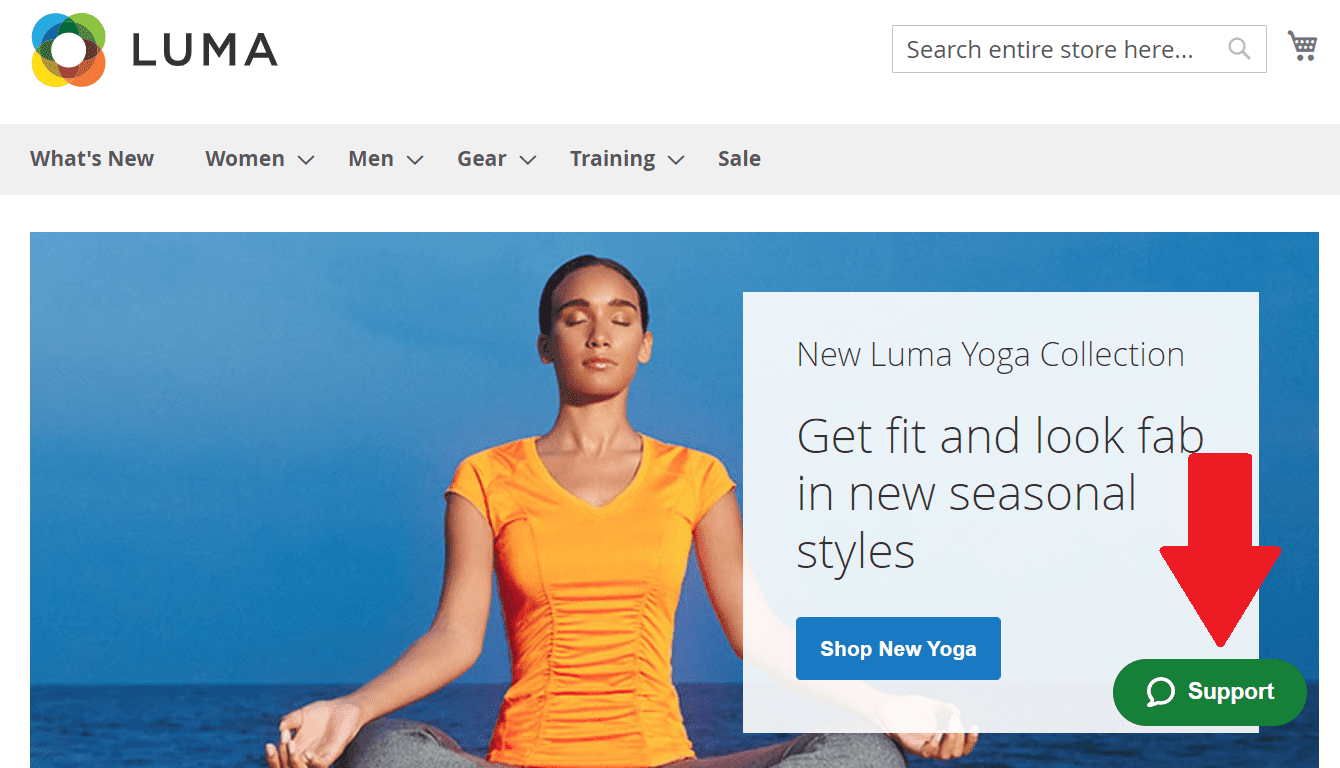
Reload your Magento store frontend page. A geen button of the chatbot should be present in the right bottom corner of the screen.
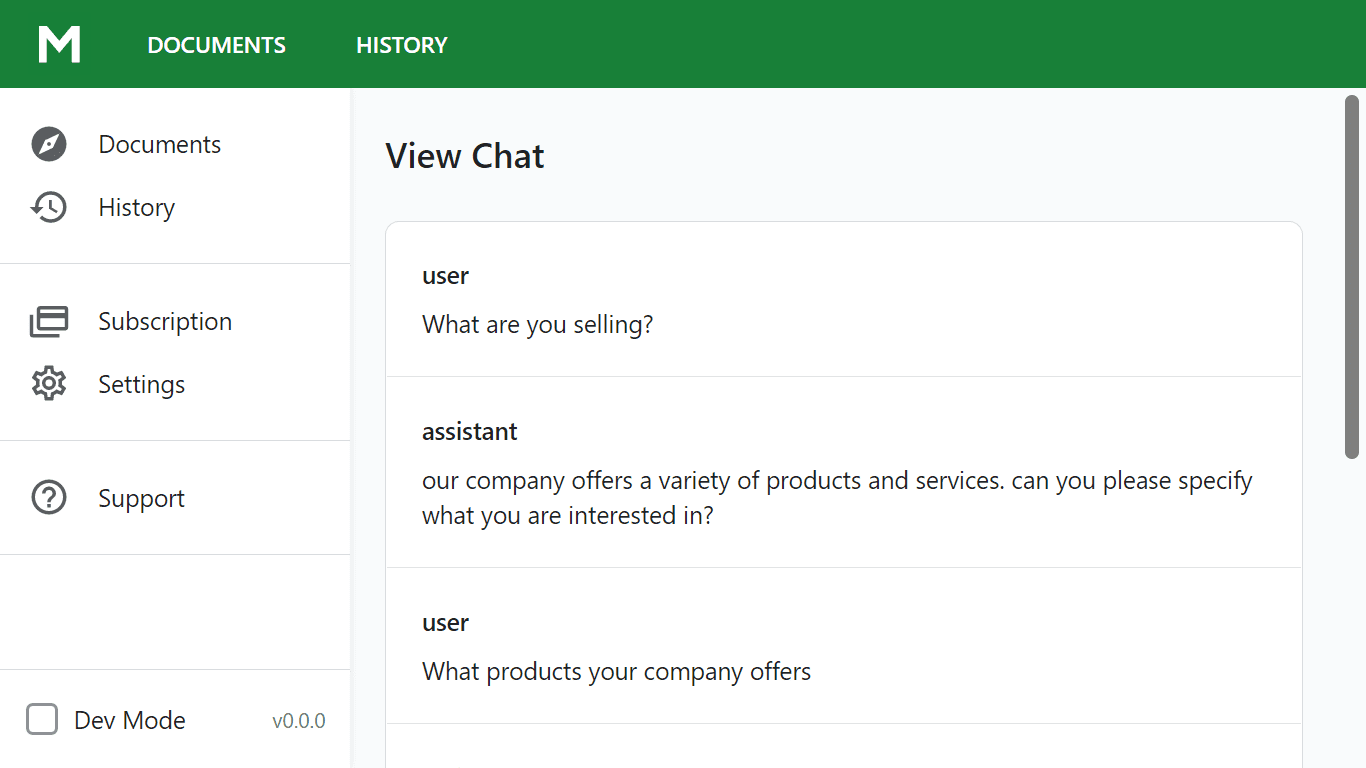
View the Chatbot's conversations
You can view the conversations the Chatbot had conducted.
On chat.mirasvit.com navigate to Settings > History. Select a session and click View.
How to upgrade extension
To upgrade the extension, follow these steps:
- Backup your store's database and web directory.
- Login to the SSH console of your server and navigate to the root directory of the Magento 2 store.
-
Run command
composer require mirasvit/module-chat:* --update-with-dependenciesto update current extension with all dependencies.Note
In some cases, the command above is not applicable, or it's not possible to update just the current module, or you just need to upgrade all Mirasvit modules in a bundle. In this case, the command above will not affect.Run instead
composer update mirasvit/*command. It will update all Mirasvit modules installed in your store. - Run command
php -f bin/magento module:enable Mirasvit_Core Mirasvit_Chatto re-enable extension. - Run command
php -f bin/magento setup:upgradeto install the updates. - Run command
php -f bin/magento cache:cleanto clean the cache. -
Deploy static view files
rm -rf pub/static/*; rm -rf var/view_preprocessed/*; php -f bin/magento setup:static-content:deploy
Disabling the Extension
Temporarily Disable
To temporarily disable the extension please follow these steps:
- Login to the SSH console of your server and navigate to the root directory of the Magento 2 store.
- Run command
php -f bin/magento module:disable Mirasvit_Chatto disable the extension. - Log in to the Magento backend and refresh the store cache (if enabled).
Extension Removal
To uninstall the extension, please follow these steps:
- Login to the SSH console of your server and navigate to the root directory of the Magento 2 store.
- Run command
composer remove mirasvit/module-chatto remove the extension. - Log in to the Magento backend and refresh the store cache (if enabled).