Getting Started
Welcome to the Google Indexing and Analytics Documentation. Whether you are a new or an advanced user, you can find some useful information here.
First of all, we recommend you check the following link:
- How to install extension
How to install the extension
- Backup your store's database and web directory.
- Login to your server's SSH console and navigate to the root directory of the Magento 2 store.
- Copy the installation instructions from the page My Downloadable Products into the SSH console and press ENTER.
- Run the command below to enable the extension:
php -f bin/magento module:enable Mirasvit_Core Mirasvit_SearchConsole - Run the command below to install the extension:
php -f bin/magento setup:upgrade - Run the command below to clean the cache:
php -f bin/magento cache:clean -
Deploy static view files:
rm -rf pub/static/frontend/*; rm -rf pub/static/backend/*; rm -rf var/view_preprocessed/*; php -f bin/magento setup:static-content:deploy - Make sure that the native Magento cronjob is configured and working correctly.
Google Indexing and Analytics settings
The settings of Google Indexing and Analytics are located at Stores ▸ Configuration ▸ Mirasvit Extensions ▸ Google Indexing and Analytics and are grouped into the following sections:
- General Settings - basic configuration of the extension;
- Indexing - Google indexing settings;
- Analytics - Google analytics settings;
Extended Settings
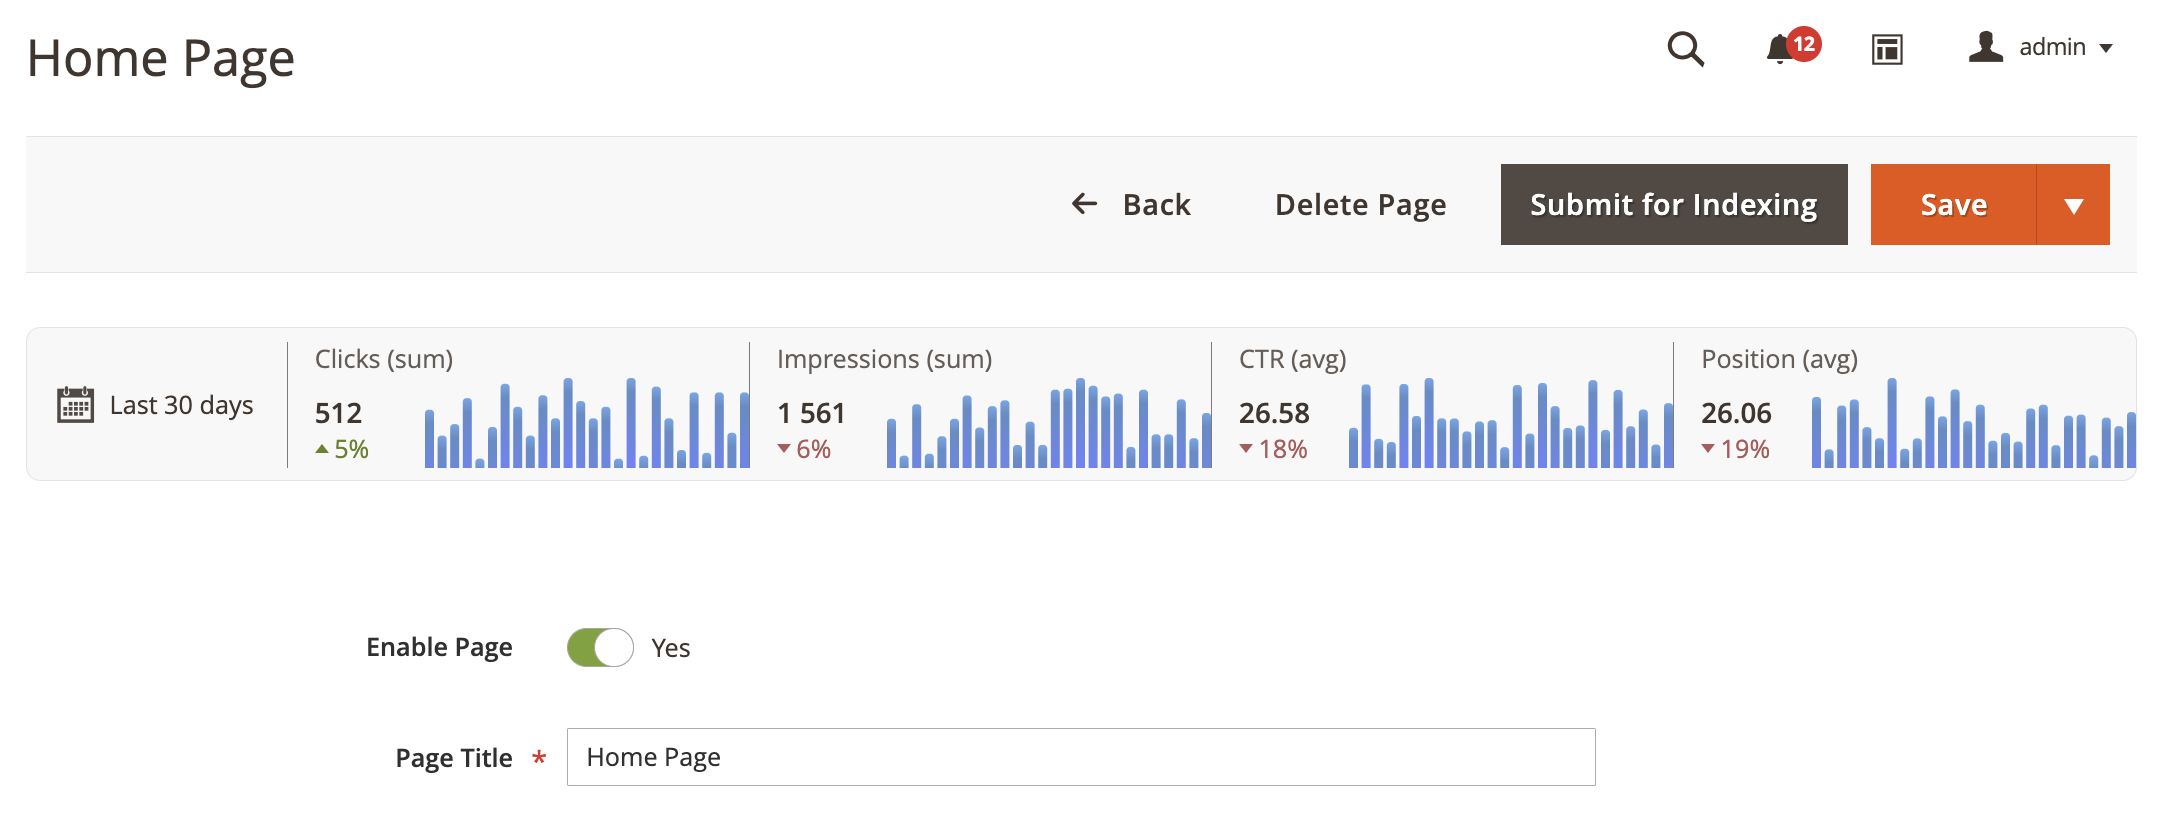
- Enable - enable/disable extension. If enabled, the Submit for Indexing button will be added to every edit page for supported entities
- Google Service Account Keys File - upload the auth file to connect to your Google Search Console project. More information about how to configure Coocle Cloud Project and recieve the auth file can be found here
Indexing
- Submit URLs to reindex by cron - enable/disable processing indexing queue on a cron basis. If disabled, URLs still can be submited for indexing from the Indexing Queue table.
Analytics
- Enable - enable/disable collecting analytics data from the Google Search Console. When enabled the extension will continiously gather analytics data from the Google Search Console by cron.
Also, when enabled, the analytics data bar will be added to every edit page for supported entities.
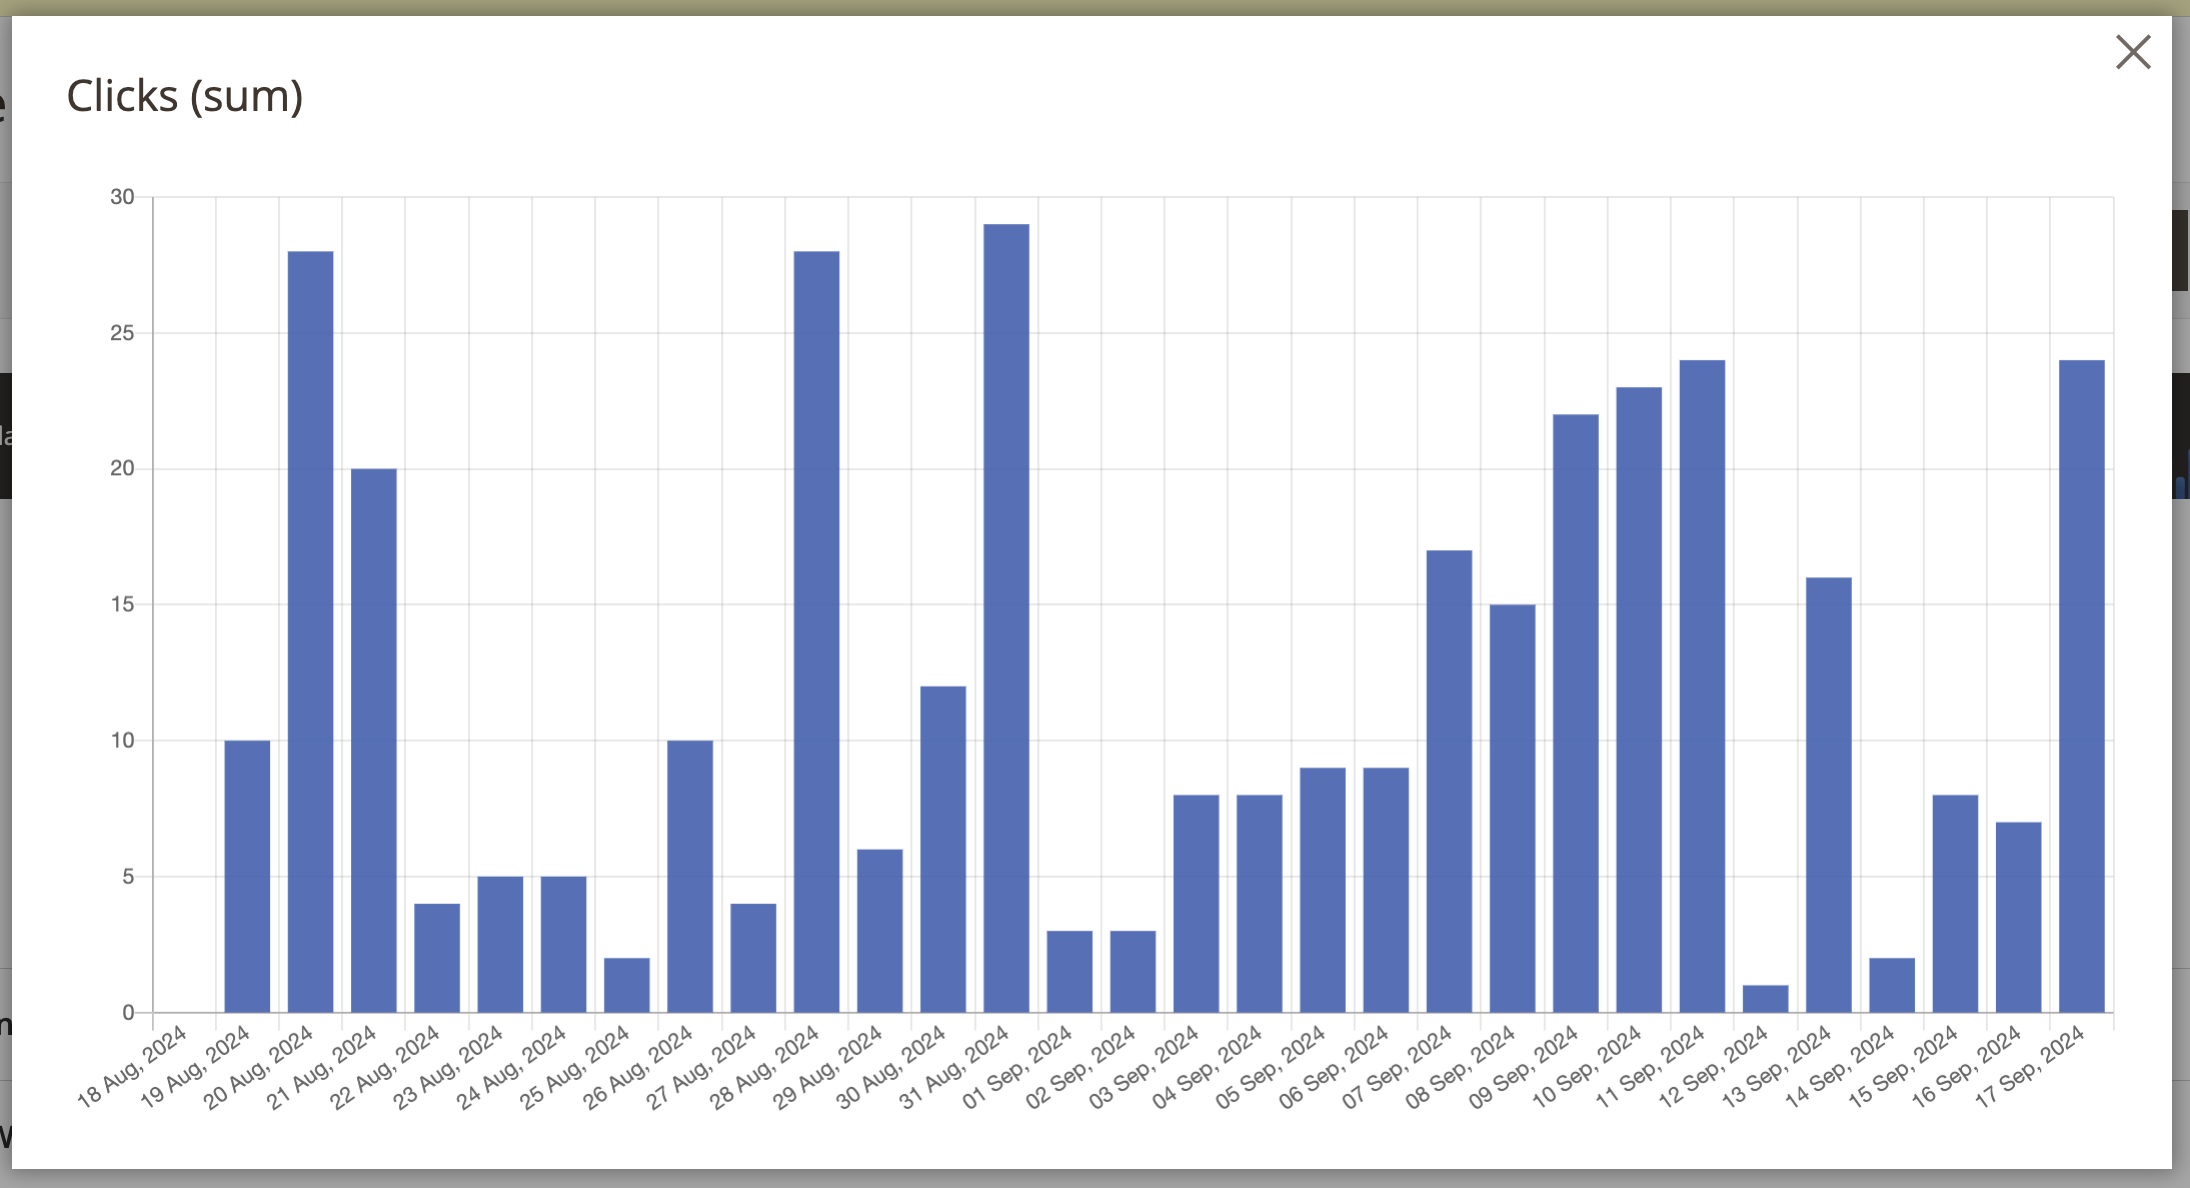
- Cron Job Settings - Cron settings for collecting analytics data. This setting has 2 options:
- Default
- Custom
If the Custom option is selected the following setting will be available: - Job Schedule - cron expression for the cron job schedule.
- Maximum job run time - The maximum job run time (in seconds). Should be less than the time interval between jobs executions according to the Job Schedule.
- Rows Limit per Request - defines how many rows will be returned from the Google Search Console API for a single request. Valid range is 1–25000, Default is 1000.
The list of supported entities:
- Products
- Categories
- CMS Pages
- BlogMX Posts
- BlogMX Categories
Google Search Console and Indexing APIs
Step-by-step instruction to configure access to the Google Search Console and Indexing APIs
- Log into the Google Cloud Console (API)
- Create a new project or select the existing one.

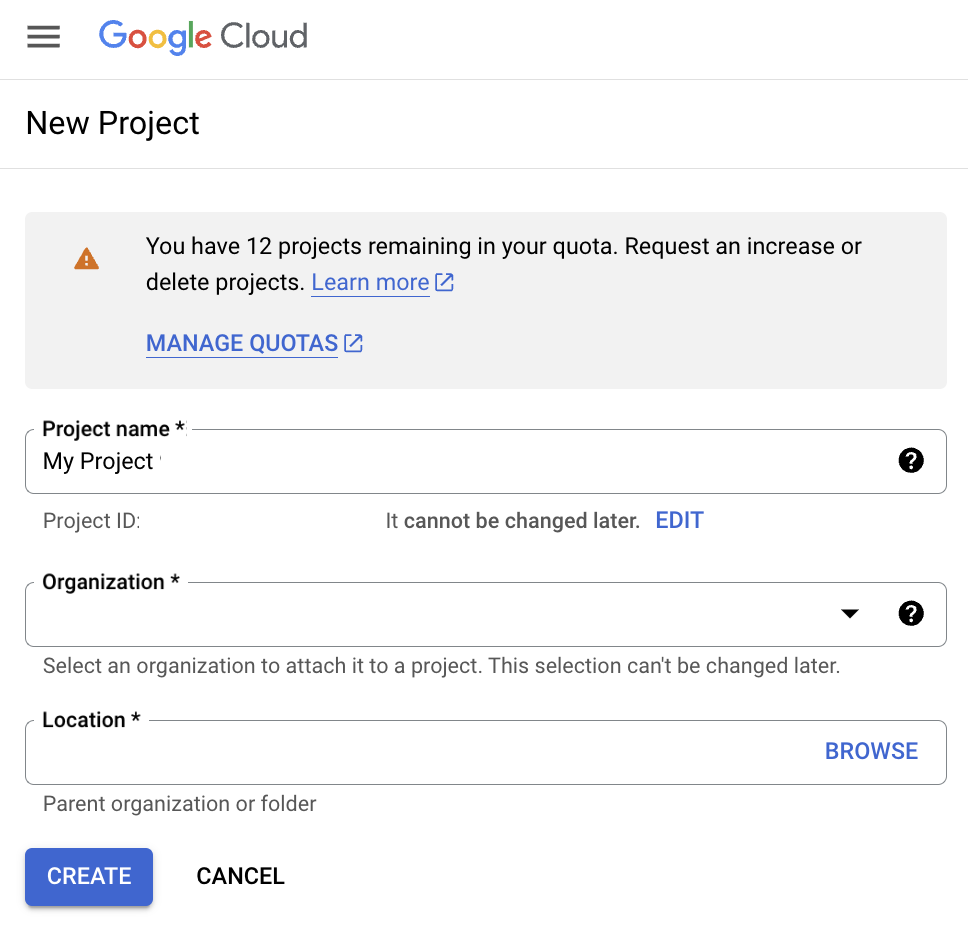
- Confirm the project and enable the API


- Go to APIs & Services and check if the Google Search Console API is in the list of enabled APIs
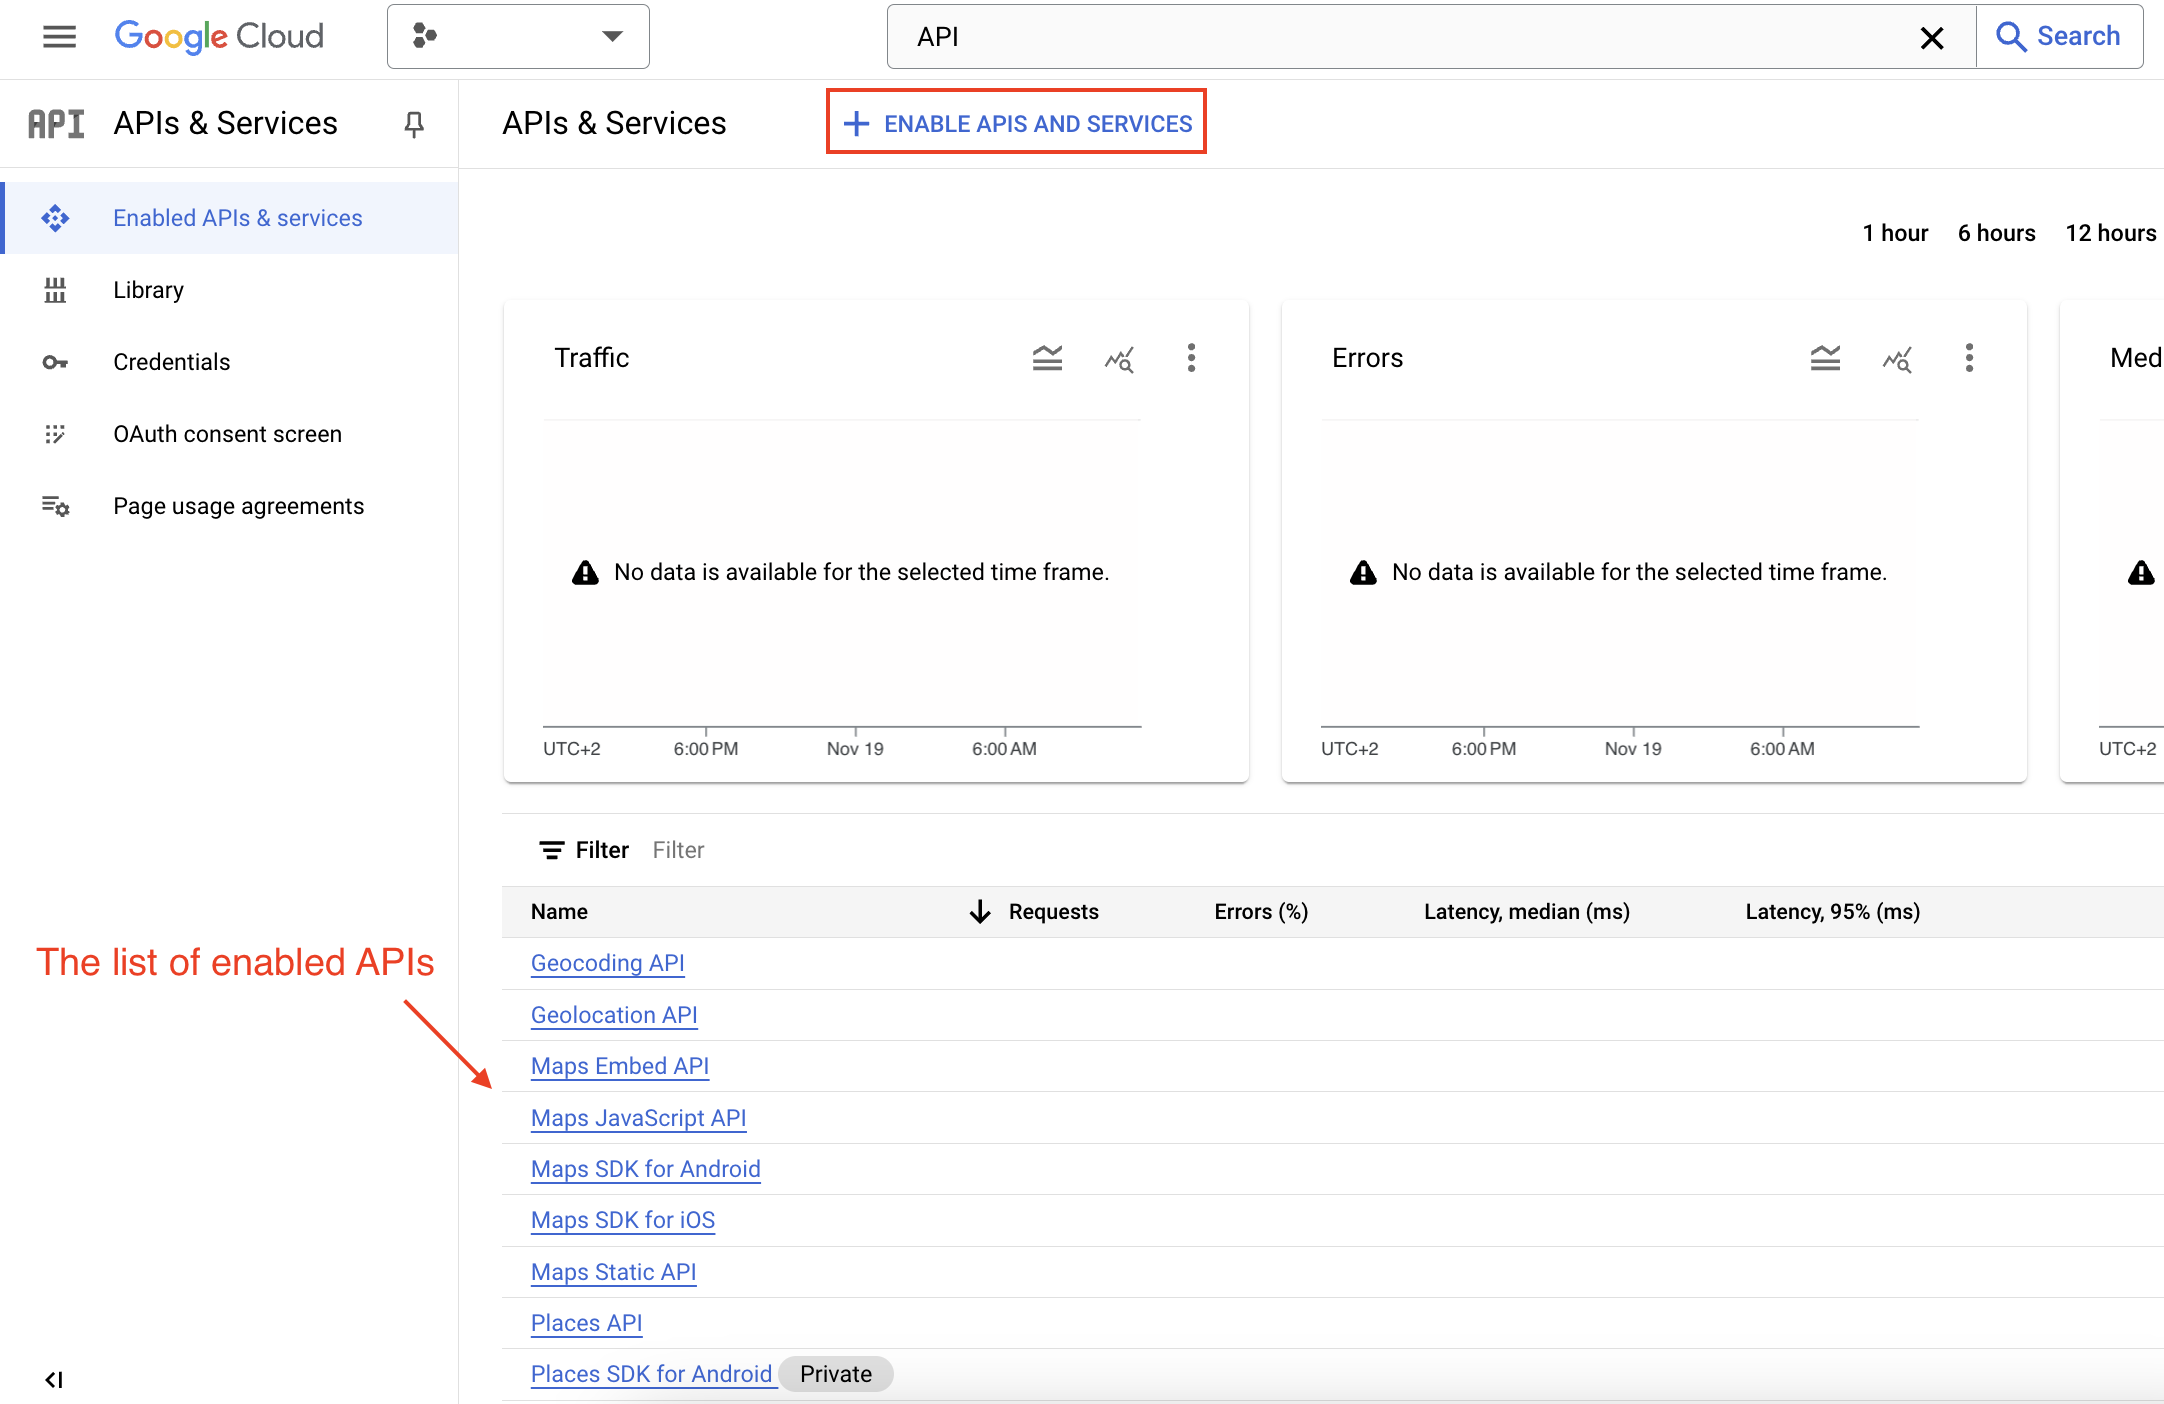 If the Google Search Console API is not on the list click ENABLE APIS AND SERVICES button.
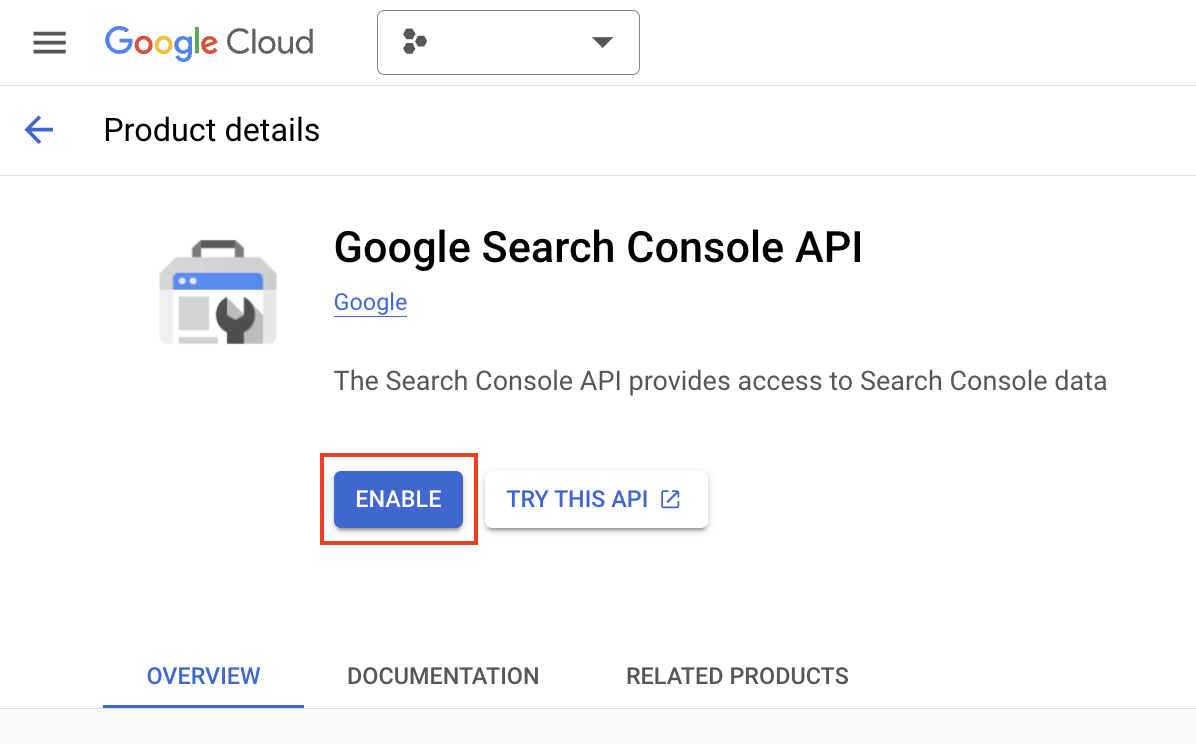
Search for the Google Search Console API
 Click on the API and then enable the API
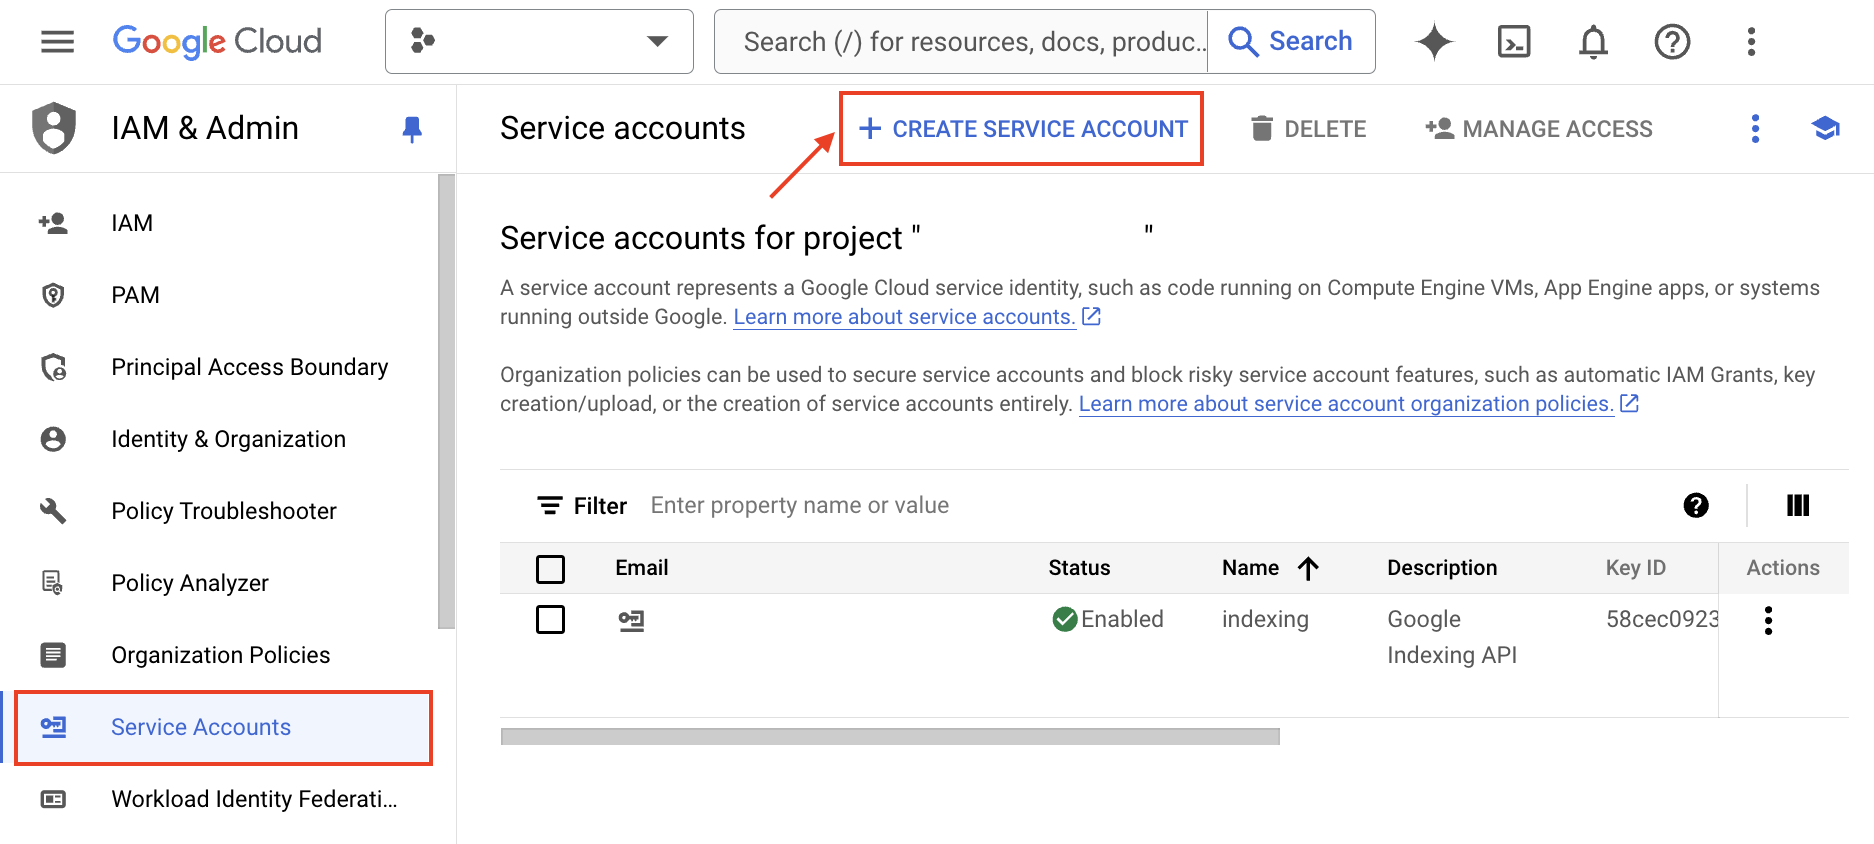
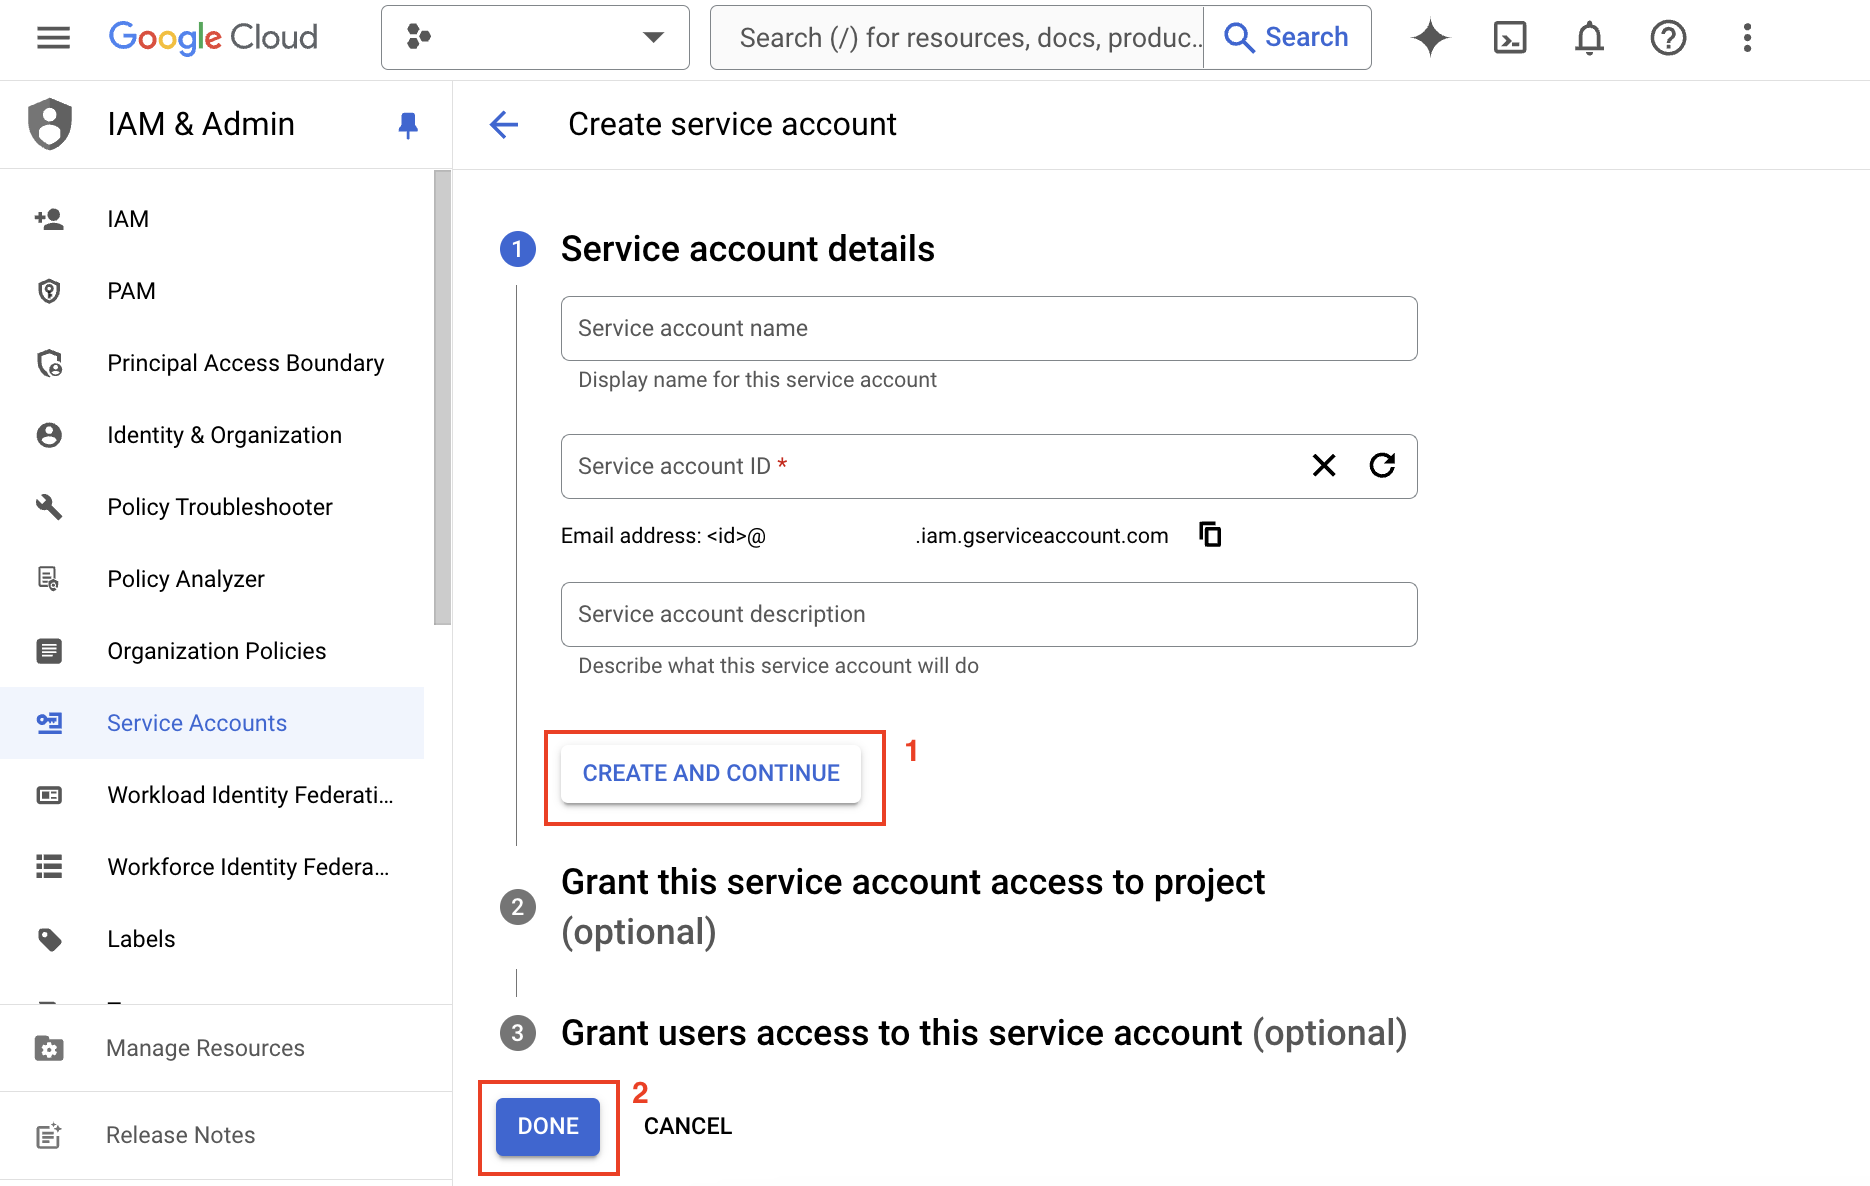
- Create Service Account
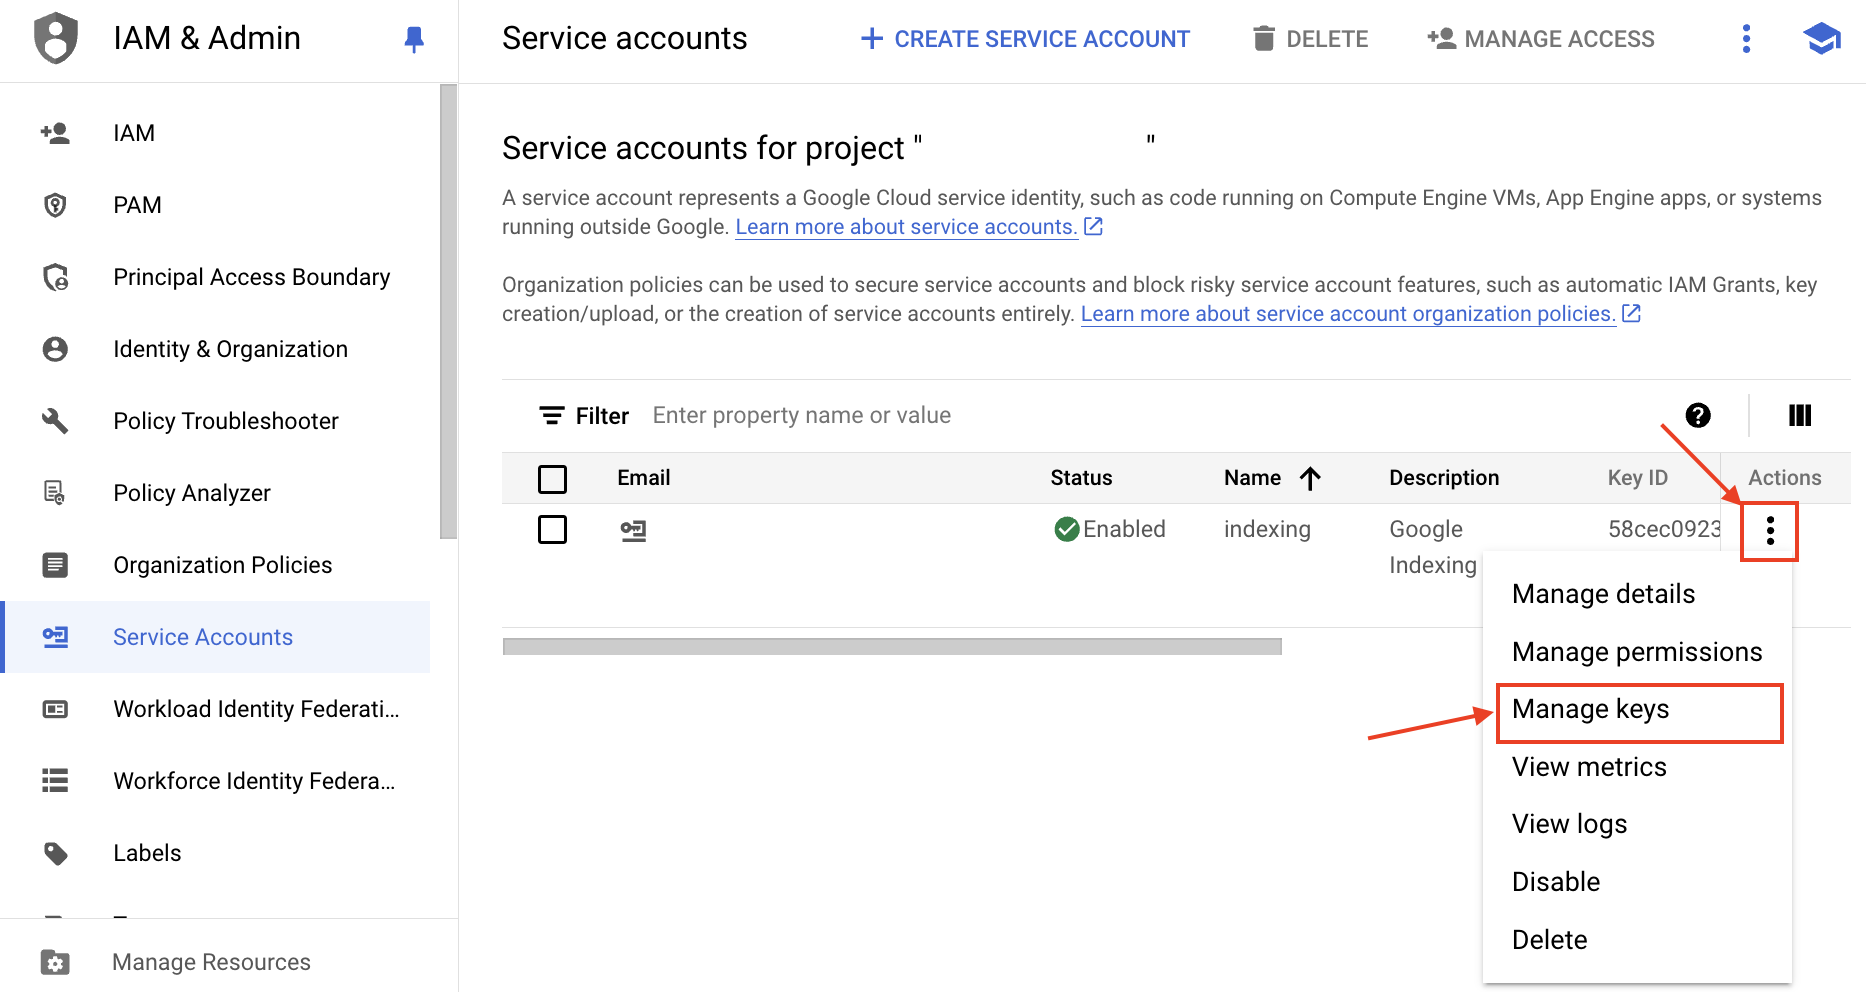
- Generate private API keys file.
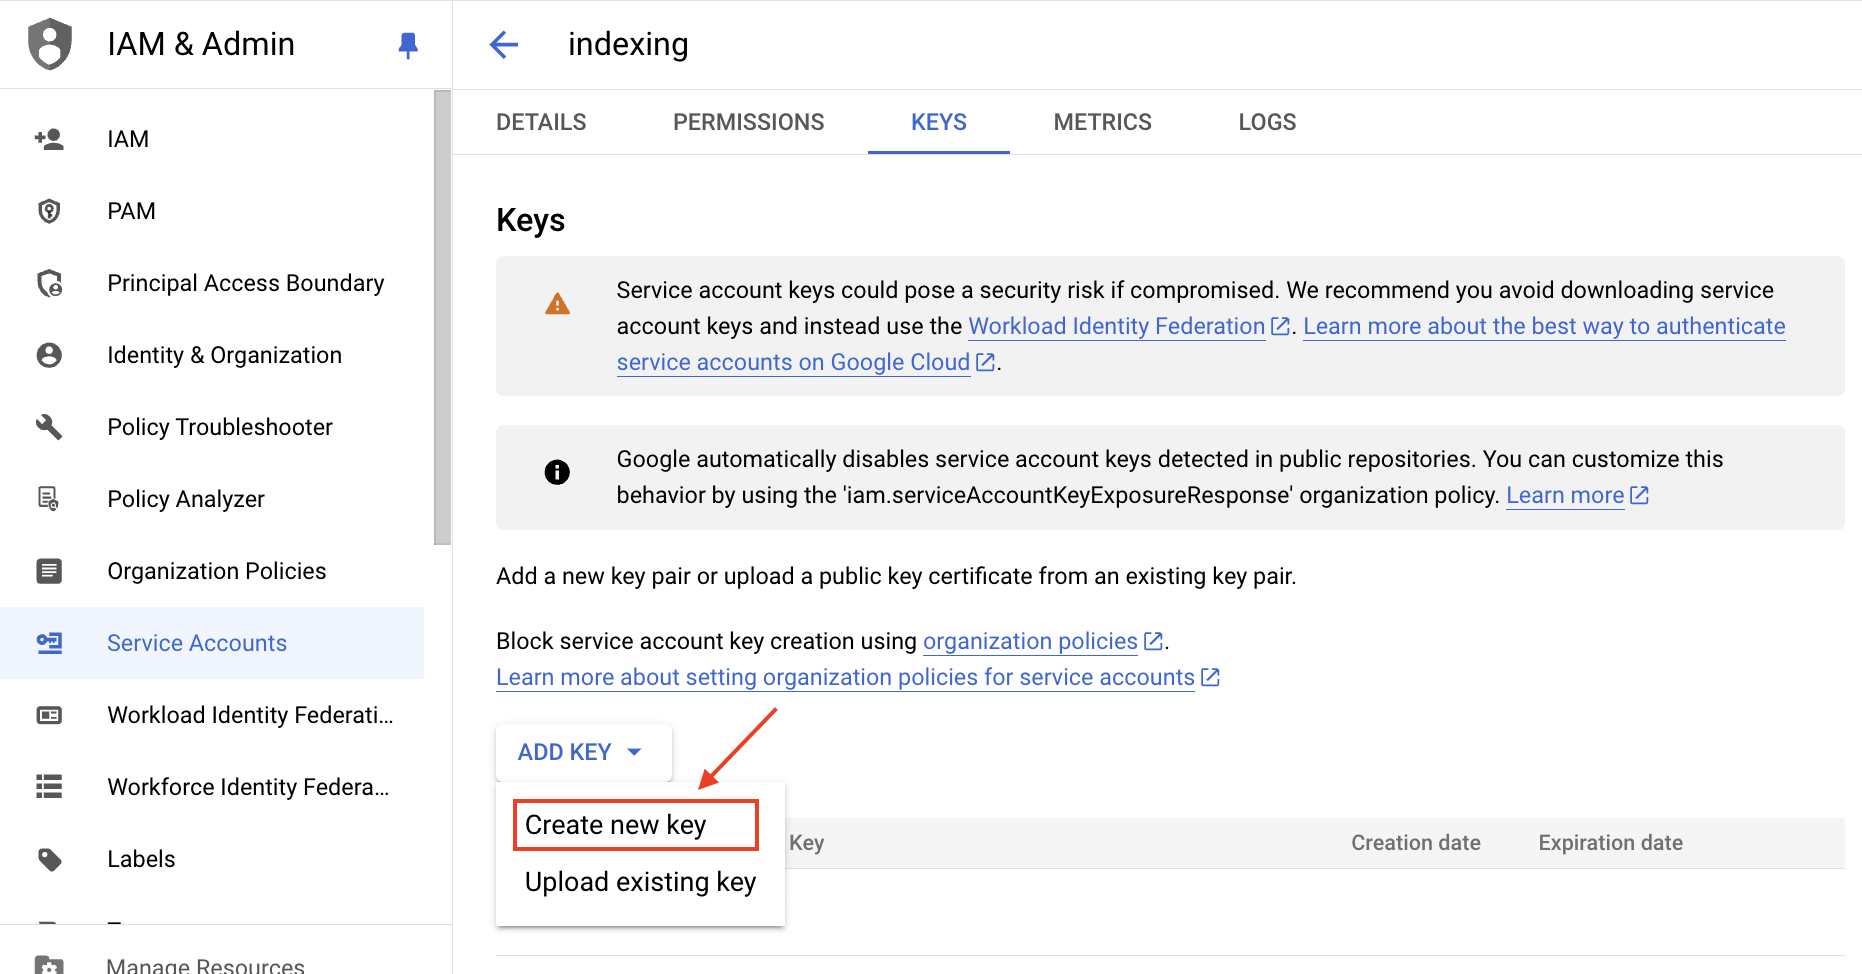
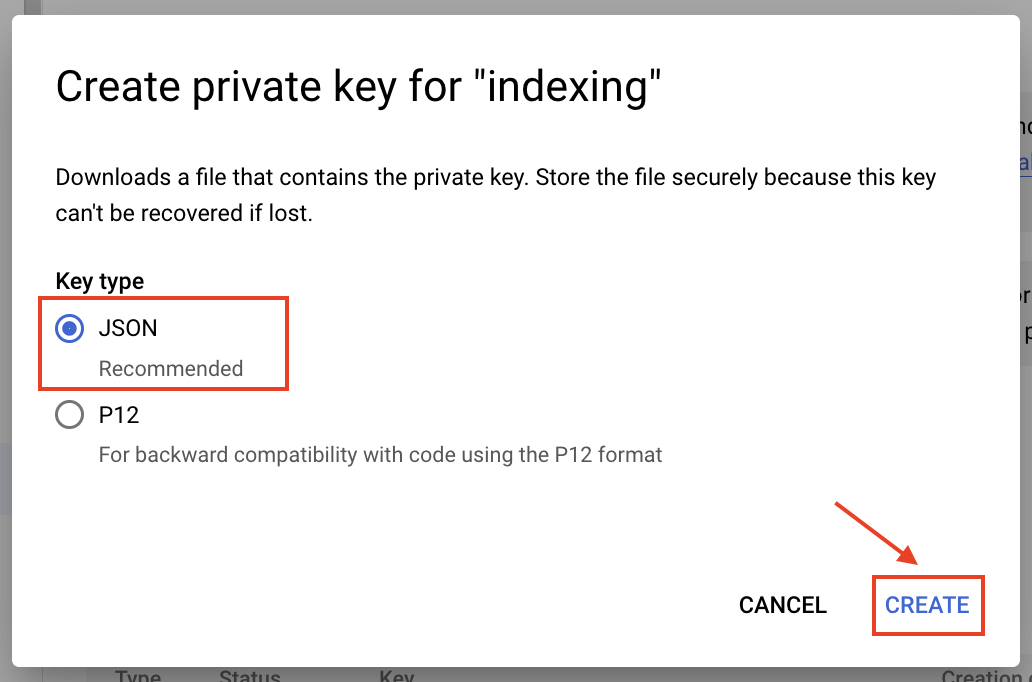
- Upload the generated file to the Google Service Account Keys File of the extension's settings.
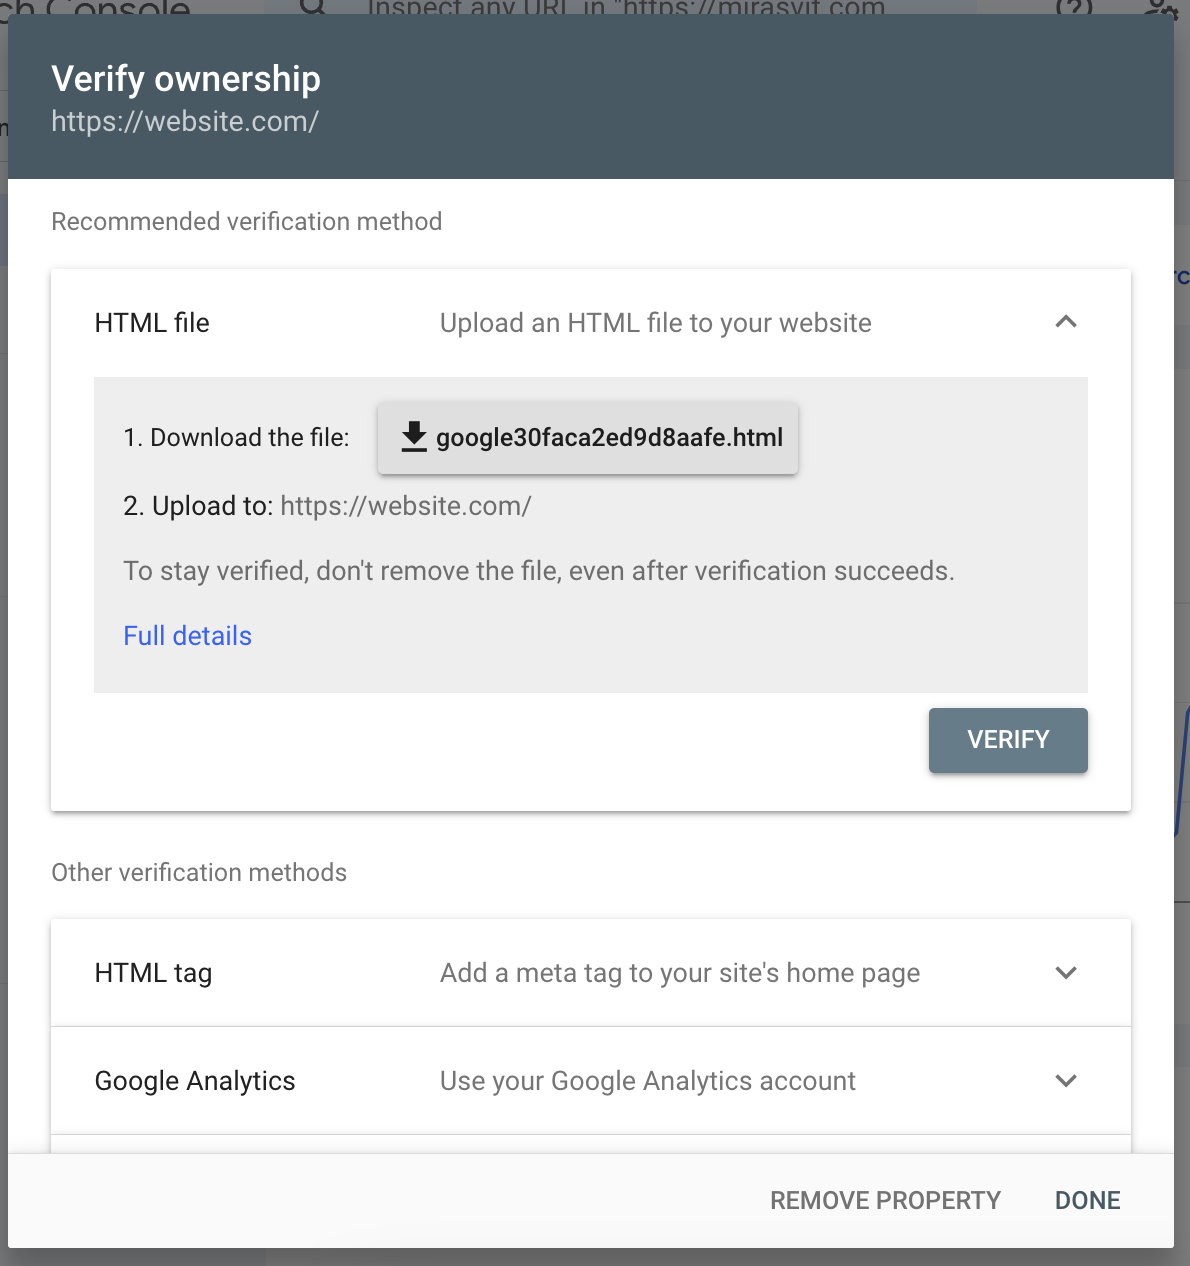
- Visit the Google Search Console and verify your website ownership.
- Add new property, select the type URL prefix, and enter the URL
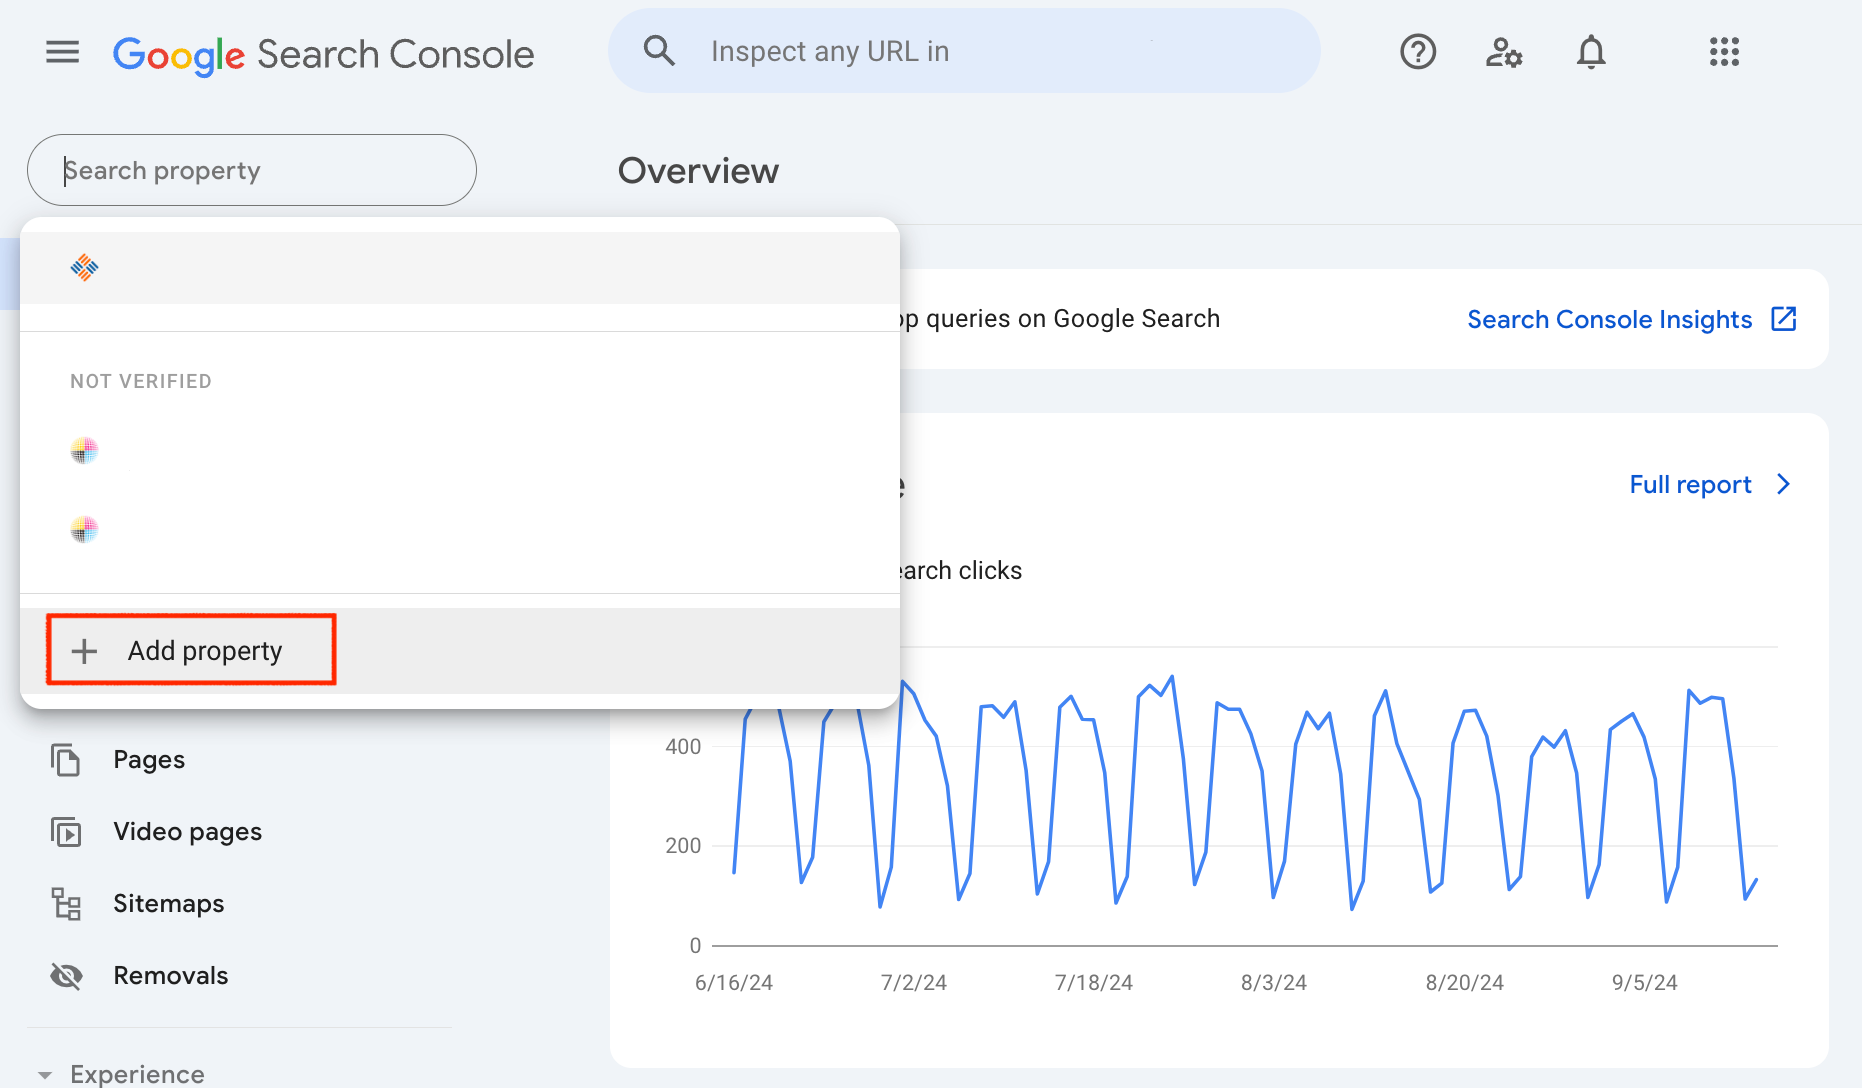
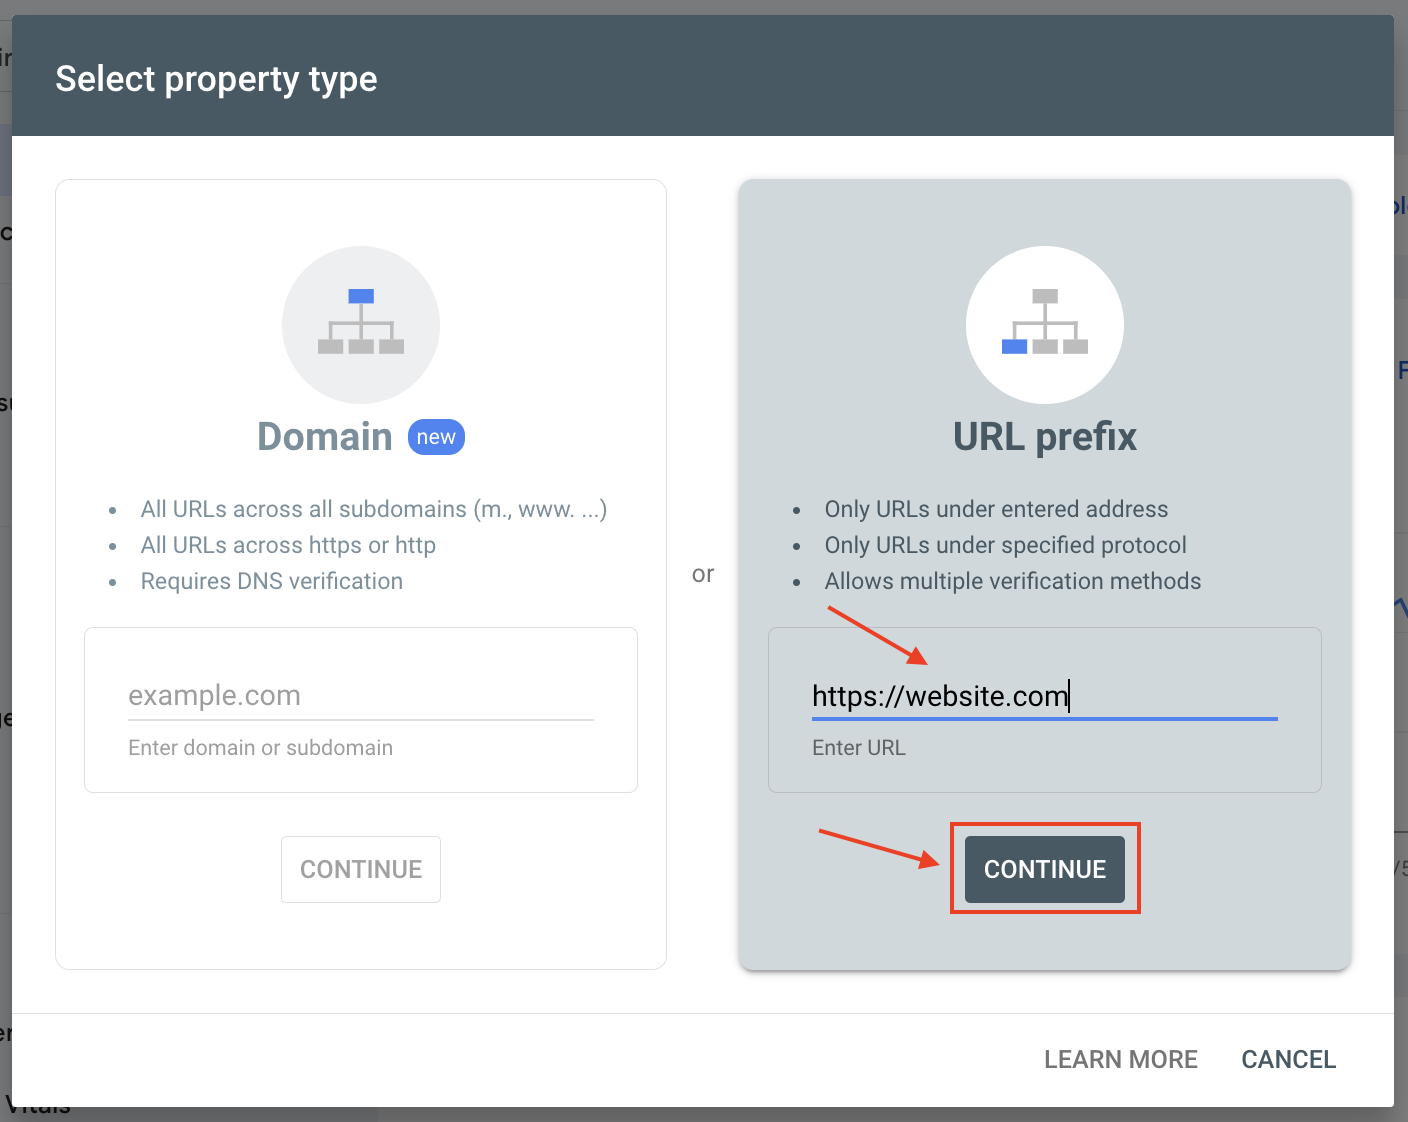
Note
If you have multiple store views, create a property and verify ownership for each store view separately - After the ownership is verified you can access the property setting by clicking on GO TO PROPERTY
- Navigate to Settings ▸ Users and Permissions and click the Add User button.
- Copy the client_email value from the JSON file from step 7. Paste the email into the Email Address fiels and select the Owner role in the Permission dropdown. Click the Add button.
Done! Now you can use full capacity of the extension in your Magento store - Google Indexing and Search Analytics.
Command Line Interface
Usage: php -f bin/magento [command]
mirasvit:search-console:publish [options]- submit URLs from the Indexing Queue to Google Search Console for indexing. Allowoed Options:--ids [ids]- specify the IDs (comma-separated) of URLs to submit. Optional.--dry-run- test run of the command. If specified, no URLs will be actually submited for indexing.
mirasvit:search-console:analytics [options]- manage Search Analytics data. Execution of this command depends on the configurations in the Analytics section of the extension's settings. Allowed options:--collect- gather search analytics data for the last 5 days. All other options except the--resetare applicable only in combination with this option.--history- if used, the extension will collect history data starting from the extension's installation date. 5 days limitation will not be applied with this option. The extension does not collect all history data during one execution duel to API limitations. The extension remember the state of the execution so each execution will continue to collect analytics data from the last point when the execution was finished.--store-id [store-id]- specify the ID of the store for which analytics data will be gathered.--store-url [store-url]- the base URL of the store for which analytics data will be gathered. This option should be used for testing purposes only.--reset- remove all collected analytics data and reset the analytics collector state to current date.
How to upgrade extension
To upgrade the extension, follow these steps:
- Backup your store's database and web directory.
- Login to your server's SSH console and navigate to the root directory of the Magento 2 store.
- Run the command below to update the current extension with all dependencies:
composer require mirasvit/module-search-console:* --update-with-dependenciesNote
In some cases, the command above is not applicable; neither is it possible to update just the current module, nor need to upgrade all the Mirasvit modules in a bundle. In this case, the command above will be of no effect.
Run insteadcomposer update mirasvit/*command. It will update all the Mirasvit modules installed in your store.
- Run the command below to enable the extension:
php -f bin/magento module:enable Mirasvit_Core Mirasvit_SearchConsole - Run the command below to install updates:
php -f bin/magento setup:upgrade - Run the command below to clean the cache:
php -f bin/magento cache:clean - Deploy static view files:
    rm -rf pub/static/frontend/*; rm -rf pub/static/backend/*; rm -rf var/view_preprocessed/*;
    php -f bin/magento setup:static-content:deploy
Disabling the Extension
Temporarily Disable
To temporarily disable the extension please follow the following steps:
- Login to your server's SSH console and navigate to the root directory of the Magento 2 store.
- Run the command below to disable the extension:
php -f bin/magento module:disable Mirasvit_SearchConsole - Log in to the Magento backend and refresh the store's cache (if enabled).
Removing the Extension
To uninstall the extension, please follow these steps:
- Login to your server's SSH console and navigate to the root directory of the Magento 2 store.
- Run the command below to remove the extension:
composer remove mirasvit/module-search-console - Log in to the Magento backend to refresh the store cache (if enabled).
Change Log
1.0.5
(2024-11-18)
Fixed
- The issue with stats cron
1.0.4
(2024-11-15)
Fixed
- Fixed the issue with submiting URLs by cron
1.0.3
(2024-11-11)
Fixed
- Fixed the issue with error when creating a new CMS block
1.0.2
(2024-11-01)
Fixed
- Issue with warnings in some custom grids
1.0.1
(2024-10-31)
Fixed
- Fixed the issue with saving auth file
1.0.0
(2024-09-27)
Features
- Initial release