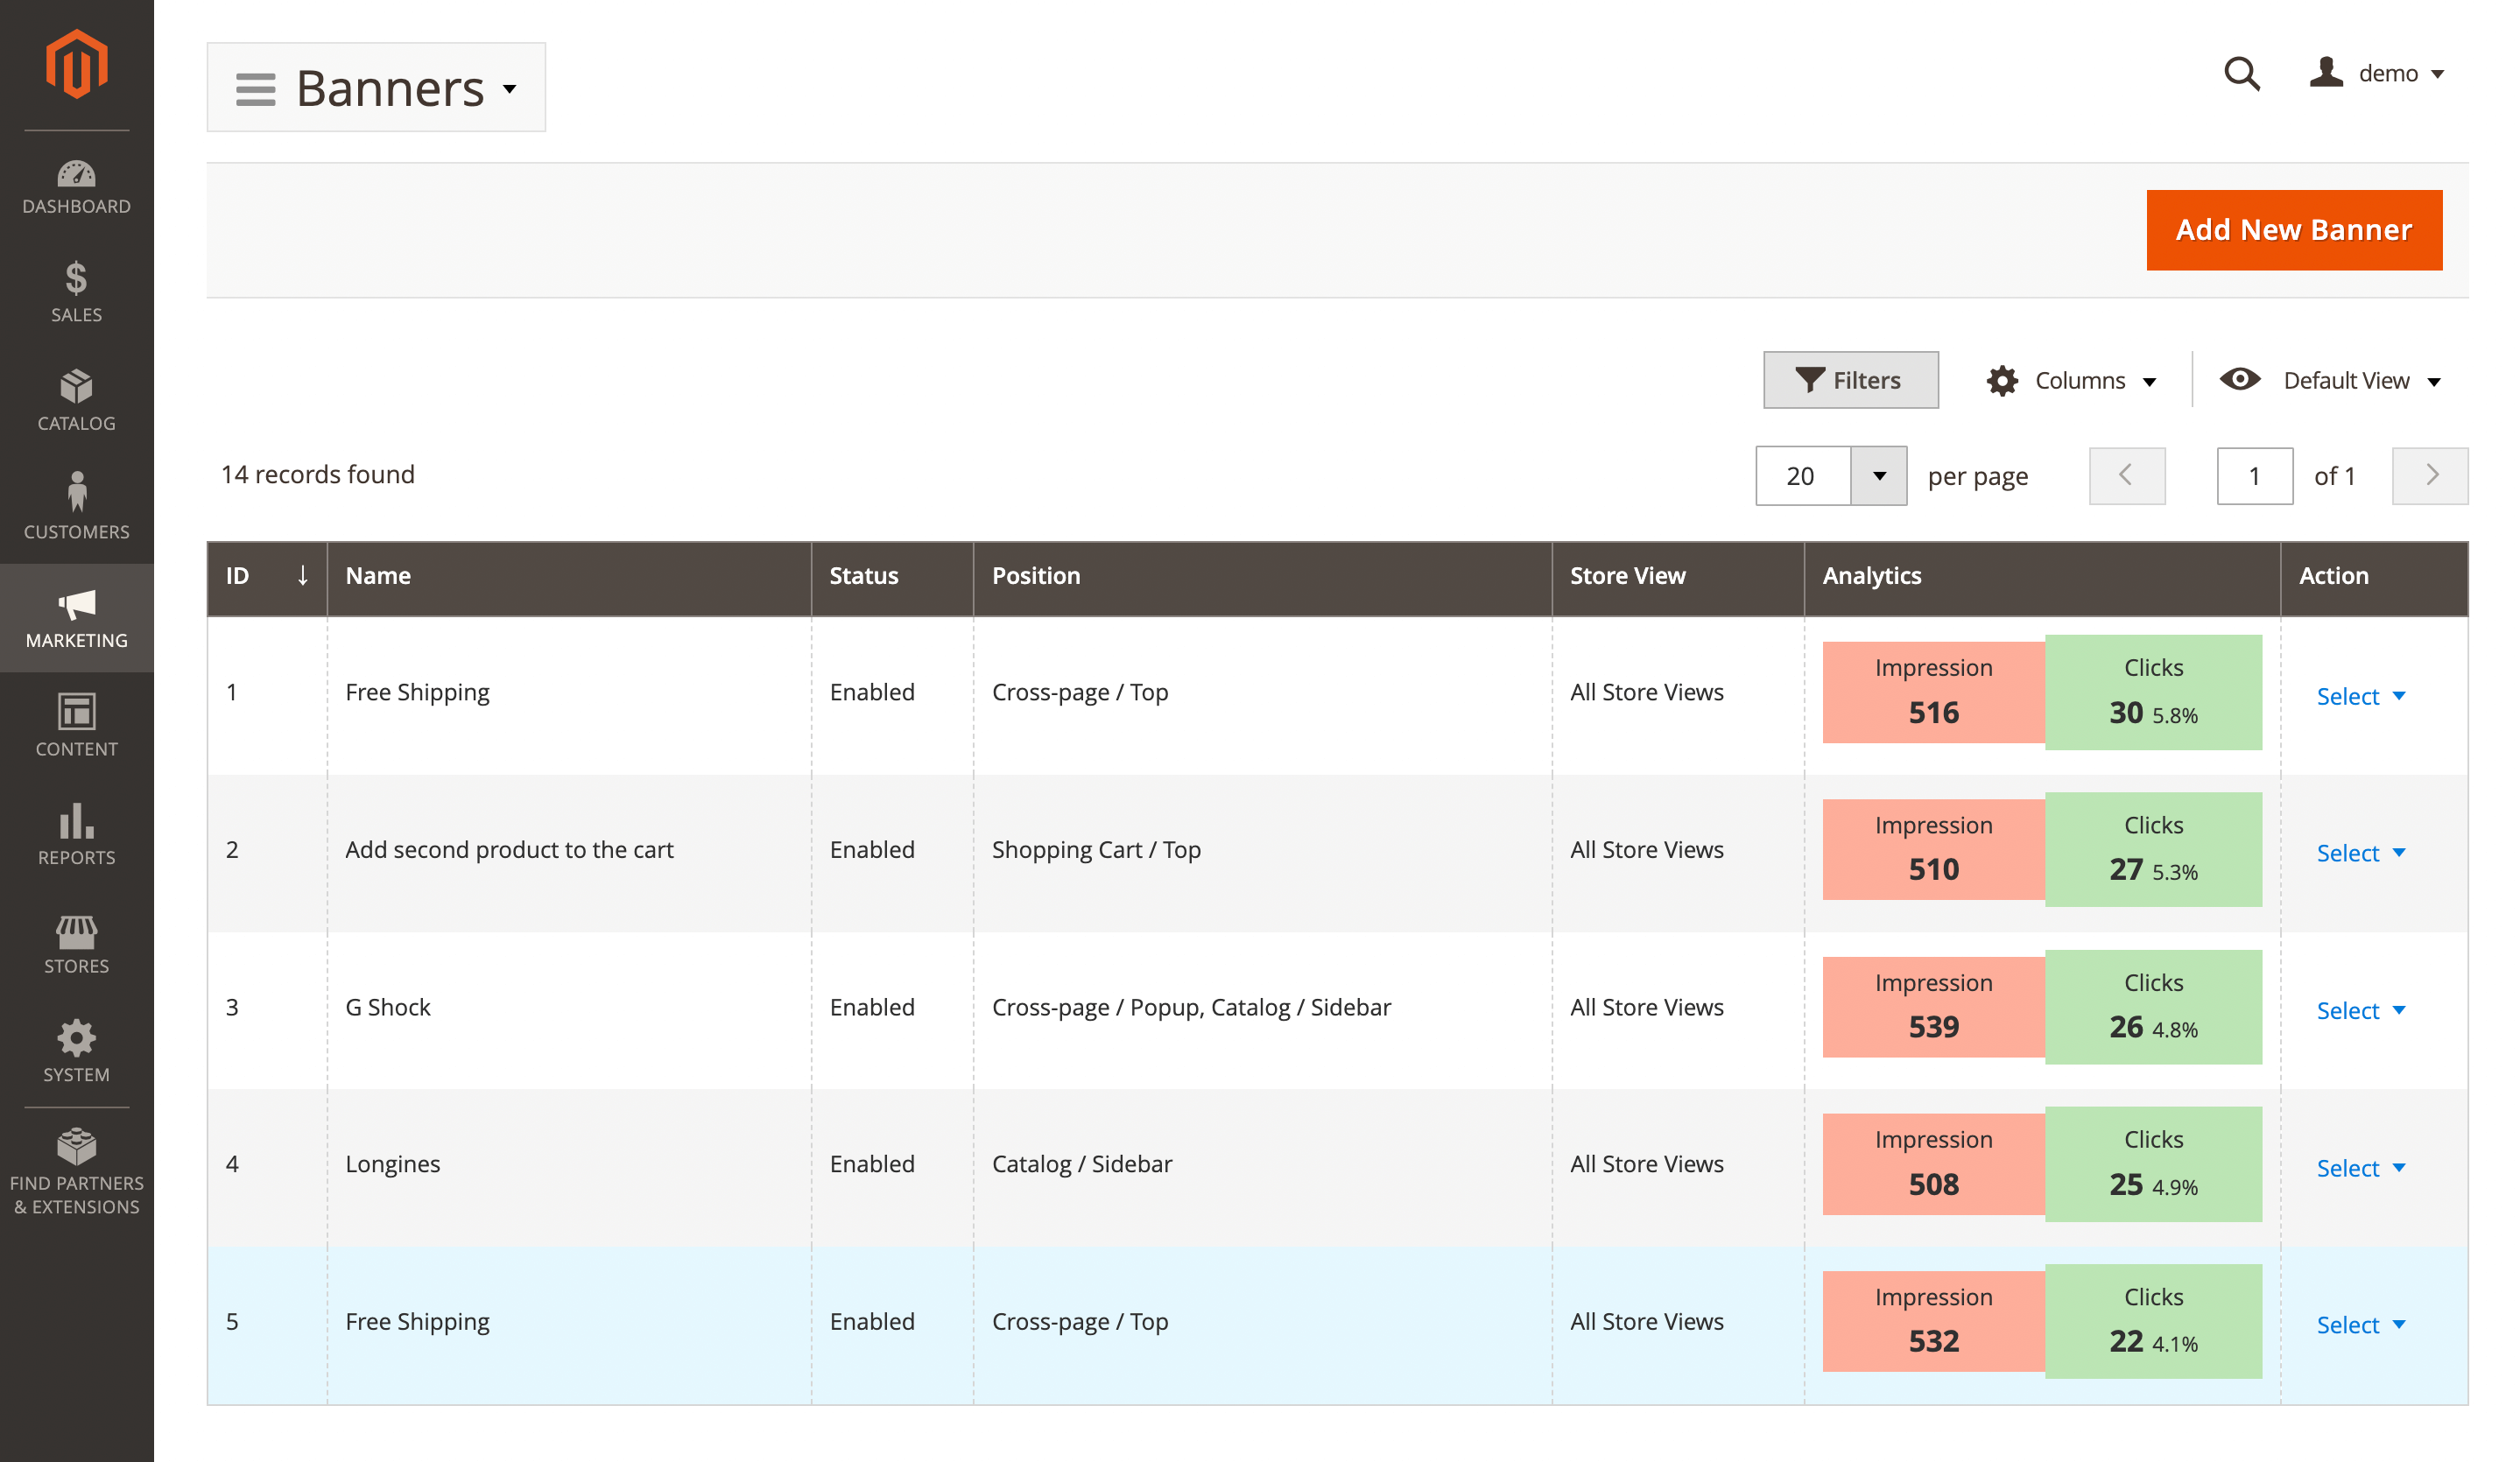
Banners
This section displays all created banners.
Banners list
Navigate to Marketing -> Promo Banners -> Banners to view the full list.

Here, you'll find the following fields:
- ID: the ID of the banner.
- Name: a unique name for the banner.
- Status: the current status of the banner.
- Enabled
- Disabled
- Position: the placeholder where the banner will appear.
- Store view: the store view where the banner will be shown.
- Analytics: displays real-time impressions and clicks for the banner, the Enable collecting banner stats option must be enabled.
- Actions: available actions for the selected banner.
- Edit: allows you to modify the banner.
- Delete: removes the banner from the list.
Banner settings
Use the Edit option in the Action column to view details of a specific record. Next settings will be available:
General Information
- Active: turn the banner on or off.
- Internal name: internal name of the banner.
- Active from: start date for displaying the banner.
- Active to: end date for displaying the banner.
- Store views: defines which store views the banner will be displayed on.
- Customer groups: defines which customer groups will see the banner (e.g.,
NOT LOGGED IN,General,Retailer,Wholesale). Multiple selection is supported. - Placeholder: locations on the page where the banner will appear. You can create custom placeholders.
- Priority: defines the display priority of the banner. A higher number means higher priority.
Conditions
Use a conditional block to add conditions and define when the banner should appear. Leave the conditions blank if you want the banner to apply to all products. In addition to Magento's default options, this feature includes several custom conditions:
- Action name: set a condition if you want to display banners only on specific page types such as CMS Pages, Category or Product pages, or the Checkout cart.
- URI: set a condition if you want to display banners on specific URLs, such as Sale pages, Blog posts, or Landing pages.
Attributes may vary by store, depending on whether the attribute is used as a Cart attribute, Product attribute, Category attribute, Cart items attribute or Page attribute.
Content
- URL: adds the link where visitors will be redirected when they click the banner
- Default Magento editor: edit the banner’s text or image content using available editor.
Use variables to personalize your banners and tailor messages based on cart or customer data.