Tickets
The Tickets section empowers you to efficiently manage and organize customer inquiries through the intuitive Ticket grid. With smart categorization and automation, you can easily track and prioritize tickets, ensuring that no issue is overlooked.
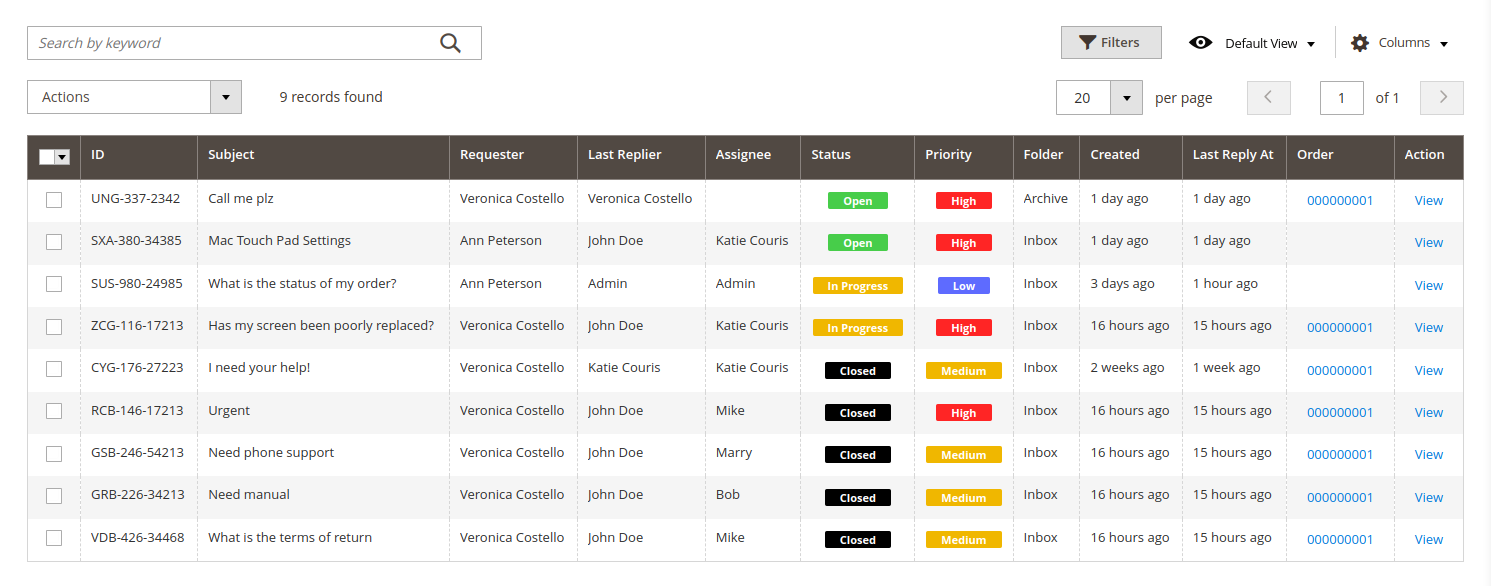
Tickets grid
The main part of the Help Desk MX extension is the Tickets grid. It is located at Customers -> Help Desk MX and contains a list of all tickets submitted by customers.
Folders
Tickets grid is divided into three separate folders (by default all tickets are shown):
- Inbox: contains all active tickets (e.g. those which have not been sent to the archive).
- Archive: contains all archived tickets.
- Spam: contains all tickets, marked as spam.
Normally, tickets are sent to a proper folder automatically by two checks:
- If a ticket's properties match one of Spam patterns, then the ticket is sent to the SPAM folder;
- If a ticket's status is one that is defined in Help Desk MX -> Settings -> General Settings -> Move Ticket to Archive if it has one of the following statuses, it will be sent to Archive.
The same action can also be done manually or by using a Workflow rule.
To force Ticket grid display tickets from only one folder, make a field Folder visible in the Columns section of the grid, and then filter tickets by the Folder using the Filters section.
Actions
The Ticket grid also provides you with some practical actions.
- Standard Magento grid actions such as filtering (using Filter section), altering columns display (using Columns section) and sorting tickets by columns;
- Search box allows you to search for tickets by its properties (mainly, Ticket ID, Subject, Messages or Tags);
- Mass actions that can be performed on selected tickets:
- Change status: statuses which are assigned here can be defined in the Statuses section.
- Change assignee: modify the current assignee of the ticket. Select a new owner from the dropdown list available after clicking the Change Assignee action.
- Mark as spam: moves tickets to the spam folder;
- Mark as archive: moves tickets to the archive folder;
- Mark as inbox: moves tickets to the inbox folder (e. g. restores ticket);
- Delete: remove tickets.
Administrators can restrict access to tickets and restrict some actions using Permissions.
Tickets counter
Near the drop-down account menu (see screenshot below), the tickets counter is shown.
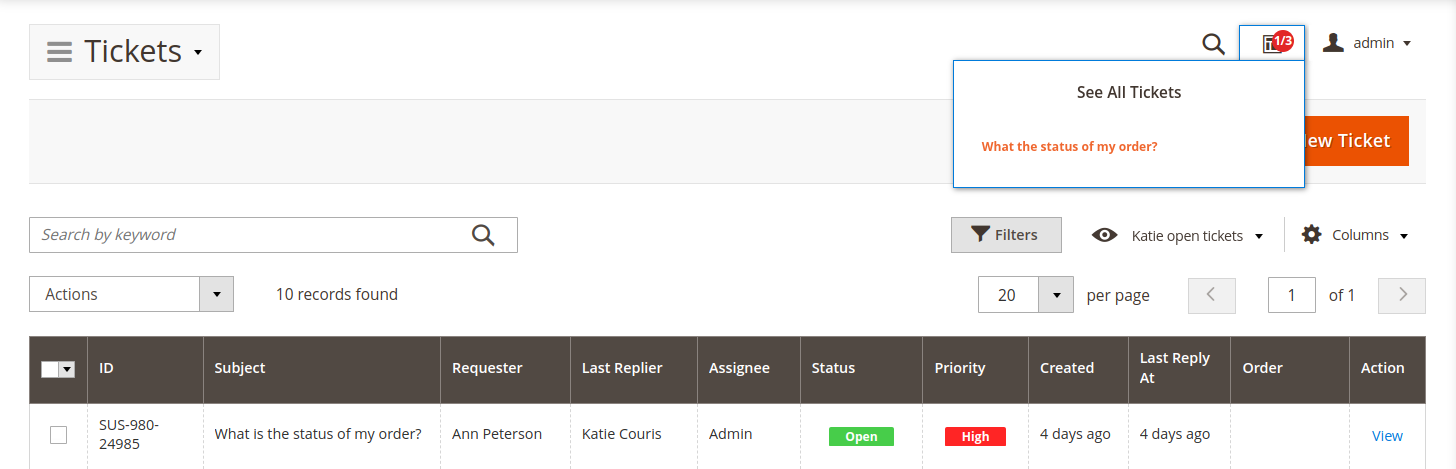
It consists of two values:
- Quantity of new tickets, located in the Inbox folder, but not linked to the assignee yet.
- Quantity of tickets, located in the Inbox, and assigned to a current staff agent.
When you click on ticket counter it shows you a list of unassigned tickets. Click on the subject of the ticket to navigate directly to the ticket.
Both values displayed in the ticket counter do not rely on active filters. e.g. if the customer filters the tickets' grid, the value will still be calculated from the entire folder.
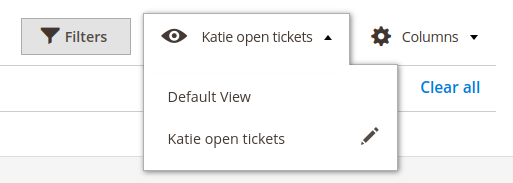
Bookmark filters
Tickets grid allows you to bookmark filters to save frequently used search filters for quick access. With bookmark filters, agents can streamline their workflow by instantly applying pre-set criteria to find relevant tickets, improving efficiency and reducing the time spent on repetitive searches.
Quick data bar
Quick data bar allowing support agents to quickly assess ticket relevance and status without opening each ticket individually. To display Quick data bar you should enable it in Stores ->Configuration ->Help Desk -> General Settings -> Admin Display Options -> Show Quick Data Bar in admin ticket grid.

Quick data bar is displayed above the tickets grid and has the following blocks:
- My tickets: shows the number of tickets assigned to current user in the inbox folder.
- All tickets: shows the number of all tickets in the inbox folder.
- Support team members: shows the current distribution of tickets among support agents, enabling better workload management and collaboration within the team. Click on the block to apply filter by the assigned tickets to the user in the inbox folder.
- Tickets status: shows the number of the tickets in specific status. Click on the block to apply filter by the tickets status in the inbox folder.
User activity data bar
User activity data bar enables a rapid assessment of activity of support team members without needing to drill into ticket details. To display User activity data bar you should enable it in Stores ->Configuration ->Help Desk -> General Settings -> Admin Display Options -> Show User Activity Data Bar in admin ticket grid.
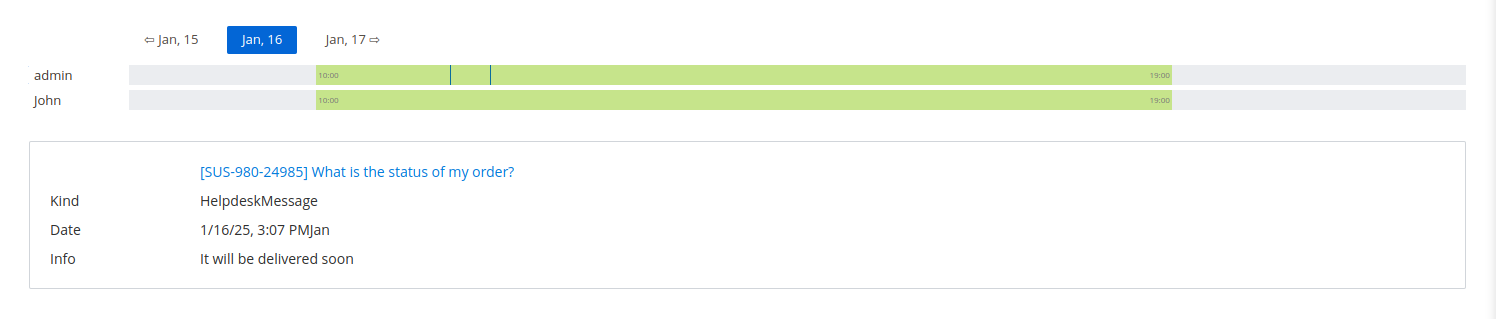
User activity data bar is located below the tickets grid and is organized by individual users, allowing you to track their daily activity. By clicking on the blue line, you can access the ticket link along with the date and time of the reply, as well as the message the user wrote in the ticket.
Ticket interface
The ticket interface is designed for maximum efficiency, offering an intuitive and user-friendly experience that streamlines ticket management within your Help Desk. Whether you're handling customer inquiries, order-related issues, or technical support, the ticket interface ensures you have all the information you need at your fingertips to provide excellent customer service.
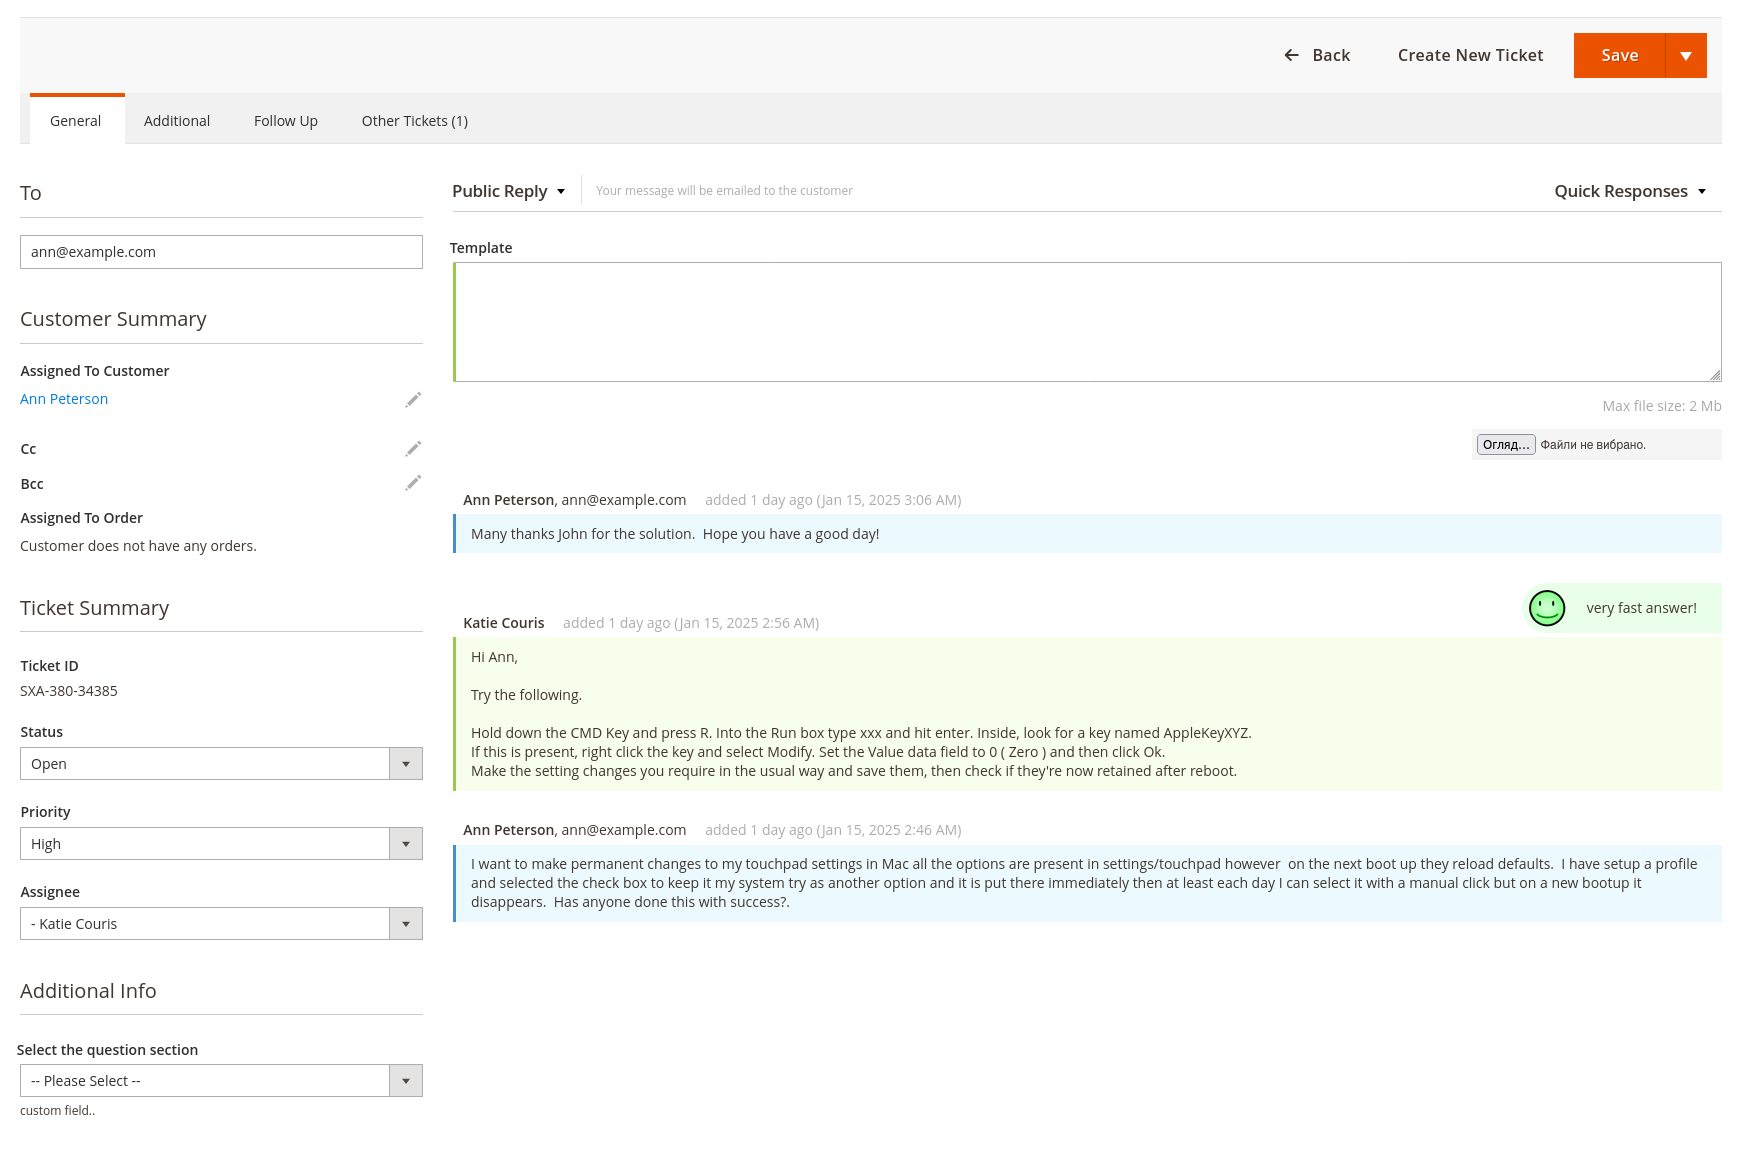
General tab
In the backend, tickets can be managed through the General tab, which is divided into various functional sections to streamline ticket processing. Below is a breakdown of the key elements found in the ticket interface:
-
To: this field contains the customer’s email address. The email is automatically populated when creating the ticket for a registered customer. You can manually type an email or select a registered customer from the list.
-
Customer summary: displays the name and email of the customer who is associated with the ticket, shows the linked order, if the ticket is connected to a specific order, along with the order details.
-
Ticket Summary: this section provides the essential details of the ticket:
- Ticket ID: the unique identifier of the ticket.
- Status: the current status of the ticket (e.g., Open, Pending, Closed).
- Priority: the urgency level of the ticket (e.g., High, Medium, Low).
- Assignee: the department or staff member responsible for resolving the ticket.
-
Additional info: this section displays custom fields, providing you additional information that is relevant to your ticketing process.
-
Reply section: allows you to leave a reply to the customer. For detailed information on how to reply to the ticket please refer to Hot to reply to the ticket section of our documentation.
-
Ticket history: the thread of communication, including customer messages and support responses, is visible within the ticket. It provides a clear history of all interactions. The system shows when and who added messages or replies, providing clarity on ticket progress.
Additional tab
Each ticket also contains useful info that can be used for different kinds of analytics. It is located in the Additional tab, and consists of the following properties:
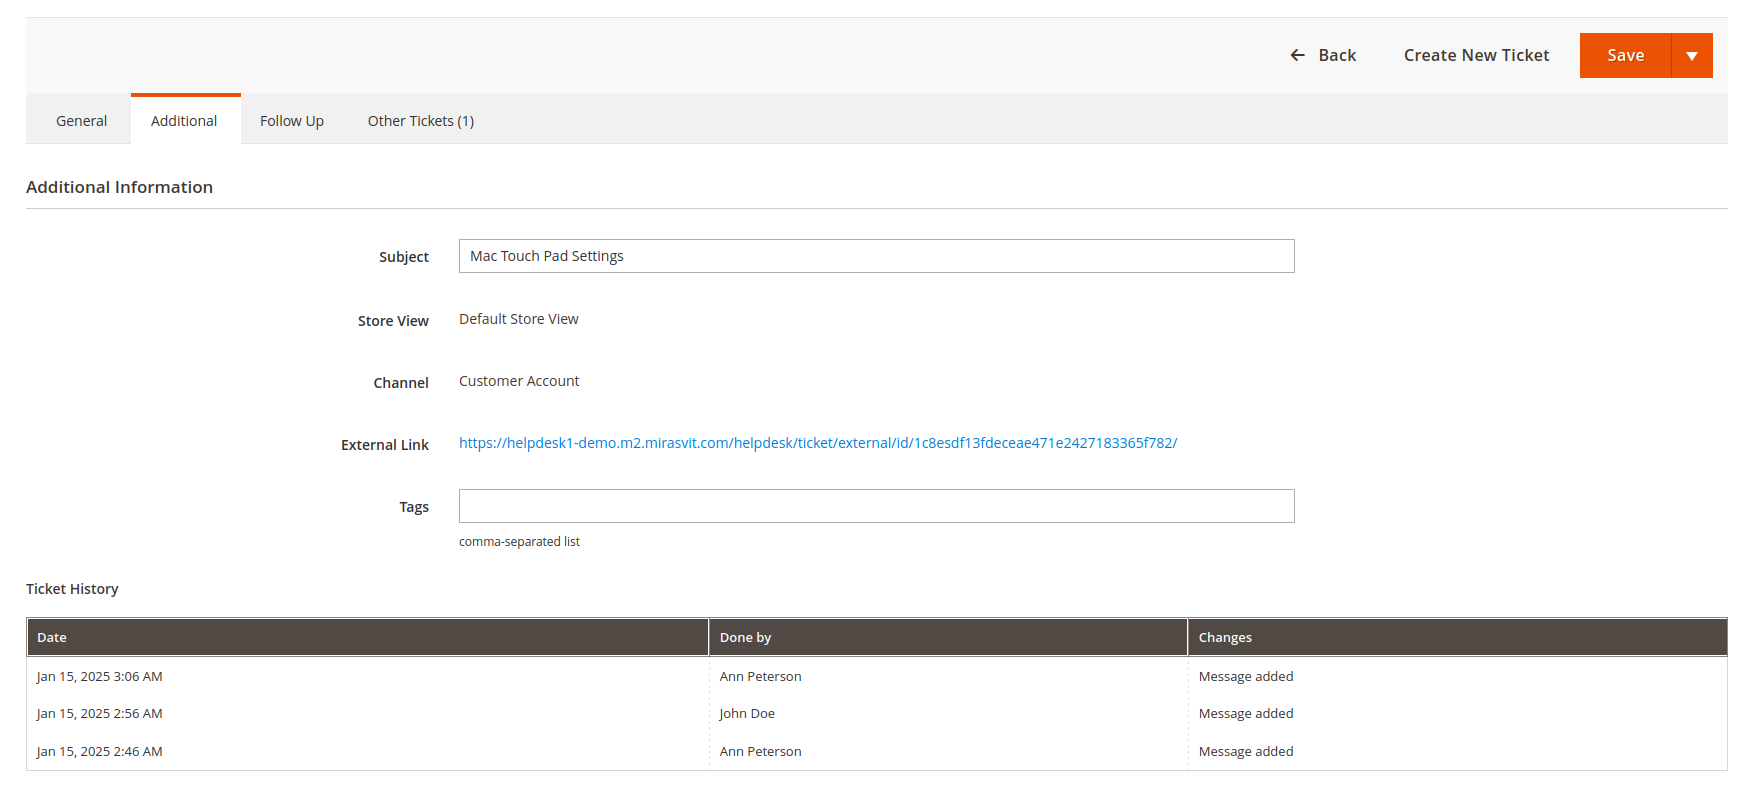
- Subject: precise subject of the initial message, that started this ticket (or email, if it was converted from it).
- Store view: displays the store's view or views where this ticket was created.
- Channel: assigned automatically during ticket creation. It contains a description of how a ticket has been created. There are four possible ways of creating a ticket:
- Email: from the message, via Gateways.
- Feedback tab: from Contact Tab, displayed at the left or right side of the frontend page, and governed by the Help Desk MX -> Settings -> Feedback Tab section.
- Contact form: from our general Contact Us form, which is overridden by our extension, and typically located at
http://store.com/contact/. - Backend: from Tickets Grid, or additional tab at Order Edit Page.
- External link: contains link, which is sent in email notifications, and can be sent to the third parties to access a ticket message thread.
- Tags: tags of the current ticket. Unlike other properties, they can be set here using a comma-separated format. This feature is extremely useful in ticket reviewing as it controls their workflow.
- Ticket History: displays log of all changes to the ticket and assignees in charge.
Follow up tab
The Follow up tab is designed for managing follow-up actions on the ticket. It allows agents to set reminders if a ticket is not answered for a long time, ensuring that no tickets are left unresolved.

Refer to How to set a reminder for ticket section for more detailed information.
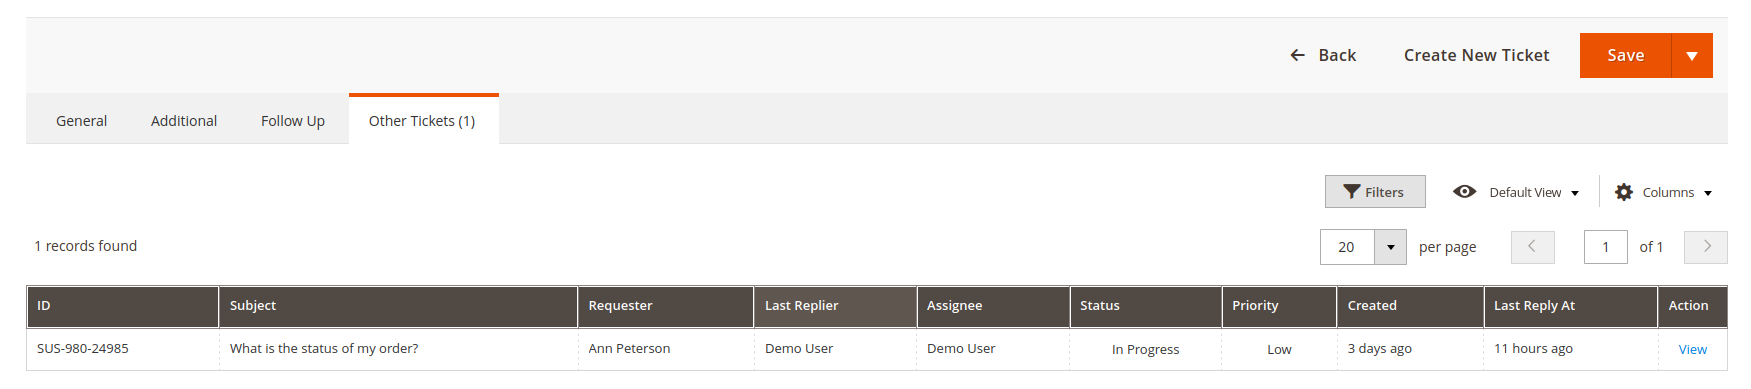
Other tickets
The Other tickets tab lists all previous or ongoing tickets associated with the customer. This helps the support agent quickly view the history of the customer's interactions with the support team. By having access to other tickets, agents can provide more informed support, ensure continuity, and avoid duplicate solutions. The tab displays essential information, such as the ticket ID, subject, status, and priority of other tickets.