Custom fields
Help Desk MX empowers you with the ability to create Custom fields, enabling you to capture and store any additional information that is relevant to your ticketing process. Custom fields offer a flexible way to tailor your help desk system to meet the unique needs of your business. With Custom fields, you can display specific information where it’s needed most and leverage these fields for advanced filtering and ticket searches, enhancing both your team’s efficiency and customer support experience.
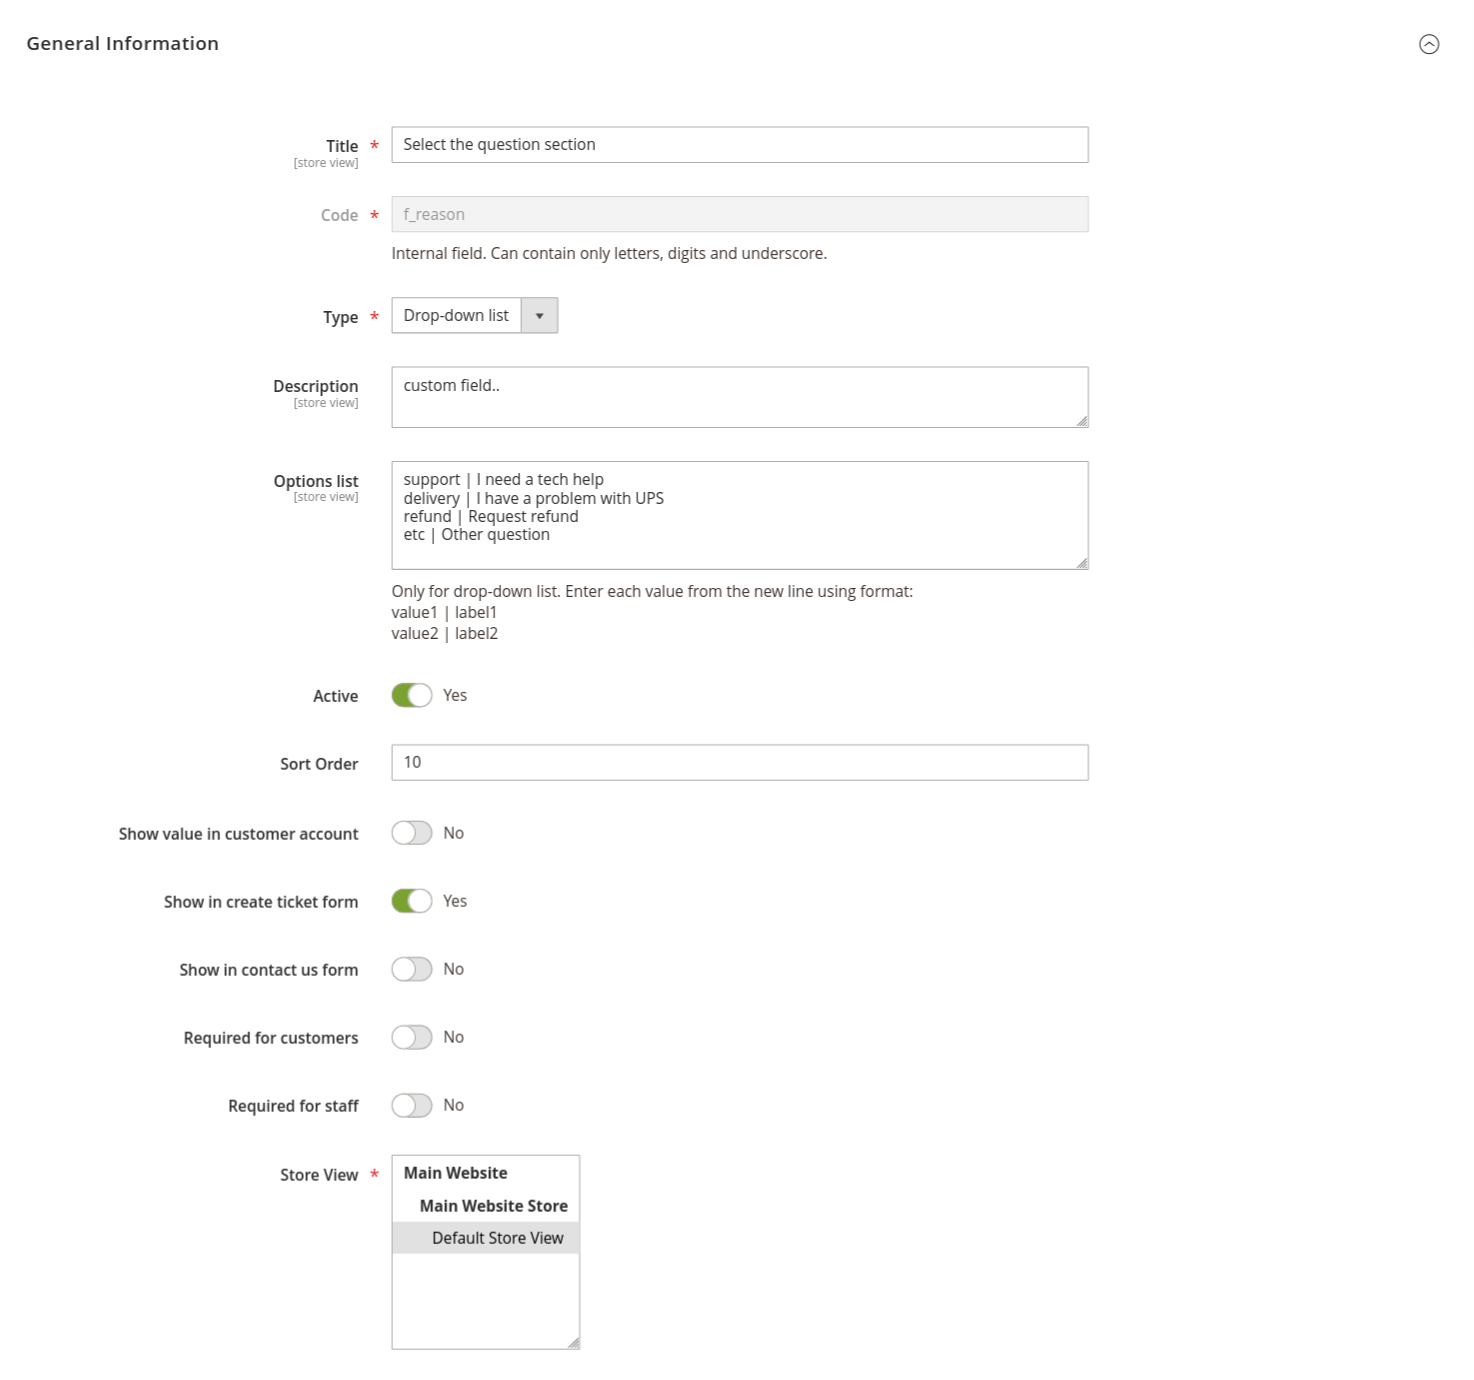
General Information
-
Title: the display name of the custom field. This title will be visible to your staff and, depending on your settings, can also be shown to customers.
-
Code: the internal identifier for the custom field. It must be unique and can contain only letters, digits, and underscores. This code is used to reference the custom field programmatically, such as in email templates.
-
Type: select the data type for the custom field. The available options provide versatility in how data is captured and displayed:
- Text: a single-line text field, ideal for short inputs like reference numbers or brief notes.
- Multi-line text: a textarea field for longer entries, useful for capturing detailed information or customer feedback.
- Date: a date picker with a built-in calendar, perfect for fields like deadlines or appointment dates.
- Checkbox: a simple binary option, used to capture yes/no or true/false values.
- Drop-down list: a predefined list of options, allowing users to select one from a range of choices. This is particularly helpful when standardizing input, such as categorizing tickets by type or urgency.
-
Description: a brief explanation of the custom field’s purpose. This description provides context to staff or customers and ensures that the field is used correctly.
-
Options List: if the field type is set to 'Drop-down list', this property allows you to define the available options. Each option should be entered in the following format:
value1 | label1
value2 | label2
The first part is the internal value, and the second part is the label visible to users.
-
Active: toggle whether the custom field is currently active and available for use. Only active fields will appear in forms or on the ticket edit page.
-
Sort order: defines the display order of this field relative to others. Fields with lower sort order numbers will appear higher on forms or lists.
-
Show value in customer account: enable this option to display the custom field’s value in the customer’s account, specifically on the ticket details page. This is useful for providing customers with additional transparency on ticket status or other relevant data.
-
Show in creating ticket form: if enabled, this field will be shown to customers when they create a new ticket. This option allows you to collect additional information upfront from customers during the ticket submission process.
-
Show in contact-us form: enable this option to display the custom field on the contact form and feedback tab, allowing customers to provide further details at the point of contact.
-
Required for customers: when this option is activated, customers must complete this field when submitting a new ticket. This ensures that critical information is always captured, reducing follow-up interactions and speeding up ticket resolution.
-
Required for staff: when enabled, agents are required to complete this field when creating or replying to tickets. This helps maintain a consistent data capture process and ensures that important information is always included during internal ticket handling.
-
Stores: specify the store views where this custom field will be available. If you run multiple stores or operate in different languages, this field helps tailor the ticketing process to each store’s specific requirements.
Custom fields can also be integrated into your email communication, allowing you to include field data in email templates dynamically. For detailed instructions on how to implement custom fields into email notifications, refer to the How to customize email notifications template section.