How to create banner with widget
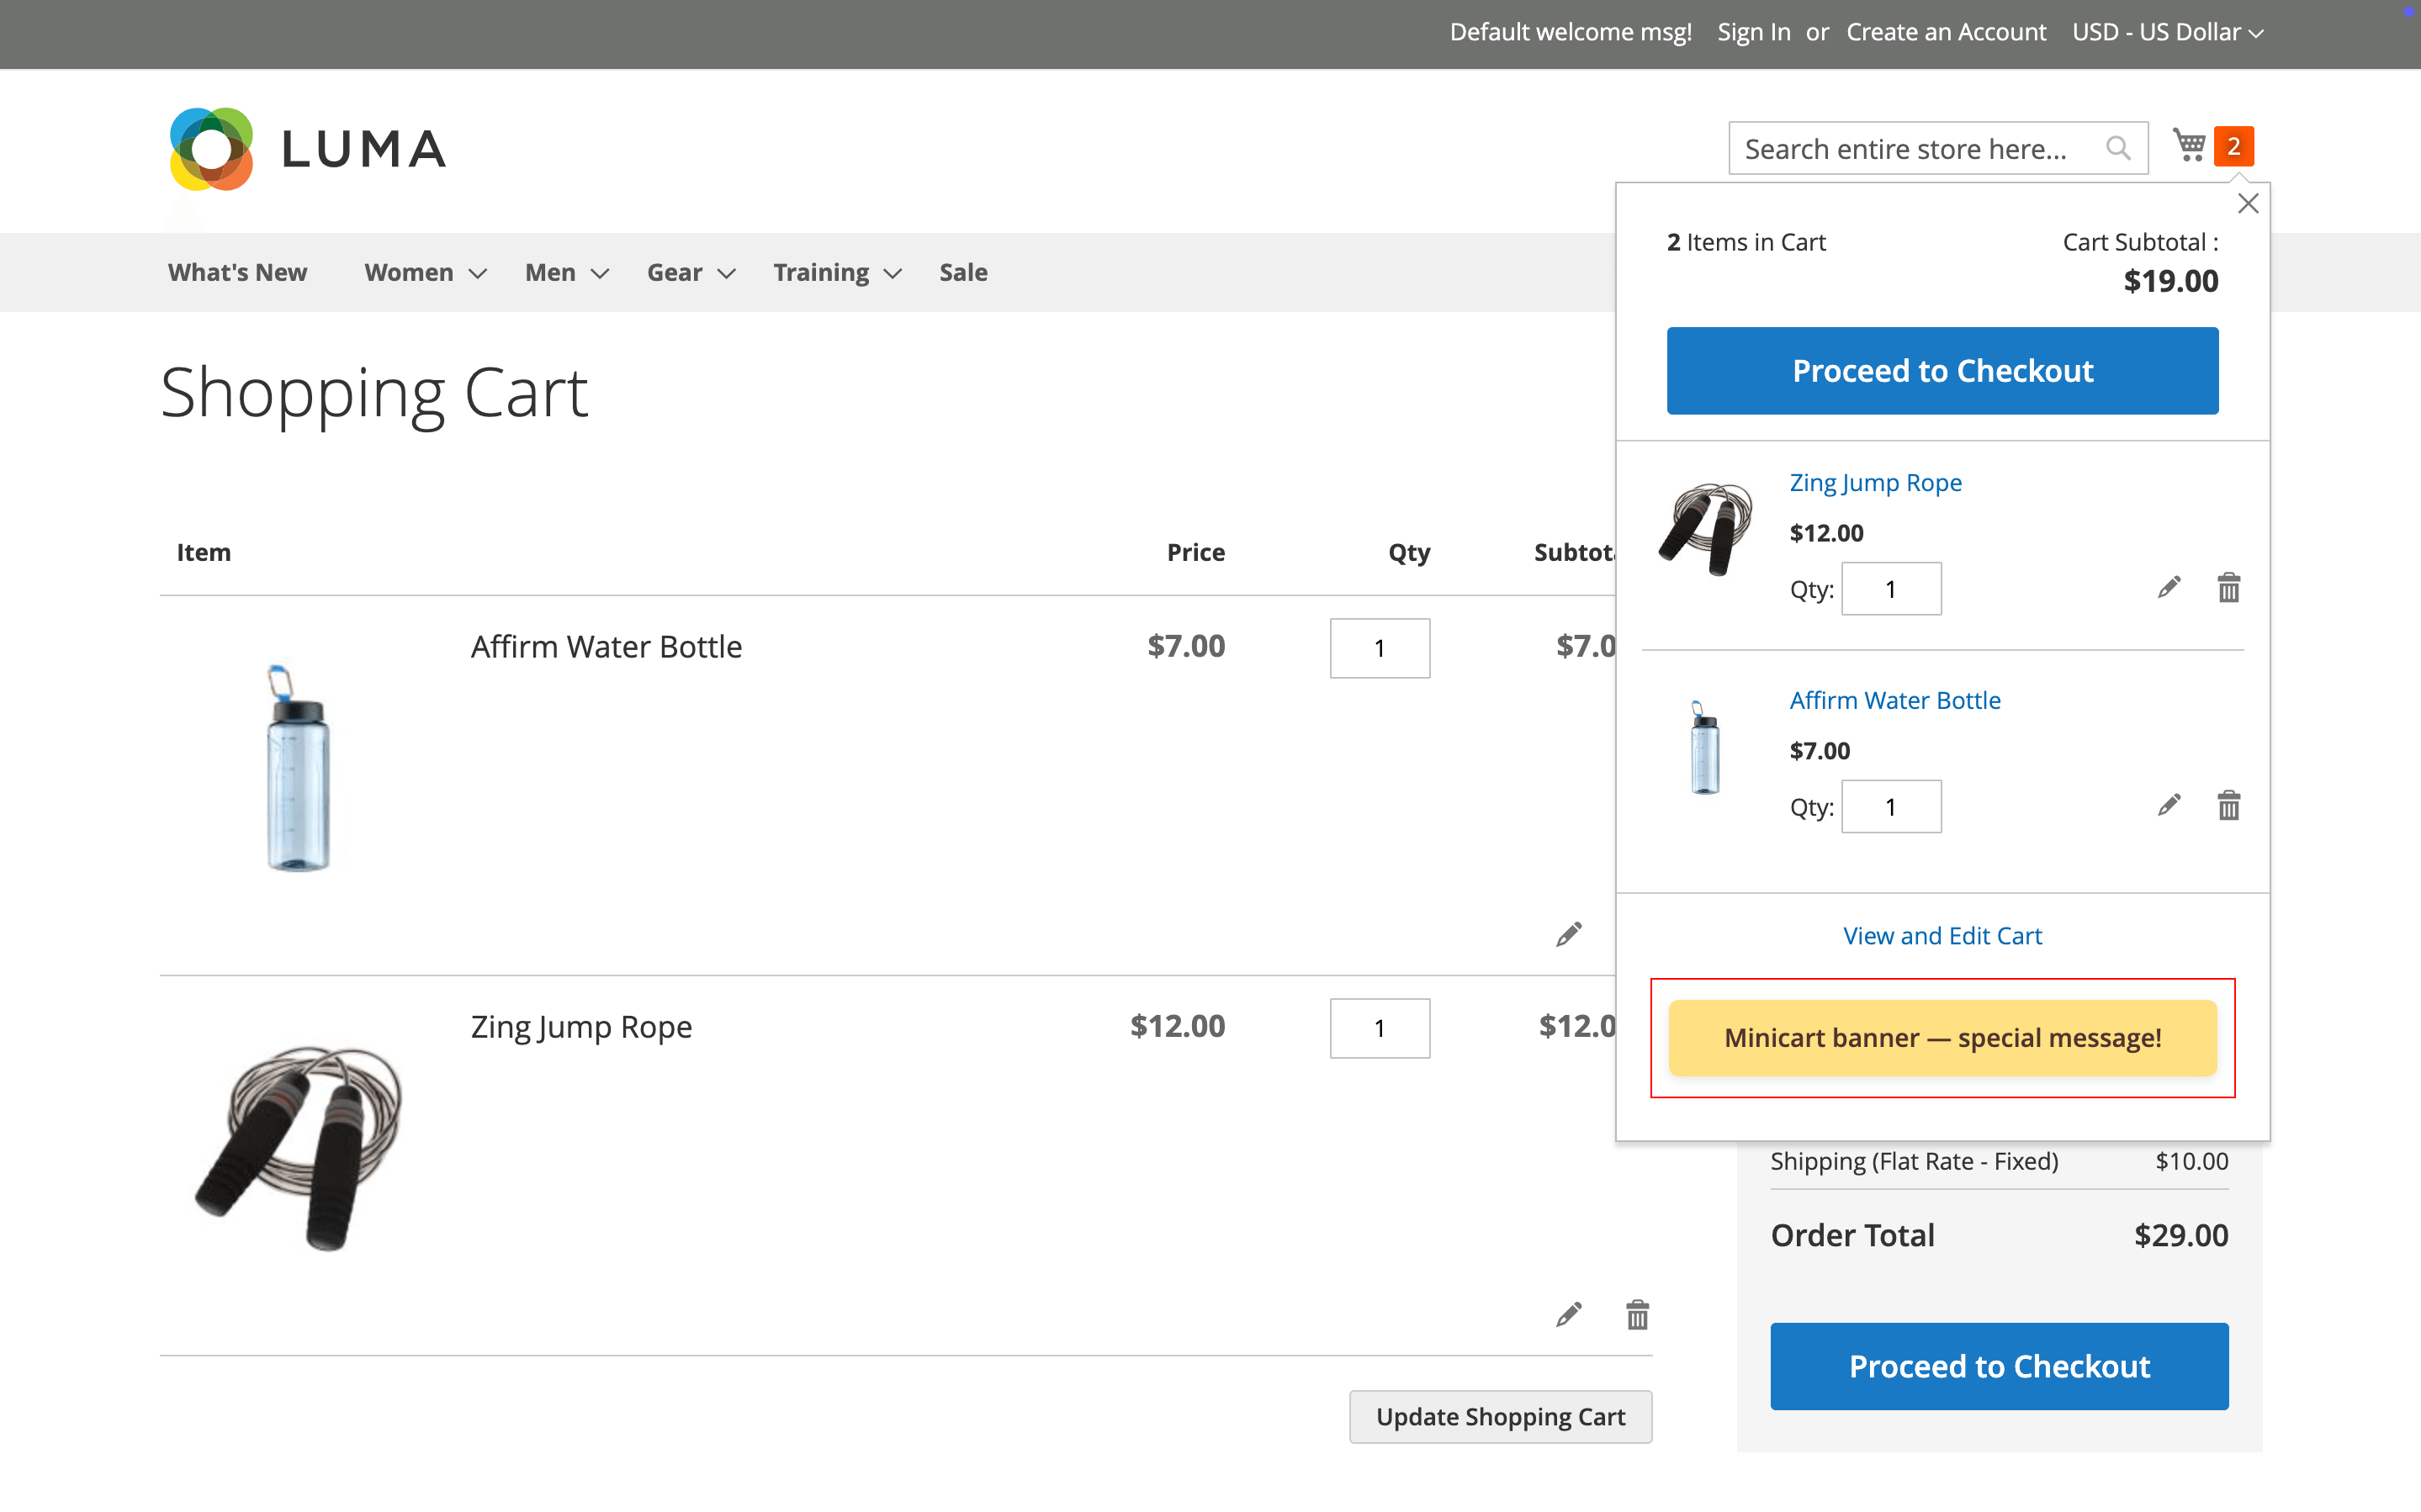
With Magento's widget functionality, you can place a banner anywhere it is supported — for example, in the mini cart. To add a banner using a widget, follow the steps below.
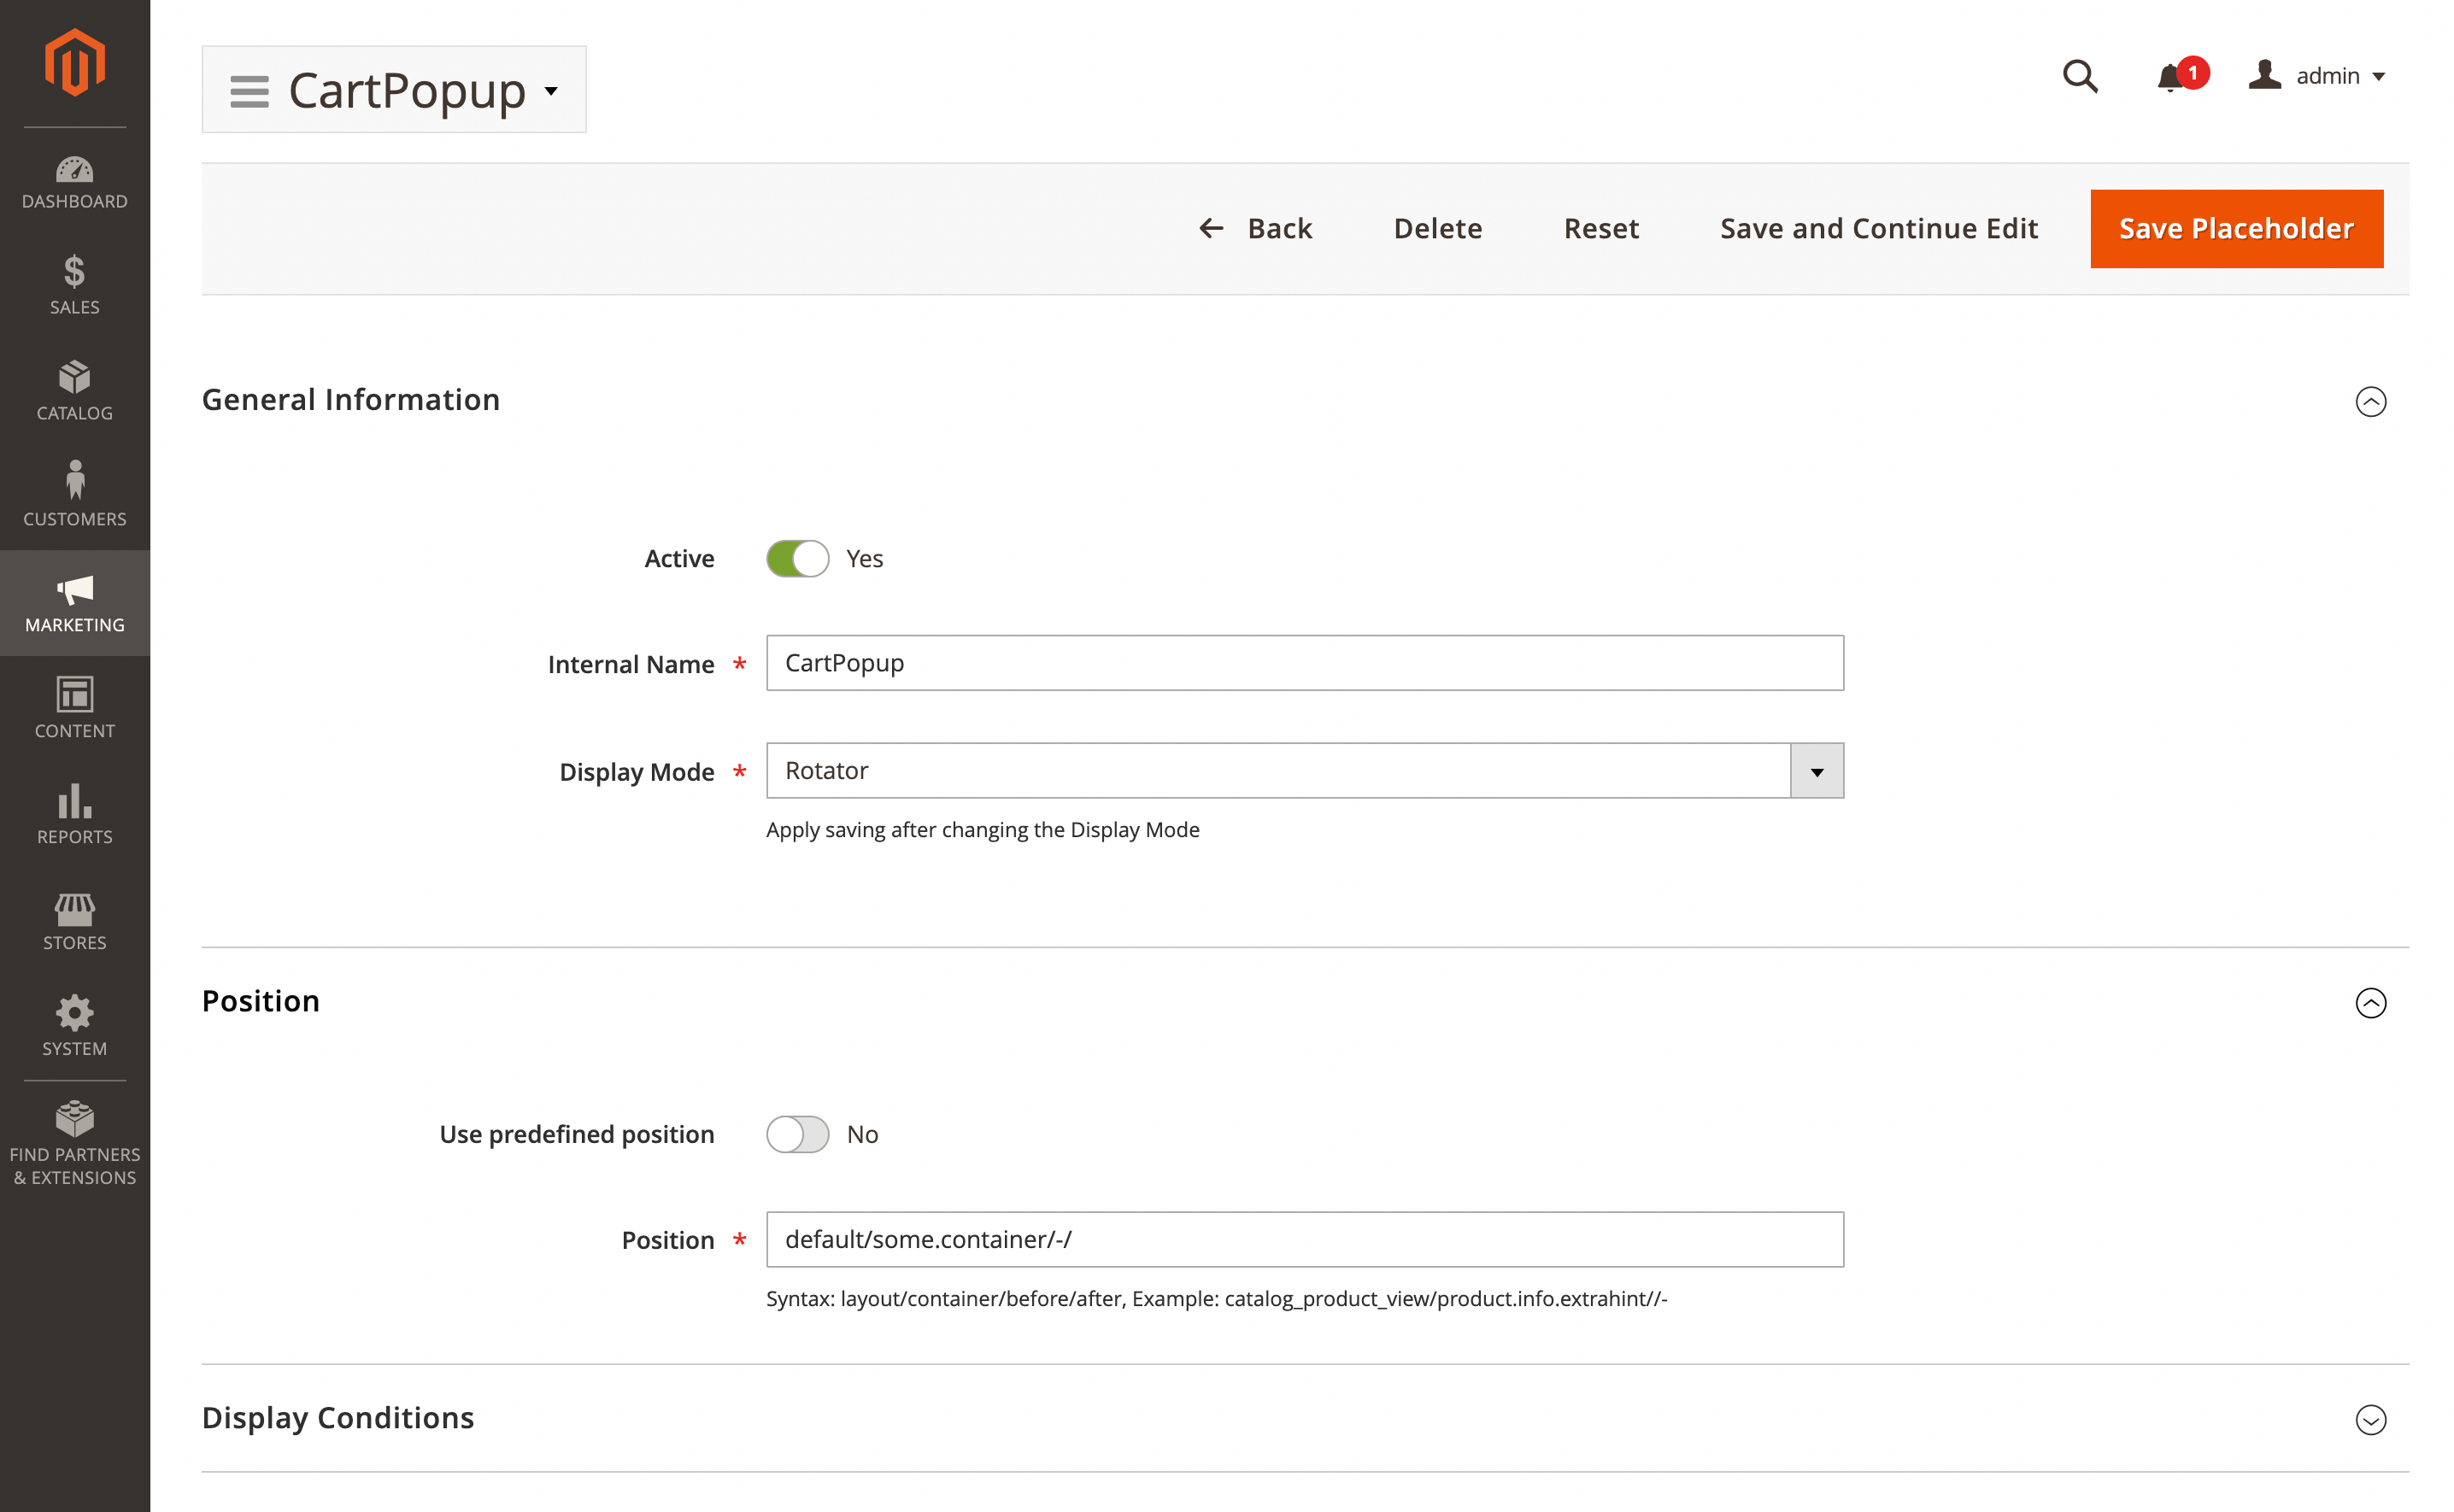
1. Create a placeholder for the widget
Navigate to the Placeholder section and create a new placeholder with the internal name CartPopup, then set the Display mode to Rotator.
Disable the predefined position and set the Position as default/some.container/-/
If you want the banner to appear only in the minicart, use a non-existent container name in the Position field.
Save your placeholder.
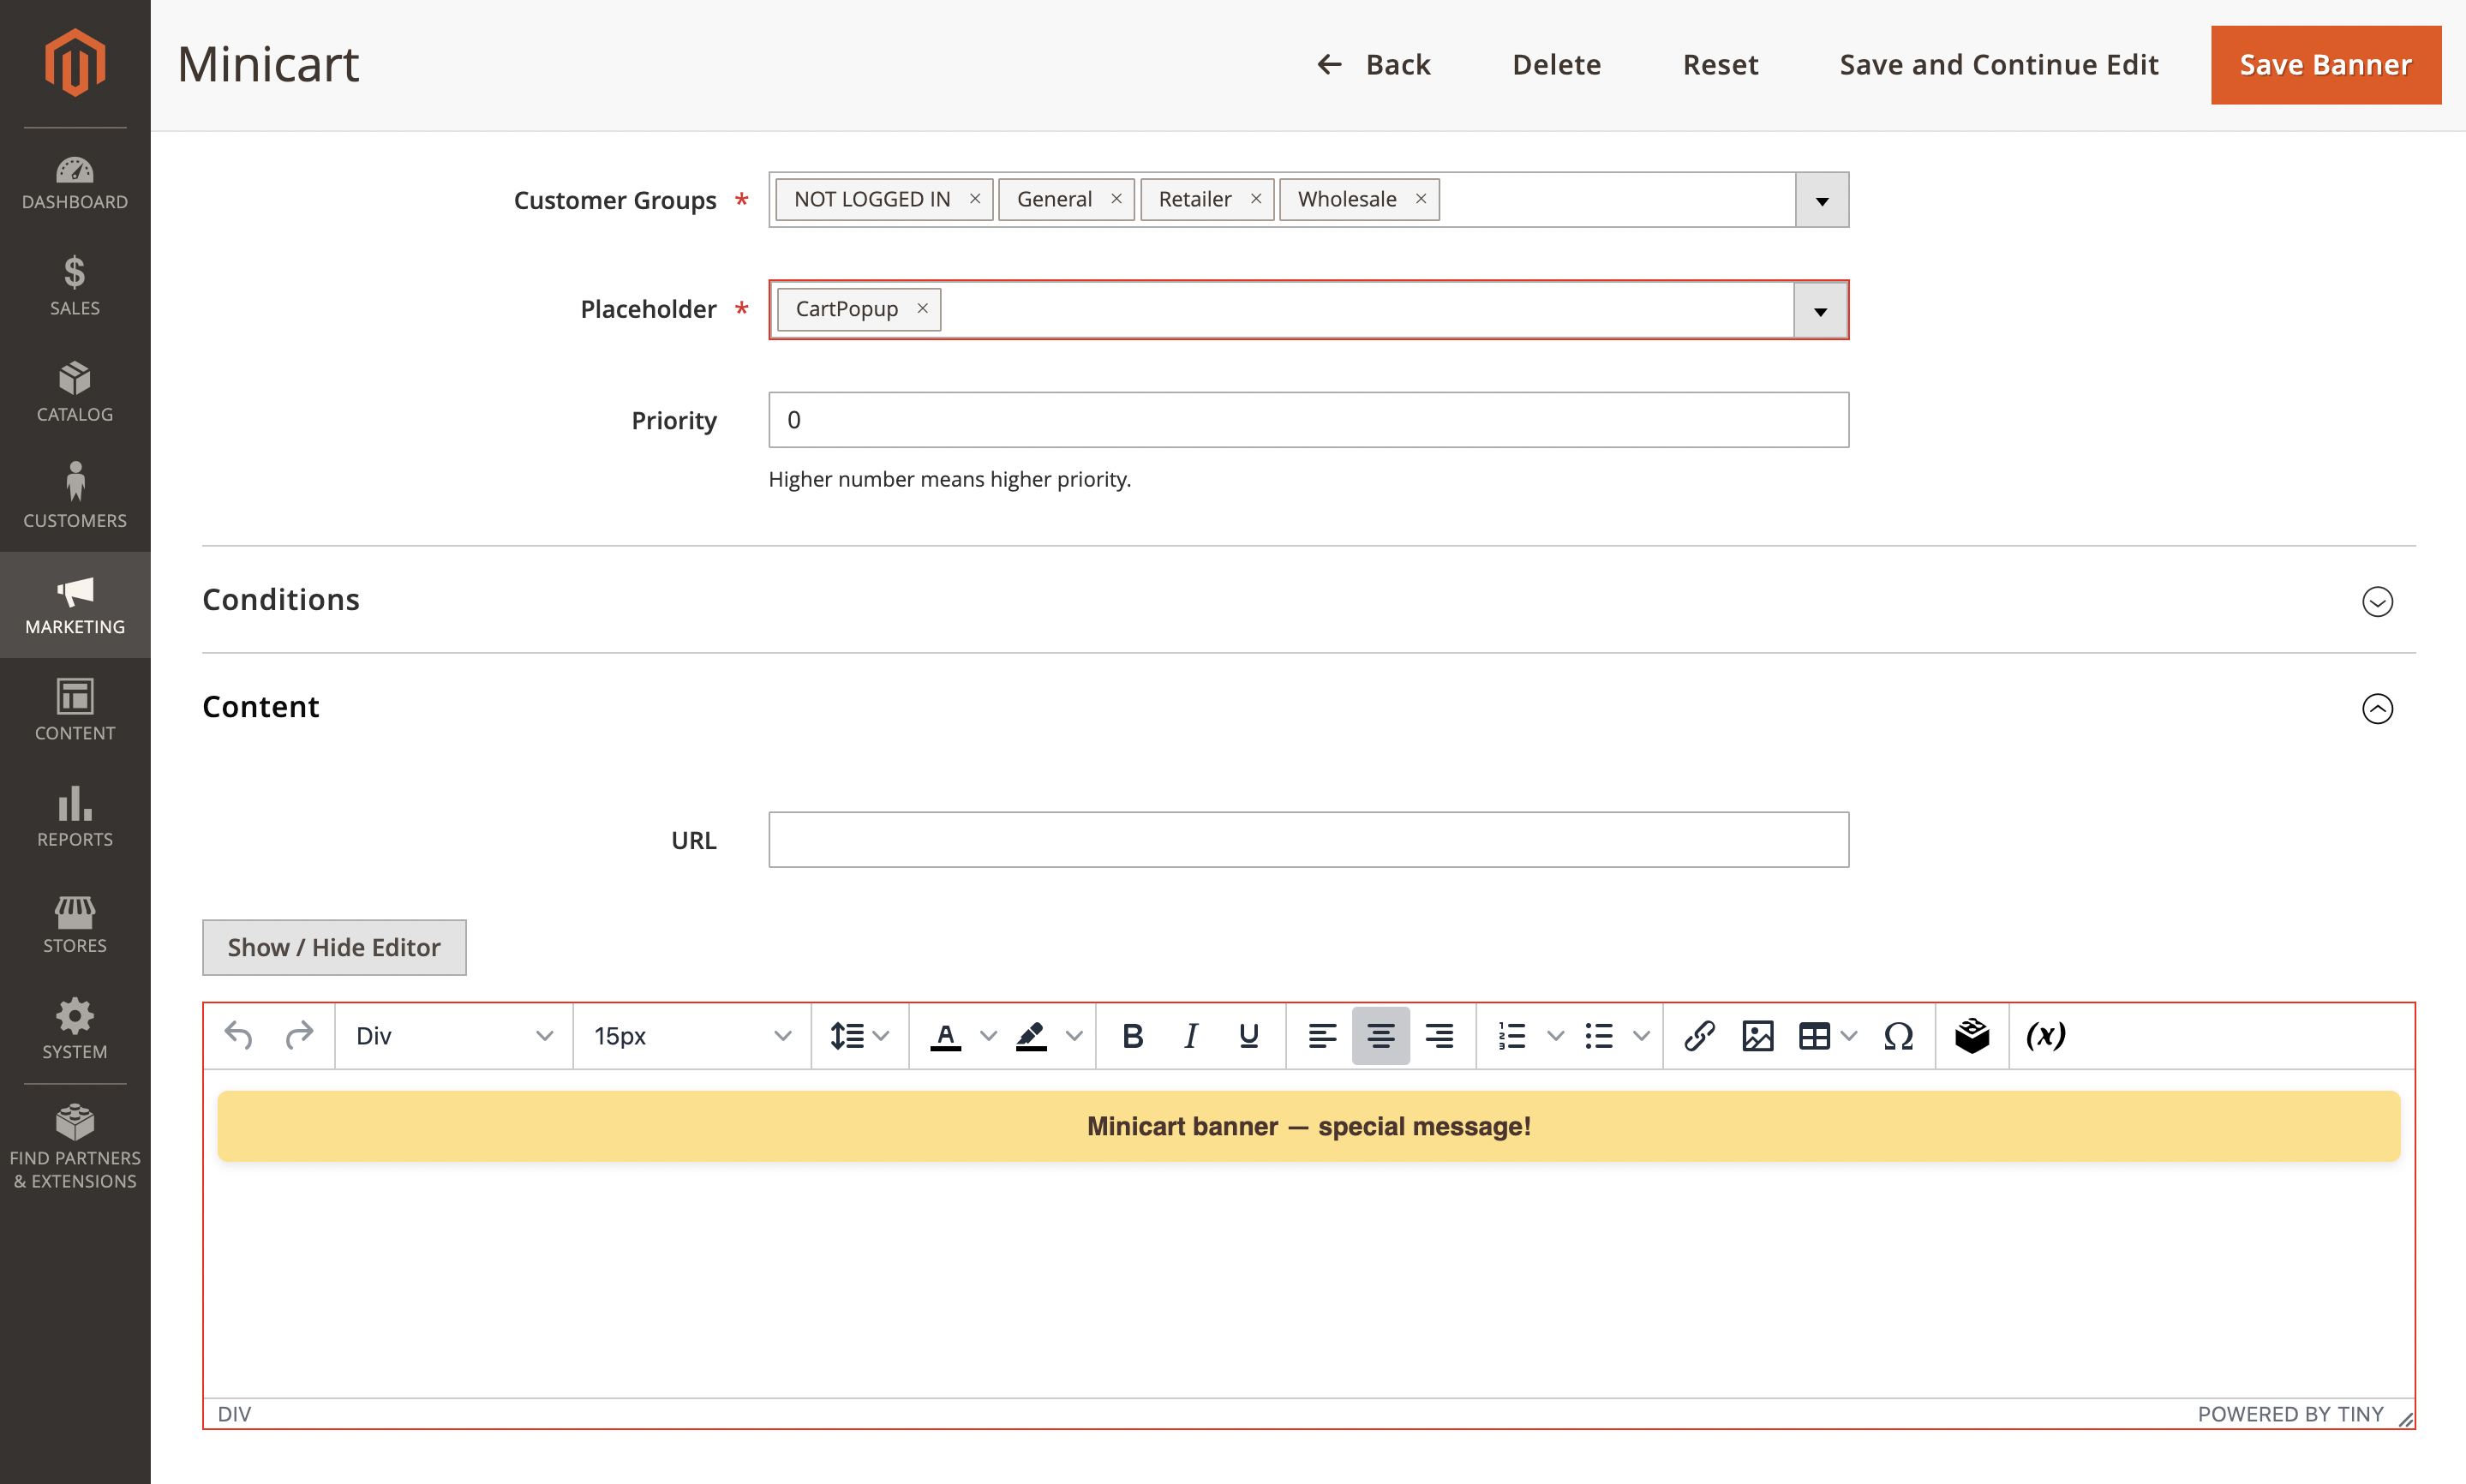
2. Create the banner for the widget
Navigate to the Banner section and create a new banner named Minicart. Assign it to the appropriate store view and choose which customer groups can view it.
In the Placeholder field, select CartPopup.
In the Content section, create the banner content. You can use an image, text, or a combination of both.
Save your banner.
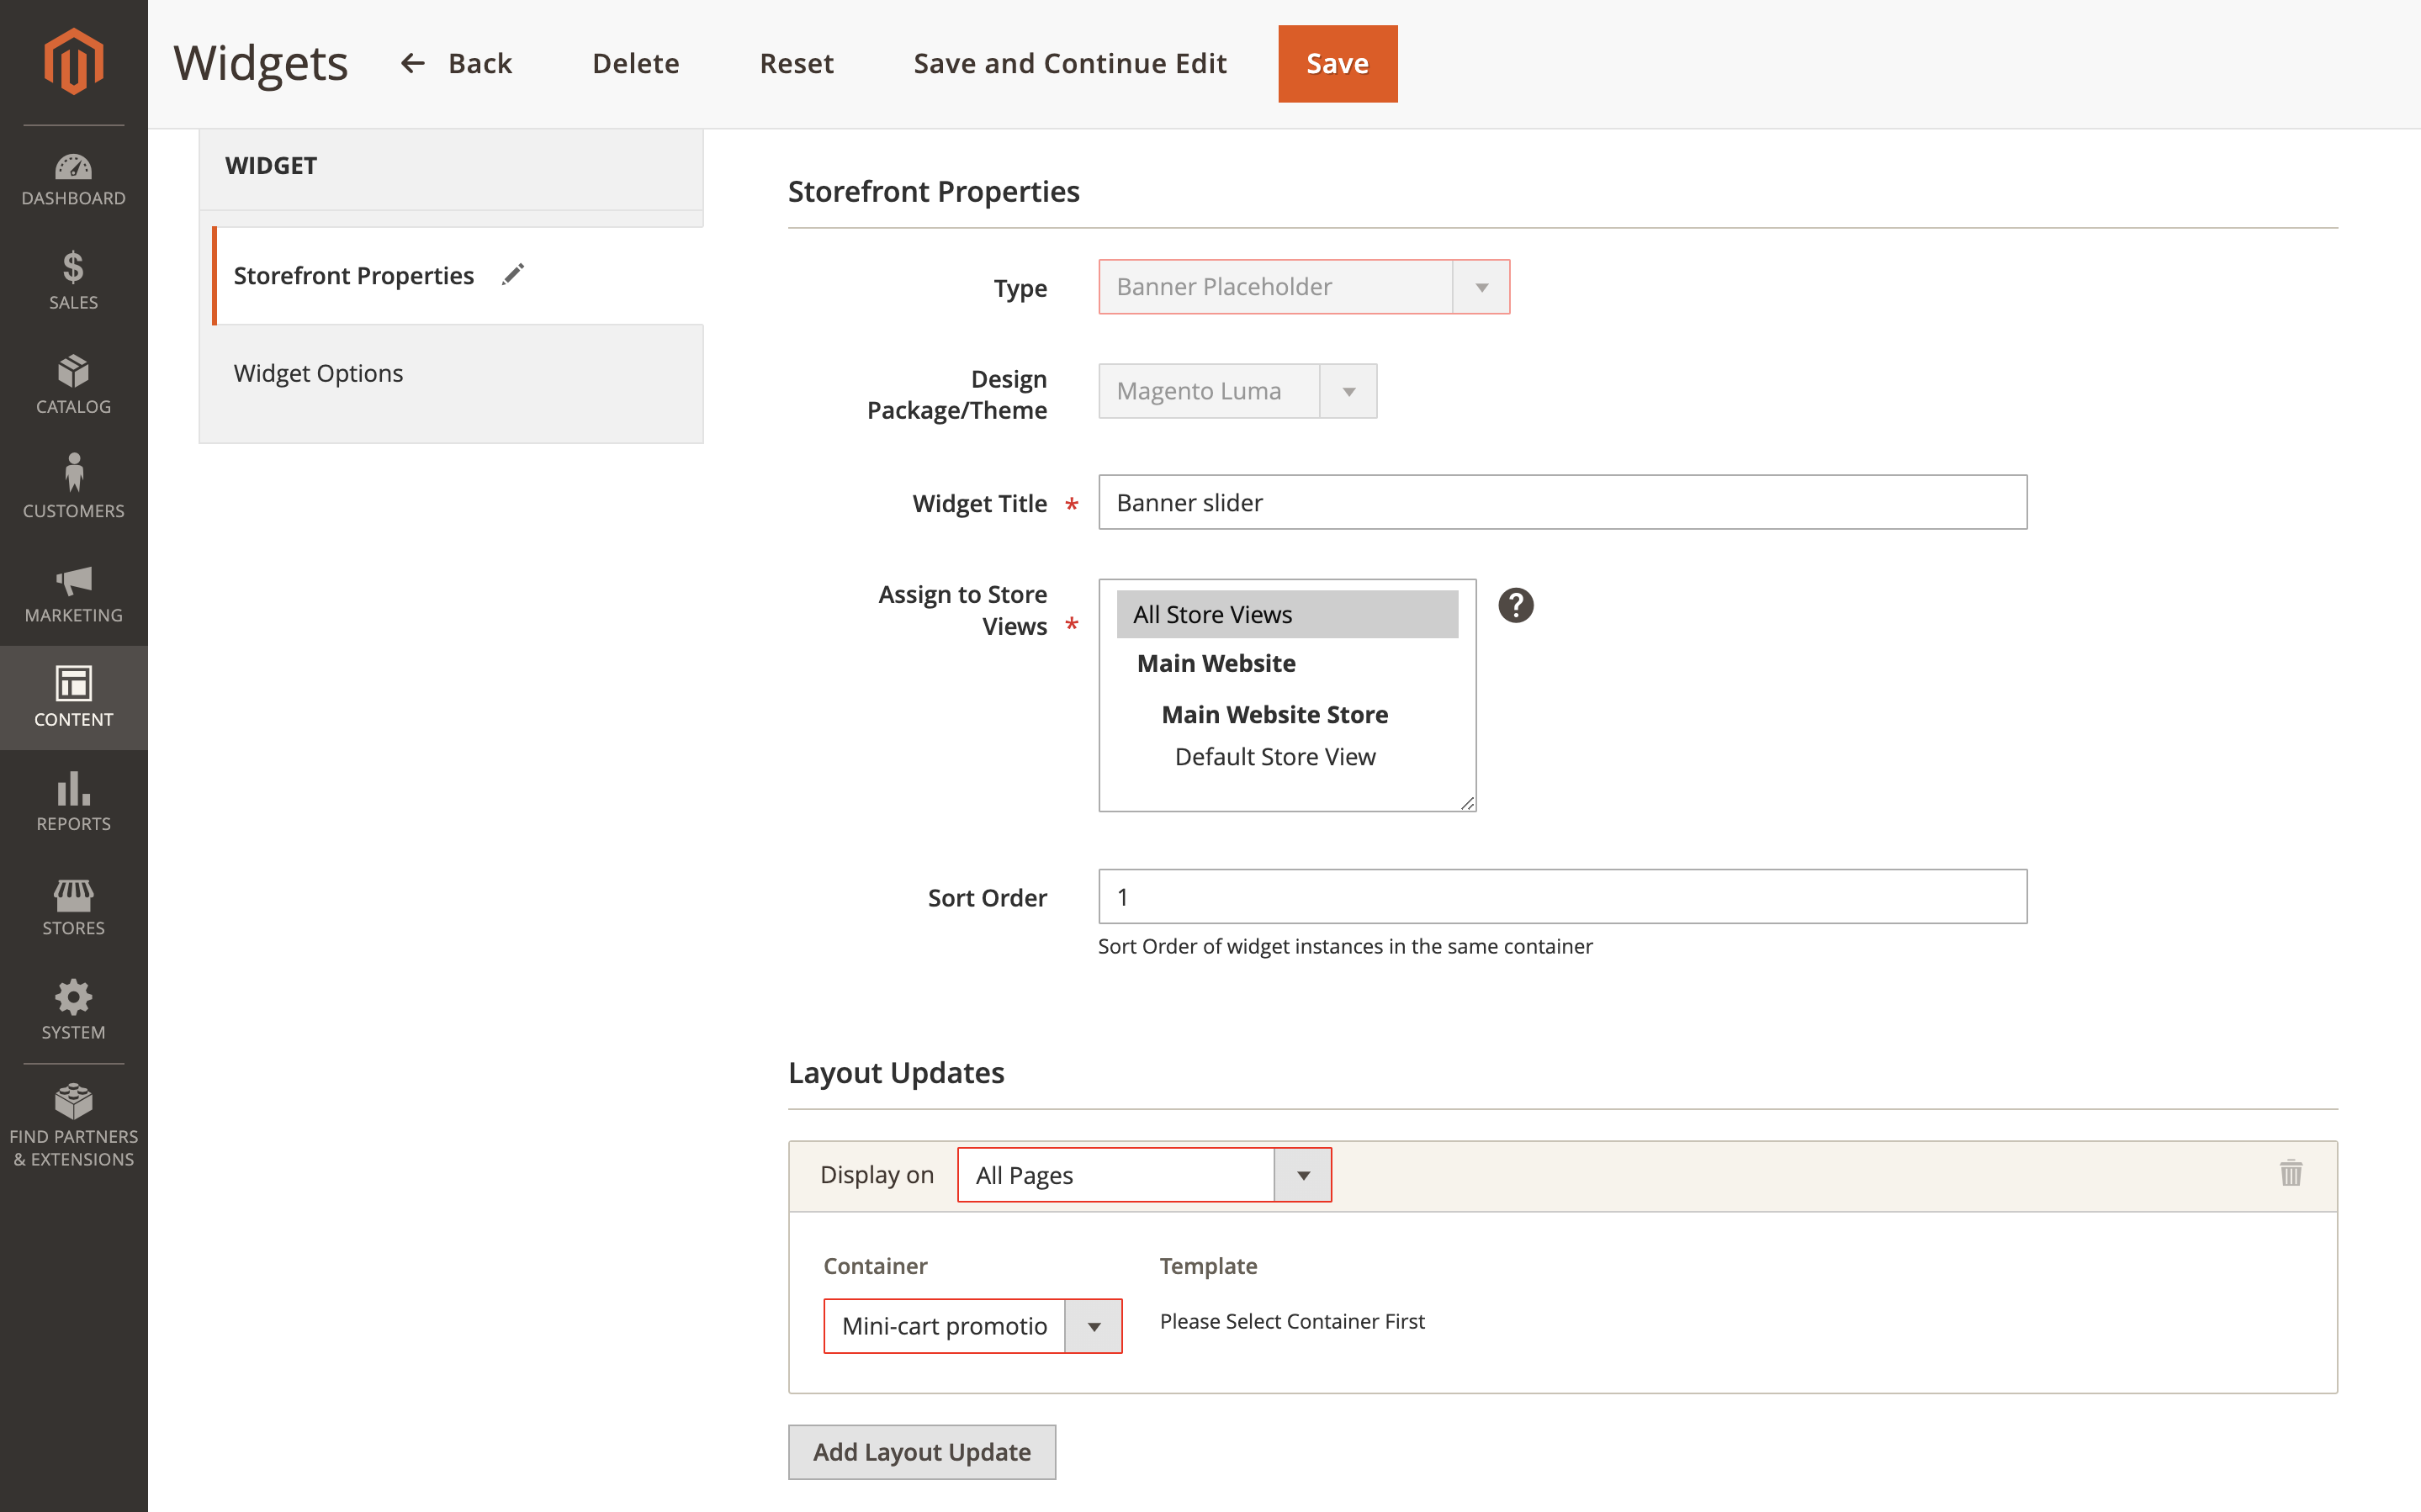
3. Create a widget for the minicart
Navigate to Content -> Widgets and add a new widget named Minicart banner. In the Settings tab, set Type to Banner placeholder, choose your design theme, and click the Continue button.
In the Storefront properties tab:
- Add a Widget title
- Assign it to the appropriate Store view
- In the Layout Updates section, set Display on to
All pages - In the Container, select
Mini-cart promotion
In the Widget options tab, choose the CartPopup placeholder.
Save your widget and clear the cache.