How to create custom banner for product page
To add a banner to the product page, the extension provides a set of predefined positions. If you need to place the banner elsewhere on the page, follow the steps below to add it manually.
The implementation steps may vary depending on the theme you are using. Below, we’ll walk through how to create a custom banner for the Luma and custom banner for the Hyvä themes in different locations on the page.
How to create custom banner for Luma product page
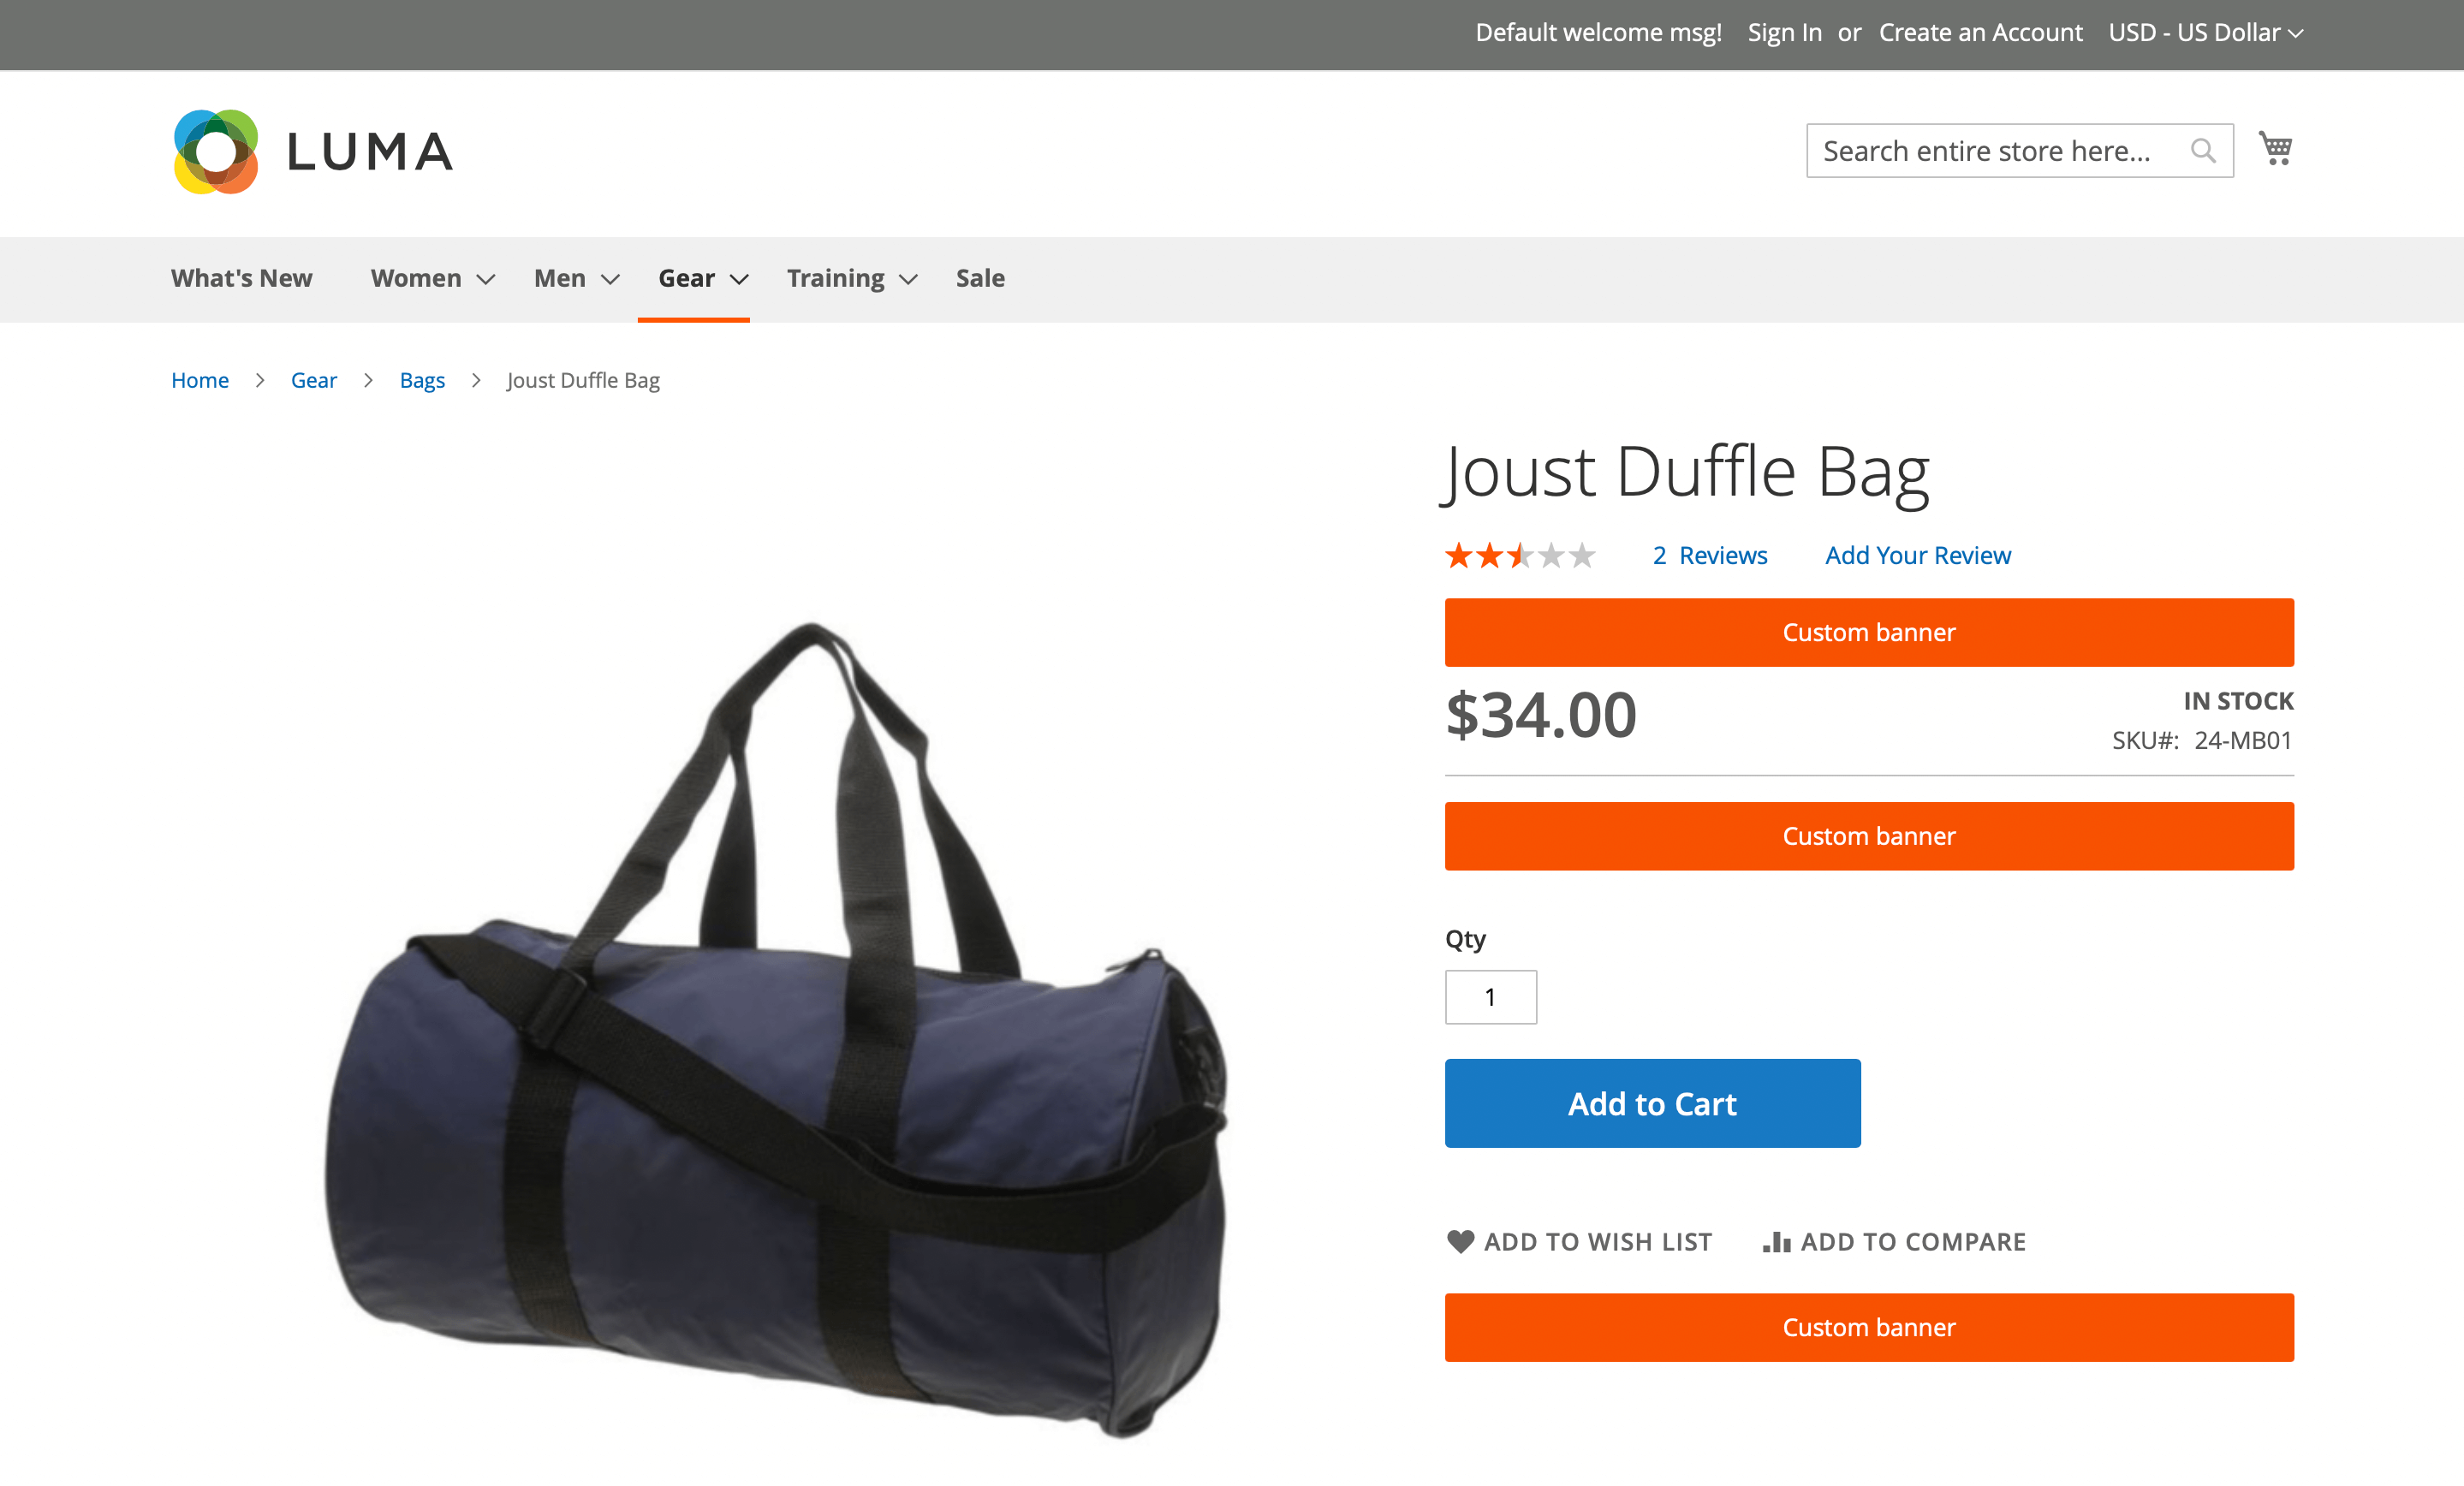
Will add new banner in the product info block like this:
Please note: Magento recommends using child themes for customization instead of modifying the parent theme directly. Therefore, before you begin, make sure to create a child Magento 2 theme if you haven't already.
1. Create custom layout file for custom container
As an example, lets add banners in the product info block, near the price. To do this, open layout folder in your theme folder app/design/frontend/themePath/Magento_Catalog/layout/ and create catalog_product_view.xml that should contain custom containers:
<referenceBlock name="product.info">
    <!-- 3 custom containers for banner around price block -->
   <container name="mst-banner_before-price" htmlTag="div" htmlClass="mst-banner_before-price" after="-"/>
   <container name="mst-banner_after-price" htmlTag="div" htmlClass="mst-banner_after-price" after="-"/>
   <container name="mst-banner_after-buttons" htmlTag="div" htmlClass="mst-banner_after-buttons" after="-"/>
</referenceBlock>
Save changes.
2. Render custom containers' content inside the template
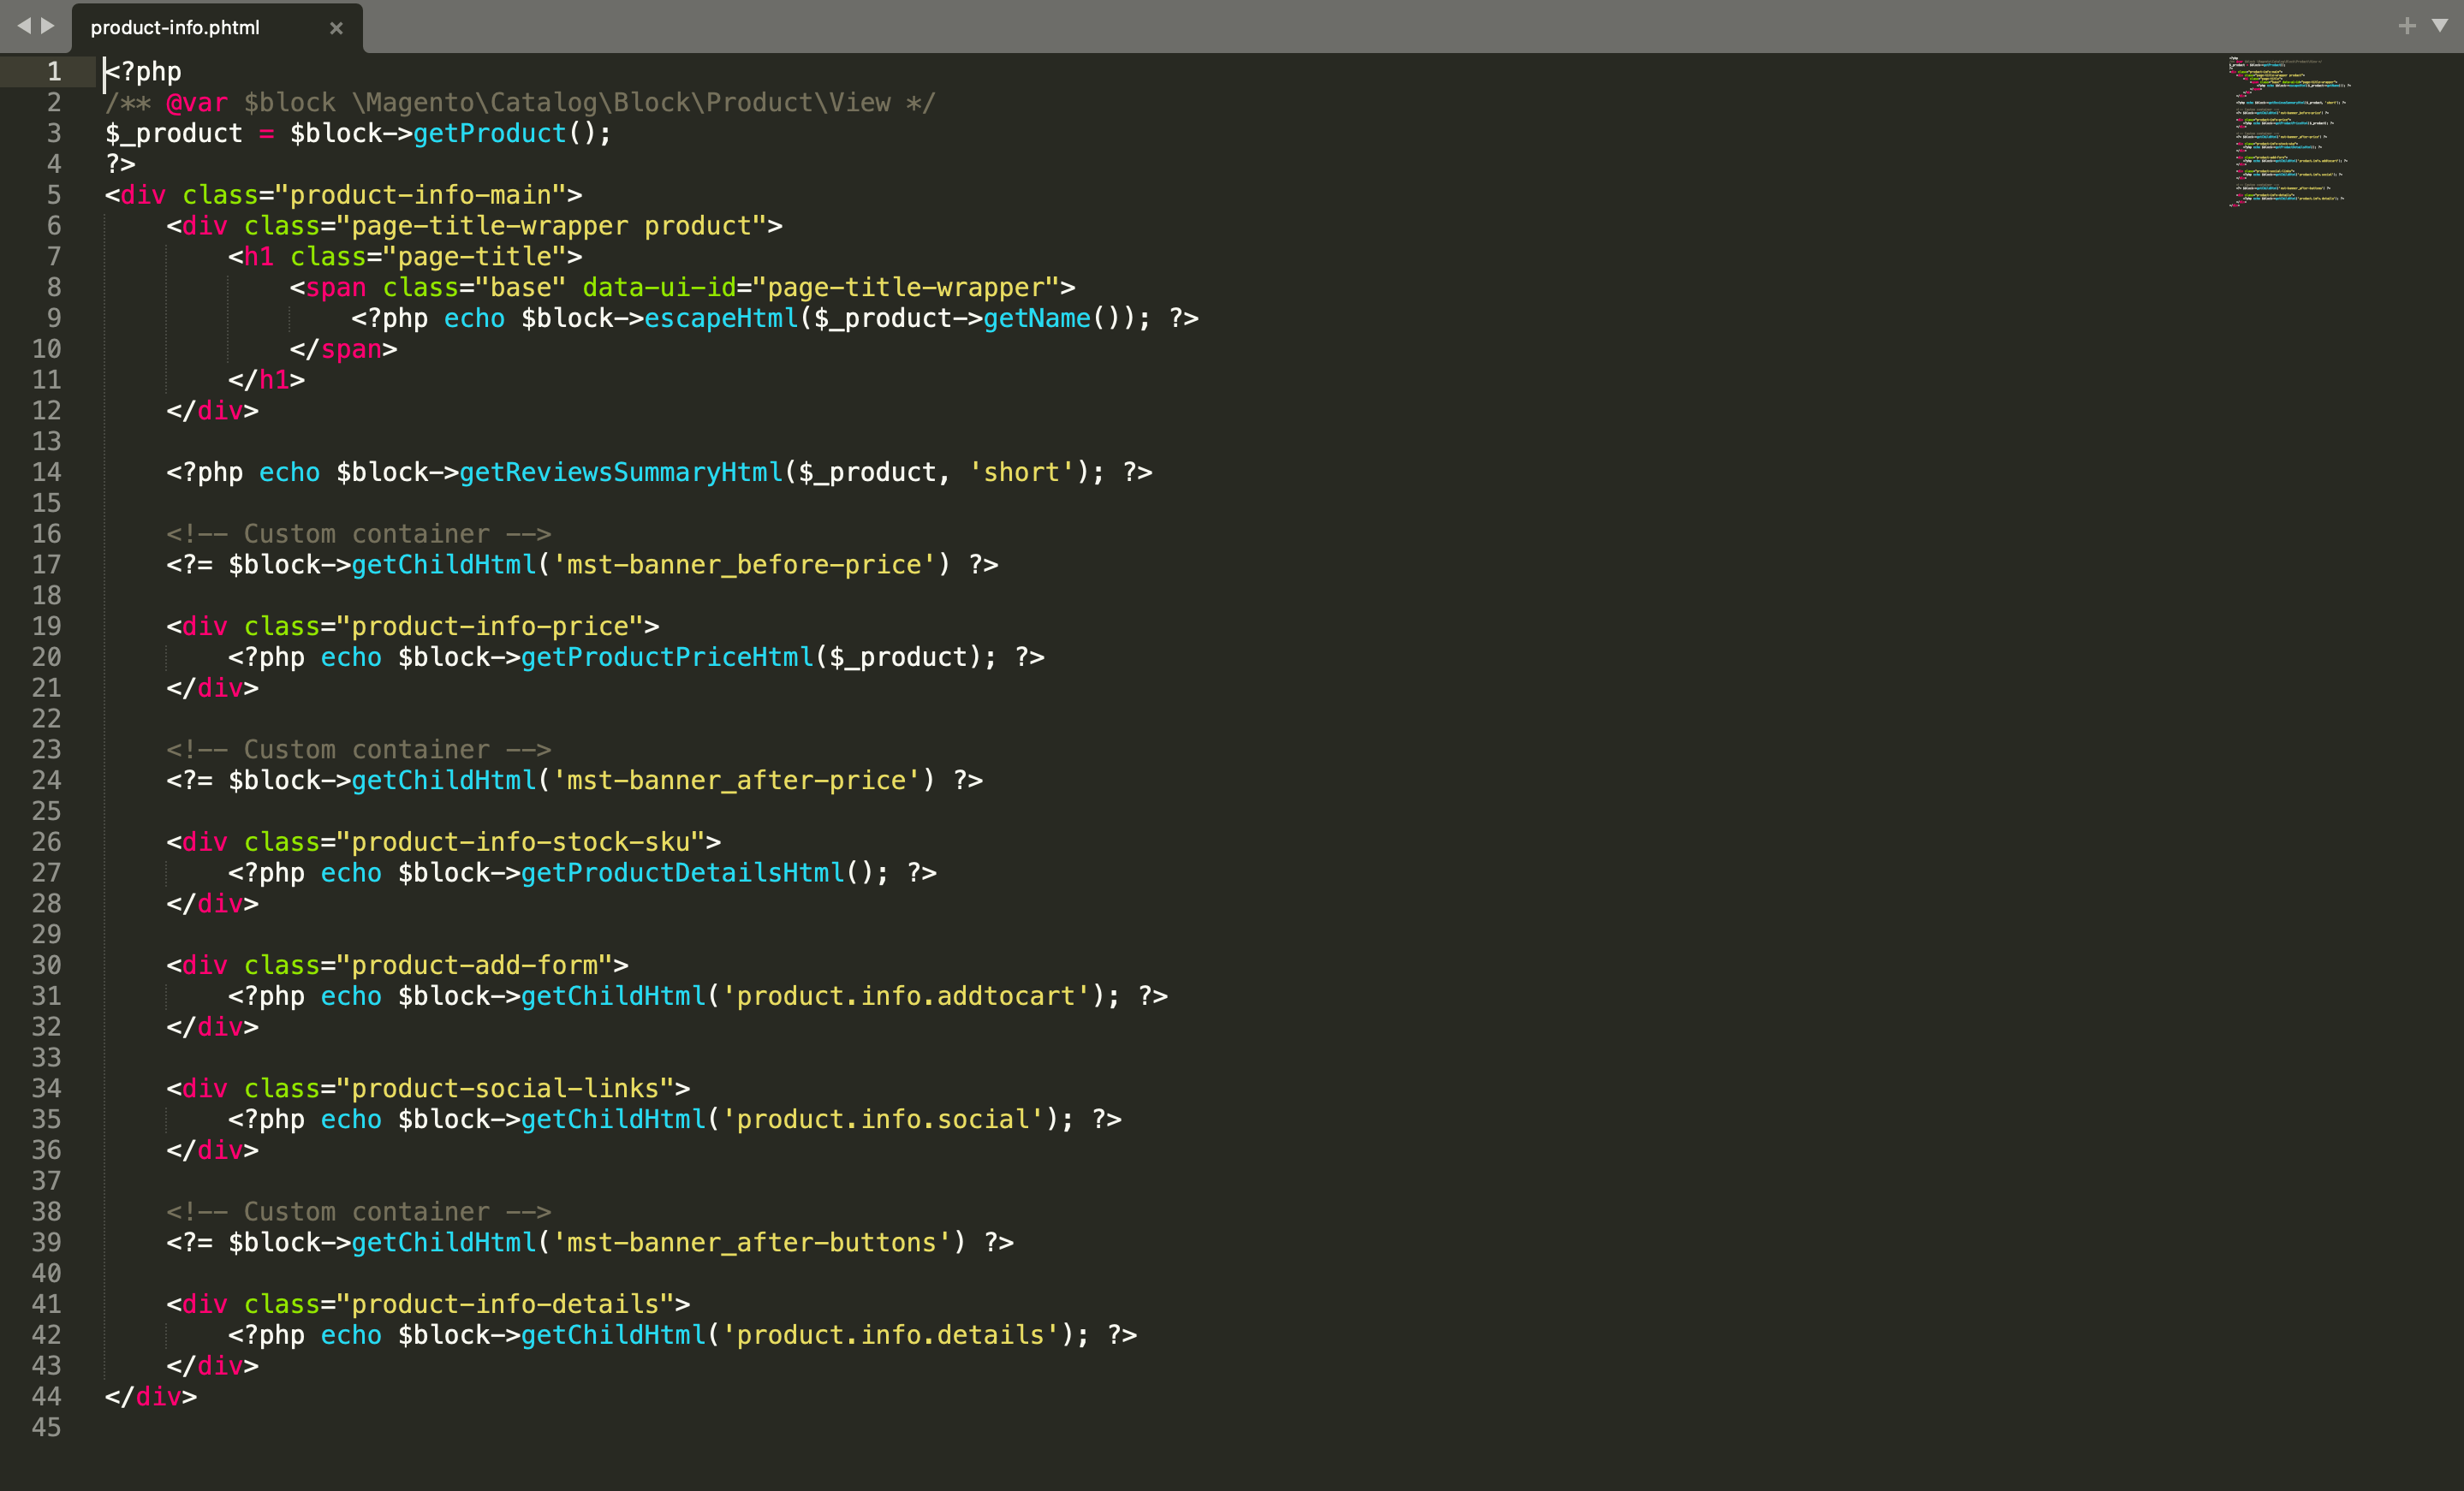
To do this, open templates folder in your theme folder app/design/frontend/themePath/Magento_Catalog/templates/product/view/ and create product-info.phtml in which add the code to call the container in the appropriate places.
<?= $block->getChildHtml('mst-banner_before-price') ?>
<?= $block->getChildHtml('mst-banner_after-price') ?>
<?= $block->getChildHtml('mst-banner_after-buttons') ?>
You should receive something like this:
Save your changes and clear the cache to apply them.
3. Create placeholders positioned in custom containers
-
Navigate to the Placeholder section.
-
Create a placeholder with the internal name:
BeforePrice.- Set Display Mode to
Rotator. - Disable the predefined position.
- In the Position field, enter:
catalog_product_view/mst-banner_before-price//- - Save your changes.
- Set Display Mode to
-
Create a second placeholder with the internal name:
AfterPrice.- Set Display Mode to
Rotator. - Disable the predefined position.
- In the Position field, enter:
catalog_product_view/mst-banner_after-price//- - Save your changes.
- Set Display Mode to
-
Create a third placeholder with the internal name:
AfterButtons.- Set Display Mode to
Rotator. - Disable the predefined position.
- In the Position field, enter:
catalog_product_view/mst-banner_after-buttons//- - Save your changes.
- Set Display Mode to
4. Create banners for custom placeholders
-
Navigate to the Banner section.
-
Create a banner named
Banner before price.- Assign it to the appropriate store view.
- Select the customer groups that should see the banner.
- In the Placeholder field, choose
BeforePrice. - In the Content section, add your text or image.
- Save your changes.
-
Create a second banner named
Banner after price.- Assign it to the appropriate store view.
- Select the relevant customer groups.
- In the Placeholder field, choose
AfterPrice. - Add your content (text or image).
- Save the banner.
-
Create a third banner named
Banner after buttons.- Assign it to the appropriate store view.
- Select the relevant customer groups.
- In the Placeholder field, choose
AfterPrice. - Add your content (text or image).
- Save the banner.
How to create custom banner for Hyvä product page
Our extension places banner placeholders into containers (container nodes in the XML layout file). However, containers are not present everywhere in Magento layout files, so placing banners in certain areas is impossible without additional theme customizations.
Therefore, if you need to place a banner inside a block, you must first create a container. Follow the steps below to add a banner to a block on the product page.
1. Create custom layout file for custom container
Please note: Magento recommends using child themes for customization instead of modifying the parent theme directly. Therefore, before you begin, make sure to create a child Hyvä theme if you haven't already.
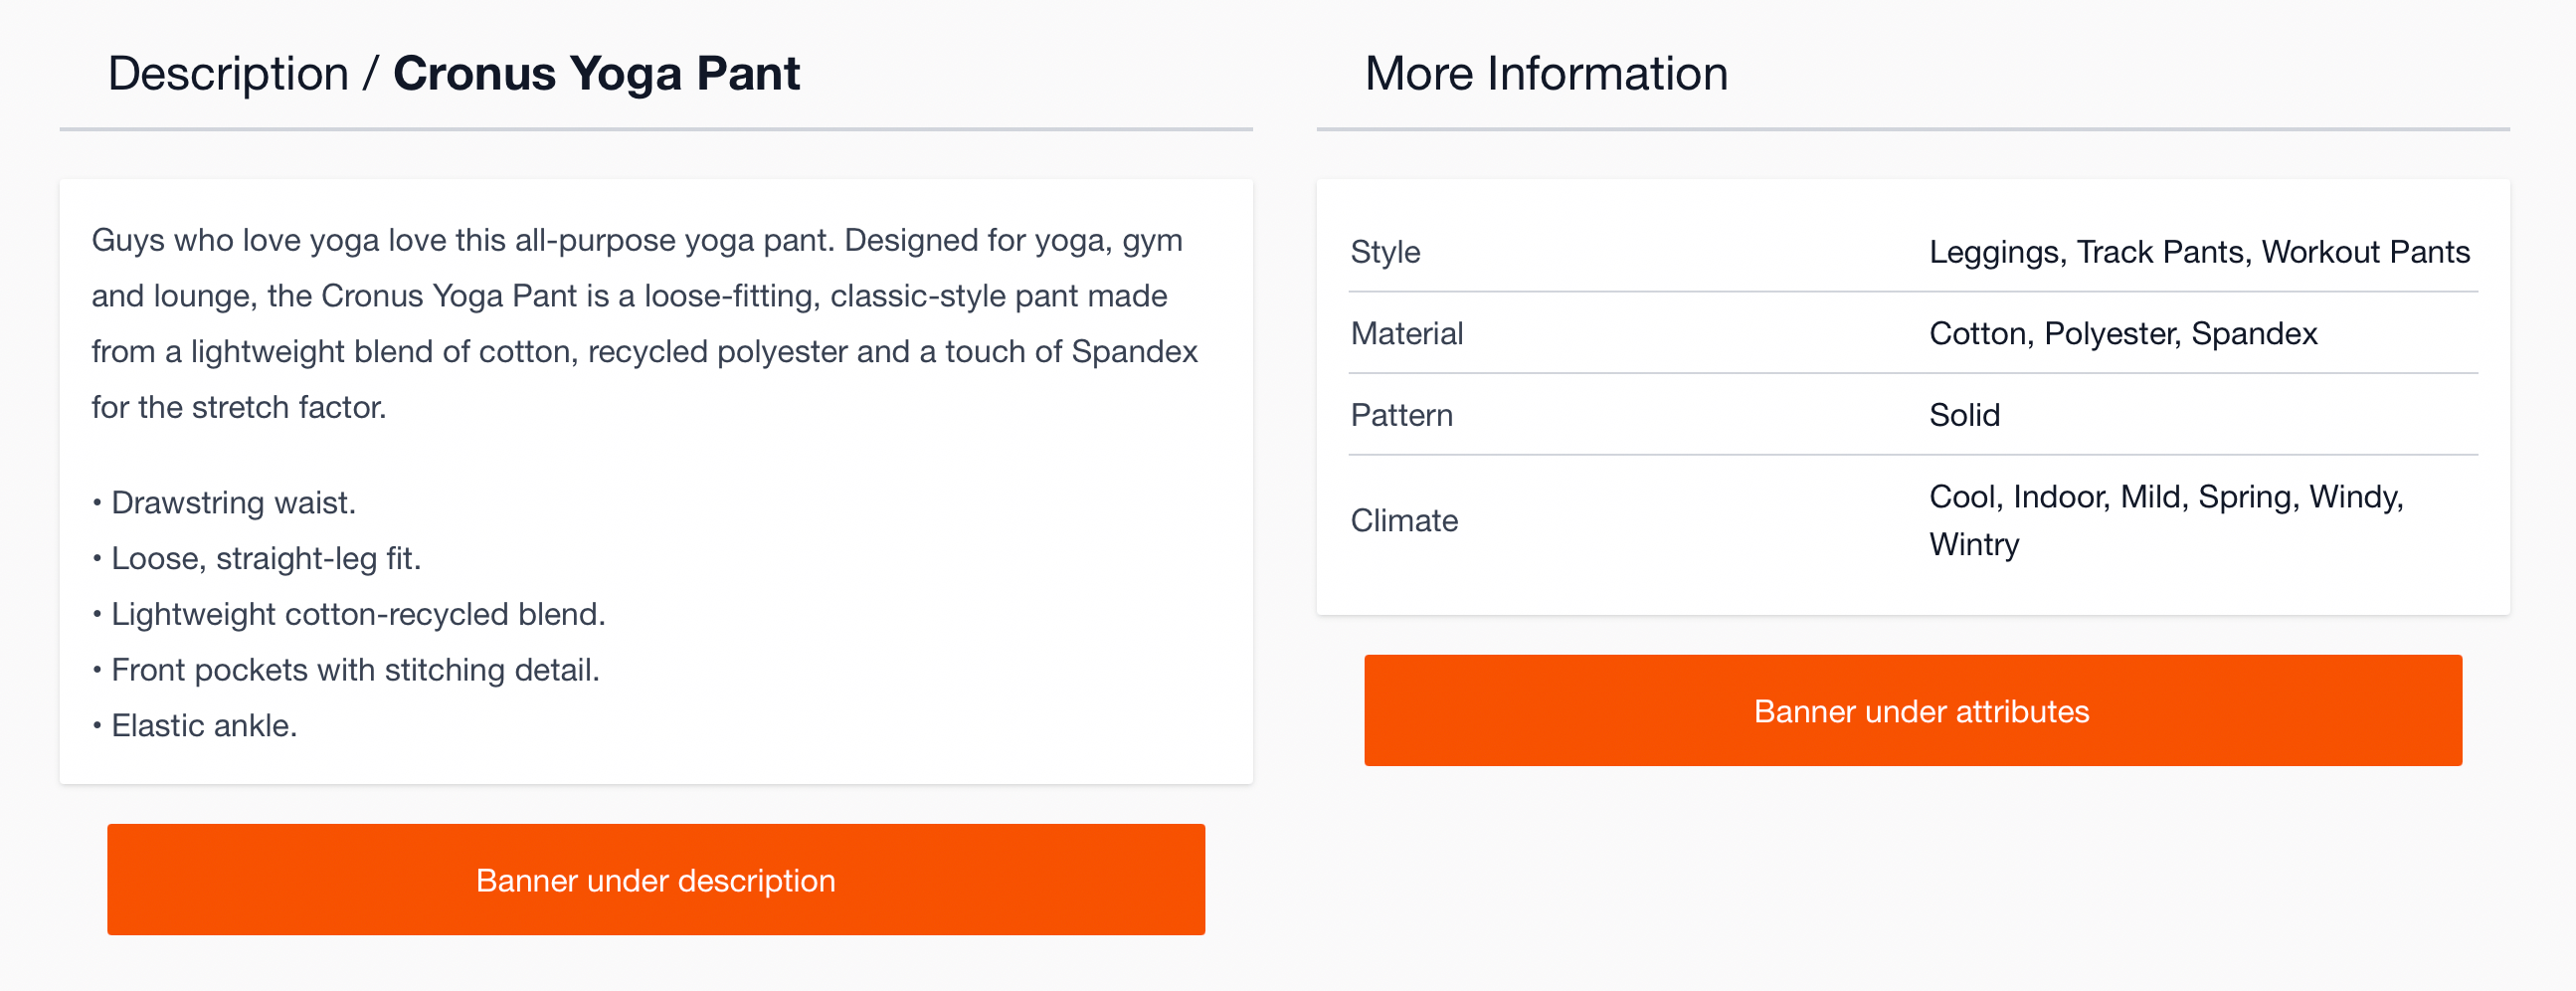
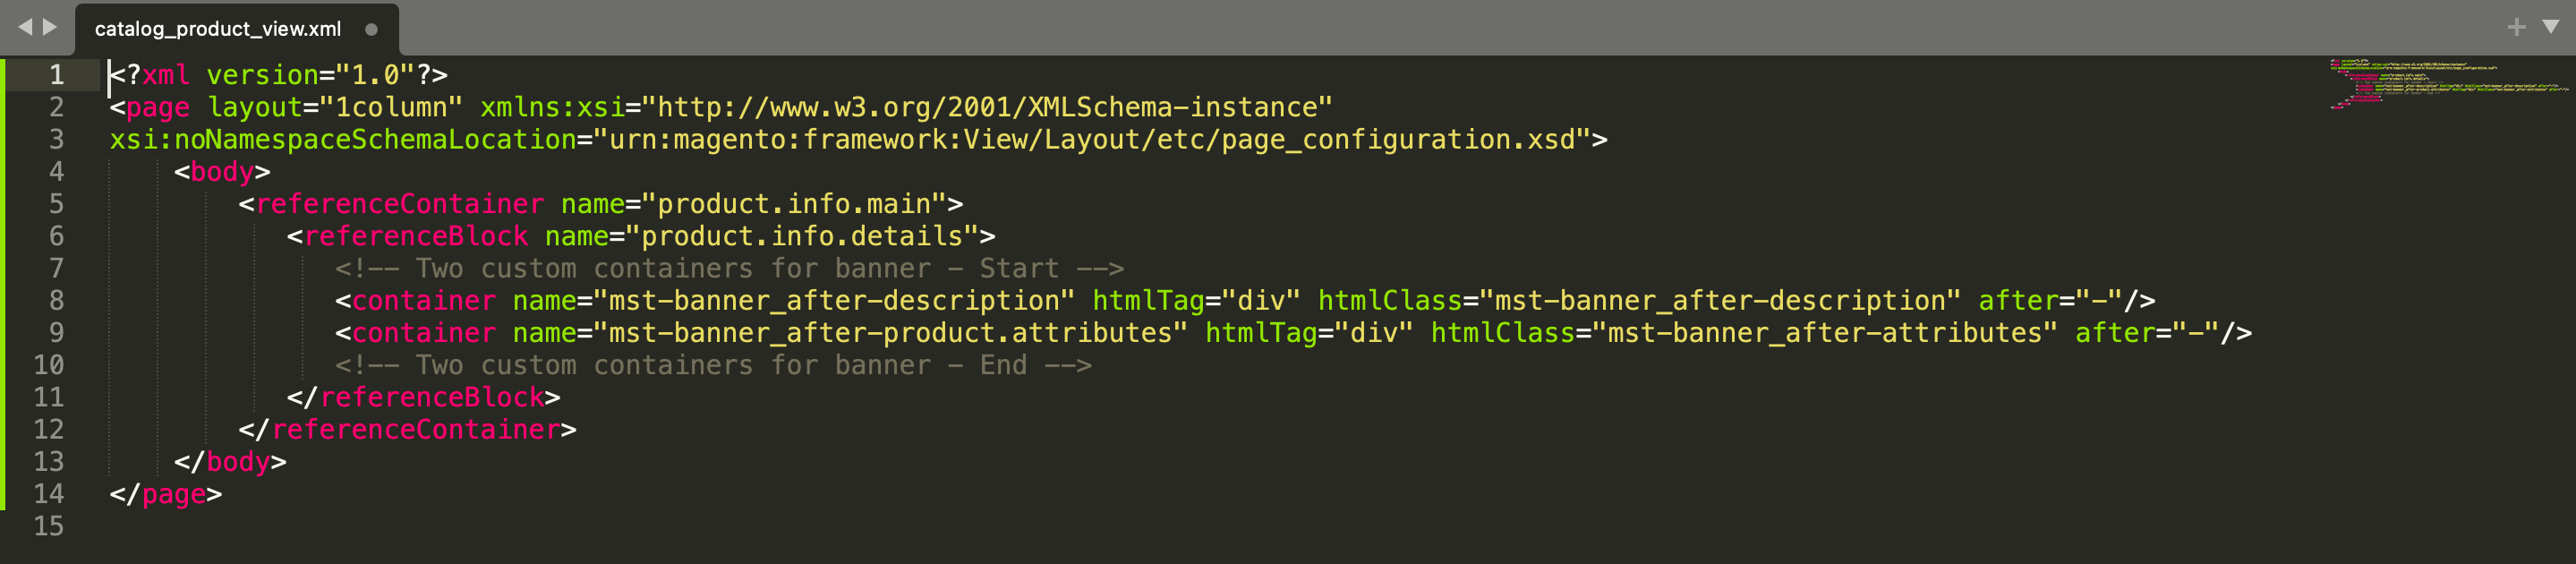
As an example, let's add banners after the More Description and More Information blocks. To do this, open layout folder in your theme folder app/design/frontend/themePath/Magento_Catalog/layout and create catalog_product_view.xml that should contain custom containers:
<container name="mst-banner_after-description" htmlTag="div" htmlClass="mst-banner_after-description" after="-"/>
<container name="mst-banner_after-product.attributes" htmlTag="div" htmlClass="mst-banner_after-attributes" after="-"/>
Something like this:
In the file add blocks for both banners. To simplify rendering, the names of these containers include the names of the blocks after which they should be displayed.
2. Render custom containers' content inside the template
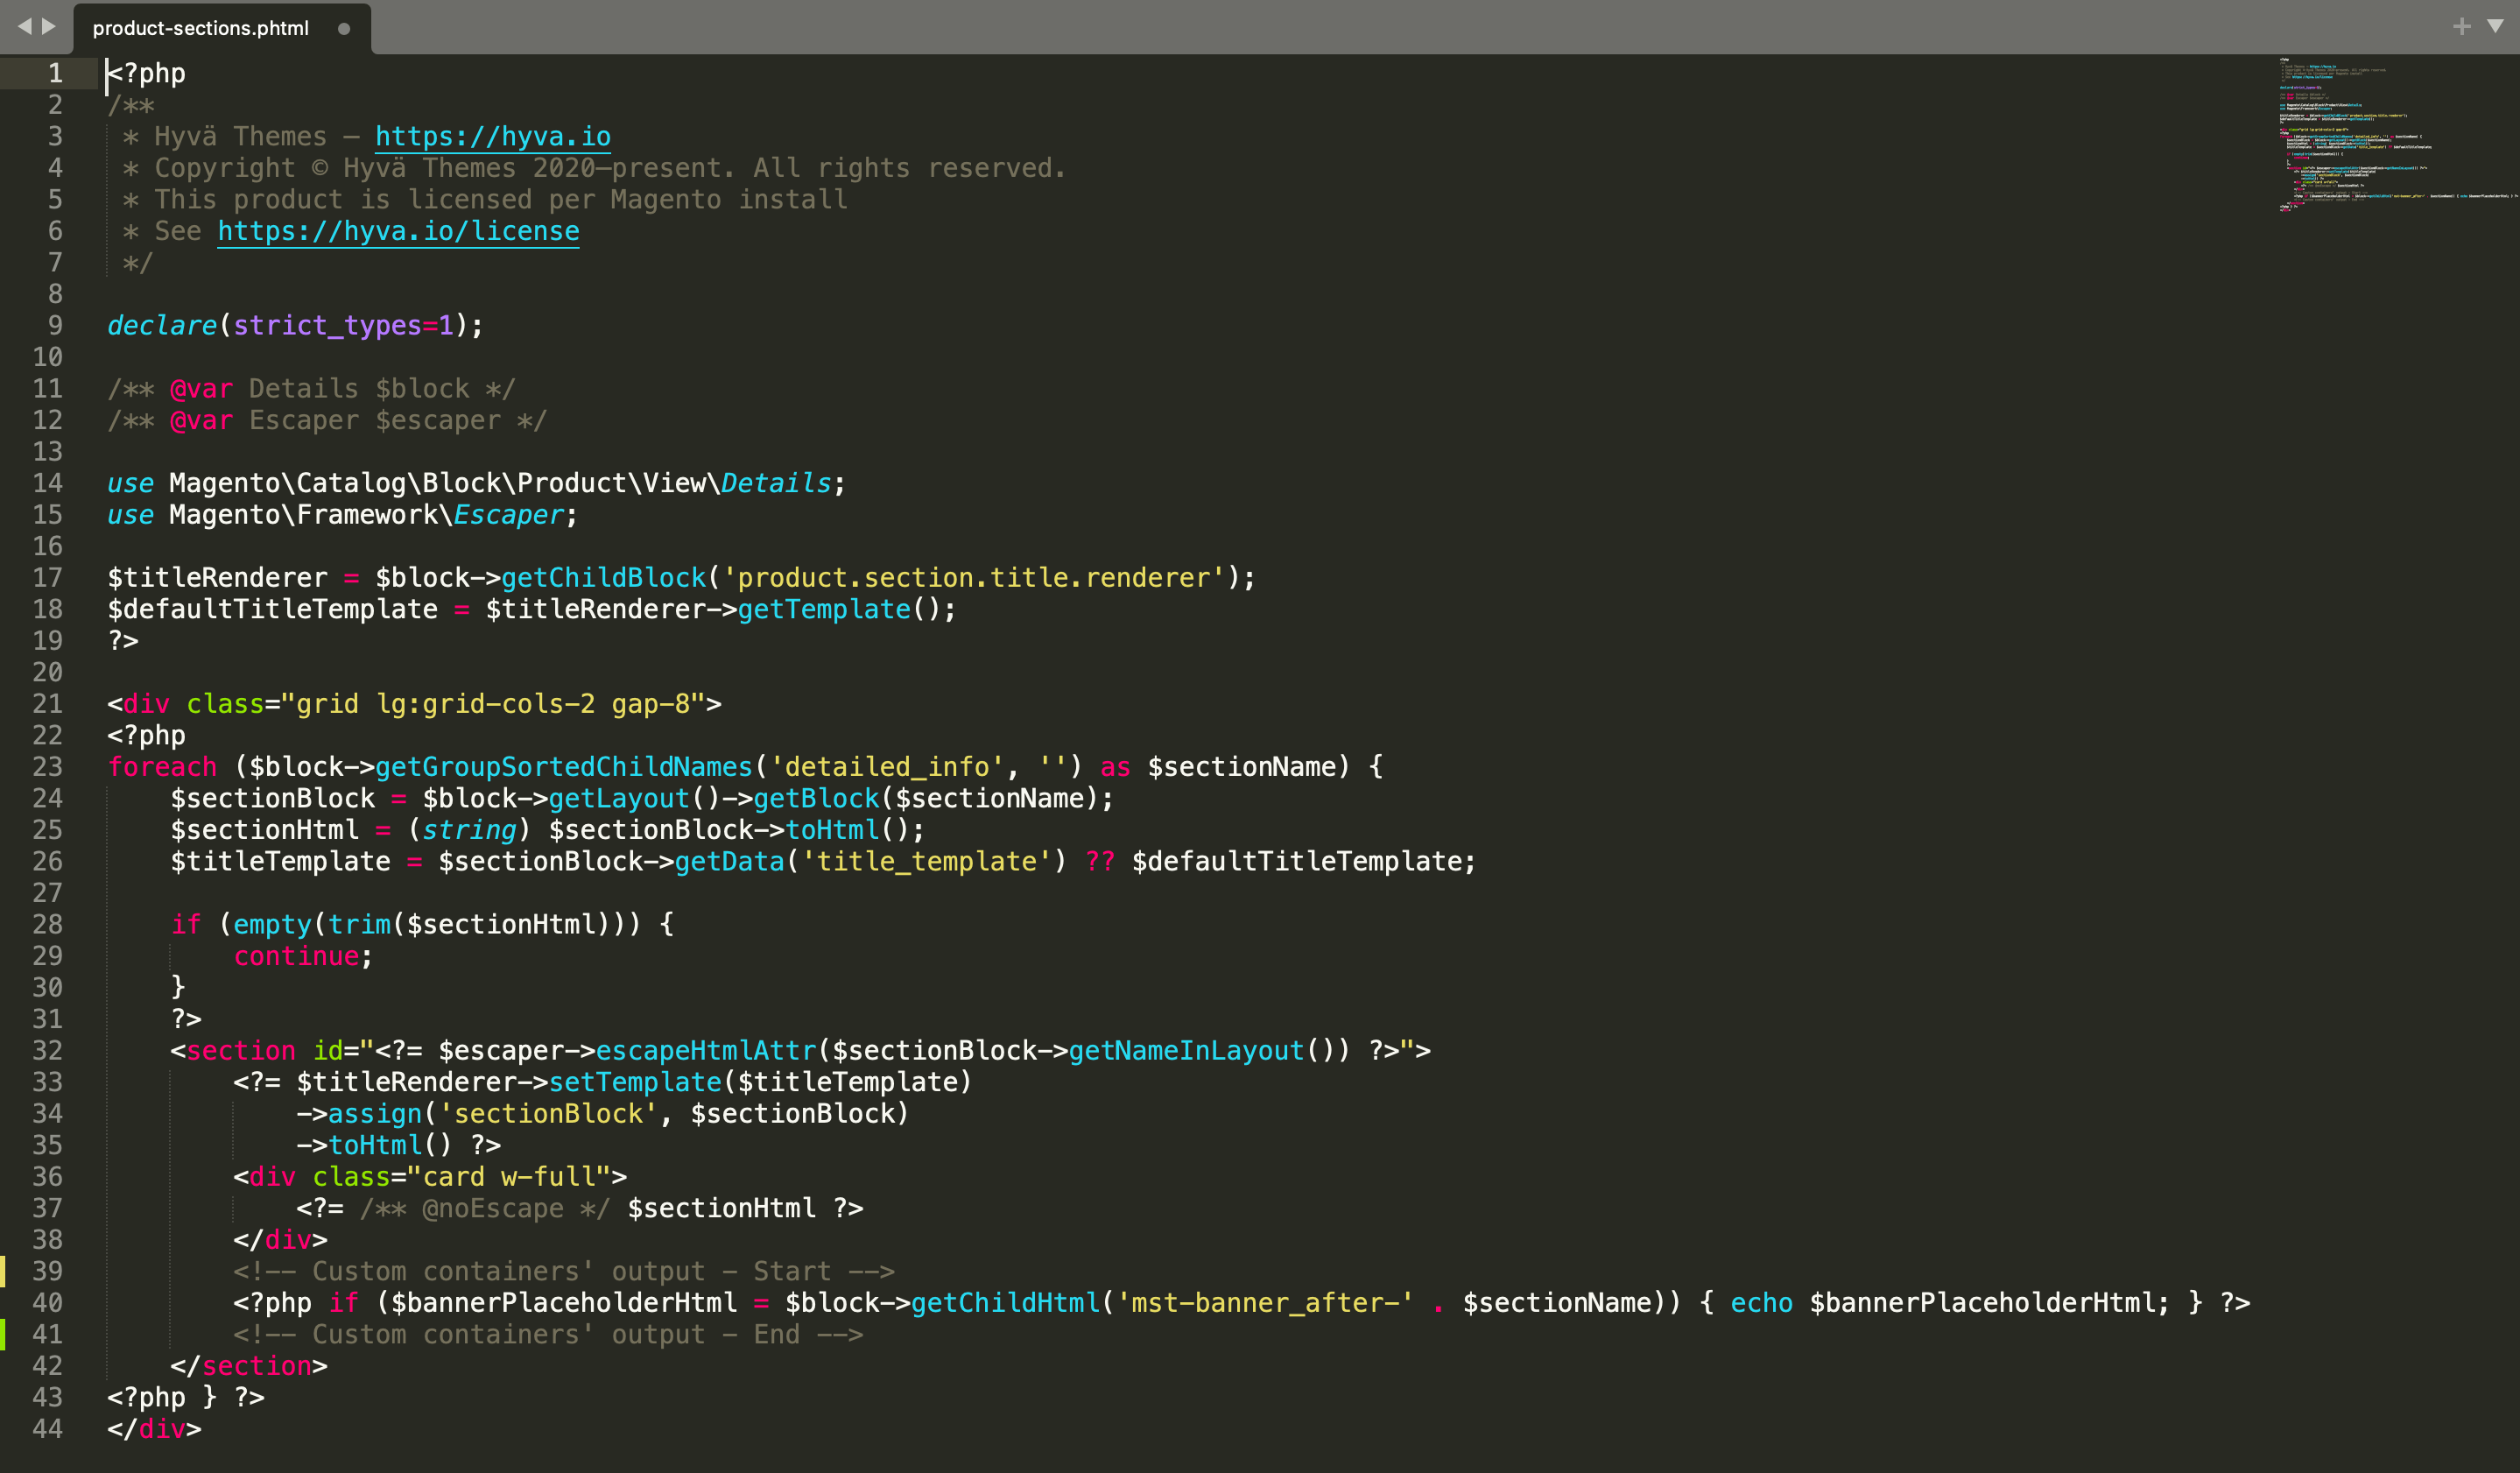
Find and modify the template file app/design/frontend/themePath/Magento_Catalog/templates/product/view/sections/product-sections.phtml to output containers inside blocks, instead of placing them inside another container.
You will need add this line:
<?php if ($bannerPlaceholderHtml = $block->getChildHtml('mst-banner_after-' . $sectionName)) { echo $bannerPlaceholderHtml; } ?>
In Magento, containers always render all their first-level child elements. However, a block does not render its child elements unless the $block->getChildHtml() method is explicitly called within the template.
Once that's done, you can use the custom containers in your placeholder configuration.
3. Create placeholders positioned in custom containers
-
Navigate to the Placeholder section.
-
Create a placeholder with the internal name:
UnderDescription.- Set Display Mode to
Rotator. - Disable the predefined position.
- In the Position field, enter:
catalog_product_view/mst-banner_after-description//- - Save your changes.
- Set Display Mode to
-
Create a second placeholder with the internal name:
UnderAttributes.- Set Display Mode to
Rotator. - Disable the predefined position.
- In the Position field, enter:
catalog_product_view/mst-banner_after-product.attributes//- - Save your changes.
- Set Display Mode to
4. Create banners for custom placeholders
-
Navigate to the Banner section.
-
Create a banner named
Banner under description.- Assign it to the appropriate store view.
- Select the customer groups that should see the banner.
- In the Placeholder field, choose
UnderDescription. - In the Content section, add your text or image.
- Save your changes.
-
Create a second banner named
Banner under attributes.- Assign it to the appropriate store view.
- Select the relevant customer groups.
- In the Placeholder field, choose
UnderAttributes. - Add your content (text or image).
- Save the banner.