Configuring the extension
Our Return merchandise authorization (RMA) extension for Magento 2 is an essential tool designed to simplify and enhance your store's return processes, ensuring a smooth customer experience. With a range of customizable settings, you can adapt the extension to suit your return policies and optimize operations.
Here’s a step-by-step guide to quickly get your RMA workflow up and running.
1. Enable return requests
The return process starts with a Return request, which can be submitted through multiple sources:
- Customer account: allow customers to initiate returns directly from their account for a seamless experience. You can disable this feature if you want to restrict RMAs to staff-only submissions by setting RMA -> Settings -> Customer Account -> Show RMA section in Customer Account to No.
- Guest RMA page: this option is enabled by default, offering non-registered customers an easy way to submit RMAs. Simplifying guest returns can increase customer satisfaction and retention.
- Backend RMA grid: ensure that your staff can manage and create RMAs efficiently from the backend. This option is always enabled for streamlined operations.
2. Collect key return parameters
When a customer submits an RMA request, they must provide essential details:
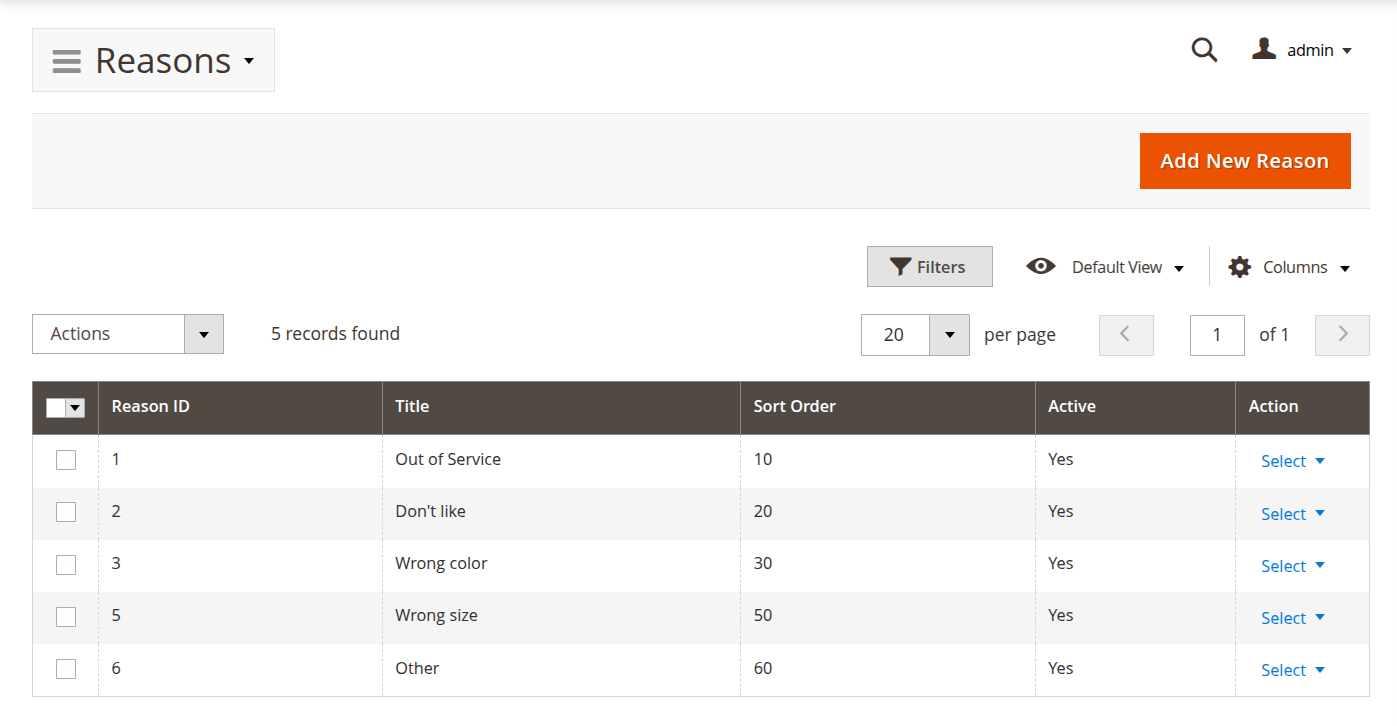
- Reason: customers select a reason for the return. You can customize the reasons to align with your store's policies through the Reasons grid.
- Condition: customers describe the product's current condition, which can be customized in the Conditions grid.

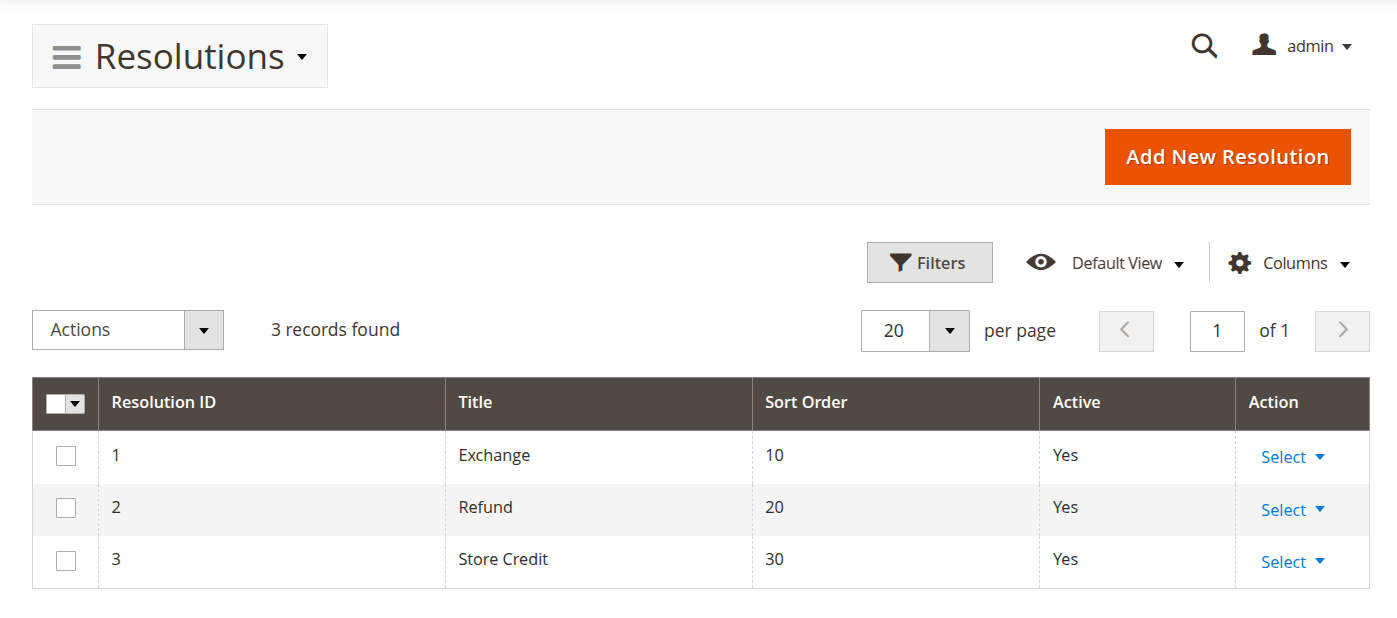
- Resolution: customers indicate the resolution they expect, such as an exchange or refund. Add custom resolutions in the Resolutions grid to cater to your store’s return procedures.
You can control which parameters customers must fill in and which can be handled by staff using the RMA -> Settings -> Customer Account -> Customers are required to select option, offering flexibility to match your return workflow.
3. Implement RMA policy restrictions
Limit RMA submissions based on criteria such as the number of days after order completion or specific order statuses. Customize these limitations to suit your store’s return policies in the RMA -> Settings -> RMA Policy section, giving you control over when RMAs can be requested.
4. Customize RMA numbering
After submission, each RMA is assigned a unique number. You can personalize the numbering format by defining custom rules in RMA -> Settings -> RMA Number. Whether you use a store-specific prefix or a more complex scheme, this ensures easy tracking and identification of returns.
5. Manage RMA statuses and notifications
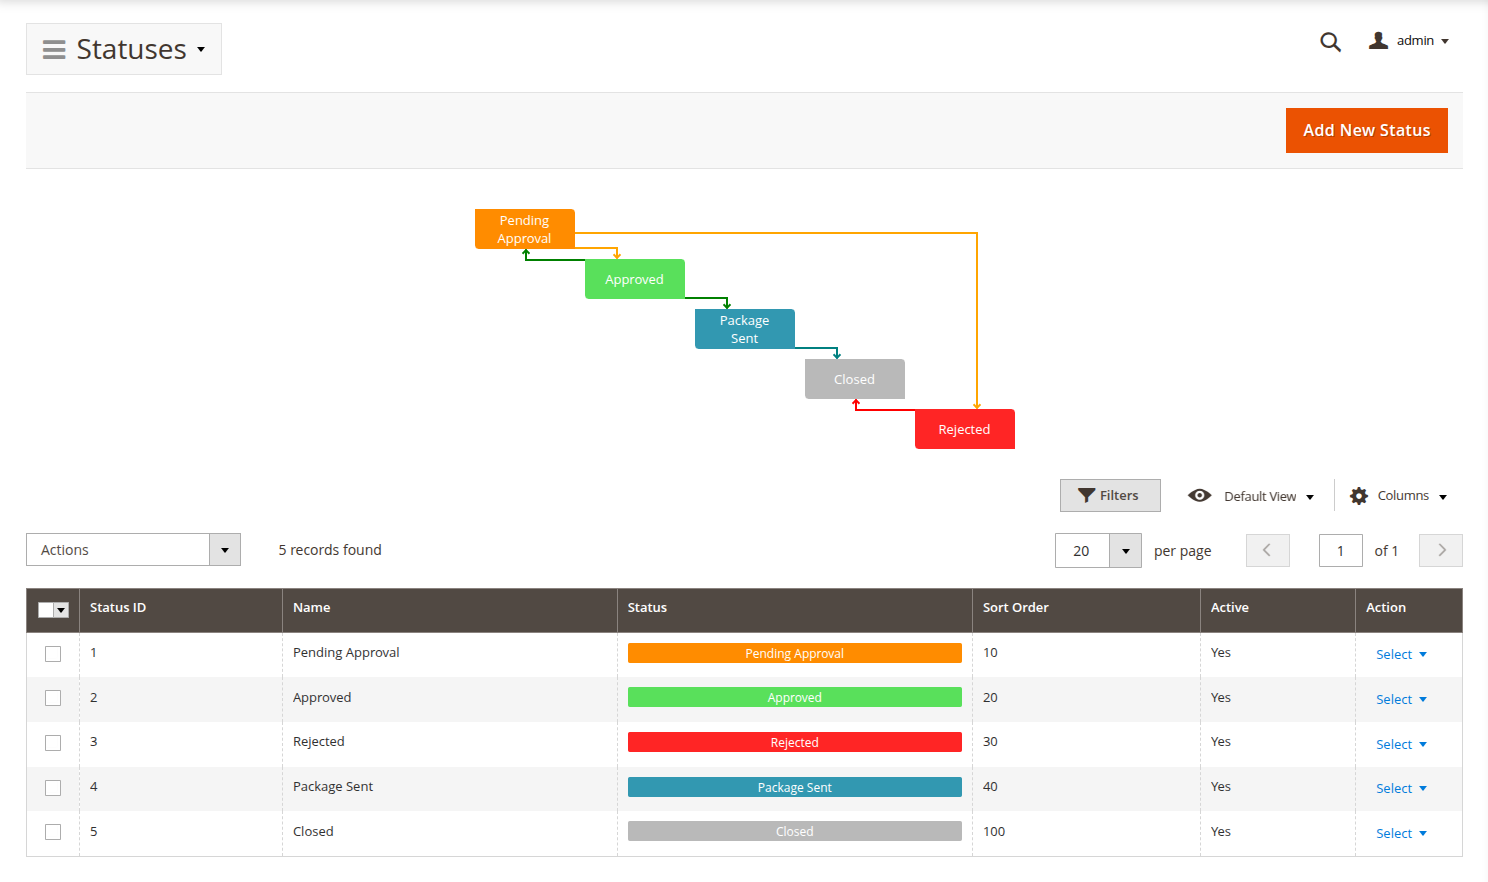
RMAs move through different stages (statuses), such as pending, approved, or declined. Customize statuses in the Statuses grid, and automate customer communication by configuring email notifications for each status. Automating notifications helps keep customers informed throughout the return process, enhancing their overall experience.
6. Use quick responses for efficient communication
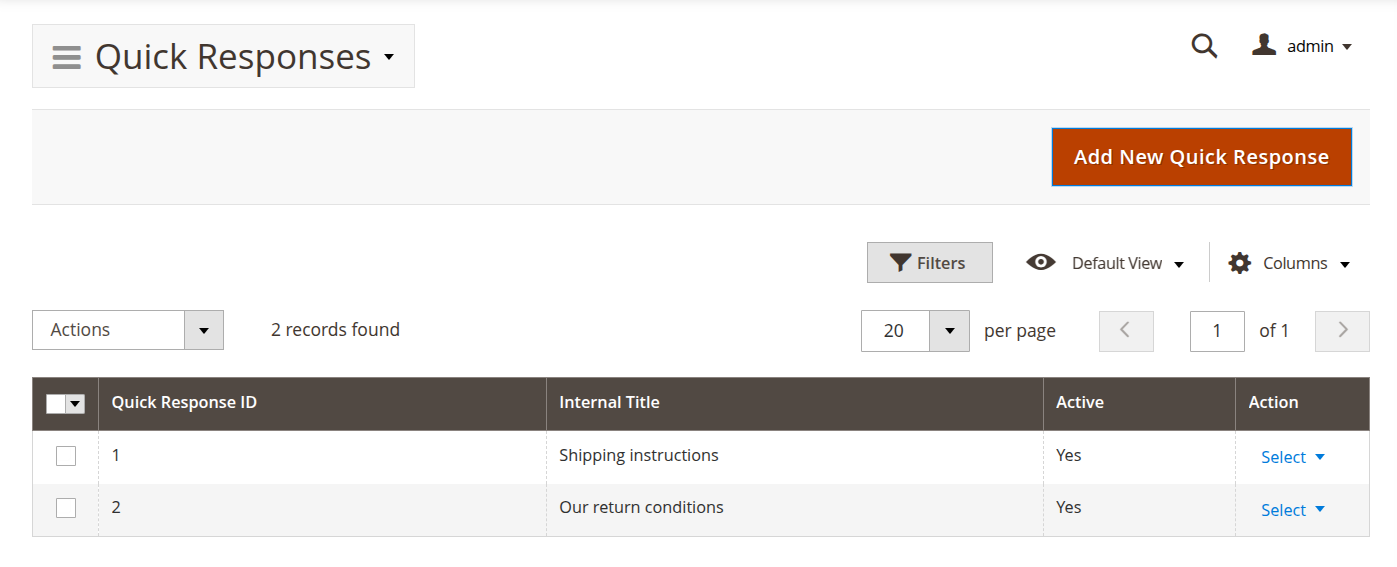
Predefined Quick responses save time by allowing your support team to quickly reply to common customer inquiries, ensuring consistency and speeding up response times.
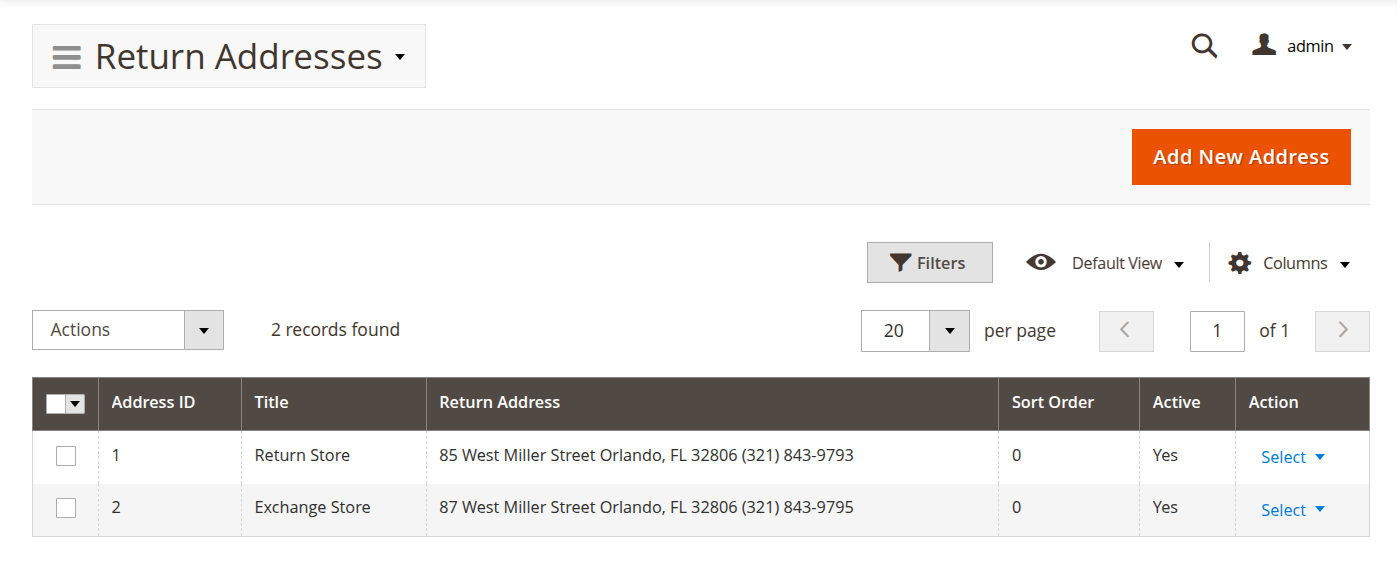
7. Set up return addresses
If you manage returns across multiple locations, use the Return addresses grid to define alternative return addresses, such as warehouses. This flexibility ensures products are returned to the correct location, streamlining logistics.
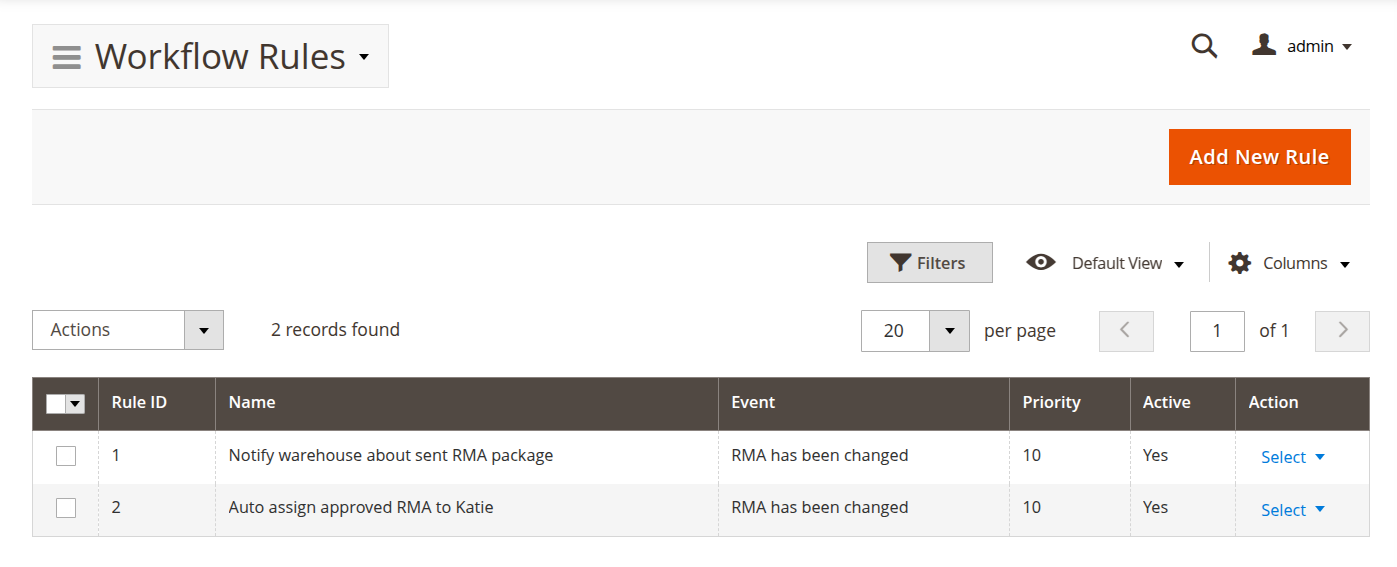
8. Automate RMA workflows
Set up Workflow rules to automate routine tasks, such as auto-approving returns for certain conditions. You can also create custom email notifications to streamline communication with customers and improve efficiency.
This quick start guide provides an overview of how to configure the RMA extension. For more detailed information, refer to the relevant sections of our manual.