How to verify if pages are cached
Our Page Cache Warmer collects URLs and monitors their status, but it does not store the cache itself. As a result, its functionality relies on the work of your Magento cache system. Use this methods to verify the functionality of the page cache warmer.
Checking your page responsive time
This check can be used without our extension and allows you to measure the page load time when it is fetched from the server or from the cache.
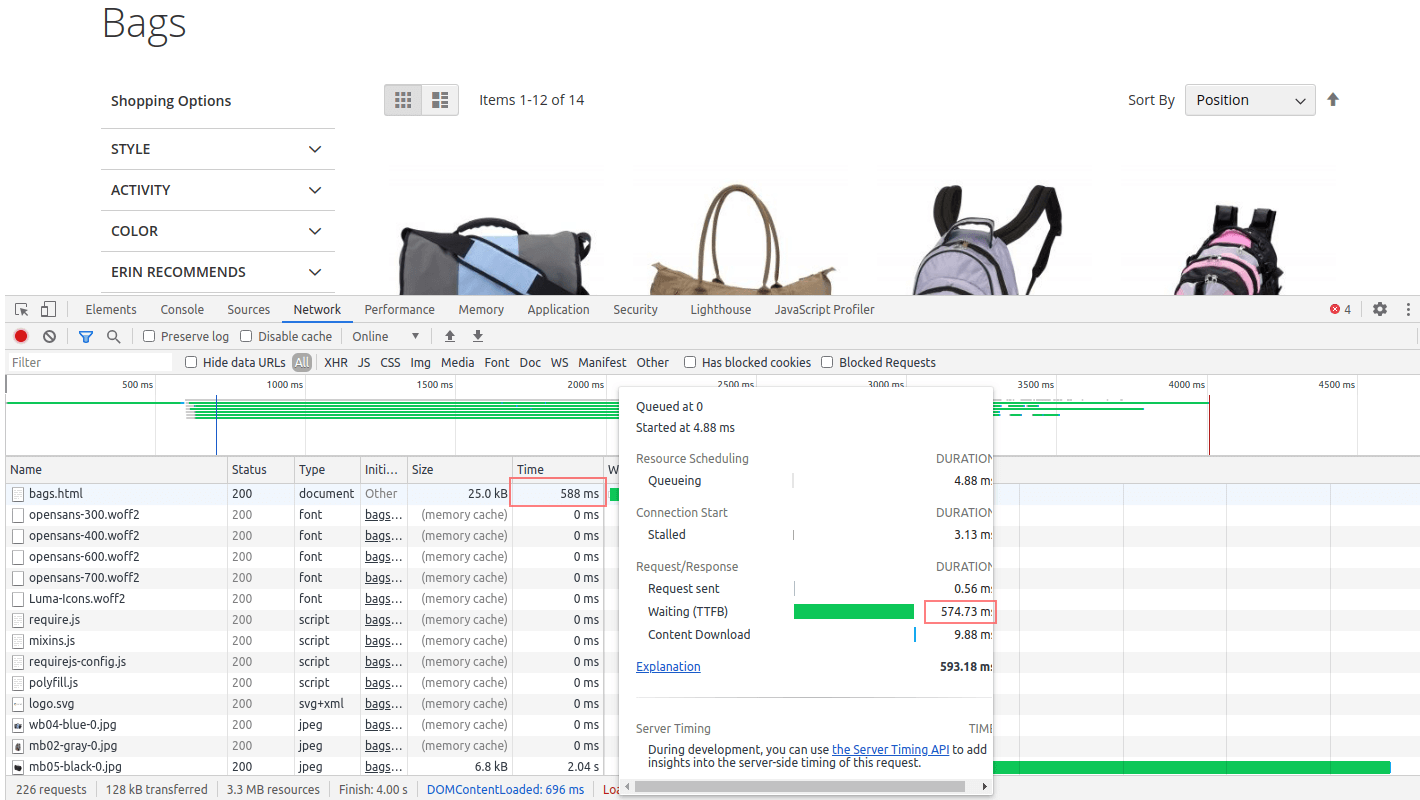
Open System -> Cache Management and clear all the cache. Then, in a new browser tab, open the developer tools and navigate to the Network tab. Visit any page of your website and check the response time for the HTML document served from your server (this will be the first entry in the Network tab grid).
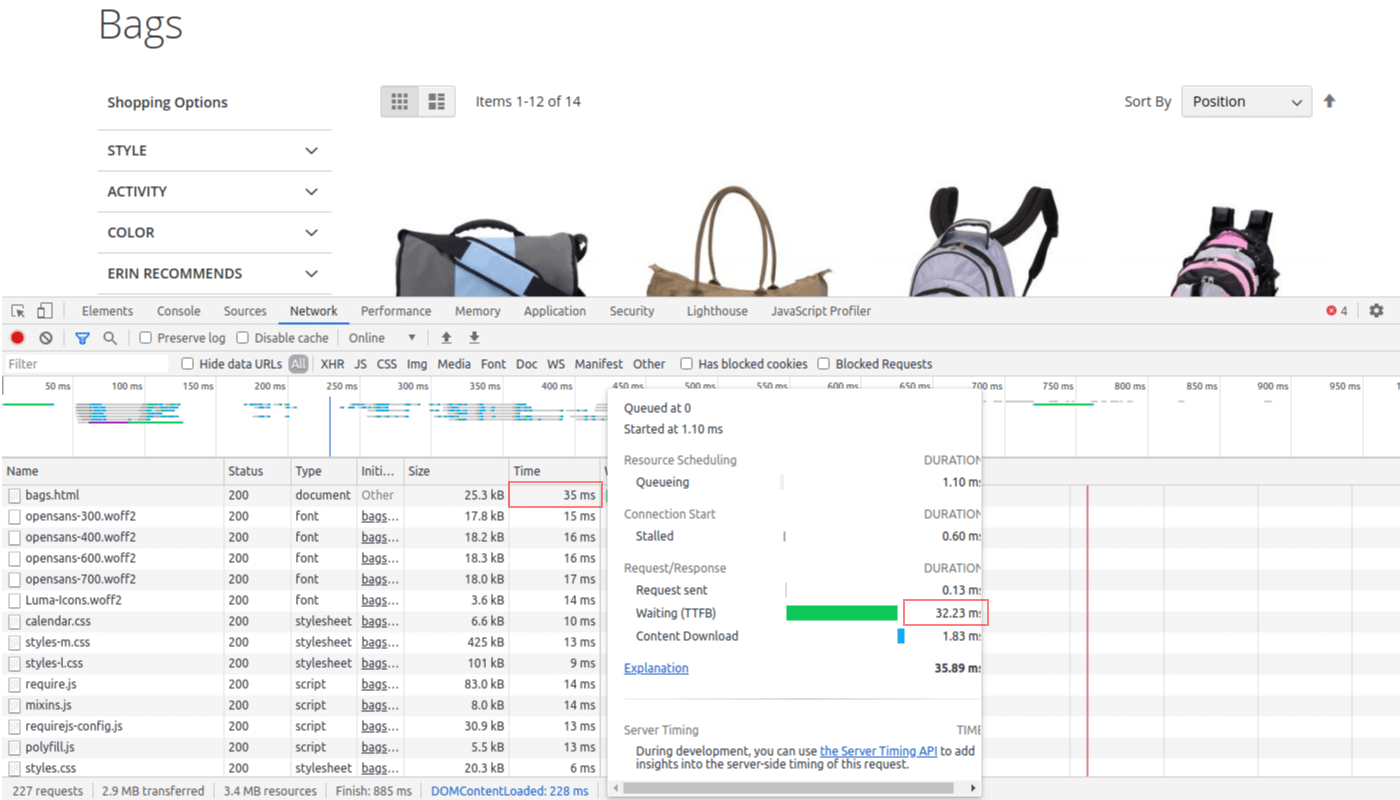
Refresh the page and check the response time for the HTML document. If the page is cached, the response time should be significantly lower than during the first visit.
If the page is not cached, the response time for the HTML document will be nearly the same as during the first visit.
This test can show that the page is not cached even when the FPC cache is working correctly. This may happen if the page you're testing contains uncacheable blocks. It's better to check a few pages with different types, as this will provide the correct result for the FPC cache. Otherwise, you'll only be testing the caching ability of a particular page.
Checking Magento cache system
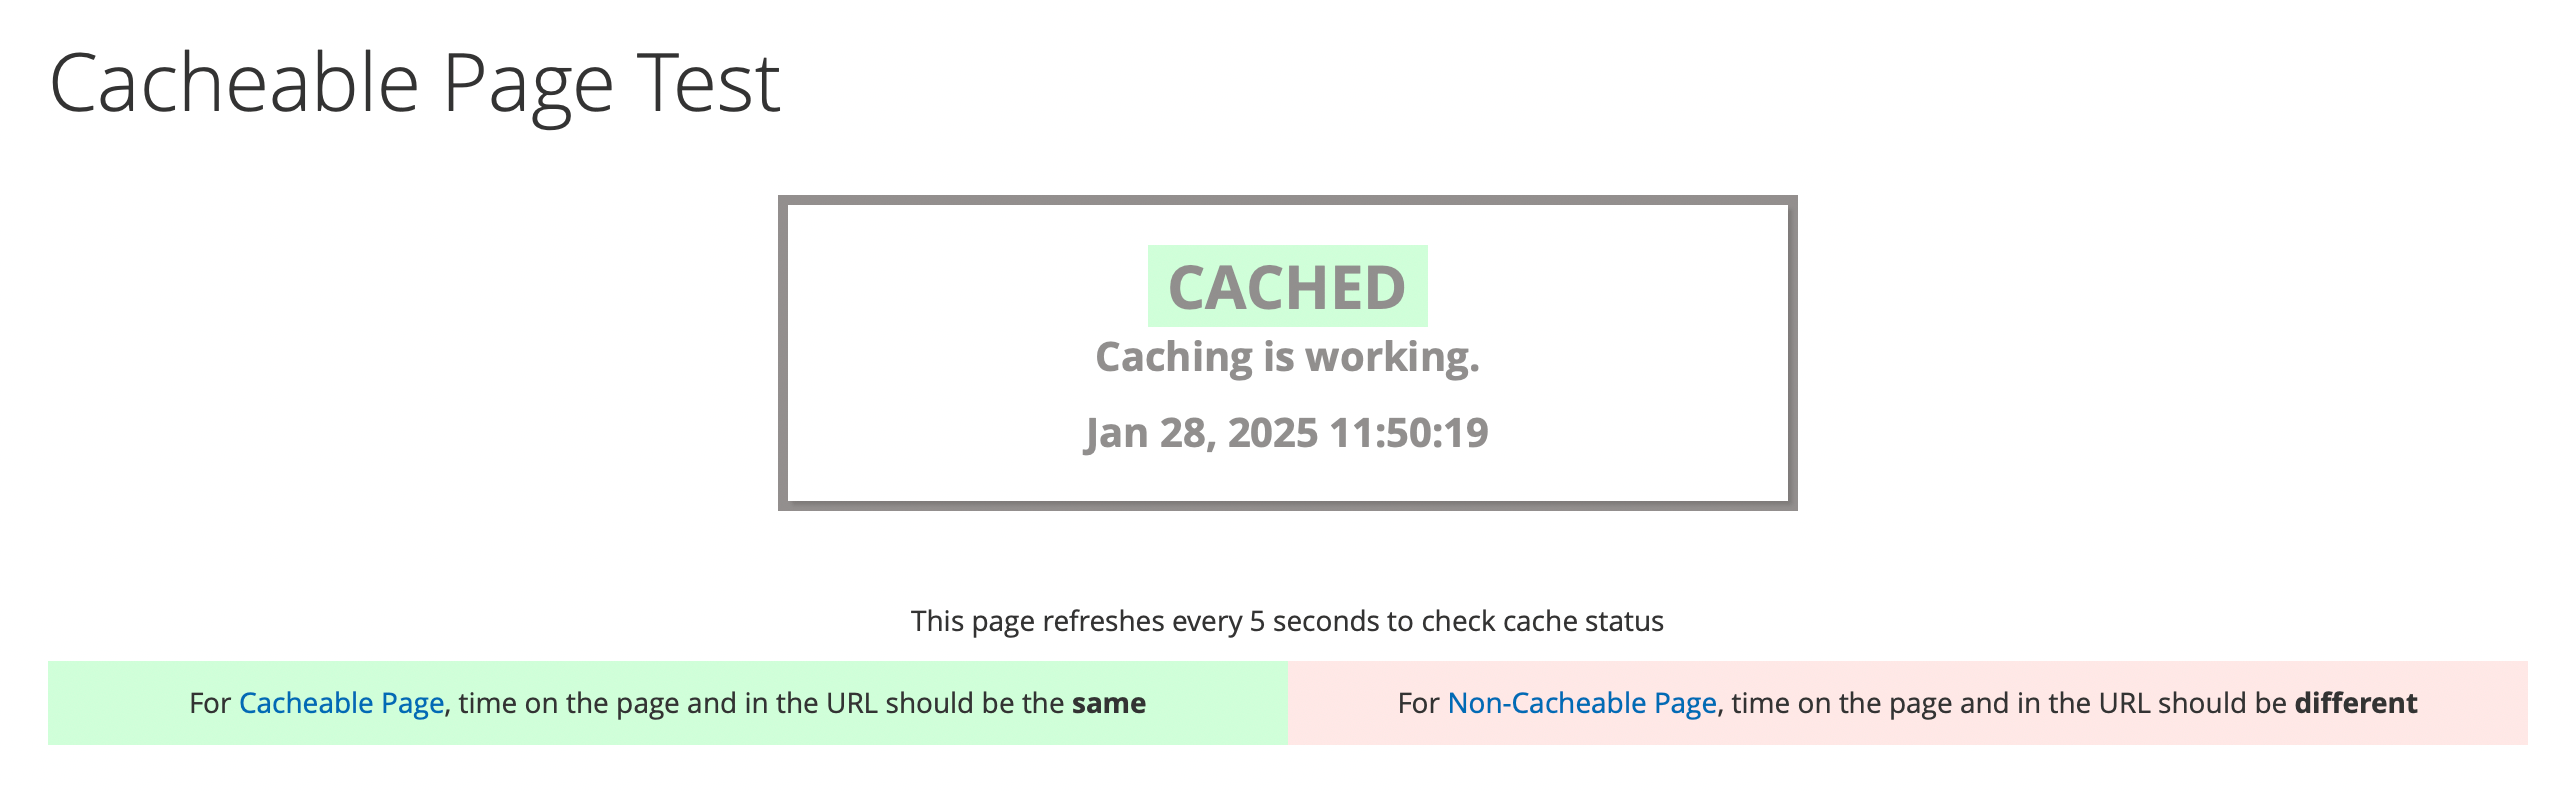
Open System -> Page Cache Warmer -> Pages and click on the Check test page button in the Server info section to open our test page. This is a very simple test. The pages are refreshed every 5 seconds and check where the page was loaded from. If the page was loaded from the cache, you will see the CACHED message.
If page was loaded directly from server you will see NOT CACHED message. In this case you will need contact with your server administrator or hoster and ask to debug your cache settings. This test will work with any cache systems: Built-in, Varnish, Redis, etc.
Checking if page can be cachable
Switch store to Built-in cache at Stores -> Configuration -> Advanced -> System -> Full page cache -> Caching application.
To enable the debug popup, navigate to Stores -> Configuration -> Mirasvit extensions -> Page Cache Warmer -> Debugging and logging settings -> Frontend debugging and set the Show cache status option = Yes.
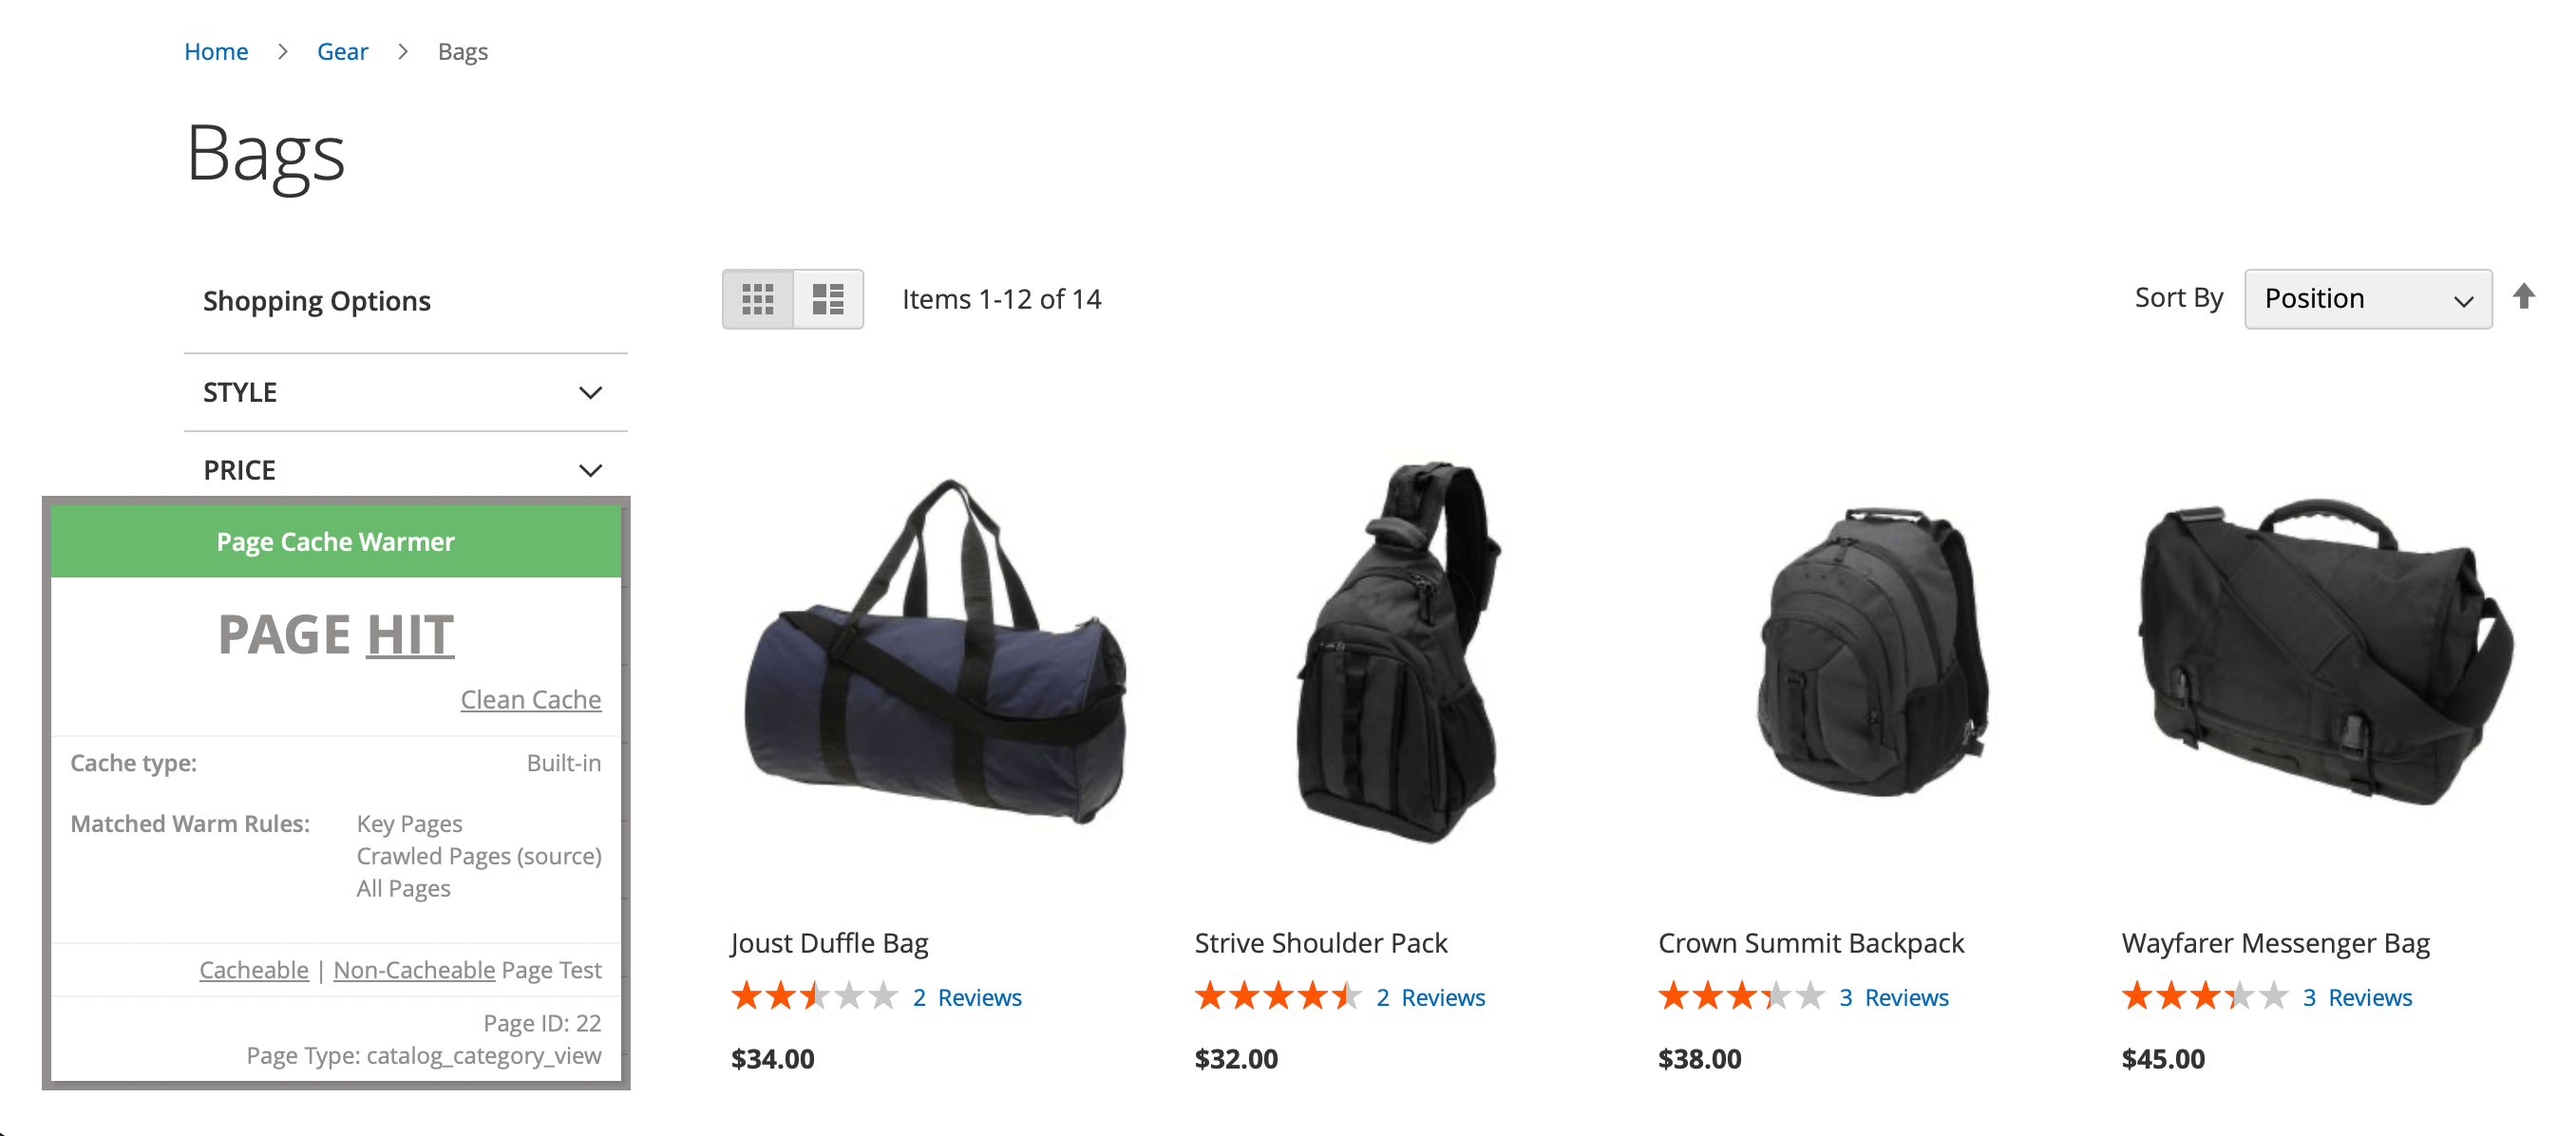
Visit the frontend category or product pages of your store to verify if they are cached. If the page is cached, you will see a Page hit message, as shown below:
If you see a Page miss message along with a list of uncached blocks, you should exclude these blocks in order to make this page cachable.
Checking if page was cached
Navigate to System -> Page Cache Warmer -> Pages and check Crawled URLs table. Pages should have Cached status.
If the page shows a Pending status, it indicates that the page cache has been cleared, and the page has not yet been warmed up. You can warm up the page using one of the methods described below.
The page status is updated on a schedule and, additionally, for the pages currently visible in the grid every time you open the Pages section. On stores with multiple store views and a large number of products the scheduled update may lag, so a page that is already cached can still be shown with the Pending status until it is re-checked. See Why the page status may differ from the status filter for details.
Why the page status may differ from the status filter
Every time you open, filter, sort, or paginate the Pages grid, the extension re-checks the live cache status of the pages currently visible on the screen and saves the up-to-date value to the table. This is on top of the scheduled update, and it ensures the pages you are looking at always reflect their real state — for example, pages that just dropped out of the cache after a flush are shown as Pending right away.
Because the grid is filtered by the stored status while the visible pages are re-checked right after the filter is applied, a row can occasionally differ from the filter you selected (for example, a Pending row while filtering by Cached). This is a deliberate trade-off — we accept a brief, self-correcting mismatch in exchange for always showing the real status of the pages in front of you. The updated status is already saved, so reloading the page shows fully consistent results.
The live re-check is limited to the visible pages and never runs against the whole store. Hiding pages that no longer match the filter would force the extension to scan further pages to refill the freed rows — potentially checking the entire catalog to fill one grid page, which would be slow on large stores, especially with Varnish.