Configuration settings
This section covers all essential settings needed to customize and streamline your returns policy, providing flexibility and ease of use.
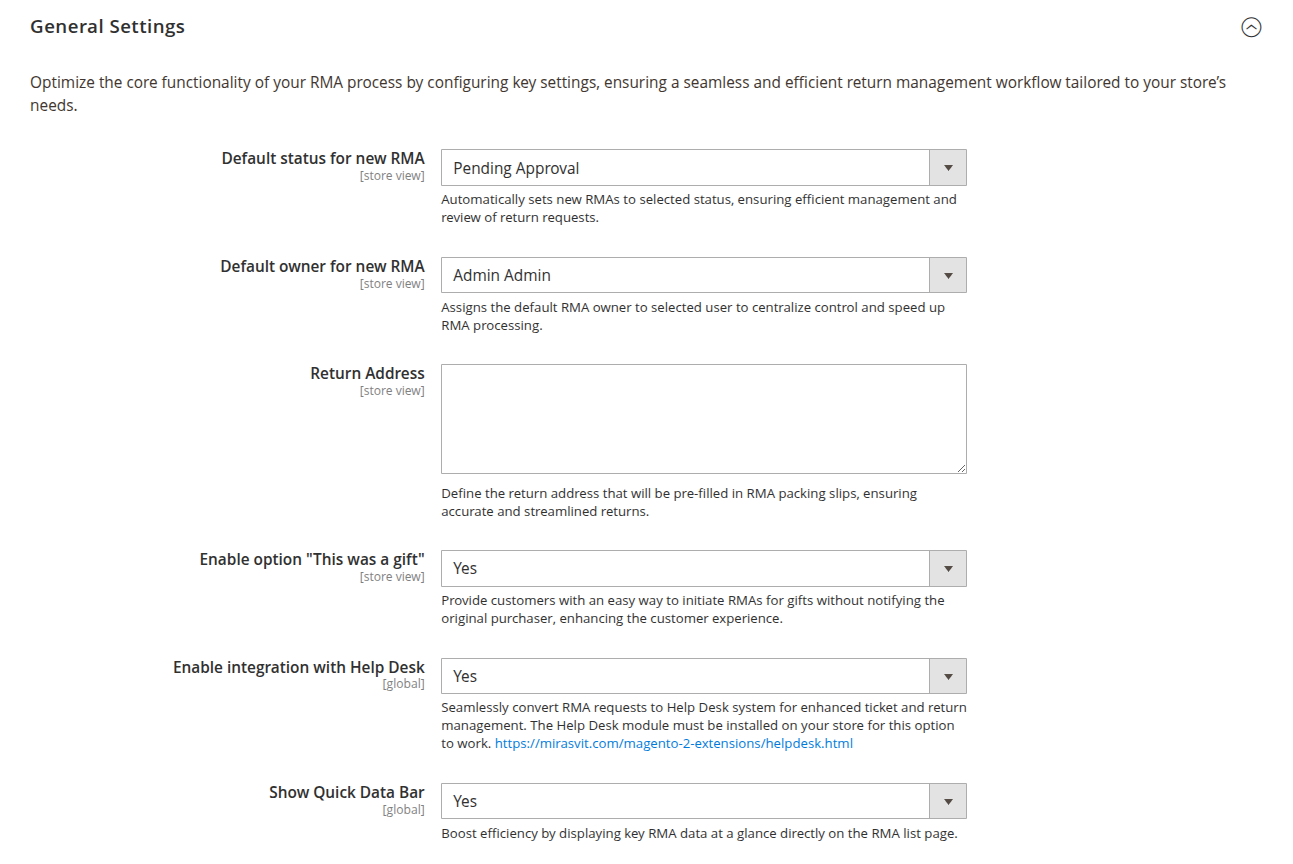
General settings
These settings define core behaviors of the RMA system, from handling return addresses to integrating with other modules.
-
Default status for new RMA: automatically assign a starting status to new RMA requests, optimizing workflow management.
-
Default owner for the new RMA: ensure proper ownership of RMA tickets by setting a default owner, increasing accountability.
-
Return address: set the default return address displayed on RMA packing slips to ensure clear communication with customers.
-
Enable option "this was a gift": let gift recipients initiate returns without notifying the original buyer, maintaining discretion.
-
Enable integration with help desk: seamlessly integrate RMA requests with your help desk system to centralize support tickets.
-
Show quick data bar: enable a data bar that provides at-a-glance information about key return details, helping staff quickly assess RMA requests and improve operational efficiency.
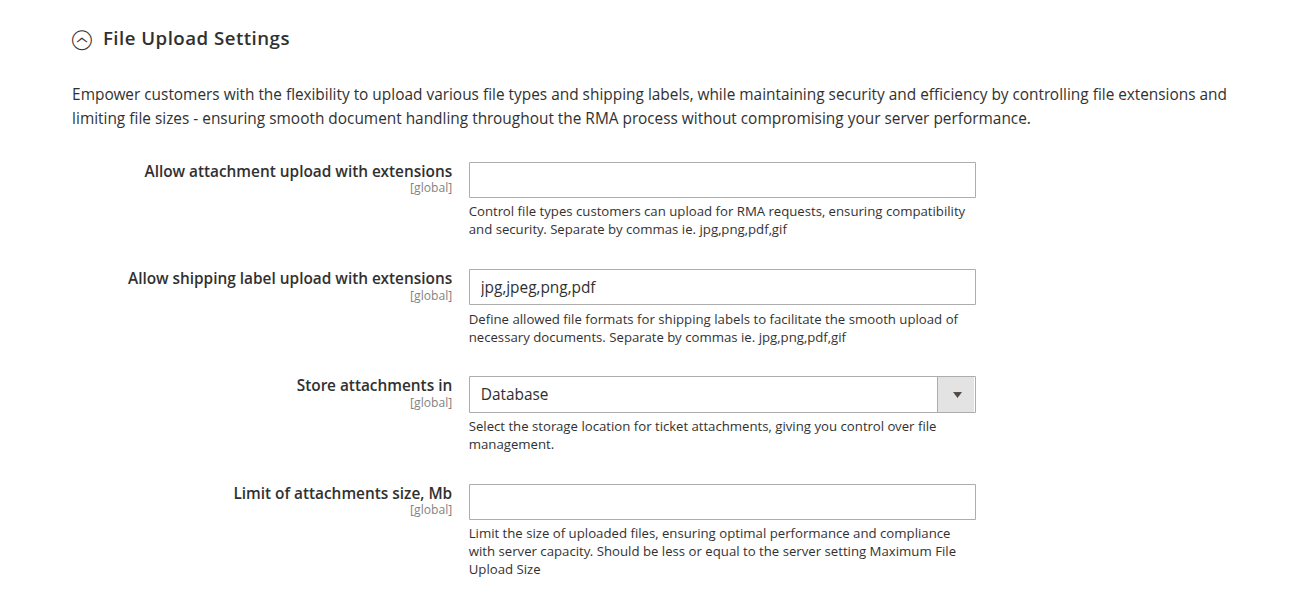
File upload settings
-
Allow the attachment to upload with extensions: control which file types customers can upload when submitting RMA requests, maintaining security.
-
Allow the shipping label to upload with extensions: specify allowed file types for shipping label uploads, ensuring a streamlined return process.
-
Store attachments in: select the storage location for ticket attachments, giving you control over file management.
-
Limit of the attachments size, Mb: set a file size limit for attachments, enhancing site performance and managing resources.
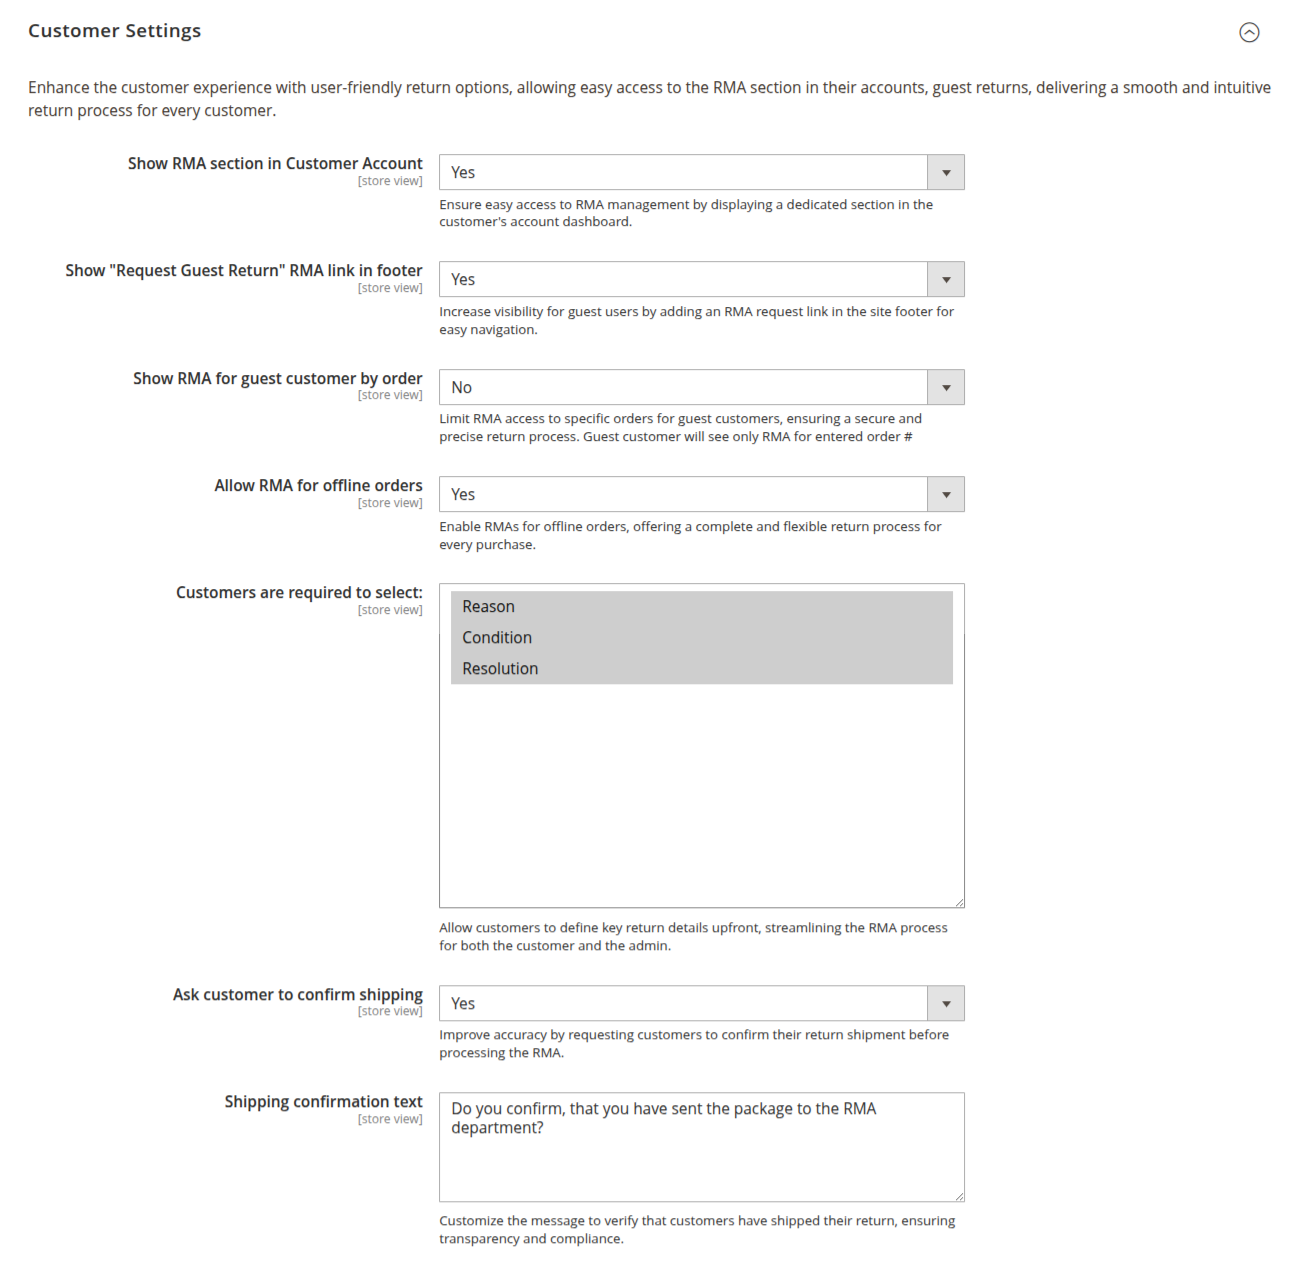
Customer settings
This section defines how customers interact with the RMA system, providing customization options to match your return policies.
-
Show RMA section in customer account: display an RMA section in customer accounts, making it easy for them to manage returns.
-
Show "request guest return" RMA link in footer: increase visibility for guest users by adding an RMA request link in the site footer for easy navigation.
-
Show RMA for guest customer by order: allow guest customers to view RMAs by entering their order number, offering a streamlined experience.
-
Allow RMA for offline orders: empower customers with the flexibility to request RMAs for orders made offline, extending service reach.
-
Customers are required to select: define which return attributes - such as Reason, Condition, and Resolution - customers must provide, optimizing returns processing.
-
Ask customer to confirm shipping: enable this option to require customers to confirm they've shipped the returned items, ensuring transparency.
-
Shipping confirmation text: customize the confirmation message to build trust and provide clarity on shipping expectations.
RMA policy
Configure key rules and limitations to align with your store’s return policies, ensuring fairness and compliance.

-
Allow for requesting an RMA after order completion, days: set the maximum time period post-order completion during which customers can submit RMA requests, increasing return flexibility.
-
Allow for requesting an RMA if order has status: specify which order statuses qualify for RMA requests, offering control over the return process.
NoteThe setting is created to allow or disallow the creation of RMA for the required statuses of the order on the frontend, but the admin user is allowed to create RMA for orders in any status.
-
Allow RMA for multiple orders: enable customers to combine items from multiple orders into a single RMA request, simplifying the return process.
-
Request only shipped products: restrict RMAs to only shipped products, ensuring accuracy when processing returns.
NoteIf the order has only been partially shipped, then only the shipped items will be available for the RMA. To request RMA for bundle products with this option enabled - the Ship bundle items for the product should be set to Separately.
-
Ask to agree with RMA policy text: require customers to agree to your RMA policy before submitting a request, reinforcing clear expectations.
-
CMS block with RMA policy text: choose a CMS block to display your RMA policy, ensuring customers are well-informed.
RMA number
Customize how RMA numbers are generated, offering flexibility for internal tracking and customer communication.

-
Allow a manual RMA number: grant administrators the ability to manually edit RMA numbers for special cases, improving control over RMA records.
-
Number format: create custom RMA number formats using variables like
[store]and[counter], enabling easy identification and tracking. -
Reset counter for order: choose whether to reset the RMA counter for subsequent orders, ensuring consistency in numbering.
-
Start counter from: define the starting point for the RMA counter, aligning with your store’s tracking preferences.
-
Counter increment step: set the increment step for RMA numbers, controlling the sequence of RMA assignments.
-
Counter length: specify the total number of digits for the RMA counter, allowing you to meet internal numbering conventions.
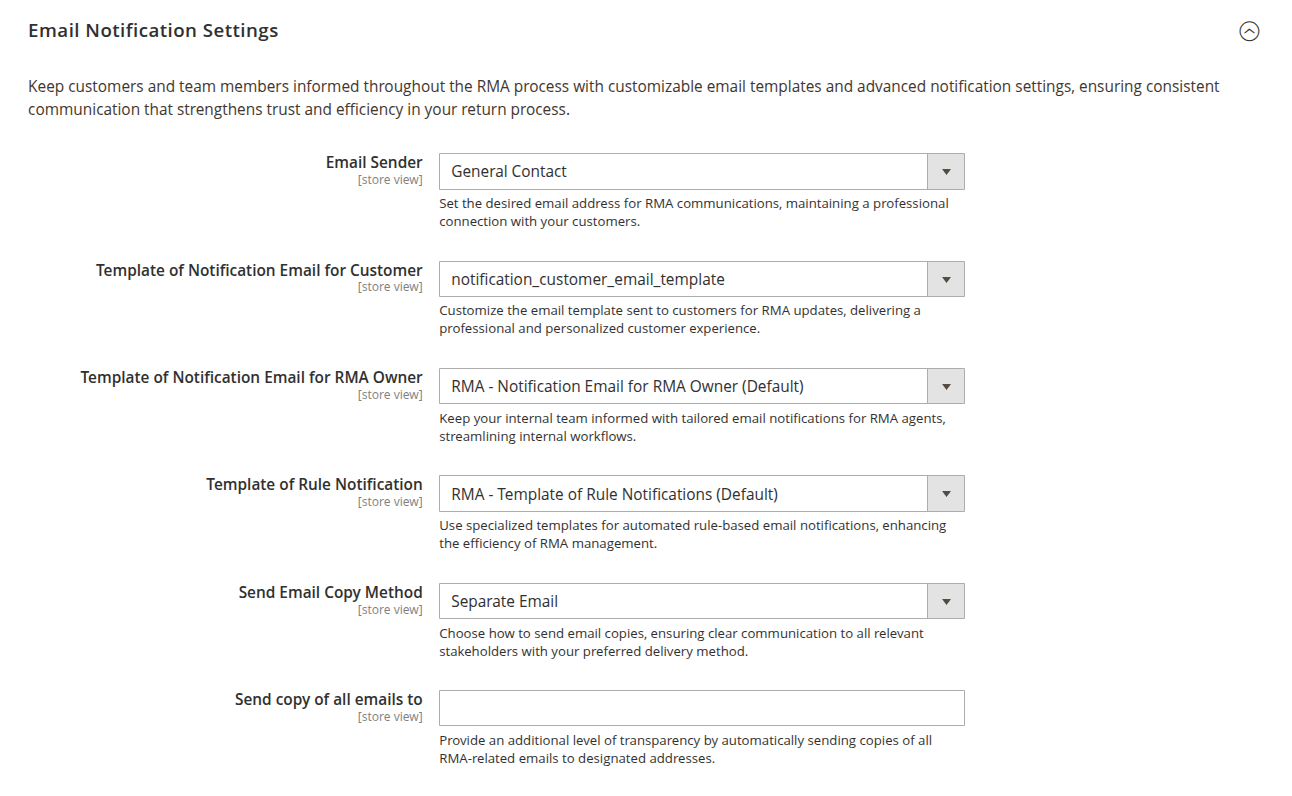
Email notification settings
Optimize your communication strategy with automated email notifications for both customers and staff, ensuring efficient information flow.
-
Email sender: set the sender email address for all RMA-related notifications, providing a professional point of contact.
-
Template of notification email for customer: choose the email template sent to customers when RMA updates occur, delivering clear and timely information.
-
Template of notification email for RMA owner: select the template for RMA owners, ensuring agents stay informed on every RMA.
-
Template of rule notification: customize the email template for rule-based notifications, automating communication based on RMA workflows.
-
Send email copy method: control how email copies are sent, ensuring transparency in internal communications.
-
Send a copy of all emails to: add additional email addresses to receive RMA notifications, keeping key team members in the loop.
NoteTo disable email notifications, in the dropdown list of the necessary notification, select the option Disable these emails.
Advanced settings

- Force theme to apply styles: if the theme overrides Magento's way of including style, this option will add the extension's styles to the page.