Statuses
In every successful return process, transparency and efficiency are key. Statuses in our RMA system help you provide just that - clear, step-by-step tracking of each return request from start to finish. These statuses define the stages of the return lifecycle, streamlining communication and actions between your team and your customers. By utilizing Statuses, you can transform a potentially frustrating return process into a seamless, well-organized journey that increases customer satisfaction and operational efficiency.
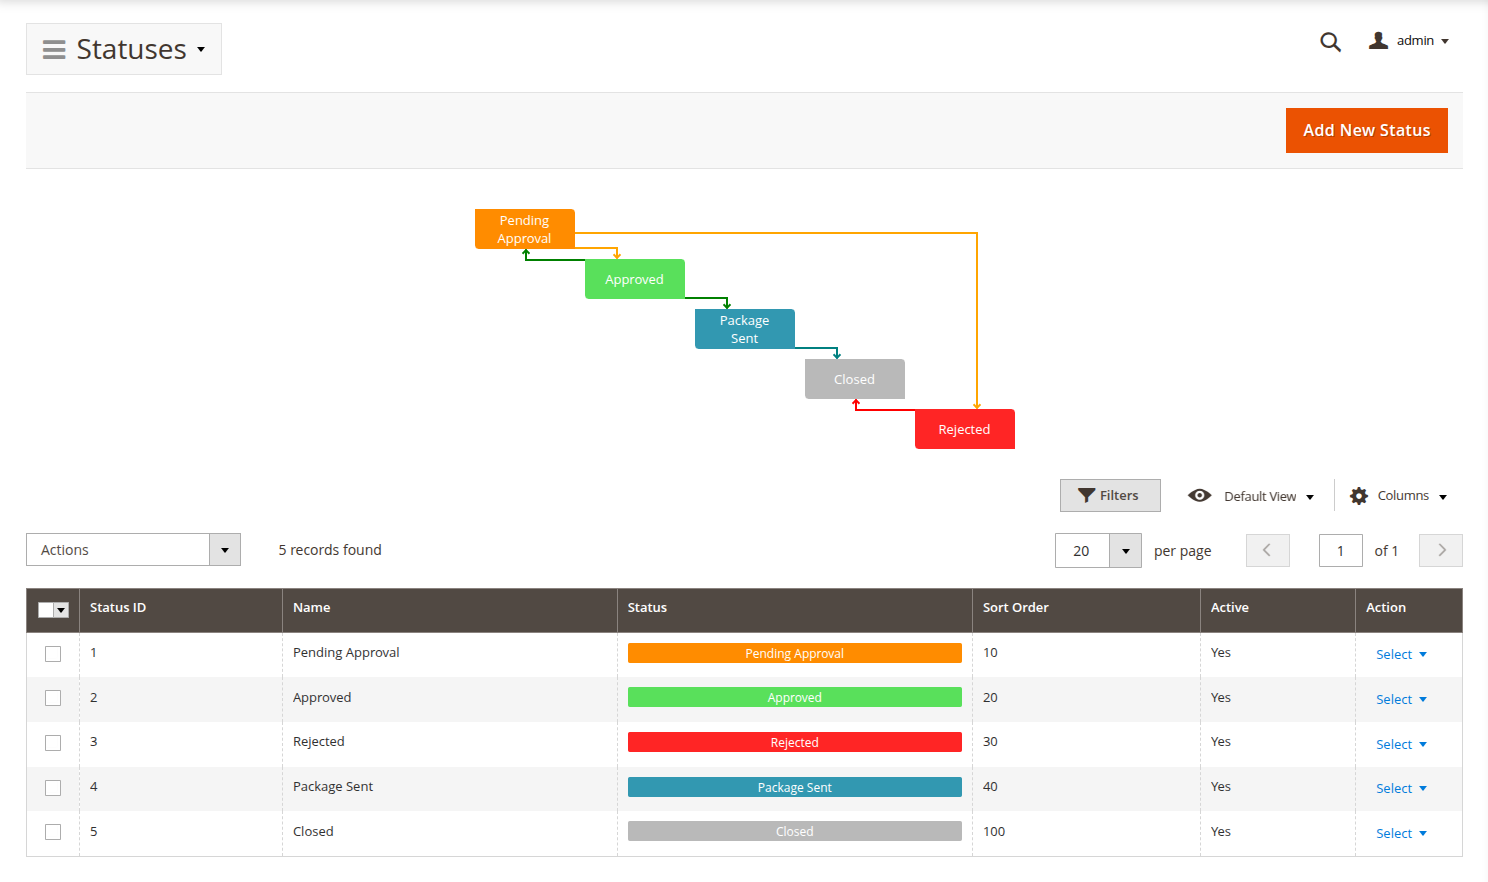
Default statuses
Our RMA extension comes with default statuses to handle basic return processing. By default, RMA can have the following statuses:
-
Pending approval: the RMA request has been submitted but hasn’t been reviewed yet. This status is assigned automatically after submission unless otherwise specified in RMA -> Settings -> General settings -> Default status for new RMA.
-
Approved: the RMA request has been approved. Customers can now print the RMA packing slip and ship their items back to you.
-
Package sent: the customer has confirmed that the returned items have been shipped to your store.
-
Rejected: the RMA request has been rejected due to conditions not met.
-
Closed: the RMA request has been fully processed and is closed.
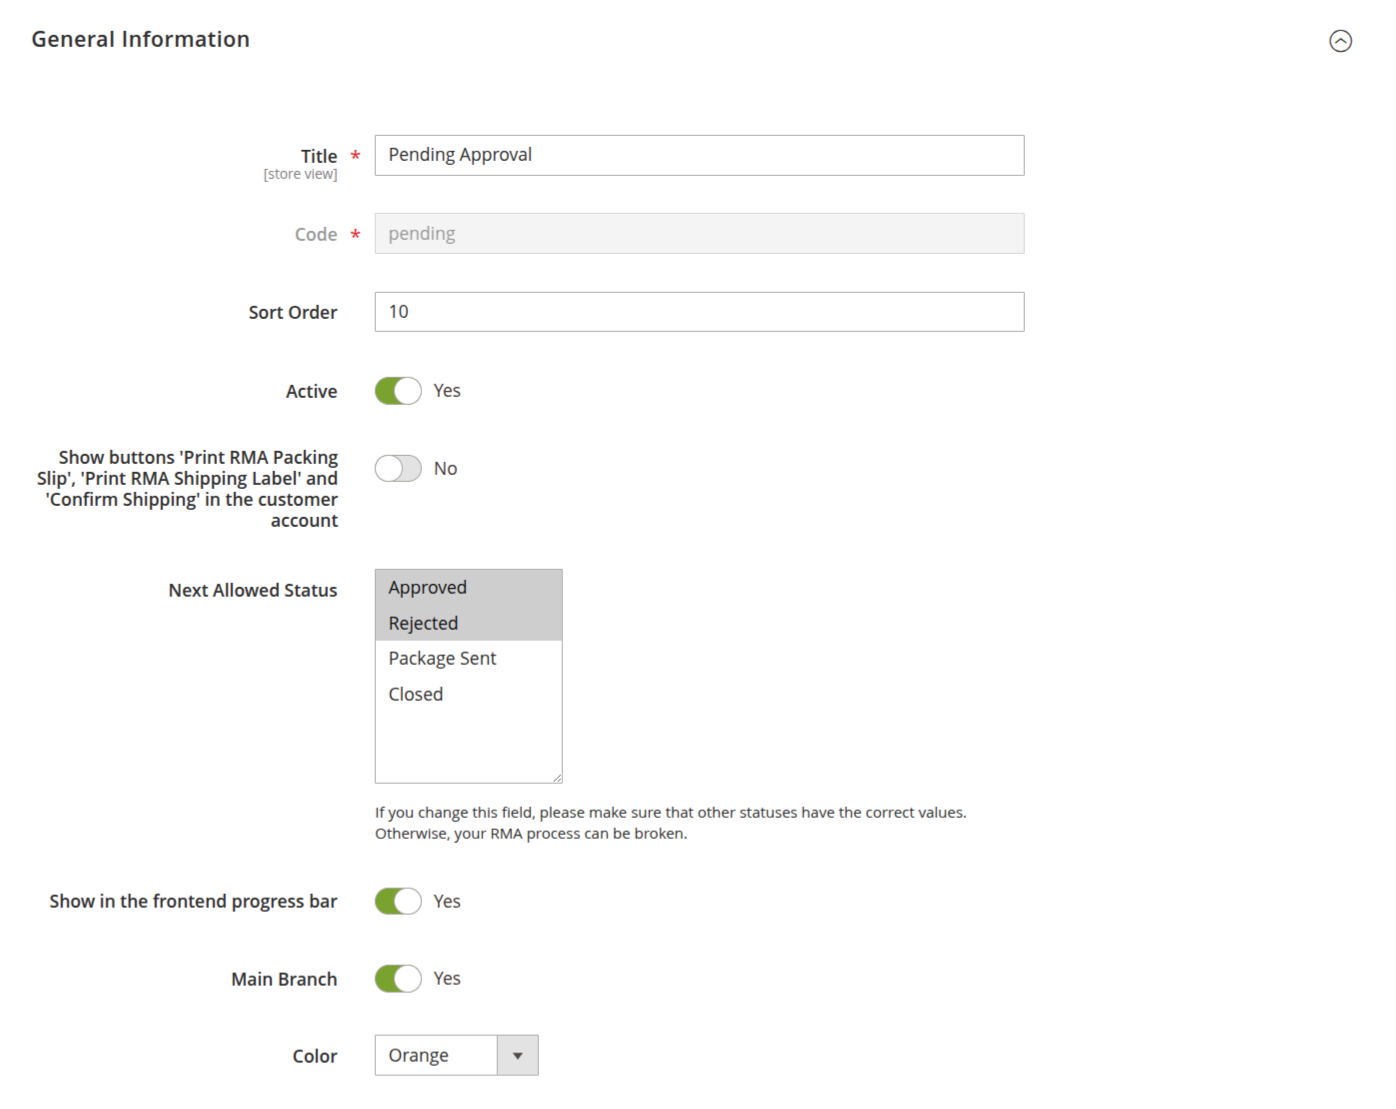
General information
-
Title: the name of your status, so you can easily identify each stage of the return process.
-
Code: a unique internal code for your status - great for backend reference.
-
Sort order: customize the order in which statuses appear in the drop-down menu.
-
Is active: toggle whether this status is visible to your team and customers during RMA creation and editing.
-
Show buttons 'Print RMA packing slip' and 'Confirm shipping' in the customer account: when this status is reached, display the option for customers to print the packing slip or confirm shipping.
-
Next allowed status: define the next available status that an admin can select for the RMA.
-
Show in the frontend progress bar: if enabled, this status will appear in the frontend RMA progress bar for customers, improving transparency.
-
Main branch: use this setting to prioritize which status should be displayed as the "next" stage in the RMA process when multiple paths are possible.
-
Color: customize the color of the status in the progress bar on both the customer and admin side for easy visual identification.
You can customize titles for specific store views directly on the edit page, ensuring your RMA language reflects local nuances and customer preferences. To do this, just switch the store switcher to the desired one, and enter contents into the proper field. It will be saved independently just for the selected store.
Notifications
To send a notification, simply enter the contents in the corresponding fields. If you don’t want to send a notification, just leave the field empty.

-
Email notification for customer: the text for the notification email that is sent to the customer when the status changes.
-
Message for RMA history: a message that appears in the RMA history log, keeping your team in the loop.
-
Email notification for administrator: the email notification sent to store staff when the status changes, helping them stay on top of their tasks.
You can also use these variables in the notification text to personalize and automate your messages:
-
rma
-
order
-
customer
-
status
-
store
You can gain access to their properties and even methods using the point operator. For example, if you need to add the customer's name, use the variable {{var customer.name}}.
You can use the following code as notification text:
Dear {{var customer.name}},<br><br>

Your Return request has been approved.
<br>

{{depend rma_getHasItemsWithResolution_1}}
You choose to receive your money back, so we will refund the following items:<br><br>
{{block class="Mirasvit\\Rma\\Block\\Rma\\View\\Items" area='frontend' template='Mirasvit_Rma::email/rma/items.phtml' rma=$rma resolution_id=1}}<br><br>
{{/depend}}


{{depend rma_getHasItemsWithResolution_2}}
You choose to exchange your product, we will contact you about the following items:<br><br>
{{block class="Mirasvit\\Rma\\Block\\Rma\\View\\Items" area='frontend' template='Mirasvit_Rma::email/rma/items.phtml' rma=$rma resolution_id=2}}
<br><br>
{{/depend}}

Please, print <a href='{{var rma.guest_print_url}}'>RMA Packing Slip</a>.
You can have different notifications for different stores, but for the same Statuses. To do this, just switch the store switcher to the desired one, and enter contents into the proper field. It will be saved independently just for the selected store.