RMA
This section will guide you on how to harness the power of the RMA system for optimal returns management, helping you enhance operational efficiency and deliver superior customer service.
RMA Listing
Go to Sales -> RMA. Here, all RMAs are located and can be managed, edited, and removed. New RMA requests, both regular and offline, can also be created from this section.
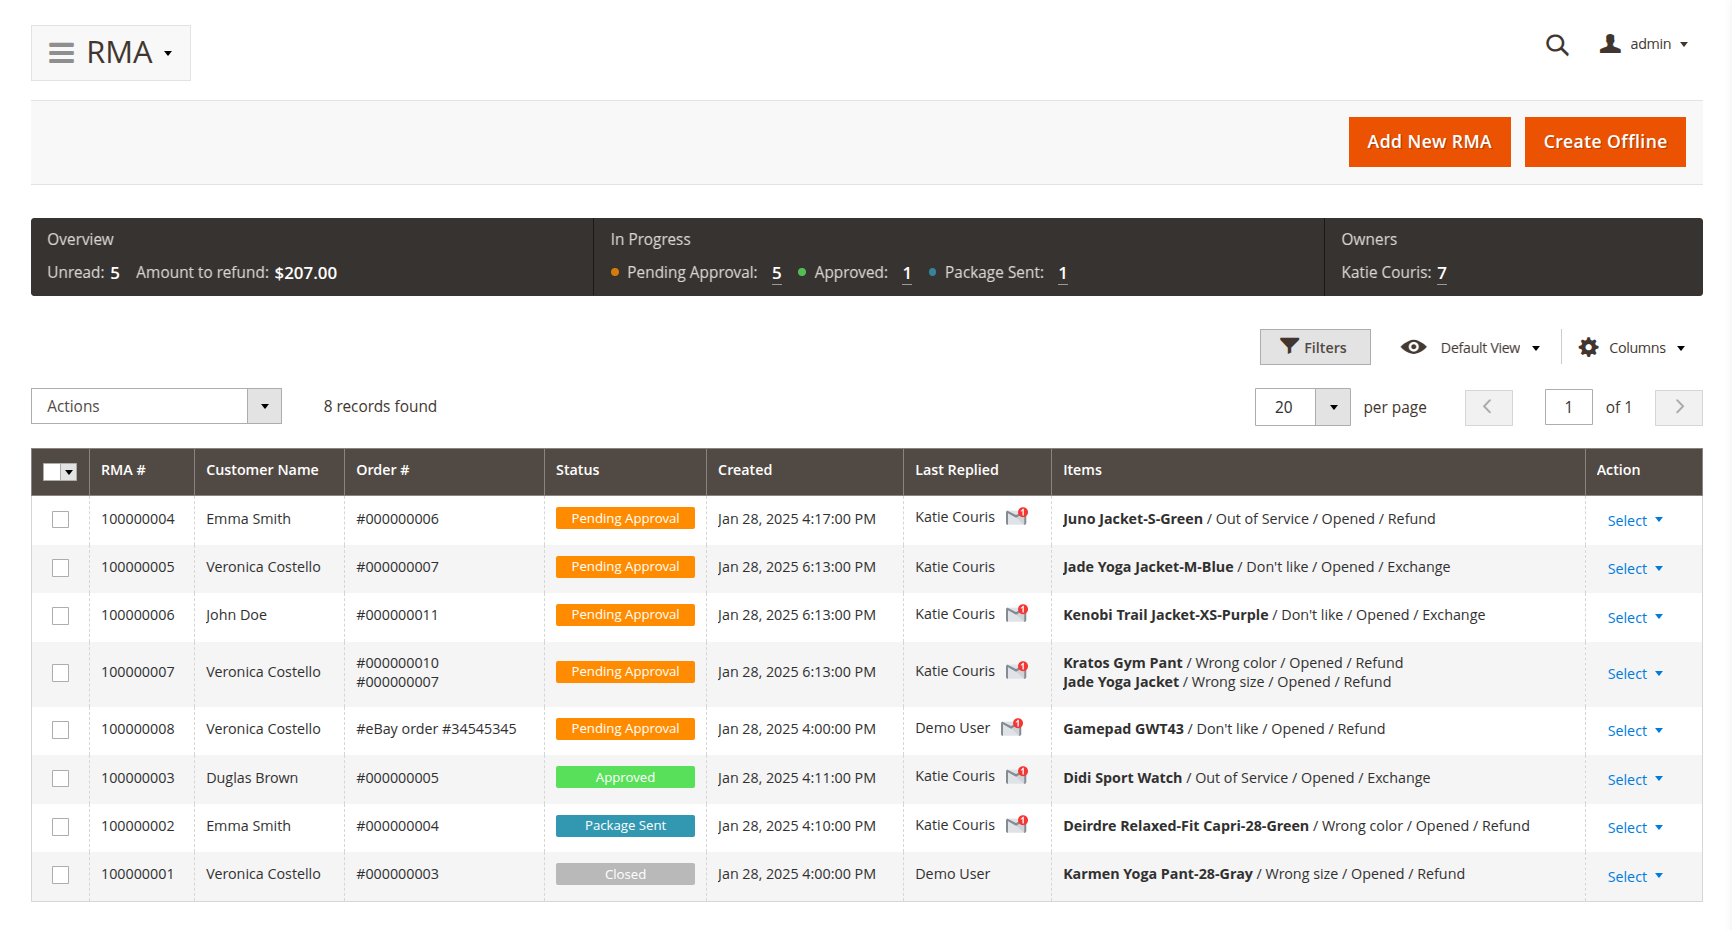
The RMA grid has the following default columns (you can add your own using the Columns button):
- RMA#: RMA ID.
- Order#: order ID.
- Customer name: customer's name.
- Owner: a store agent who is responsible for the RMA.
- Last replier: the person who last added a message to the RMA.
- Status: the status of the RMA request. See also RMA Statuses.
- Created date: the date of the RMA request creation.
- Last activity: the time since the last activity on the RMA.
- Items: the RMA's items with their statuses.
- Resolved: this field allows you to filter resolved/unresolved RMAs. It shows that the RMA order is completely closed. The Resolved mark should be added using workflow rules.
The RMA process follows a lifecycle that staff agents should adhere to, as discussed below.
Overview of RMA workflow
Consider the RMA workflow chart and its detailed explanation, which fully describes a typical everyday returns process.

There are two possible types of RMA:
- Regular RMA: this constitutes the majority of returns. These are properly based on original orders and have a full document cycle.
- Offline RMA: this type of RMA is used when there is no original order. This may happen in cases such as orders placed by phone, from a point-of-sale device, or even from another site but still applied to your store.
To allow or forbid Offline orders, ensure you have set the following option:
- Allow RMA for offline orders: located in the General settings section of Configuration settings. If set to Yes, placing offline orders is allowed.
RMA workflow explained
-
If a customer wishes to request a refund or exchange of ordered items, they can follow two paths:
- If they are a registered customer, they should visit the dedicated My returns section in their Customer Account and press the Request new return button.
- If they are a guest, the Guest RMA form is available (by default accessible from the footer of frontend pages).
-
The original order should typically be completed (i.e., invoiced, shipped, and marked Complete). You can modify the required order status using the Allow for requesting an RMA if order has status option in the RMA policy settings section.
RMAs should be requested within the time period specified by the Allow for requesting an RMA after order completion, days option in the same settings section. Customers can issue a return only if these two conditions are met.
- If an order exists, the RMA can be placed in Regular mode, selected from a drop-down menu (for registered customers) or entered in the Guest Form.
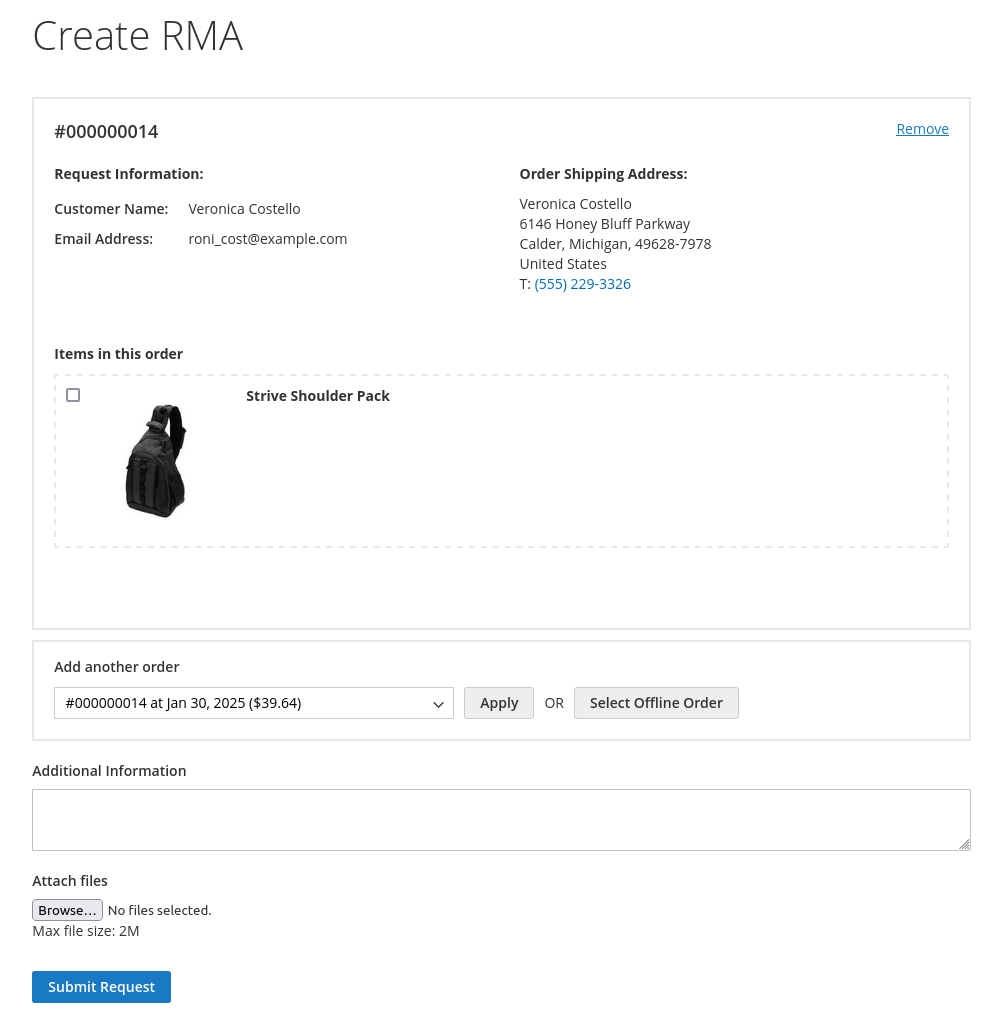
Regular RMA request form - If an order does not exist, the RMA can be placed in Offline mode, using the Create Offline Order item from the drop-down. The customer will be asked to manually enter the order number and products to return.
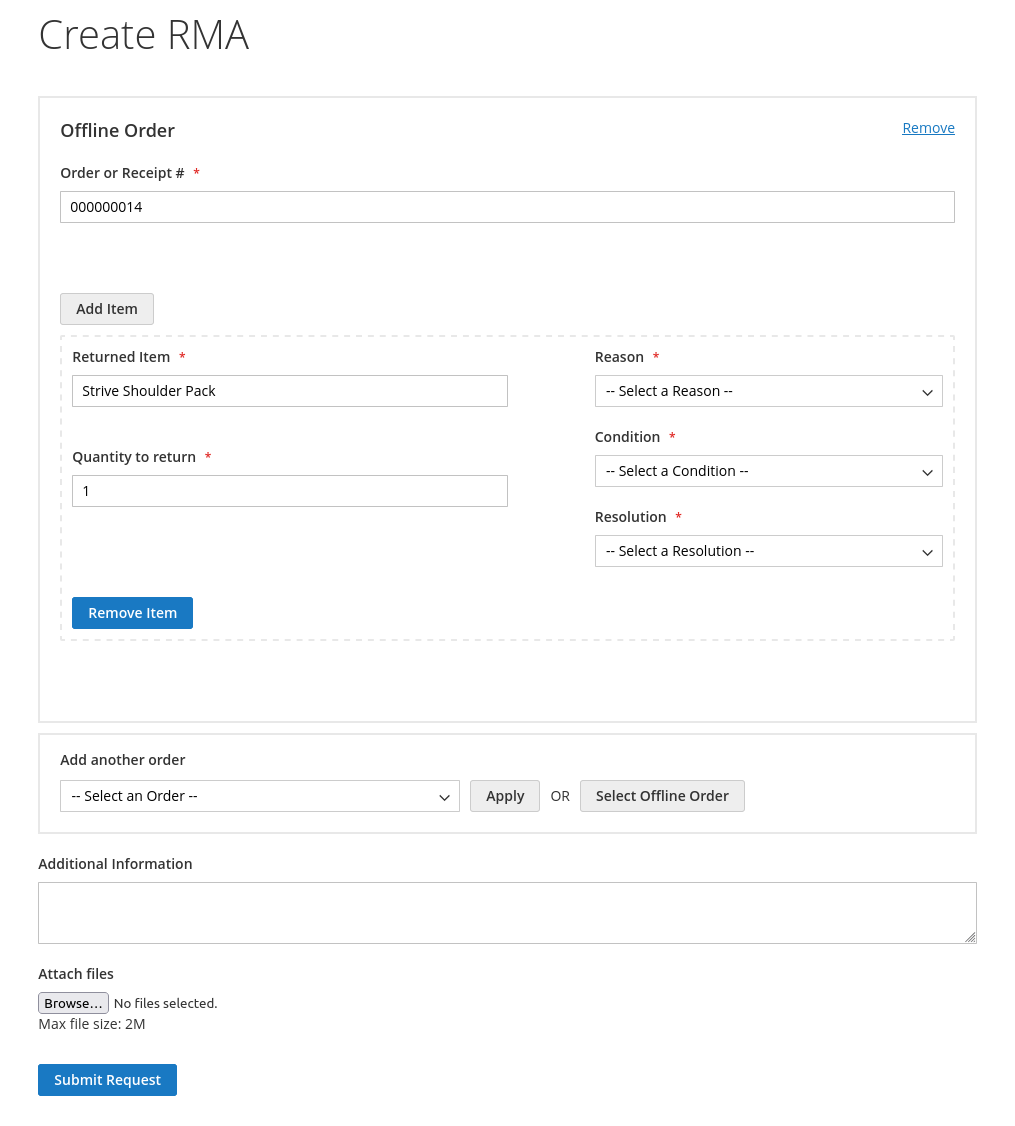
Offline RMA request form -
By default, customers must provide a Condition, Reason for the return, and their desired Resolution for each returned product.
NoteYou can specify which product details should be required using the Customers are required to select option in the Customer settings.
-
After products are selected and their details are provided, the RMA request can be placed. By default, each new RMA immediately receives the Pending Approval status and is assigned to a default staff user. The customer will receive an Email notification.
NoteYou can change the default status and staff user using the Default status for new RMA and Default owner for new RMA options in the General settings.
Additionally, the email notification sent when the default status is assigned can be customized in the Status edit page under Email Notification for customer.
-
A newly placed RMA request can be automatically processed using a Workflow rules.
NoteWhen placing an RMA request, two events are triggered:
-
New RMA has been created: at this stage, basic properties such as RMA Number, initial status assignment, and customer data are set.
-
RMA has been changed: at this stage, returned items are added, and original orders are linked to the RMA.
Use the first event to process basic RMA properties or custom fields. Use the second event to process items and their details.
-
-
After the request is placed and the initial status is assigned, the staff agent and customer can communicate to exchange details and arrange the return. Communication occurs through emails (with each message triggering a notification) or through the frontend. Staff and customer responses can also be processed using Workflow rules.
-
There are two possible outcomes for the RMA:
- If the item cannot be returned or refunded, the agent sets the RMA status to Rejected and archives it.
- If the decision is positive, the agent sets the status to Approved (or a similar status), and the return process begins.
In both cases, the customer will receive an automatic Email notification (defined in the corresponding Status).
-
Upon RMA approval, the customer can print an RMA packing slip and confirm shipping (corresponding buttons will appear in the frontend).
-
The customer prints the RMA packing slip and sends the package to your store.
-
After sending the package, the customer confirms shipping from their account. The RMA then automatically receives the status Package Sent.
-
When the package arrives at the store, if the desired resolution is Exchange, the agent has the following options:
- If the product can be exchanged for an identical one (useful for replacing faulty items), the agent creates a Replacement Order. This creates an automatic, zero-total order with the same product.
- If the product is being exchanged for a cheaper or more expensive item, the agent creates an Exchange Order. This opens a standard order dialog, where the agent can select the product for exchange. If the price is higher, the Custom Price option should be used to enter the difference between the old and new product prices.
Note
Magento has limitations in the order creation dialog, so the following properties cannot be automated:
- Order number: magento will number the Exchange order as a regular order, but a link to the order will be attached to the corresponding RMA (see the Exchange order field in the RMA backend edit page).
- Automatic address pickup: for registered customers, the default shipping address will be used. For guest orders, the original order's shipping address will be used.
- Automatic product selection: products for exchange must be manually added.
- Special surcharge: any exchange fees must be manually added, or a virtual product can be created as a workaround.
-
When the package arrives at the store, if the desired resolution is Refund, the agent can:
- Issue a Credit memo and refund the customer.
-
Once the customer receives the exchange or refund, the agent sets the RMA status to Closed (or a similar status) to complete and archive the RMA.