Google Search Console and Indexing APIs
Step-by-step instruction to configure access to the Google Search Console and Indexing APIs
- Log into the Google Cloud Console (API)
- Create a new project or select the existing one.

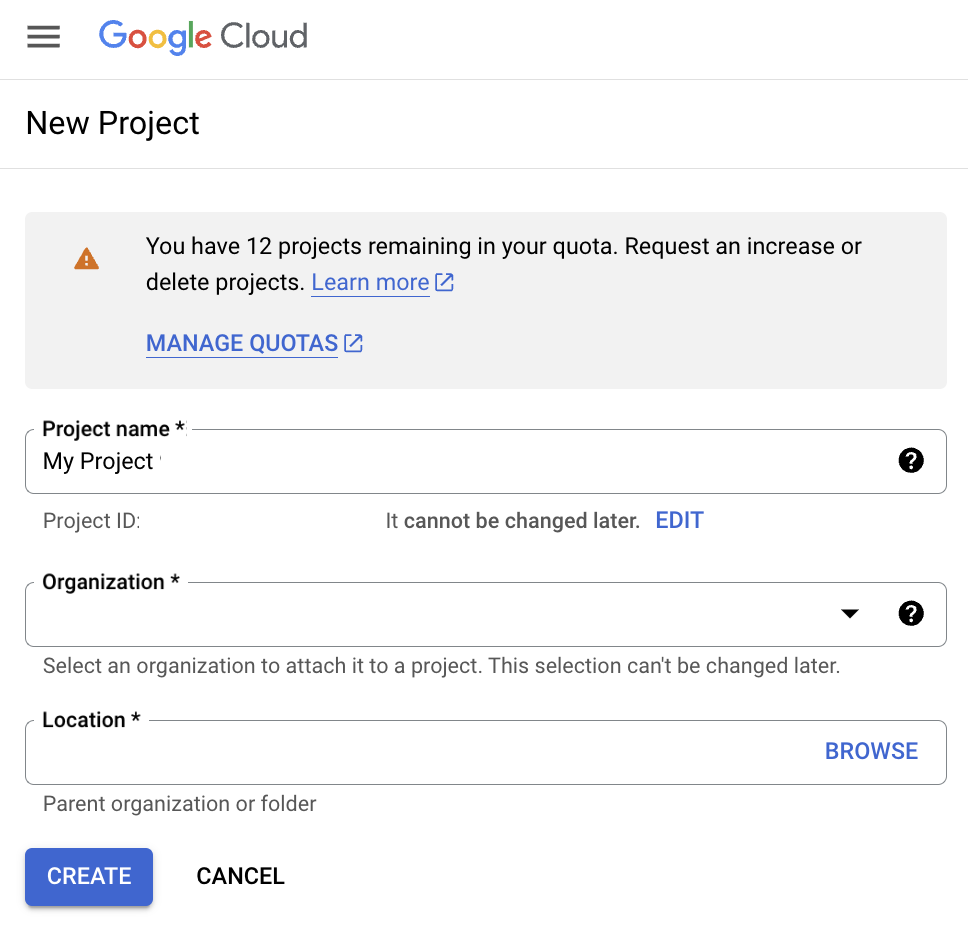
- Confirm the project and enable the API


- Go to APIs & Services and check if the Google Search Console API is in the list of enabled APIs
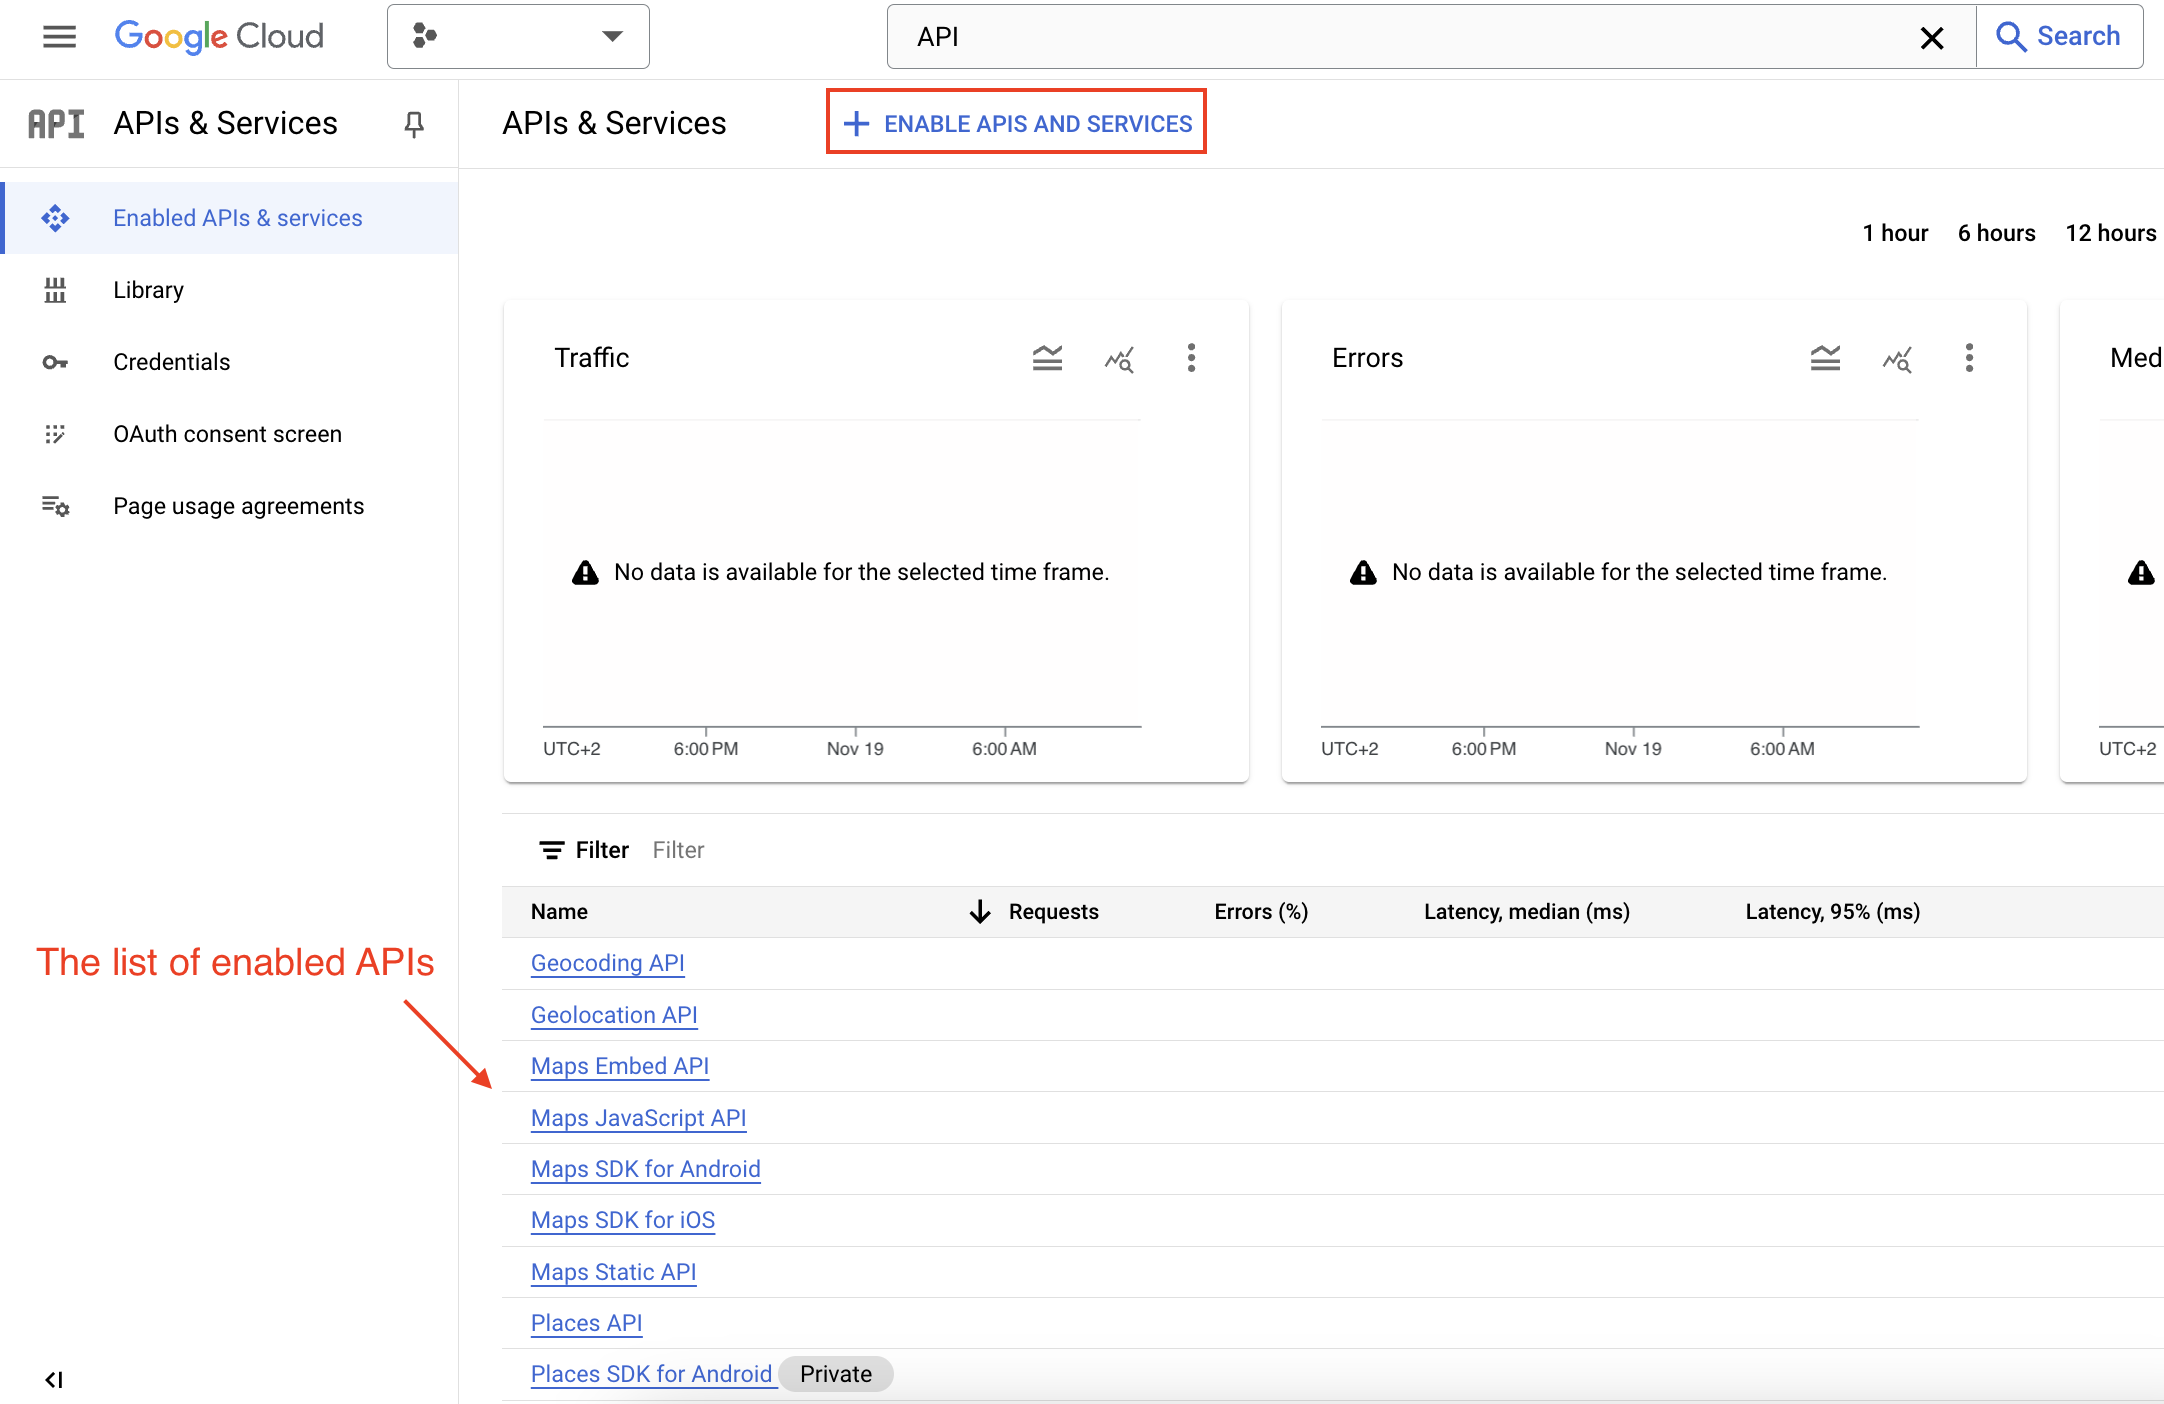 If the Google Search Console API is not on the list click ENABLE APIS AND SERVICES button.
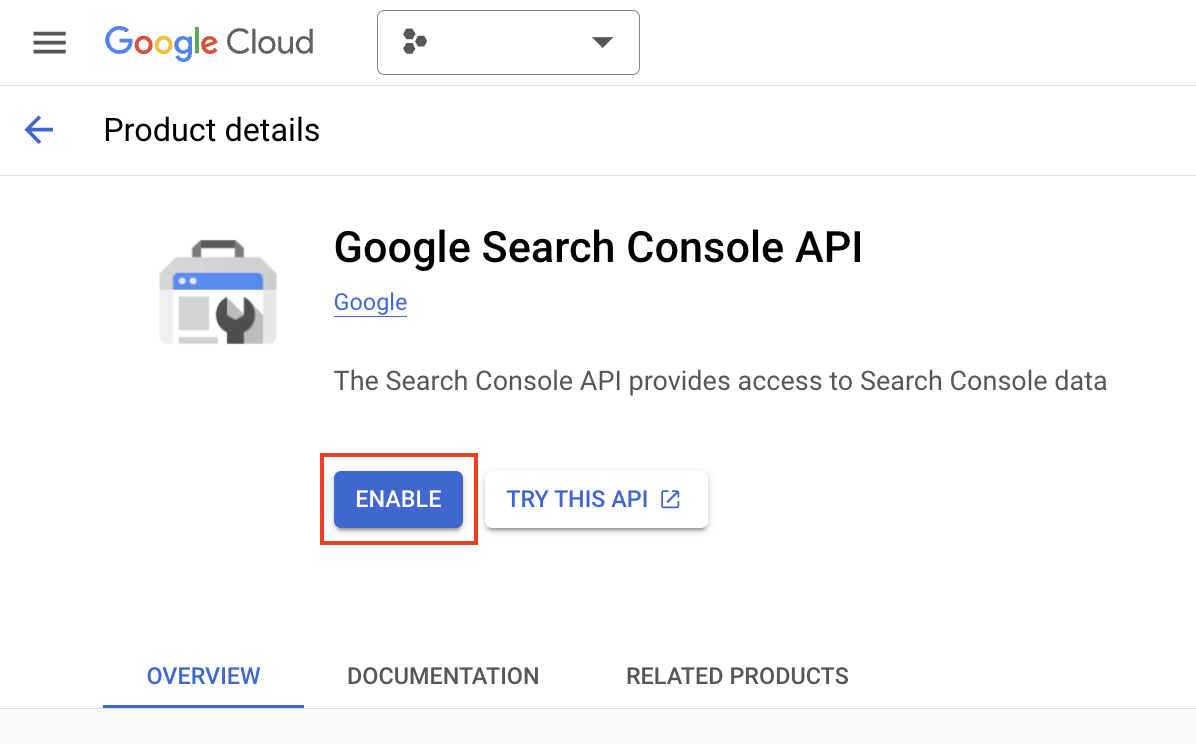
Search for the Google Search Console API
 Click on the API and then enable the API
- Create Service Account
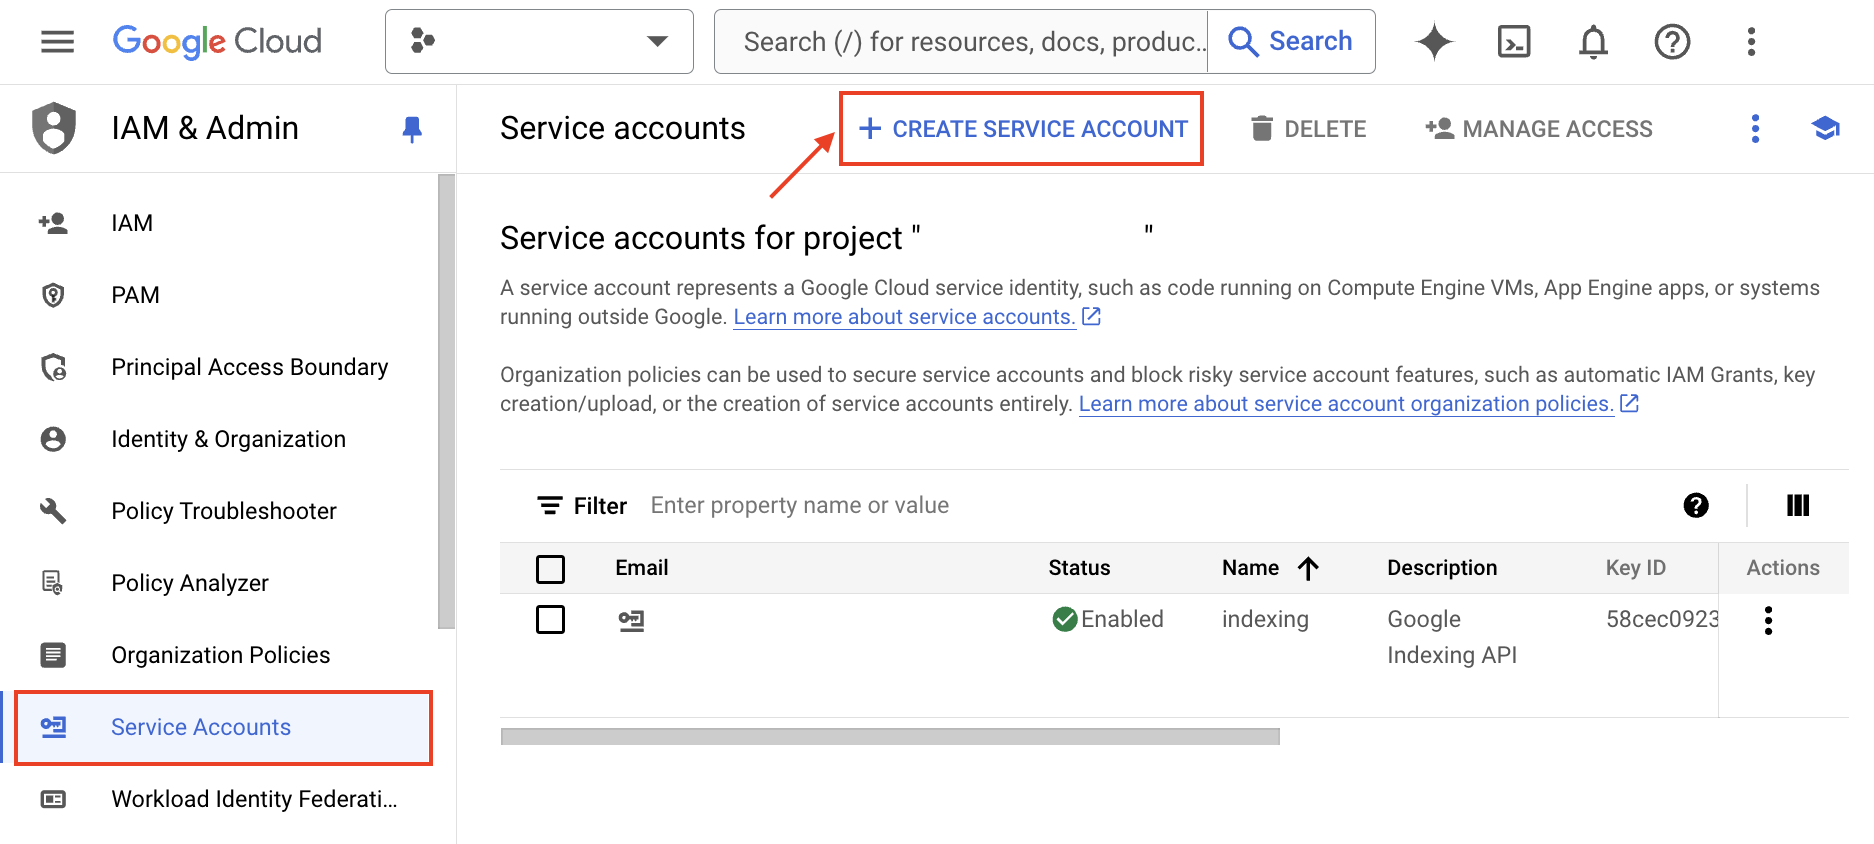
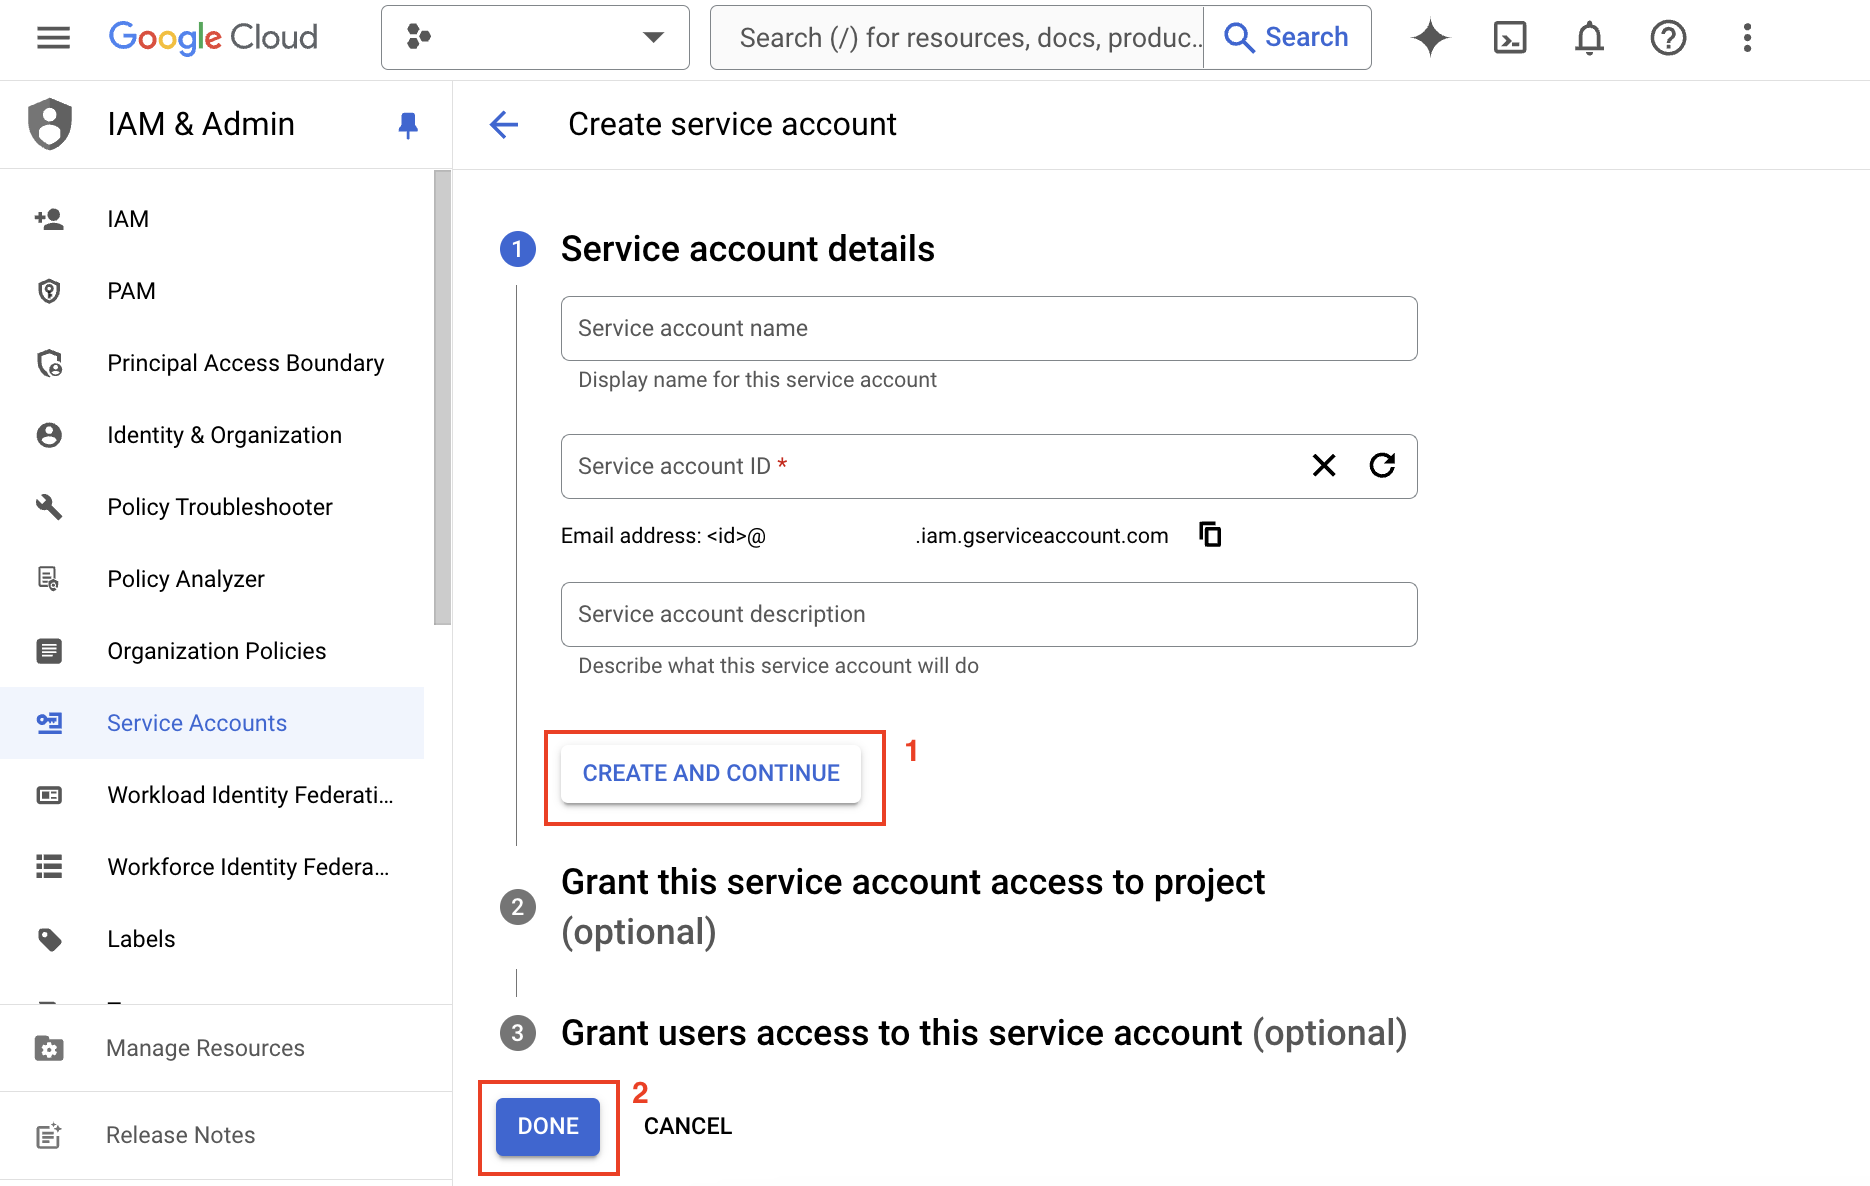
- Generate private API keys file.
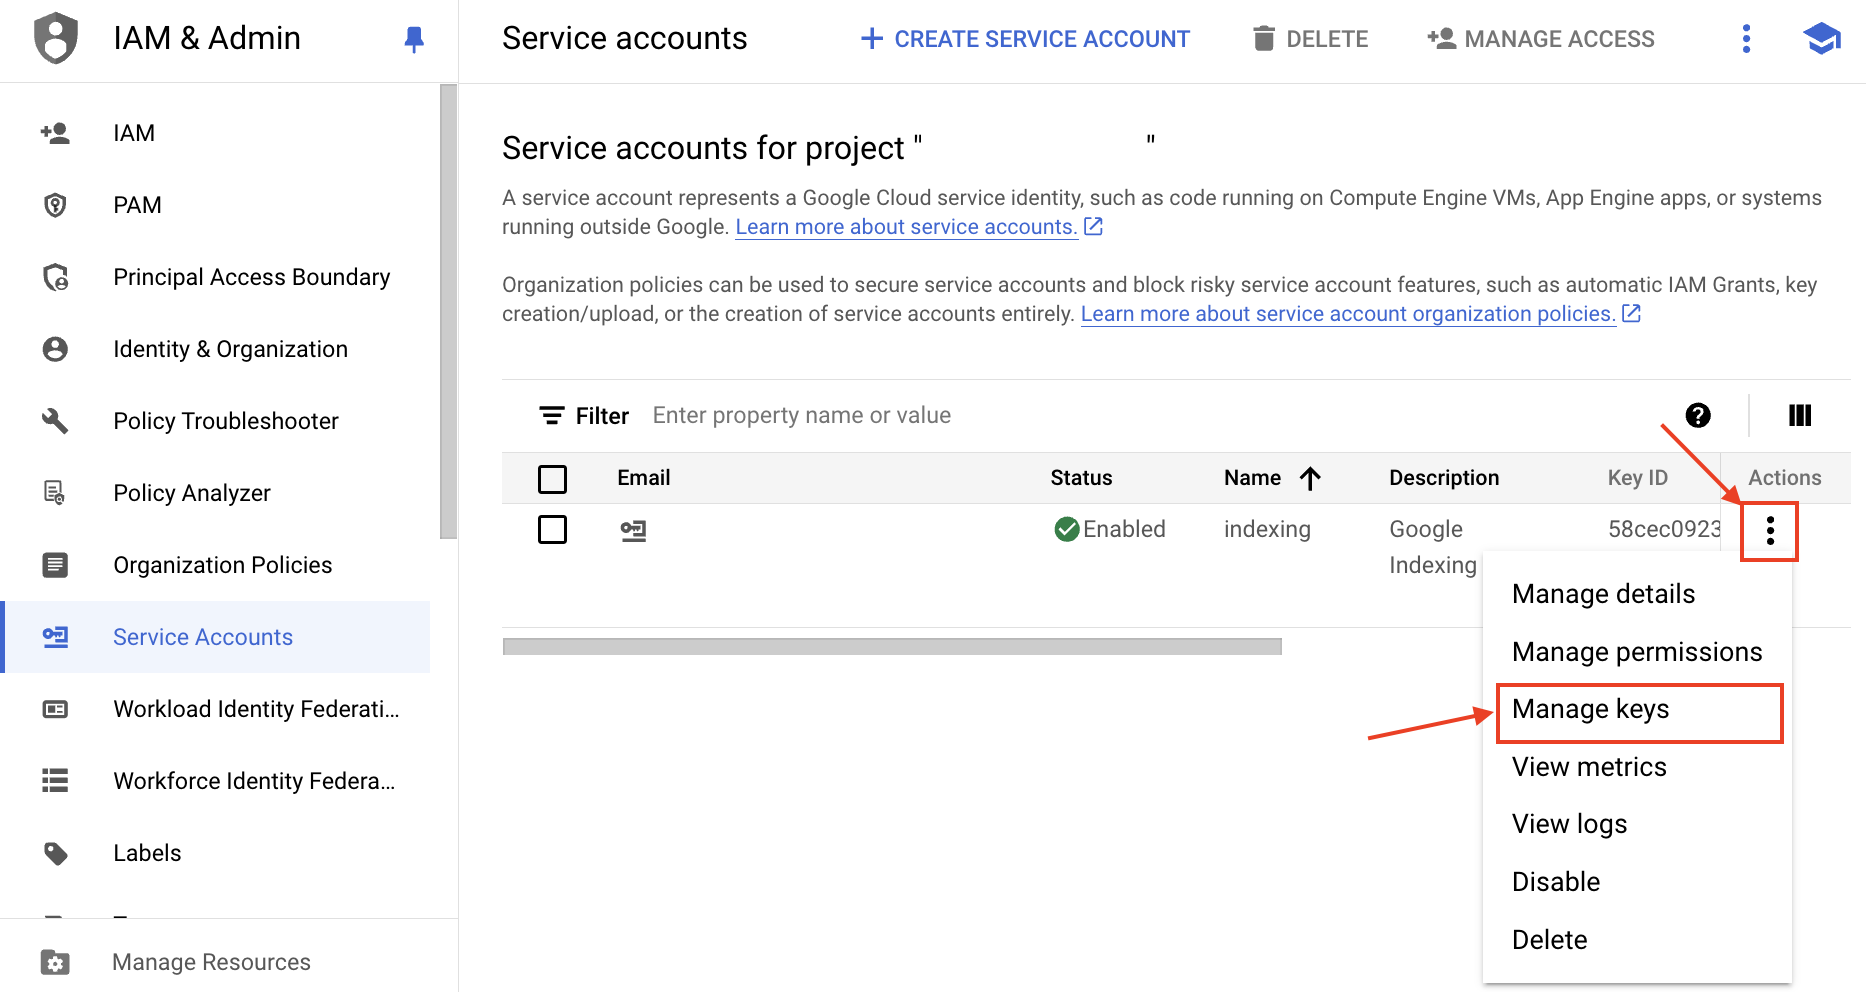
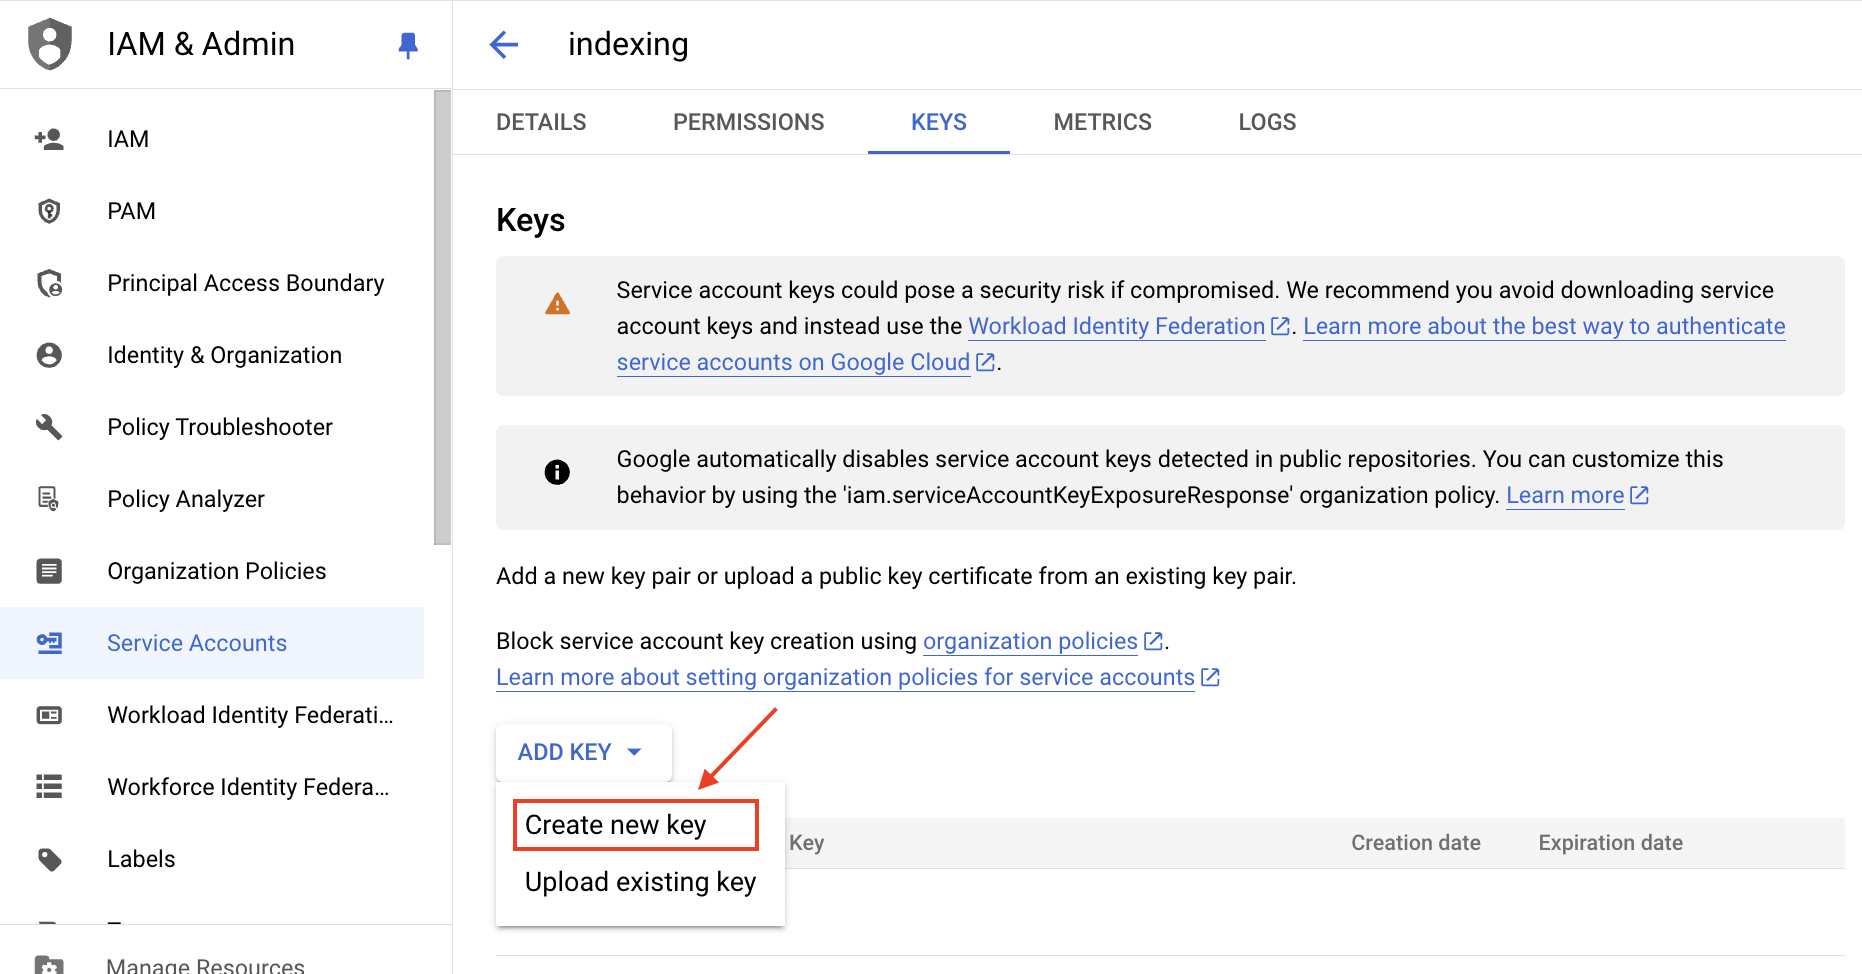
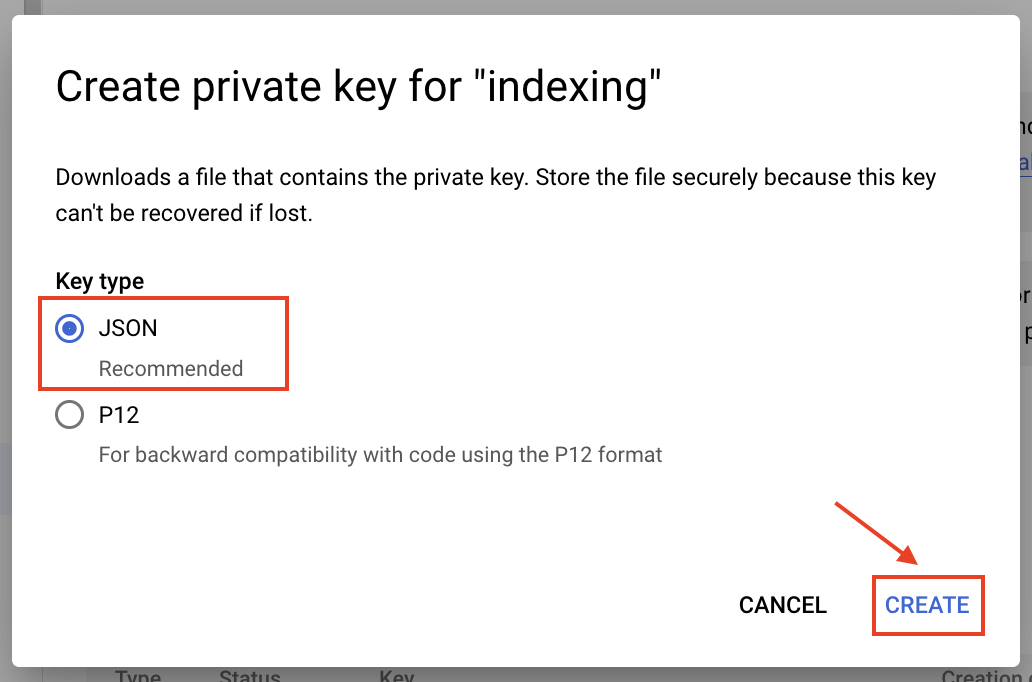
- Upload the generated file to the Google Service Account Keys File of the extension's settings.
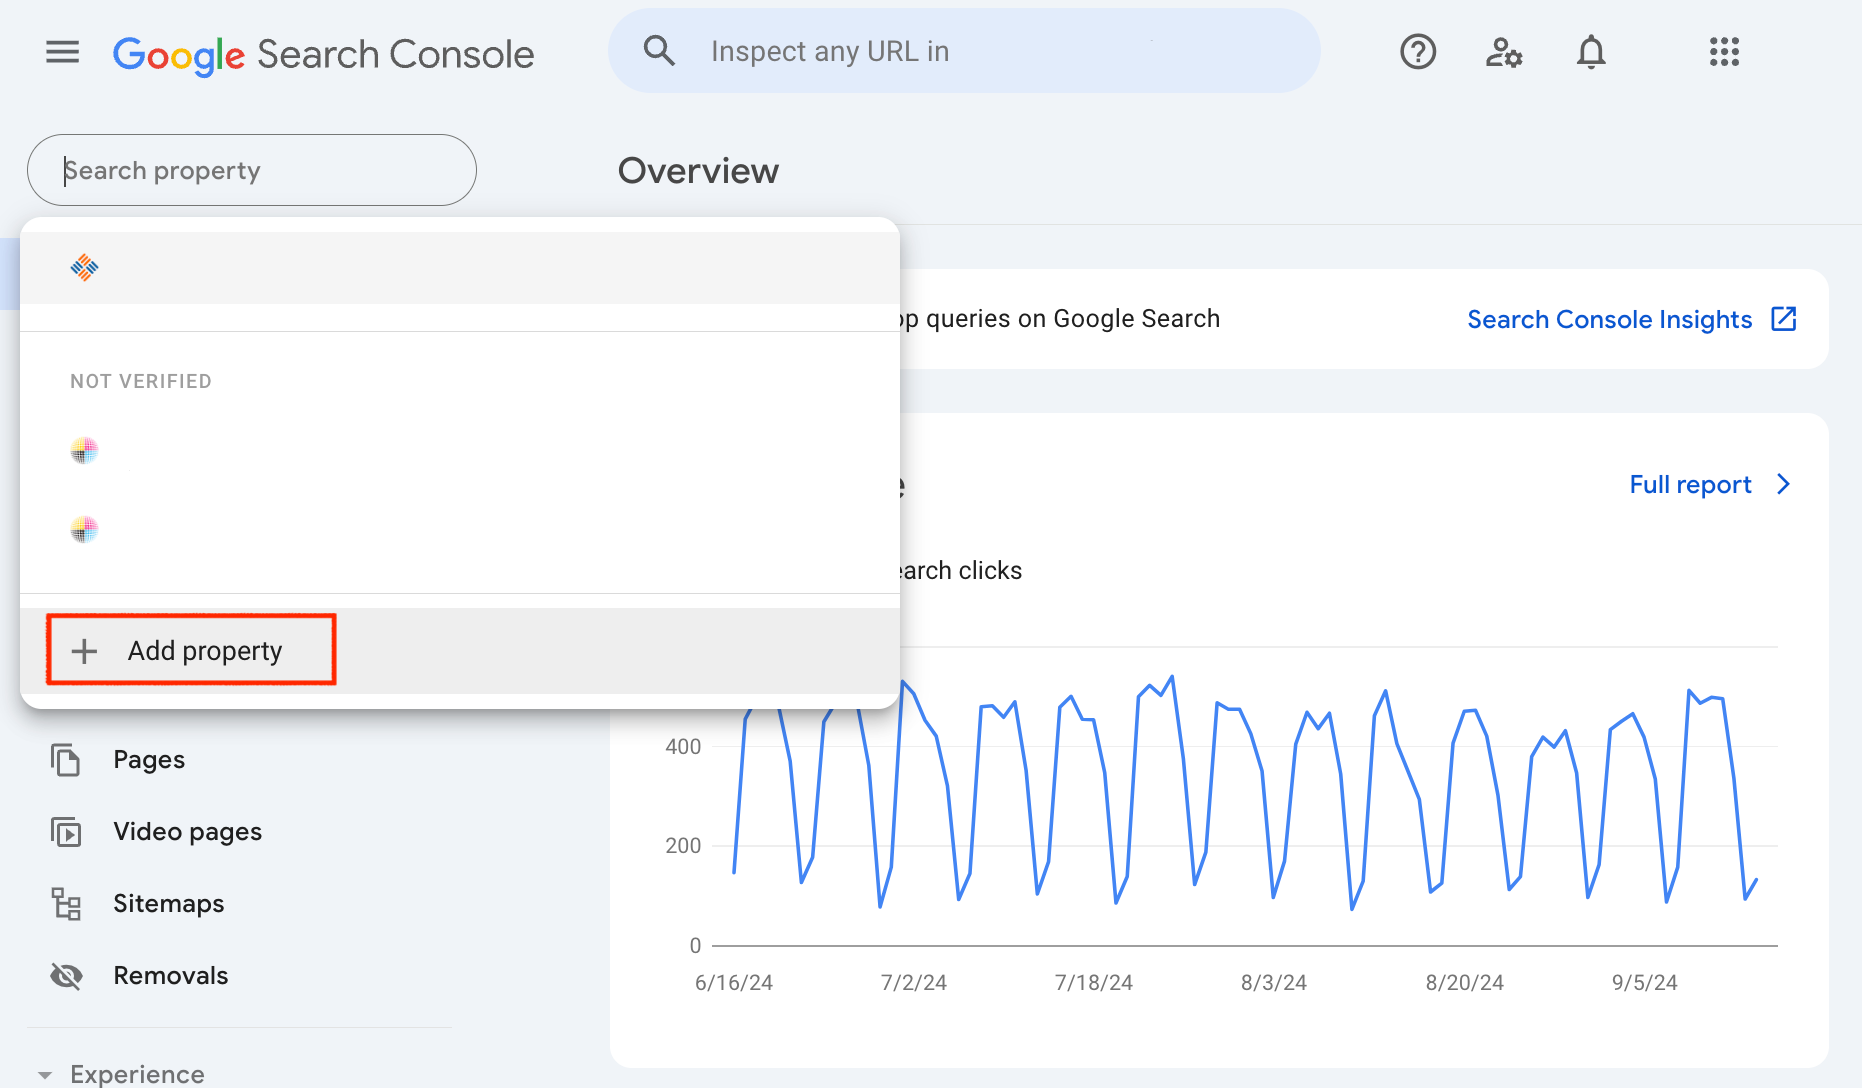
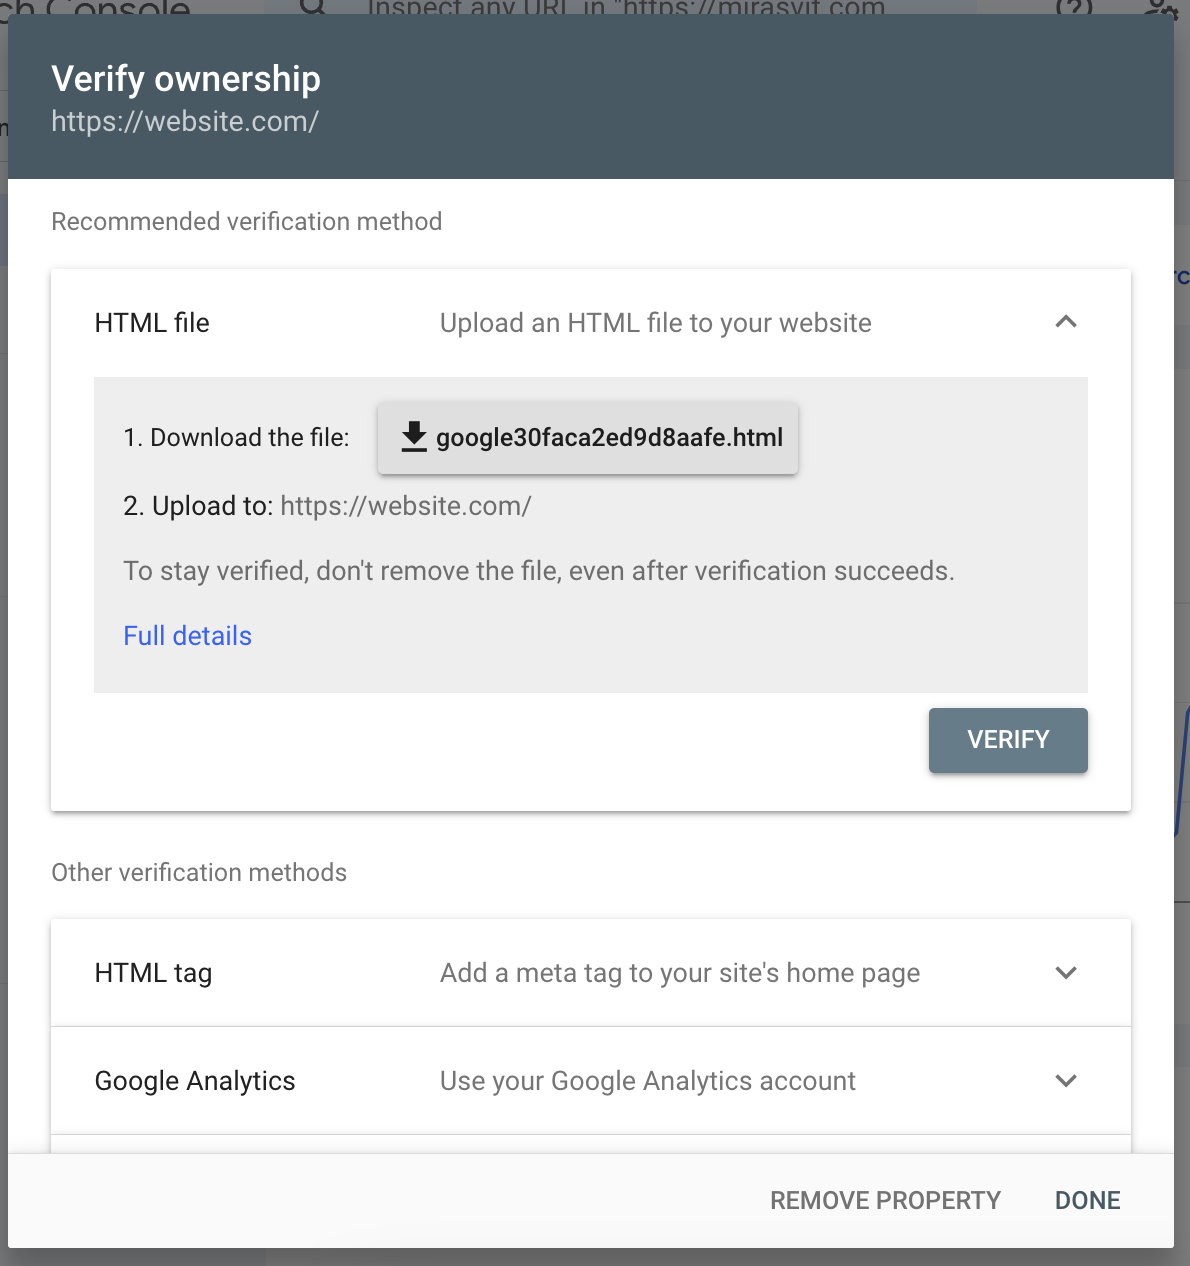
- Visit the Google Search Console and verify your website ownership.
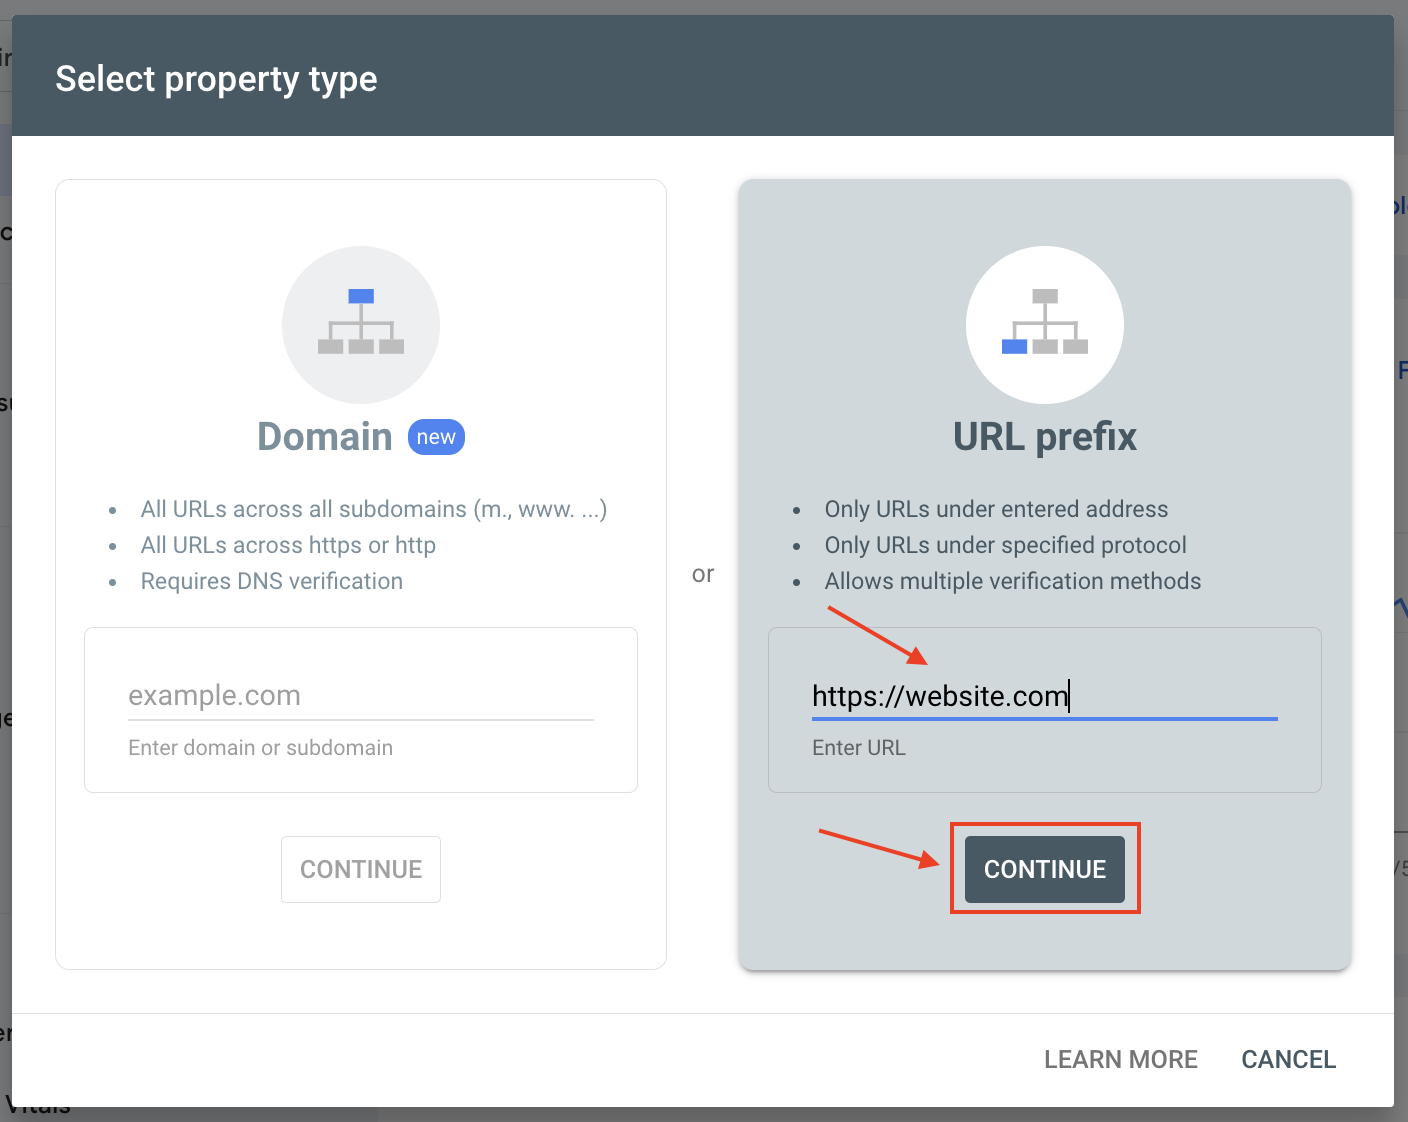
- Add new property, select the type URL prefix, and enter the URL
Note
If you have multiple store views, create a property and verify ownership for each store view separately - After the ownership is verified you can access the property setting by clicking on GO TO PROPERTY
- Navigate to Settings ▸ Users and Permissions and click the Add User button.
- Copy the client_email value from the JSON file from step 7. Paste the email into the Email Address fiels and select the Owner role in the Permission dropdown. Click the Add button.
Done! Now you can use full capacity of the extension in your Magento store - Google Indexing and Search Analytics.