How to create testimonial page
To create a separate CMS page with all your store reviews, follow the steps below.
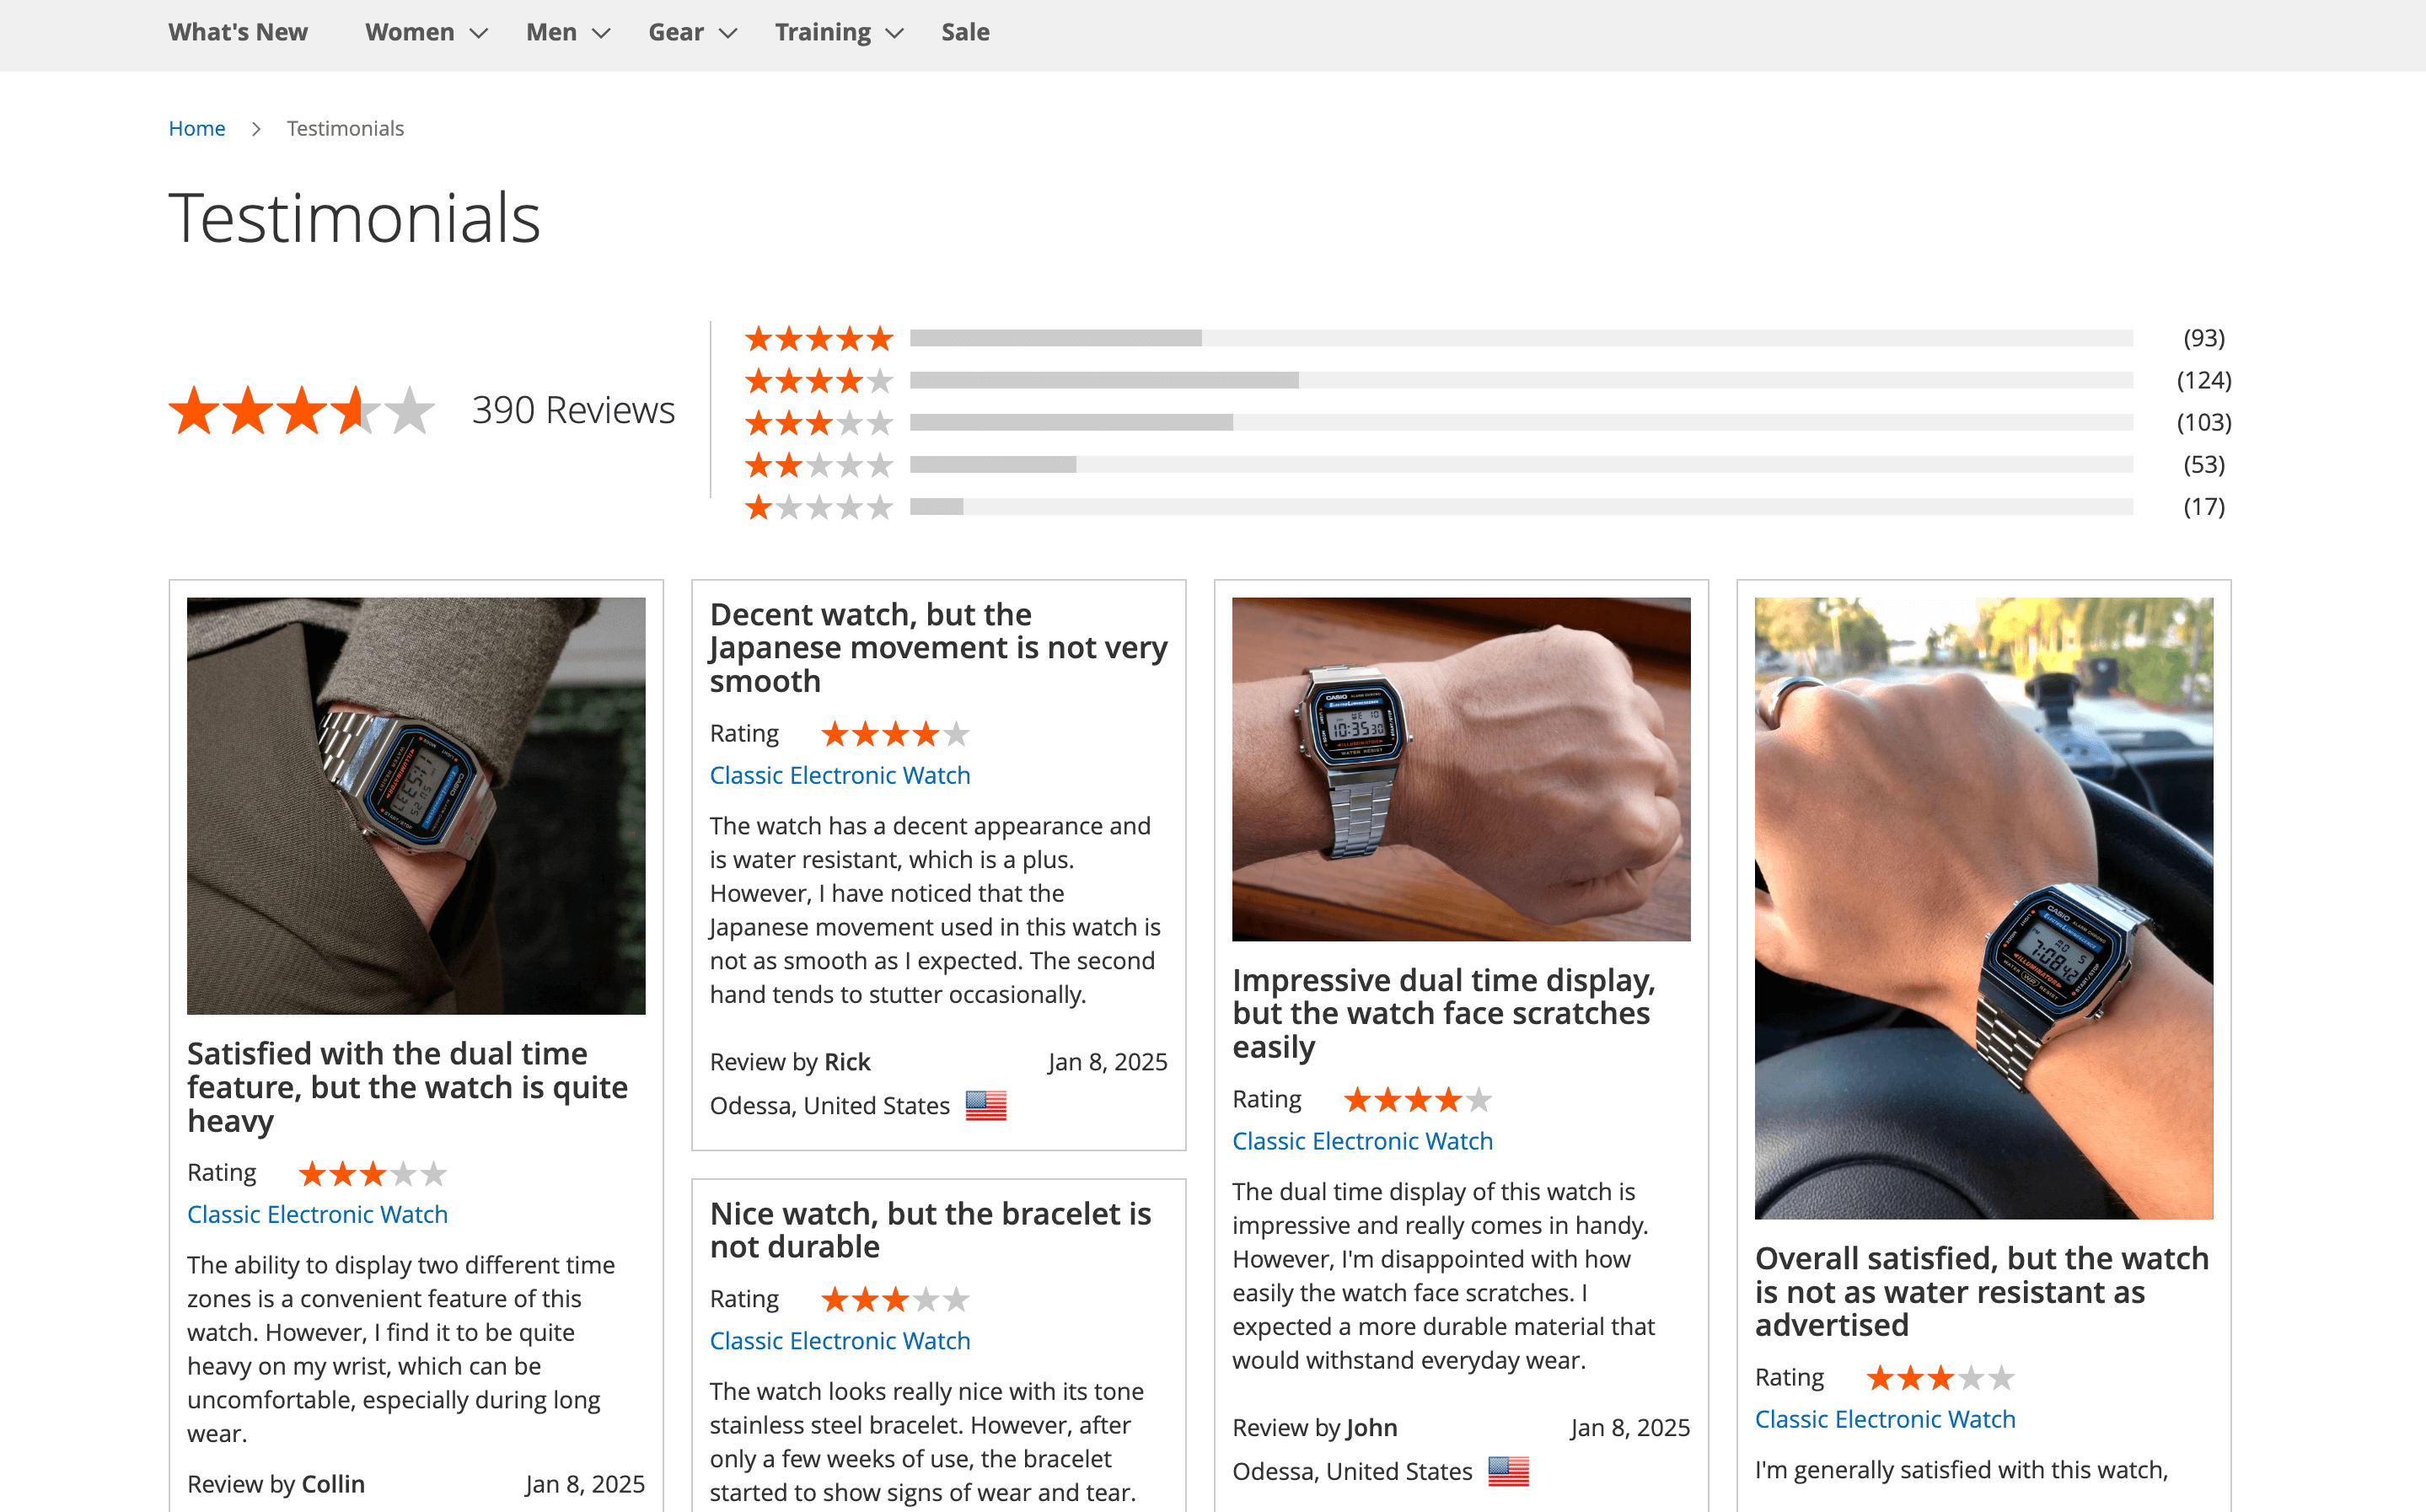
1. Create overall rating widget
Navigate to Content -> Elements -> Widgets and click the Add widget button. On the new page, in the Settings tab, set Type to Advanced Reviews: Overall Rating and choose your theme in the Design theme field. Click the Continue button to proceed to the next step.
Add a Widget title and assign the widget to a store view if you have more than one.
In the Widget options tab, add a frontend title.
Use Save button to finish.
2. Create masonry grid widget
Navigate to Content -> Elements -> Widgets and click the Add widget button. On the new page, in the Settings tab, set Type to Advanced Reviews: Masonry Grid and choose your theme in the Design theme field. Click the Continue button to proceed to the next step.
Add a Widget title and assign the widget to a store view if you have more than one.
In the Widget options tab, add a frontend title, set the Maximum number of reviews to display in the widget, and choose one of the available sort orders from the list for the reviews.
Use Save button to finish.
3. Add widgets to the CMS page
To create new CMS page, navigate to Content -> Elements -> Pages and click Add New Page button.
Set Page Title as Testimonials, and URL key as testimonials, add Meta data and configure Store view.
In the Content tab, if you're using the Page Builder editor, call them using Edit with Page Builder button, and add HTML code element were you can call widgets.
Using button Insert Widget add Advanced Reviews: Overall Rating and Advanced Reviews: Masonry Grid widgets one by one. You should receive in the HTML code field lines like this:
{{widget type="Mirasvit\Review\Block\Widget\Rating"}}
{{widget type="Mirasvit\Review\Block\Widget\ReviewGrid" sort_order="created_at-desc" page_size="20"}}
Save your page and clear cache to implement changes. In the result you should receive CMS page with overal rating and all reviews from your store.