Widget configuration
Admins with the Widget Configuration permission can customize the Copilot chat widget's appearance and welcome screen directly from inside the chat. Settings are stored on the Copilot server per Magento instance — once saved, every admin that uses Copilot on the same store sees the customized widget.
Access
Customization is gated by the Mirasvit_Copilot::widget_config ACL resource. Grant it on System → Permissions → User Roles → [Role] → Role Resources → Stores → Settings → Configuration → AI Copilot → Widget Configuration to let a role customize the widget.
When the permission is granted, a gear icon appears in the Copilot header on the welcome screen only. Clicking it opens the configuration panel to the left of the chat. The gear is hidden once a conversation starts, to keep the chat uncluttered.
How the panel works
The configuration panel shows five tabs — Welcome, Window, Launcher, Behavior, Connectors — and a footer with three buttons: Save, Reset, Restore defaults.
The conversation area on the right acts as a live preview. Every change you make in the panel is reflected immediately in the preview. The chat is non-interactive while the panel is open — you can see changes but cannot click questions, prompts, history items, or send messages. Buttons in the chat header (new conversation, expand, close) and scrolling remain available.
Footer buttons
- Save — persists the draft. Enabled only when there are unsaved changes.
- Reset — discards unsaved changes and reverts to the last saved configuration. Enabled only when there are unsaved changes. No confirmation.
- Restore defaults — wipes the saved configuration and returns the widget to its original factory look and content. Asks for confirmation. Enabled only when the saved configuration differs from defaults.
Closing the panel with unsaved changes asks for confirmation.
Welcome tab
Controls the welcome screen — the view shown at the start of a new conversation, before any messages. This is the first tab in the panel.
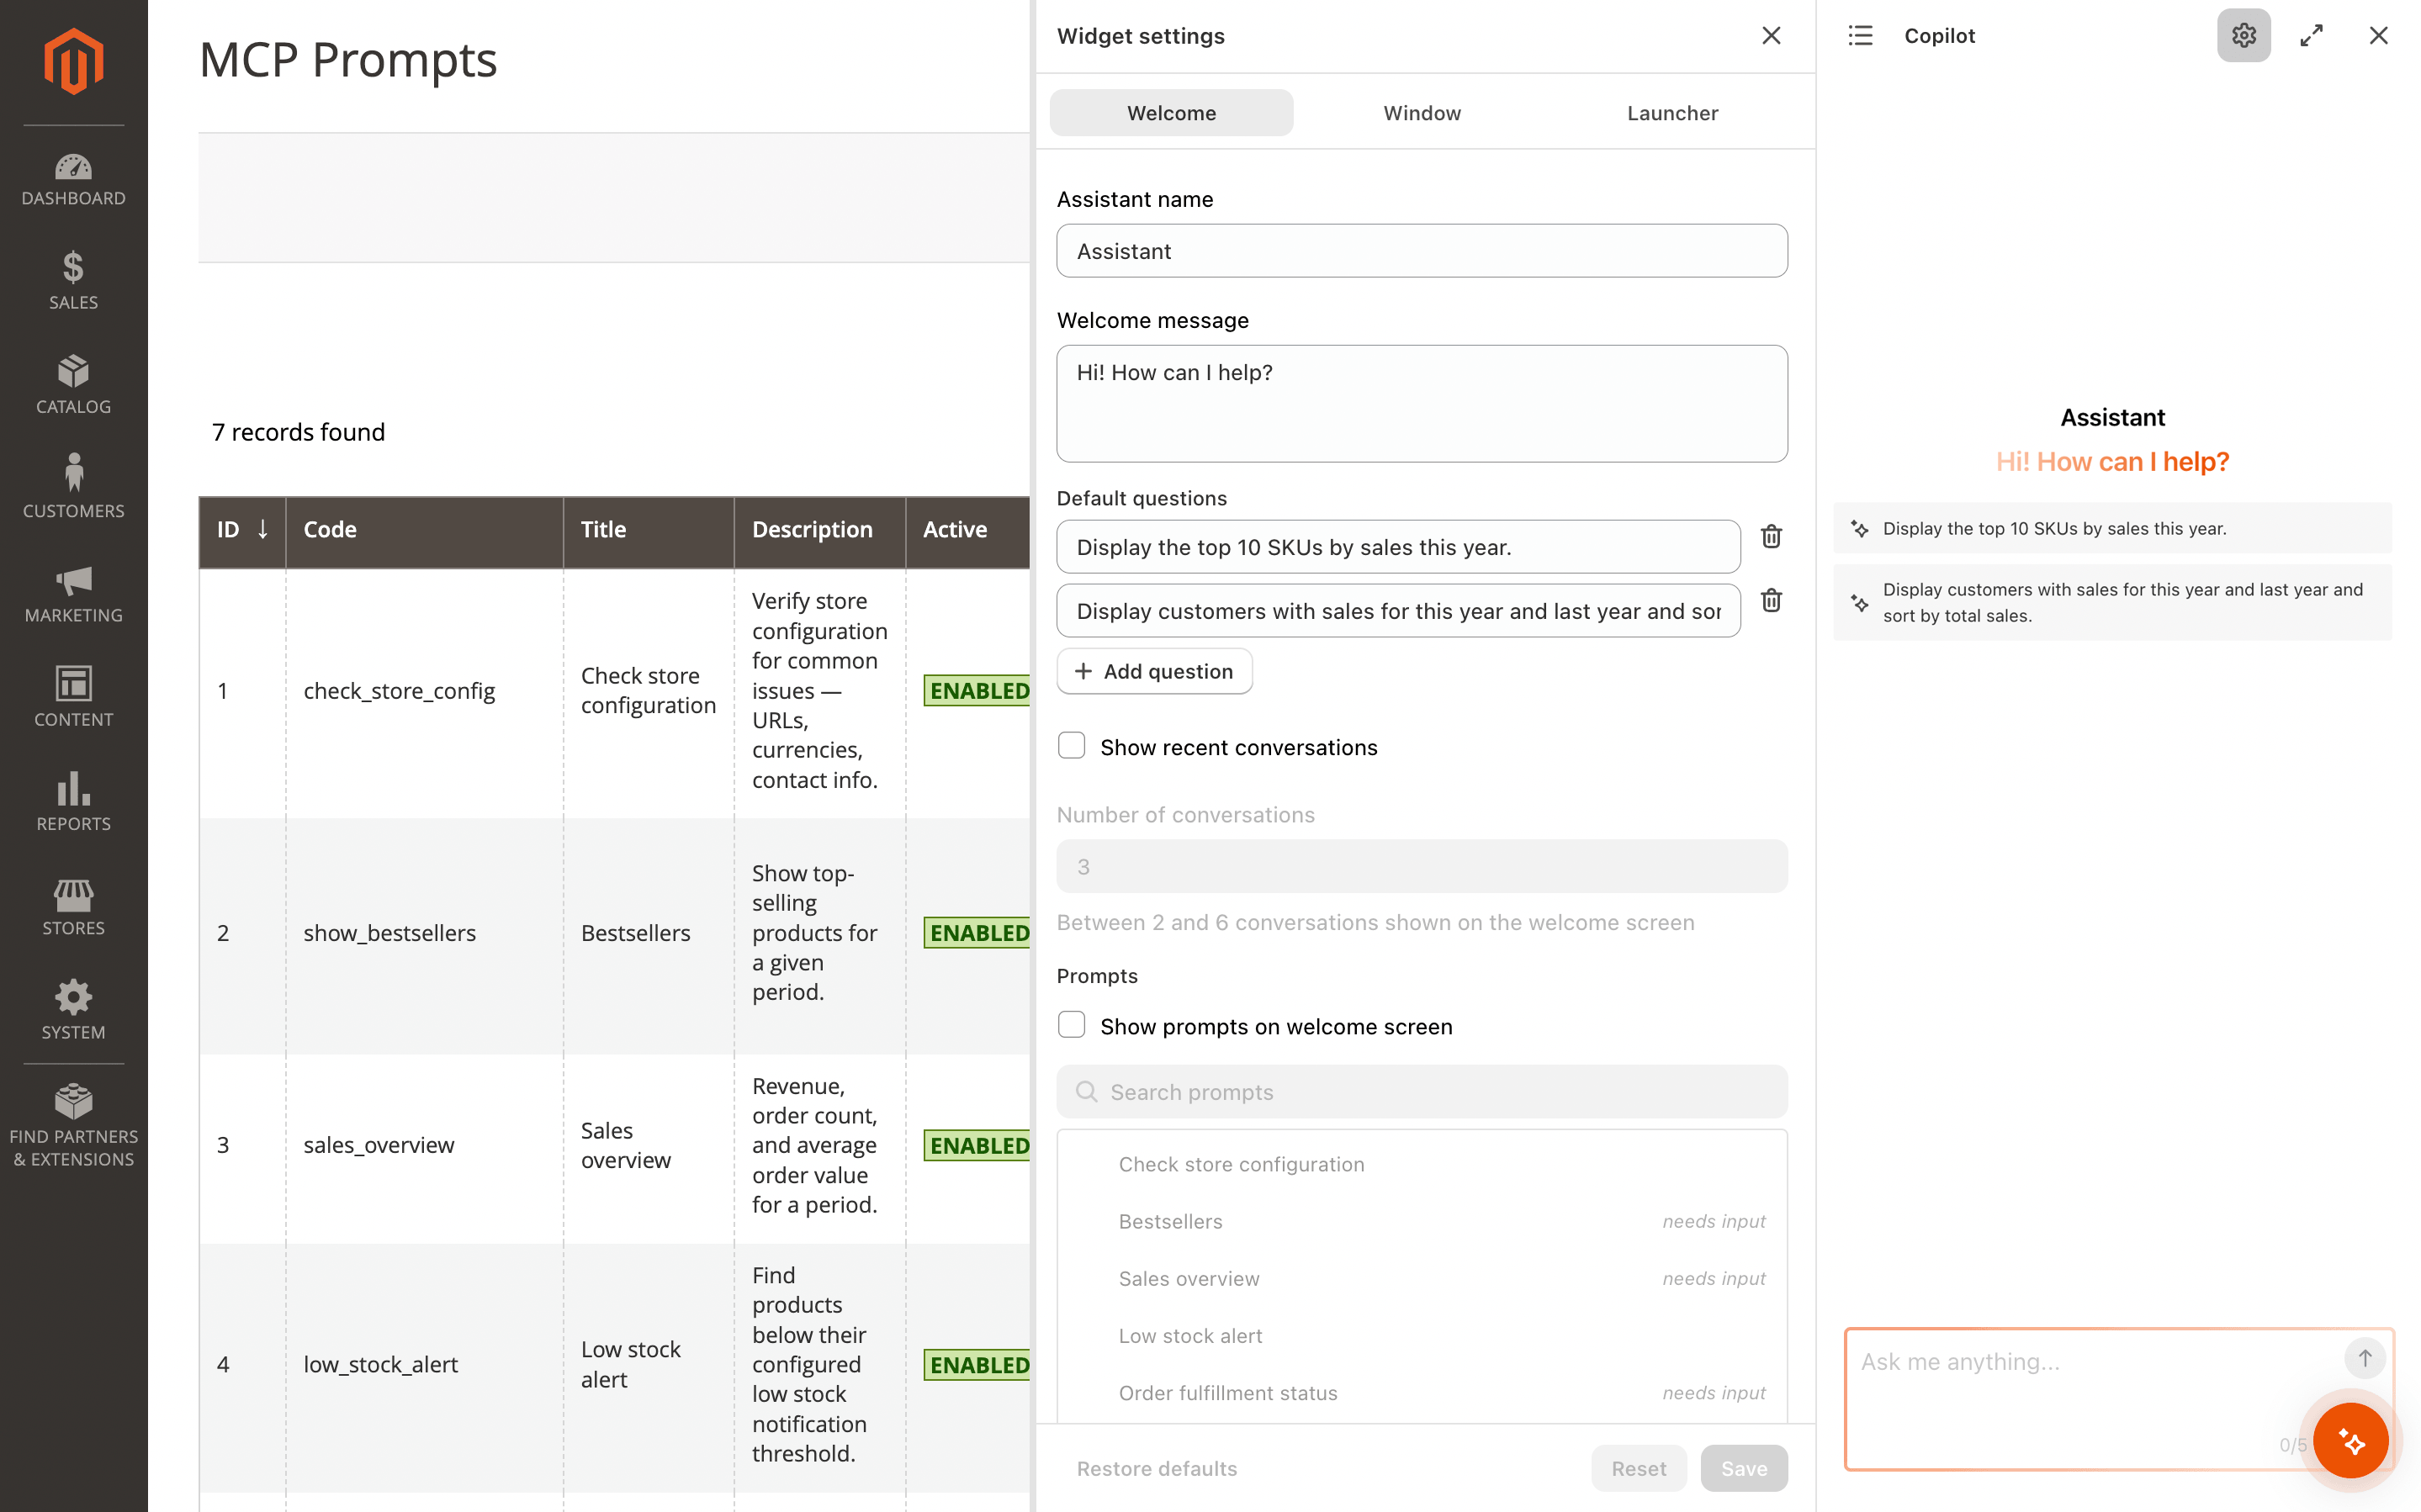
Assistant name and welcome message
- Assistant name — name shown as the welcome-screen heading ("Hi there!" by default). Falls back to the default heading when left blank.
- Welcome message — main greeting shown below the assistant name. Leave blank to fall back to the default greeting.
Default questions
Up to 6 clickable question cards shown on the welcome screen. Clicking a card sends the question as the first message.
- Add question — adds an empty row (disabled once 6 are defined).
- Remove question — removes a row.
Empty rows are skipped when rendering.
Recent conversations
Shows the most recently updated conversations as clickable items on the welcome screen. Clicking an item loads that conversation.
- Show recent conversations — enable or disable the section.
- Number of conversations — how many items to show. 2–6.
The section is hidden automatically when the user has no past conversations.
Prompts
Renders selected prompts as clickable cards on the welcome screen. See Prompts for how prompts work and how they are created.
- Show prompts on welcome screen — enable or disable the section.
- Search prompts — filters the list of available prompts by title or code.
- Prompt list — each prompt has a check indicator; click a row to toggle selection. Selection is preserved in the order you pick items. Prompts that require input show a needs input tag so you know they will route the user to the chat input to fill arguments rather than firing immediately.
If no prompts are defined on the instance, the section displays a "No prompts are available" note.
Window tab
Controls the chat window appearance.
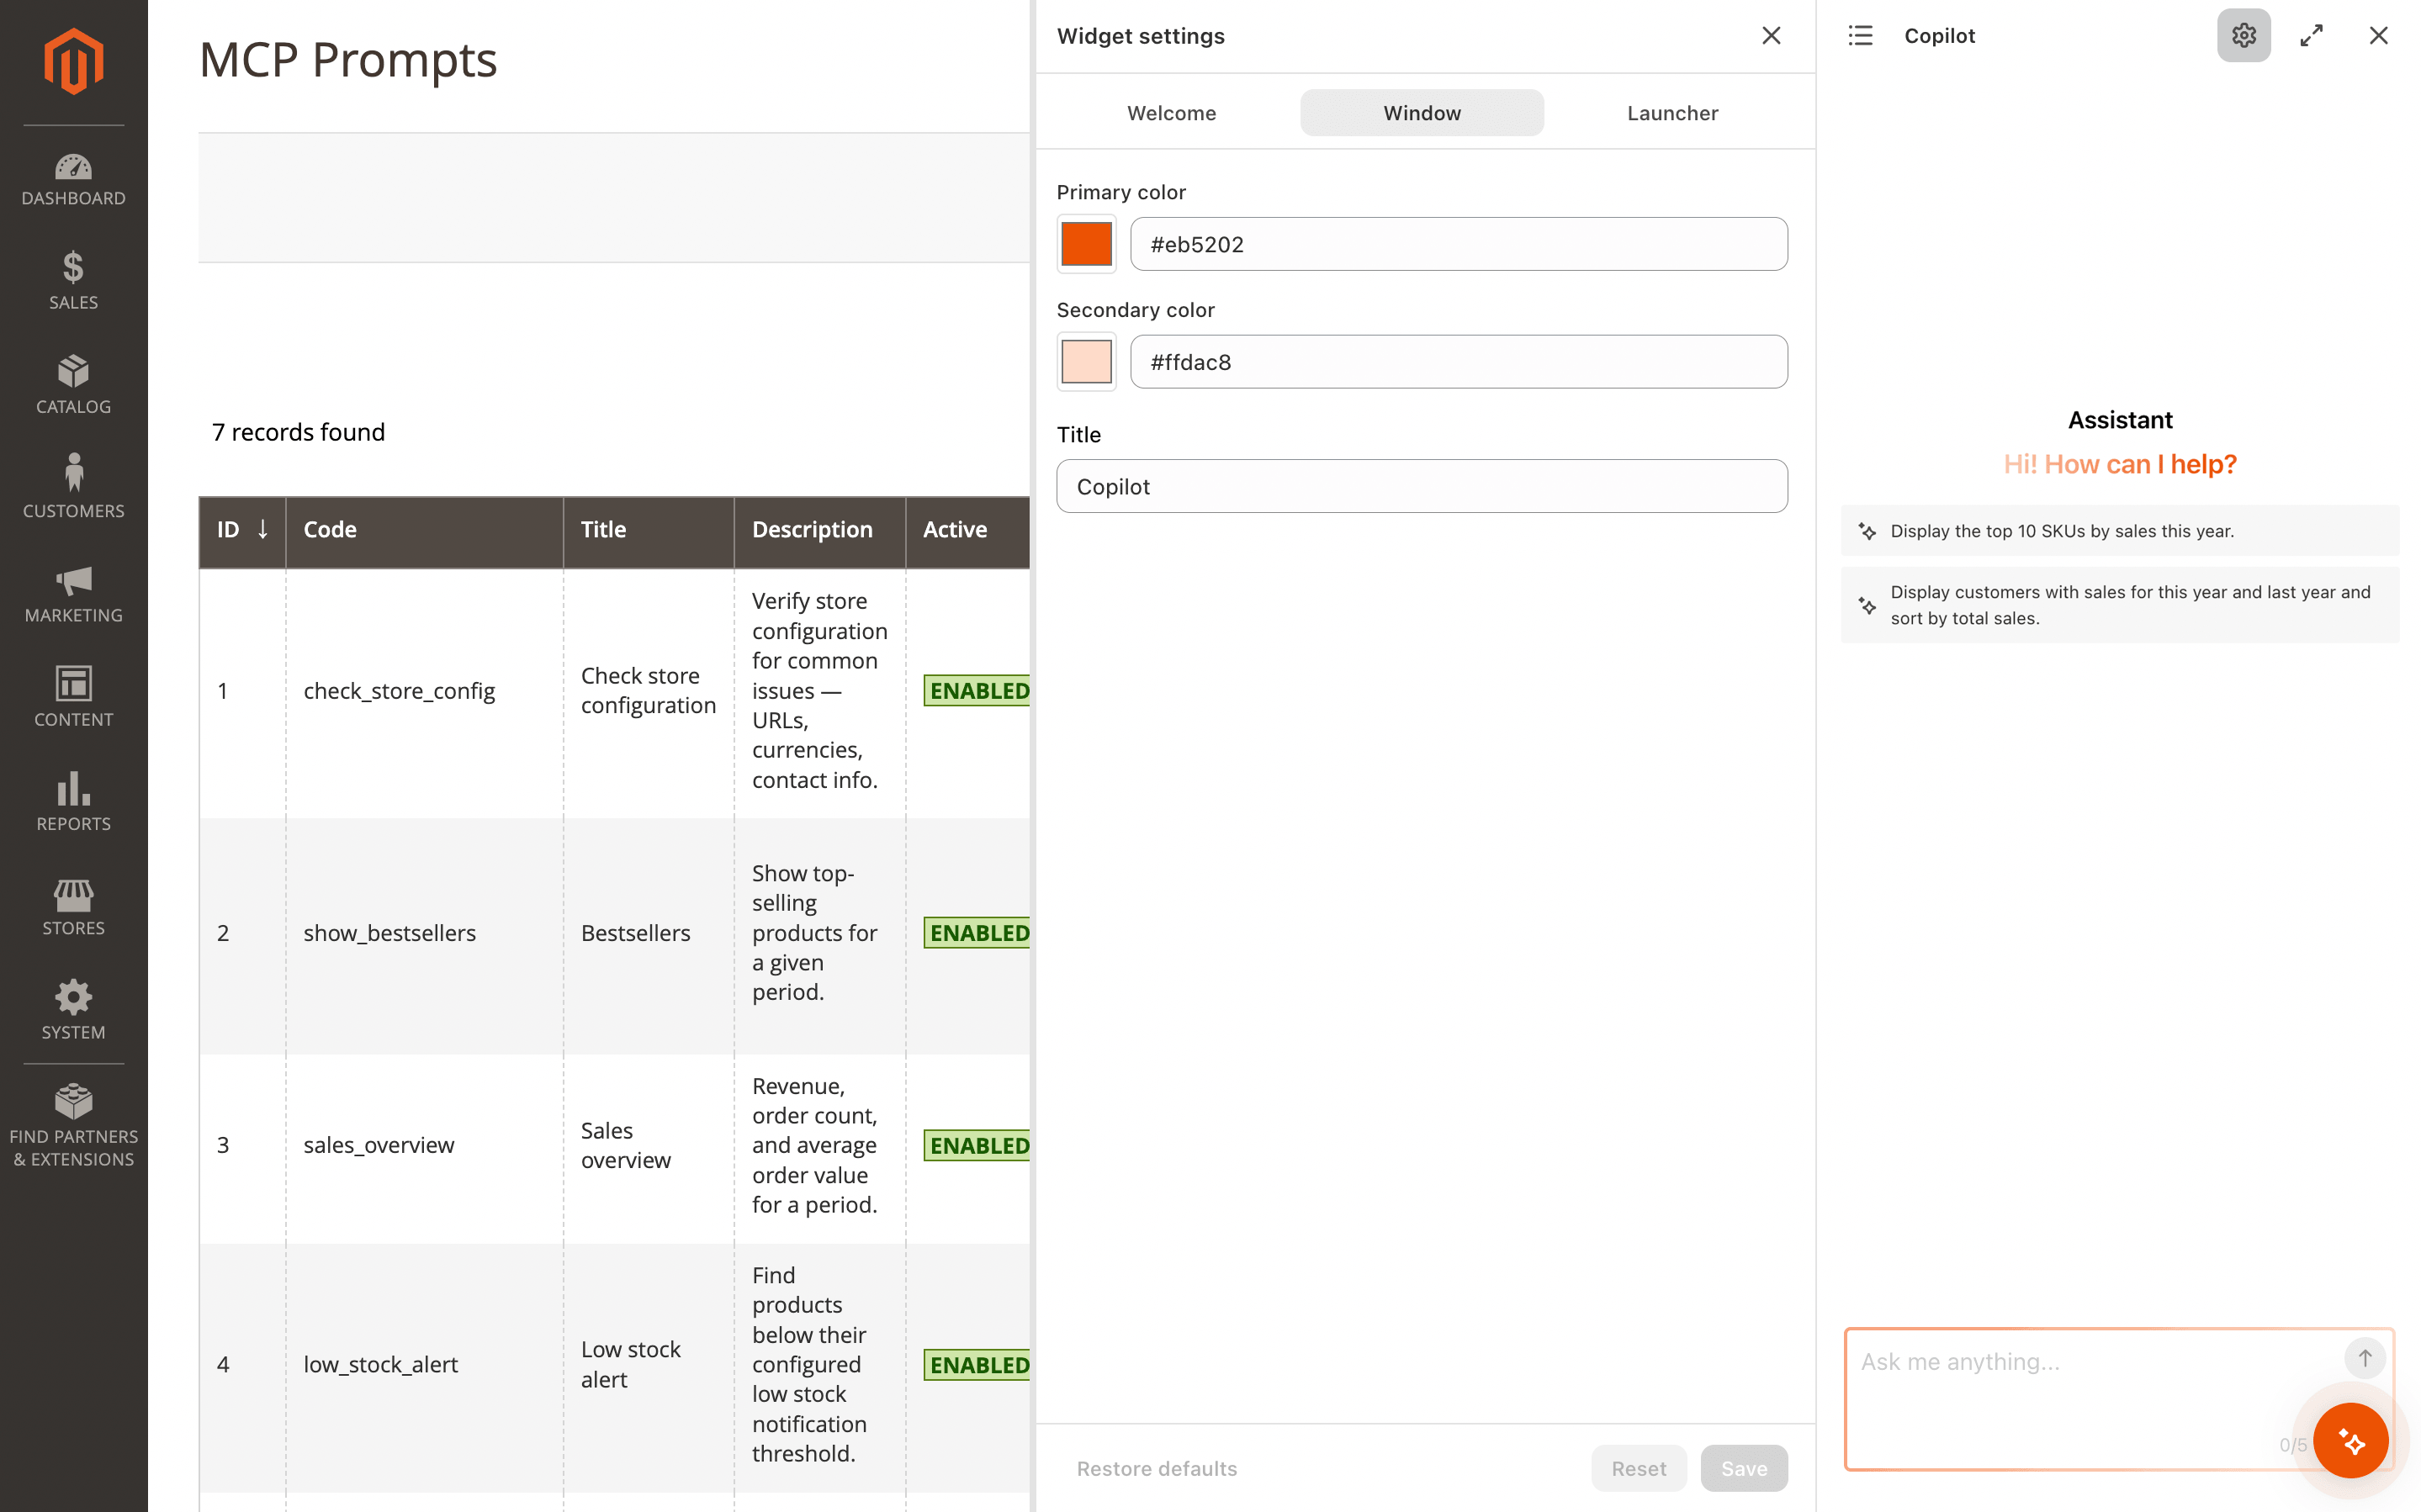
- Primary color — base accent color used on the send button, focus glow, and input border.
- Secondary color — supporting color used for the welcome-message gradient and soft accents.
- Title — text shown in the chat header next to the conversations icon. Leave blank to hide.
Colors accept any CSS hex value. A color picker and a text input are provided side-by-side — either can be edited.
Launcher tab
Controls the launcher button (the floating button that opens the chat from any admin page).

- Position — corner of the viewport the launcher is pinned to. Options: Bottom right (default), Bottom left.
- Horizontal padding (px) — distance from the pinned edge. 0–200.
- Vertical padding (px) — distance from the bottom. 0–200.
- Primary color — launcher button background color.
- Secondary color — color of the pulsing rings around the launcher.
- Icon — glyph shown inside the launcher. Five options: Magic, Chat, Sparkle, Question, Robot.
- Label text — optional text rendered inside the launcher pill next to the icon. Leave empty to keep the launcher as a plain circular button.
The launcher preview in the configuration view anchors to the real viewport corner, so you see exactly where the launcher will appear on the page.
Behavior tab
Controls how Copilot responds, how long conversations are kept, and which skills it may use.
Response mode
Selects the AI tier new conversations run on.
- Smarter (higher quality) — the default. Best for complex tasks such as building reports.
- Faster (lower latency) — quicker and cheaper for everyday questions.
Conversation history retention
Sets how long each conversation is kept on the Copilot server before it is deleted automatically.
- Enter the number of days to keep a conversation. The period is measured from the conversation's last activity.
- Set it to
0to keep conversations indefinitely (the default).
Cleanup runs once per day, so changing this value does not remove old conversations immediately — they are removed on the next daily cleanup. Conversations can also be removed manually at any time; see Manage conversation history.
Skills
Controls which skills Copilot may pick when answering a question. Each row is a checkbox grouped by vendor and category, with a search field at the top. Toggling a skill takes effect immediately for the next message. See Skills for what skills are, how the assistant picks them, and what ships in the catalog.
Storage and portability
Widget configuration is stored on the Copilot server, keyed by the Magento instance's unique Copilot client ID. It is not stored in Magento's own configuration and is not included in Magento configuration exports.
When you move a Magento instance to a new domain or reinstall the extension and apply a Recovery Token in AI Copilot settings, the widget configuration is preserved automatically — it's tied to the same Copilot instance.