How to create new campaign
A campaign is a central point in our Follow-Up Emails extension. Each campaign is a project which consists of one or more Triggers, each with its own Audience, triggering Event and Emails сhain. You can create one by pressing Create сampaign button at Marketing -> Follow-Up Email -> Manage сampaigns.
1. Choose or create pre-defined campaign template

Select one of the suggested (and previously defined) campaigns as a template, or click the Custom Campaign button to create a new campaign with a clean workspace.
Give your new campaign a name. It is best to use a name that clearly explains its purpose, such as Abandoned Cart Emails.
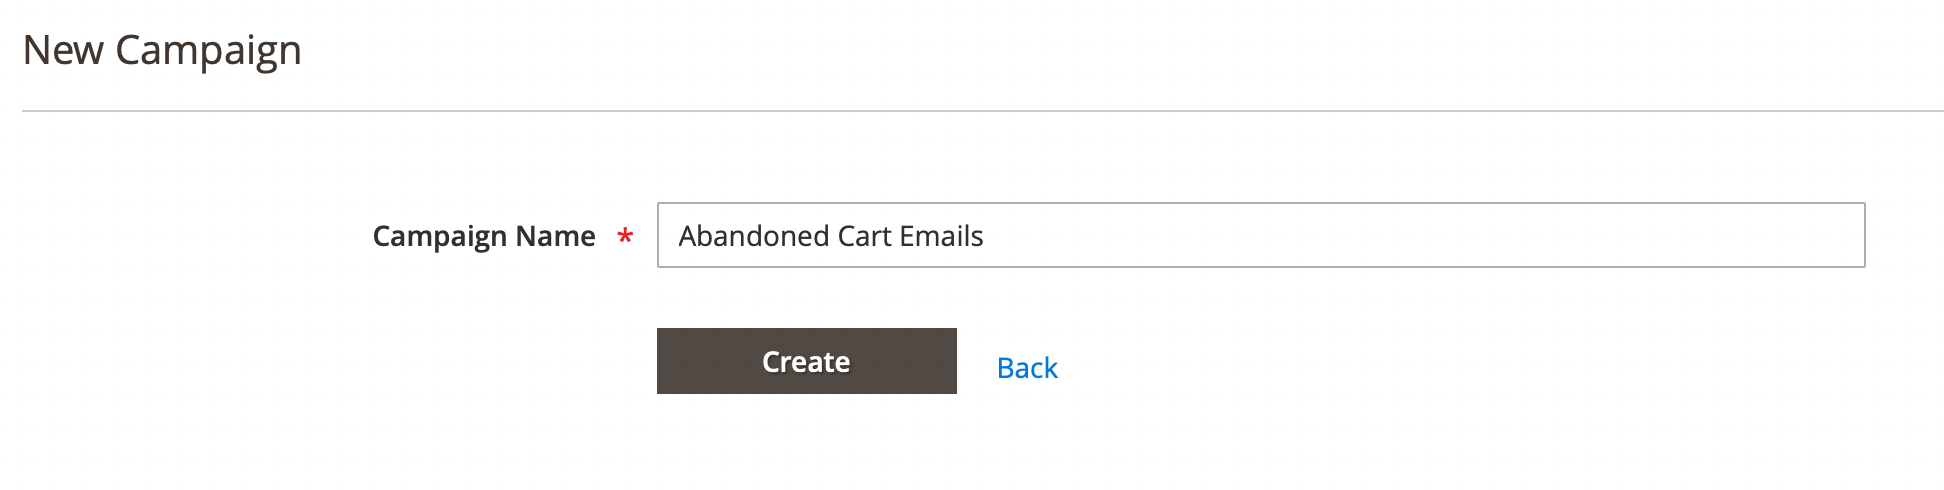
Use Create button to confirm and build campaign.
2. Configure trigger to manage your campaign
A Trigger is an element that controls the sending of emails, sets the start event, defines conditions, and selects the emails to be sent.
To operate successfully, a campaign needs to have one or more triggers assigned to it. You can add a trigger by pressing the Add Trigger button. You will then see a trigger definition dialog which contains the basic data, broken into three categories.
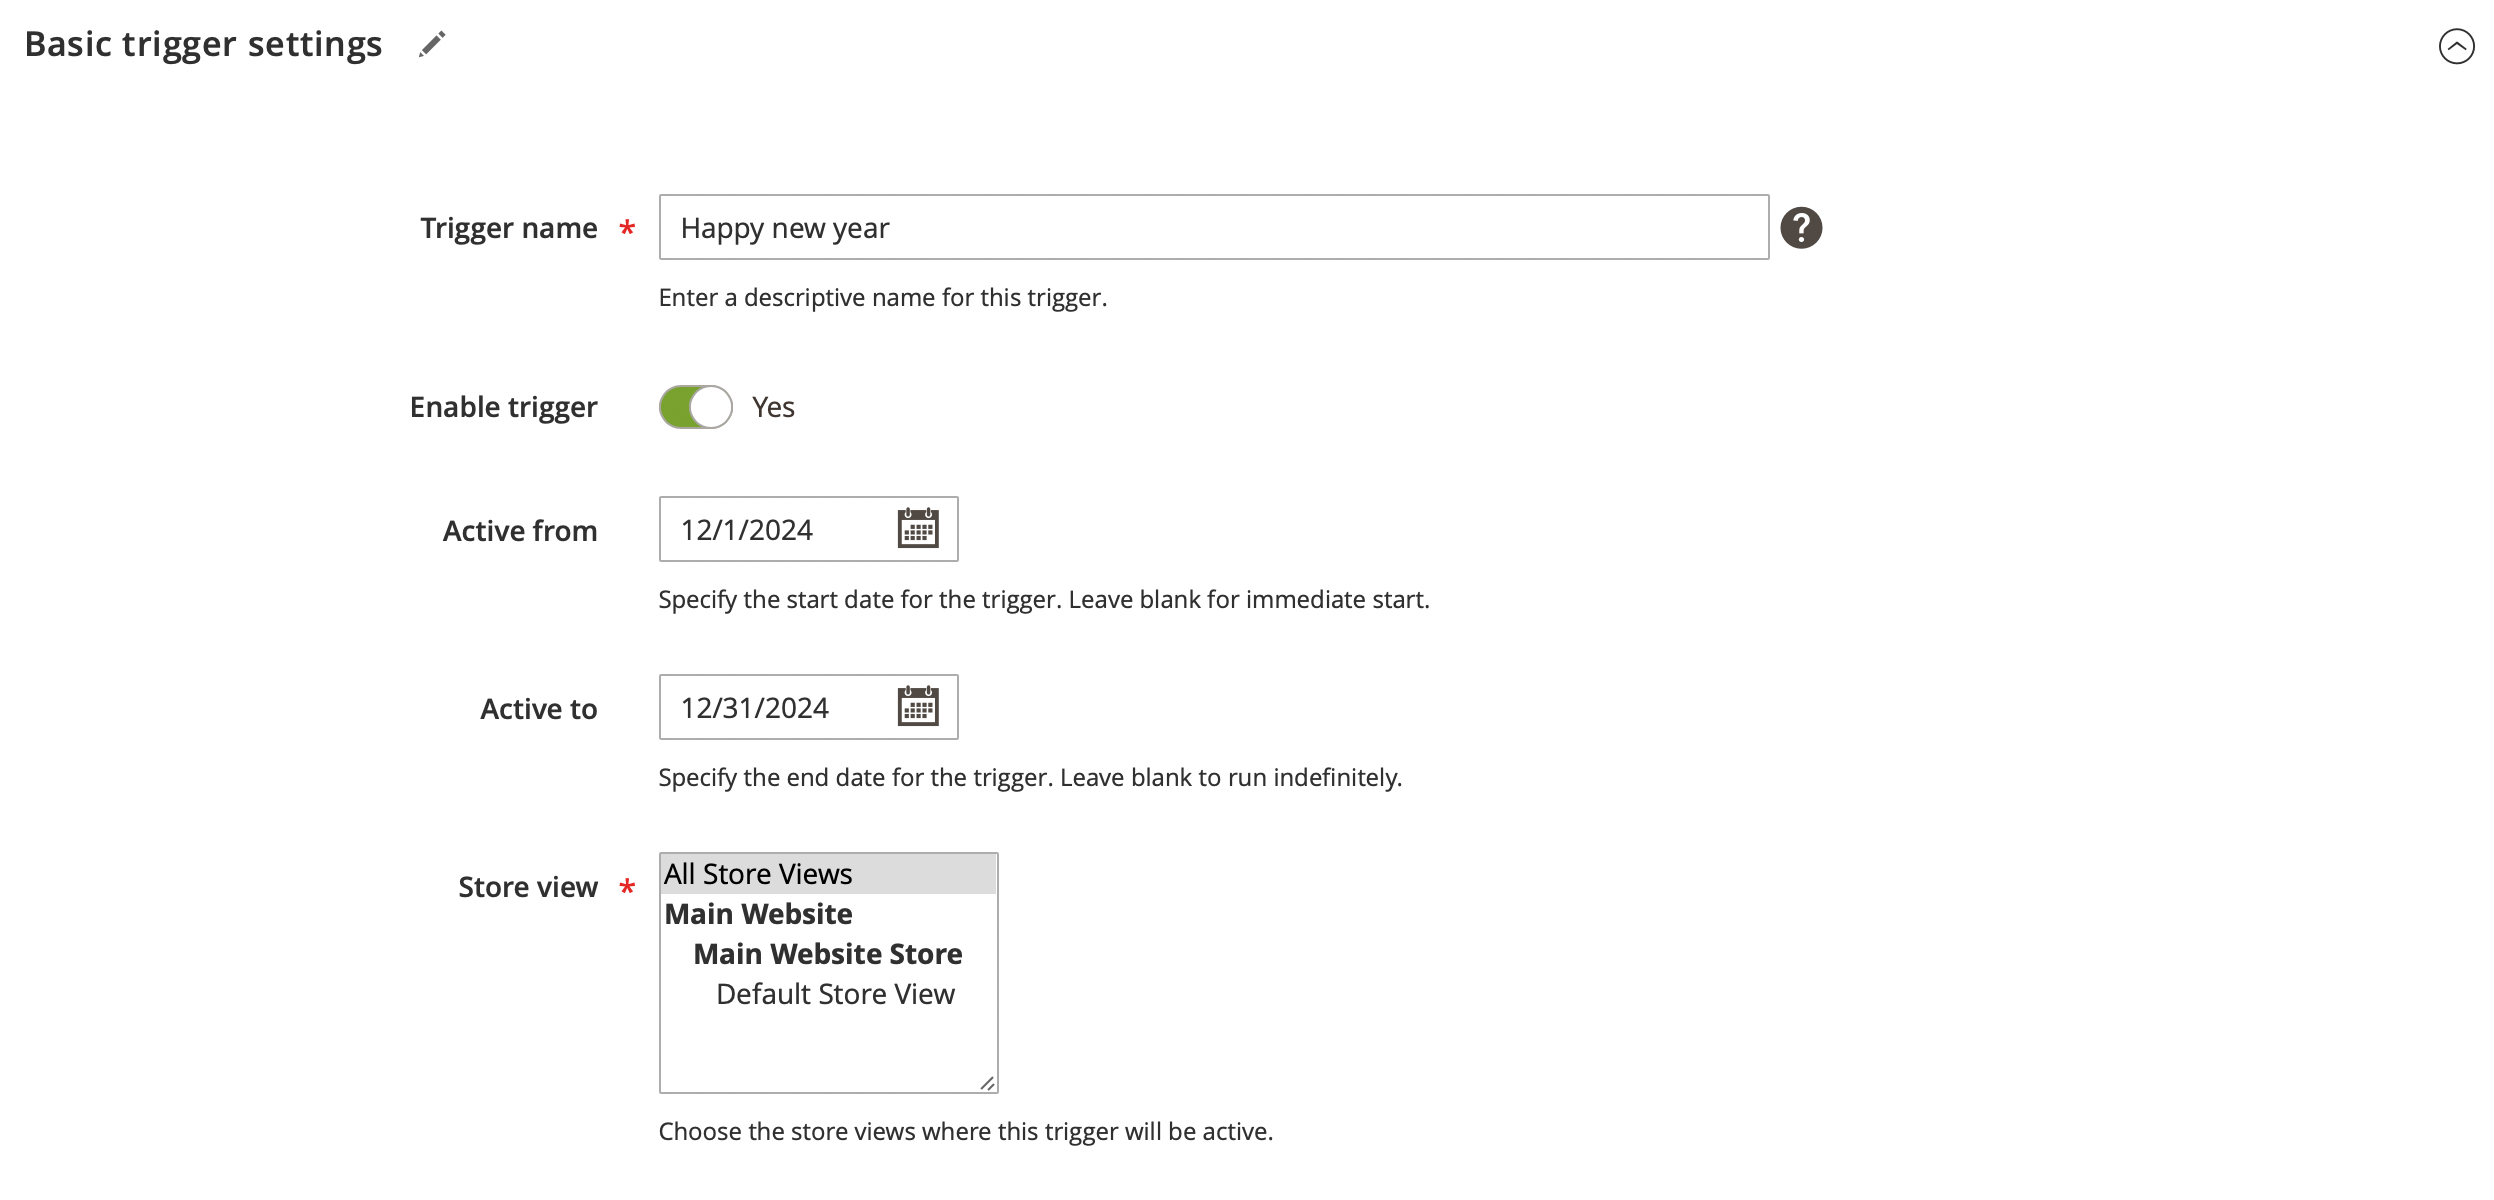
In the Basic trigger settings, you will need to add a trigger name, choose the Store View where the trigger will be used, set the start and end times for the trigger (leave the fields empty if you want the trigger to start immediately and run indefinitely), and enable it using the Enable trigger toggle.
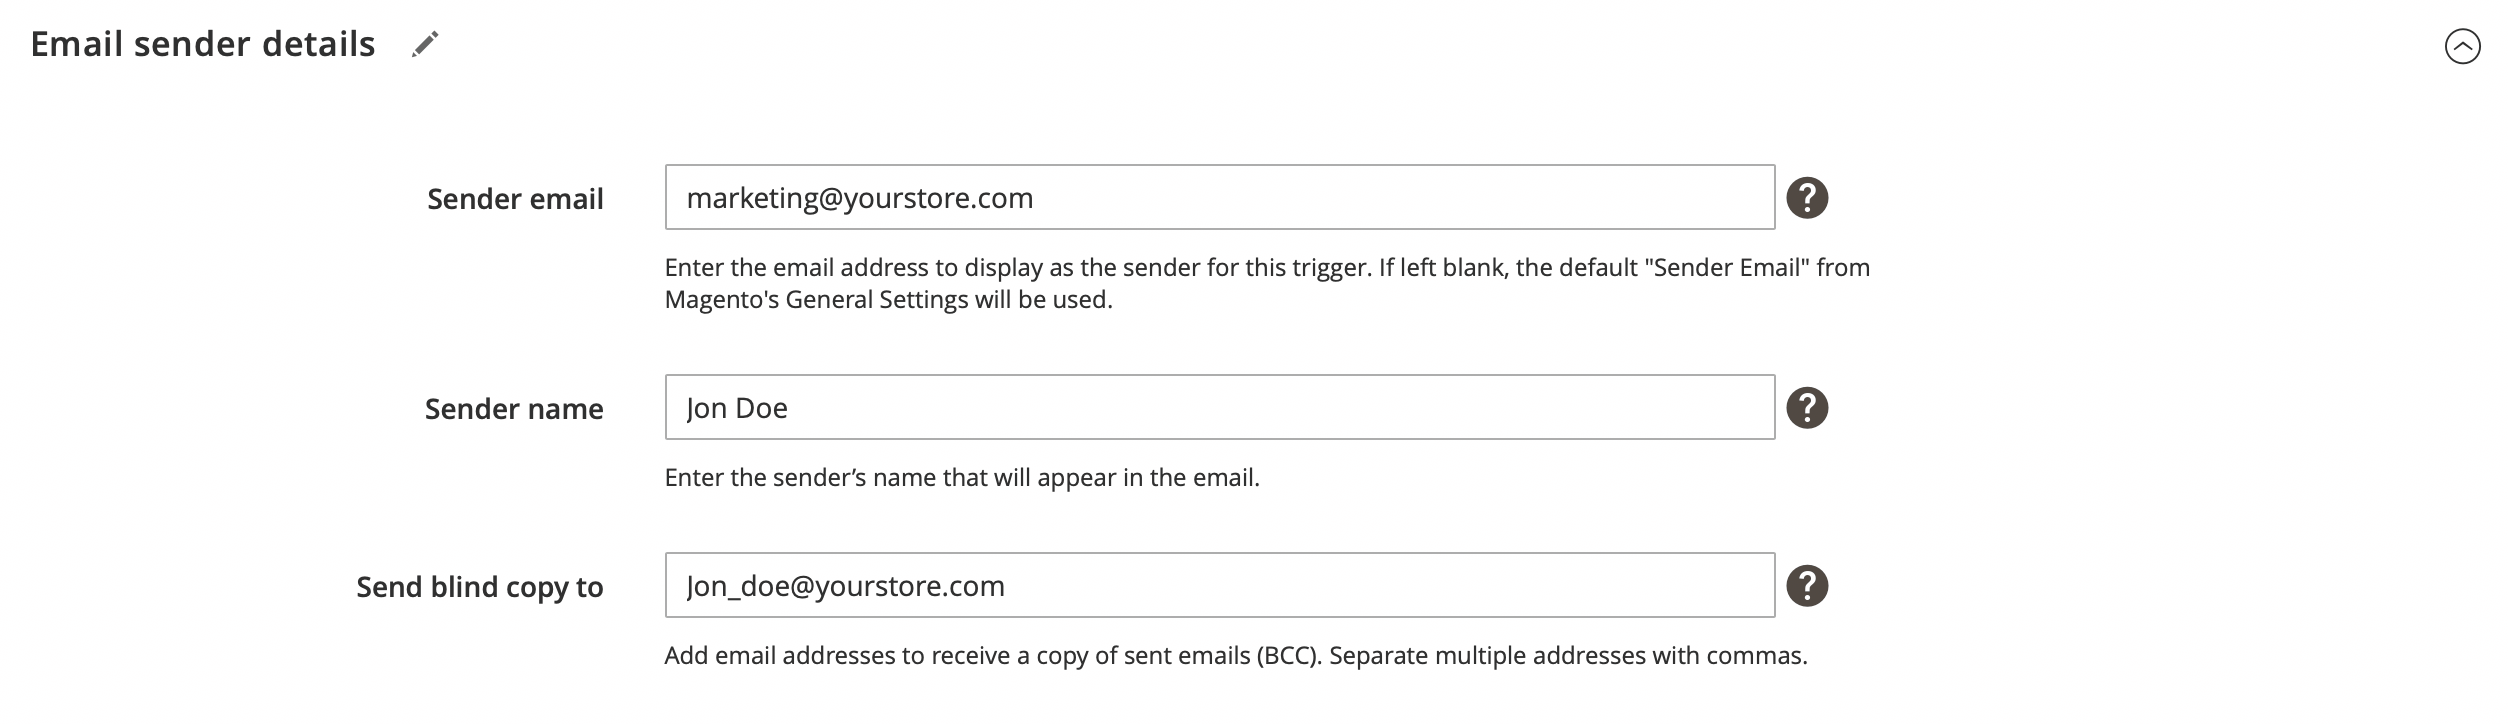
In the Email sender details section, add the Sender Email and Sender Name if you want to use a separate sender for this trigger. If you leave these fields empty, the default data from Magento's General Settings will be used. Use the Send blind copy to field to send a blind carbon copy (BCC) to the specified email address.
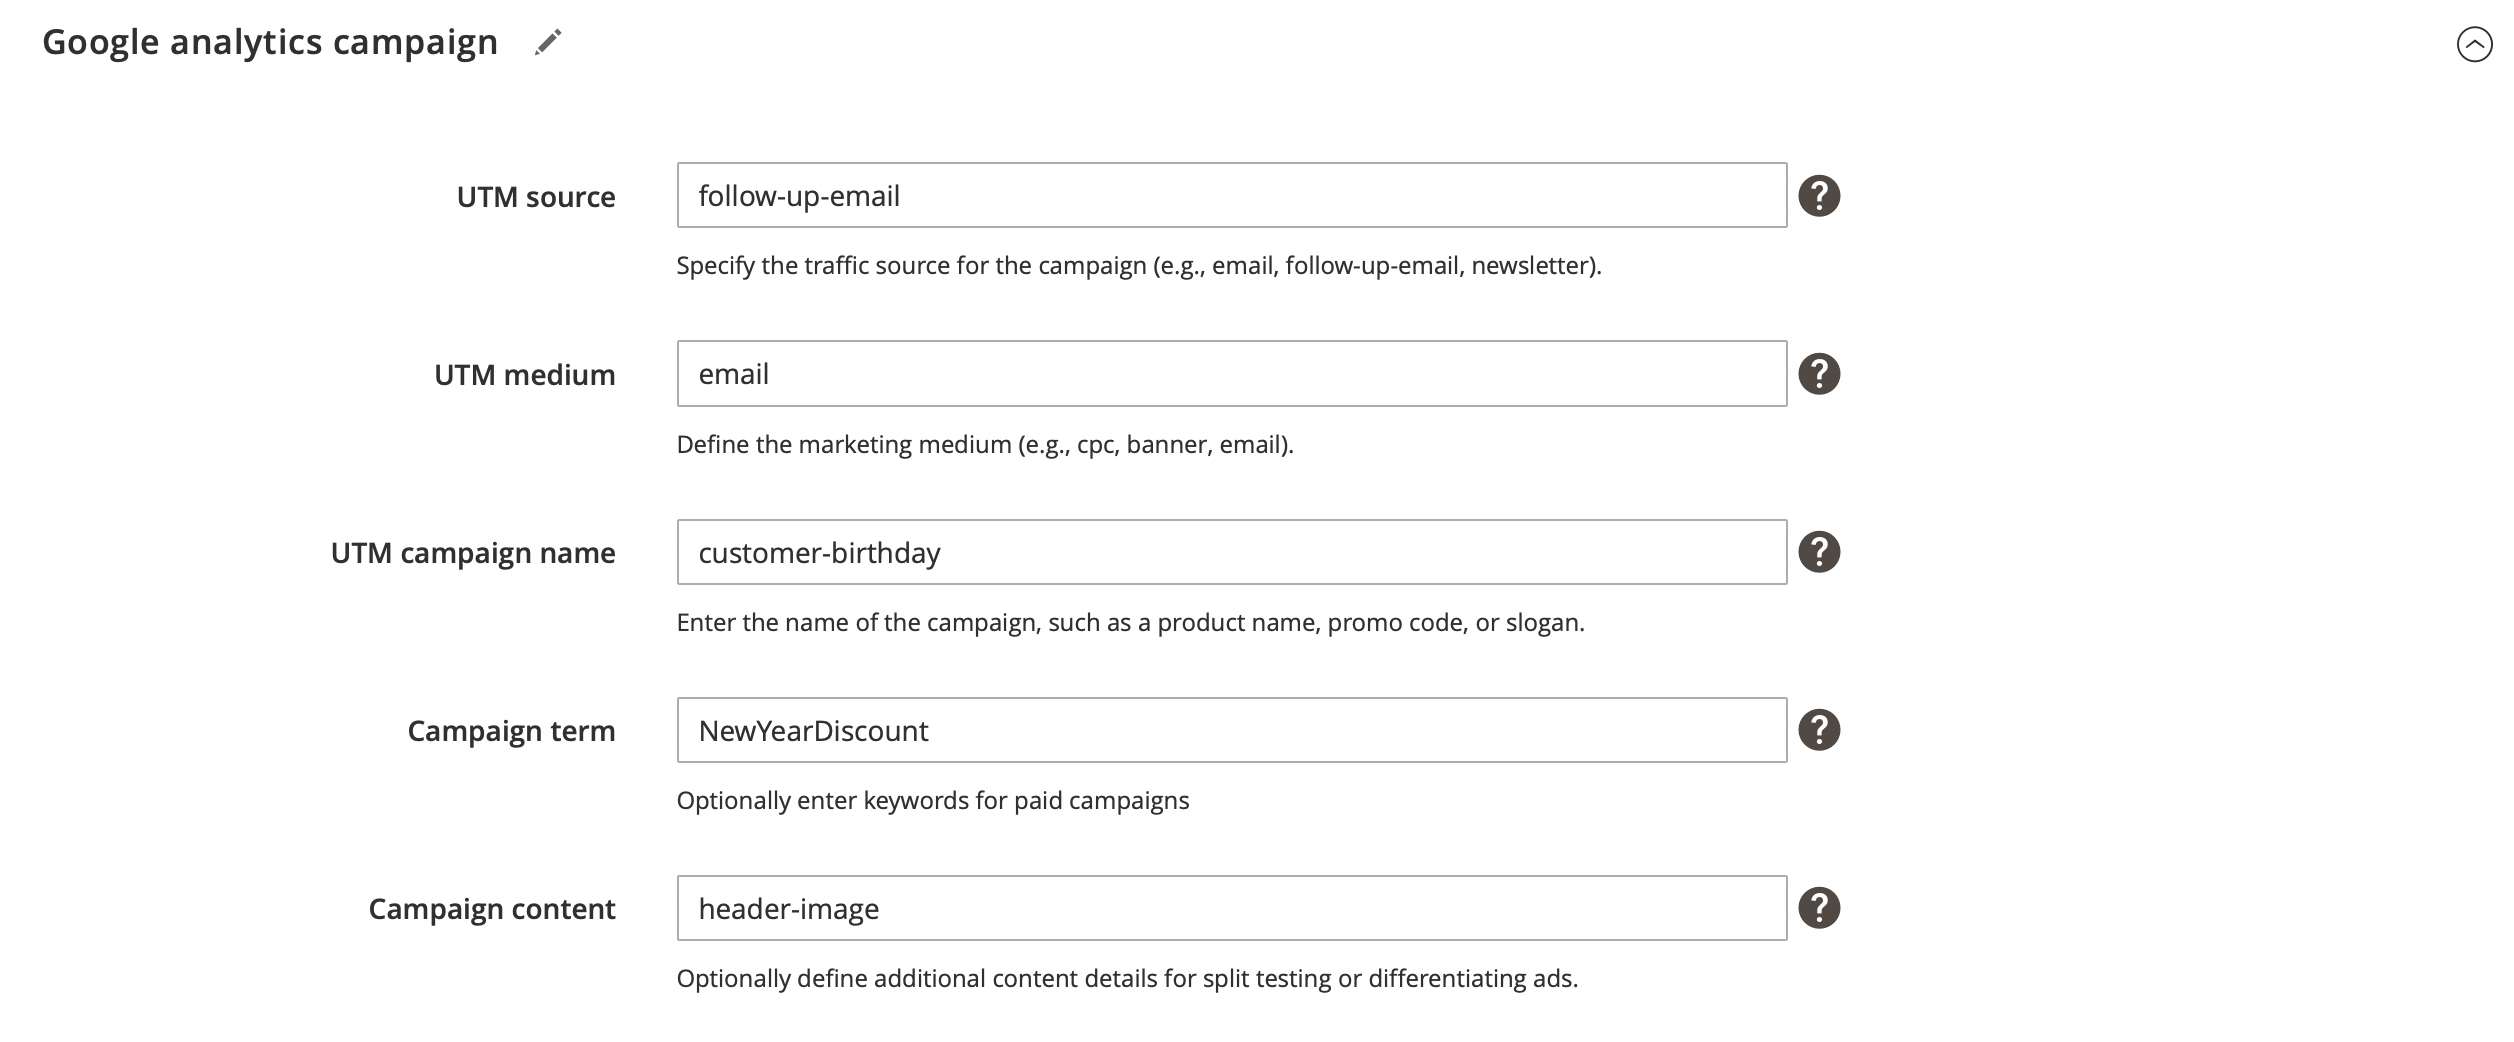
In the Google analytics campaign section set the UTM data: source, medium and campaign name to analyze the number of visits, conversion rate, time of visits, etc. for those who arrive after reading a specific email.
After configuring the Google Analytics section, the extension will automatically add special GET params to all links in the emails. This way, following them will be recorded by Google automatically without any additional adjustments.
Example: http://example.com/about-us/ will be converted to http://example.com/about-us/?utm-source=email&utm-medium=trigger-email&utm-name=review-request.
To track the campaign performance at Google Analytics, log in to your Google account and go to Traffic Sources -> Campaigns. Select the campaign source from the list, and you will receive a report.
Fill in the Campaign term and Campaign content fields to specify keywords for your paid campaign and identify ad variations in your campaign. Save your settings.
3. Set trigger audience to filter target recipients
Audience is used to define the conditions under which the message will be sent and to filter target recipients. The condition is checked right before the email is sent, and if it's not met, the email will not be sent.
Use Customer: Number of Orders is 3 to send an email only to customers who have placed three orders on the site.
4. Add email template and configure it advanced options
For a single trigger, you can configure multiple different emails with varying delays. Use this feature to send customers multiple reminders about the same event. To add an email, follow the steps below:
- Click Add Email button.
- Choose Email template for your email, you can use one of the predefined templates or create your own.
- Configure the Delivery time delay - that define a delay after which an email is sent to a recipient, e.g. 1 day later after the triggering event is registered.
- Use Excluded weekdays to prevent sending emails on selected days, such as weekends.

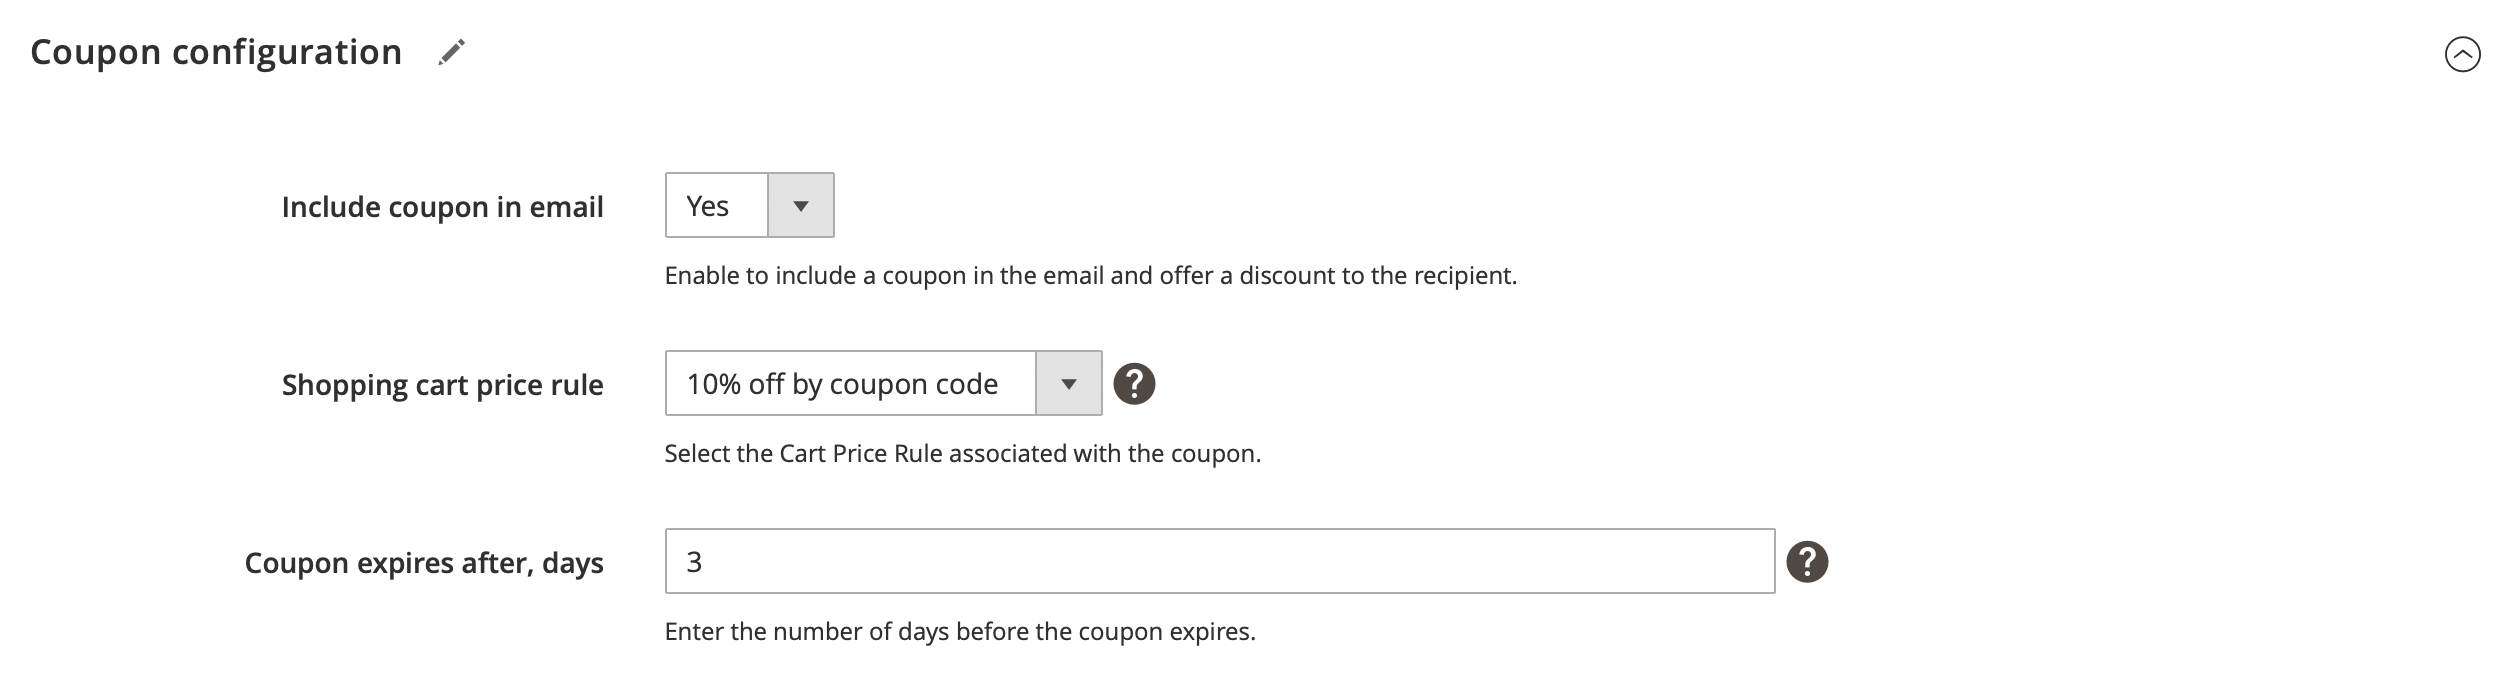
- Activate Include coupon in email and select the Cart Price Rule to provide a discount to your customers. Use Coupon expires after X days to limit the coupon's usage duration.
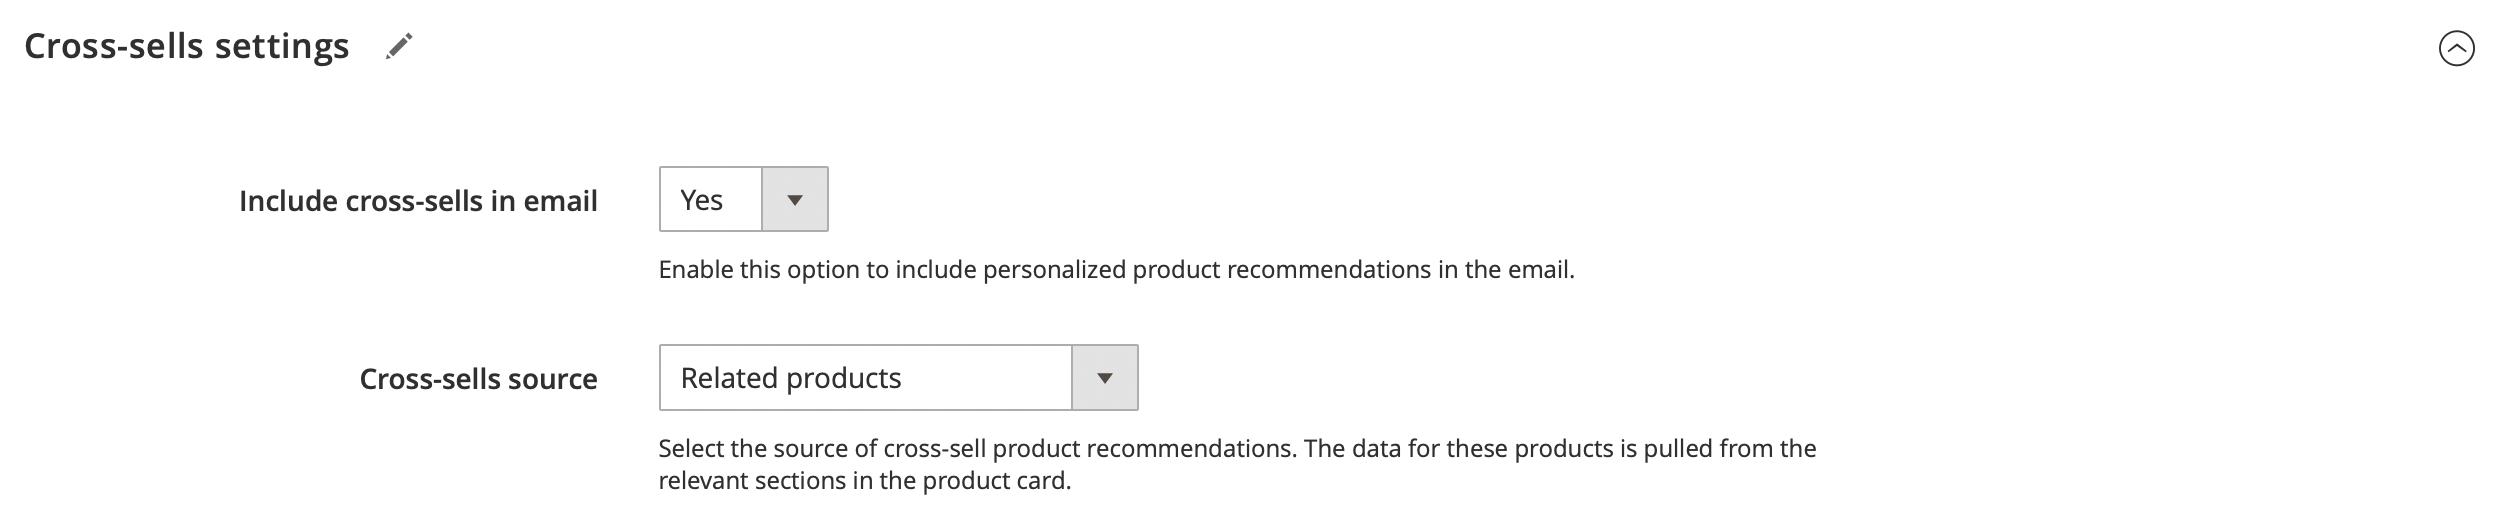
- Activate Include cross-sells in email and choose Cross-sells, Related, or Upsell products if needed.
Click the 👁 eye icon next to any email to open an inline preview modal. It shows the rendered subject (prefixed with Subject:) and the full email body, populated with sample store data. The icon is available on both the Manage Campaigns listing page and inside an individual campaign view — no page navigation required.
Study the Examples of ready-made campaigns before starting.