Layout editor
The Blog MX layout editor allows you to customize the layout of each blog page type individually — no coding required. You can choose from predefined layouts or fully tailor the structure to your store’s needs. Go to Content > Blog MX > Layout editor, or click the Layout editor button in the Layout settings section of the module configuration.
Layout editor overview
The editor interface is divided into two main sections:
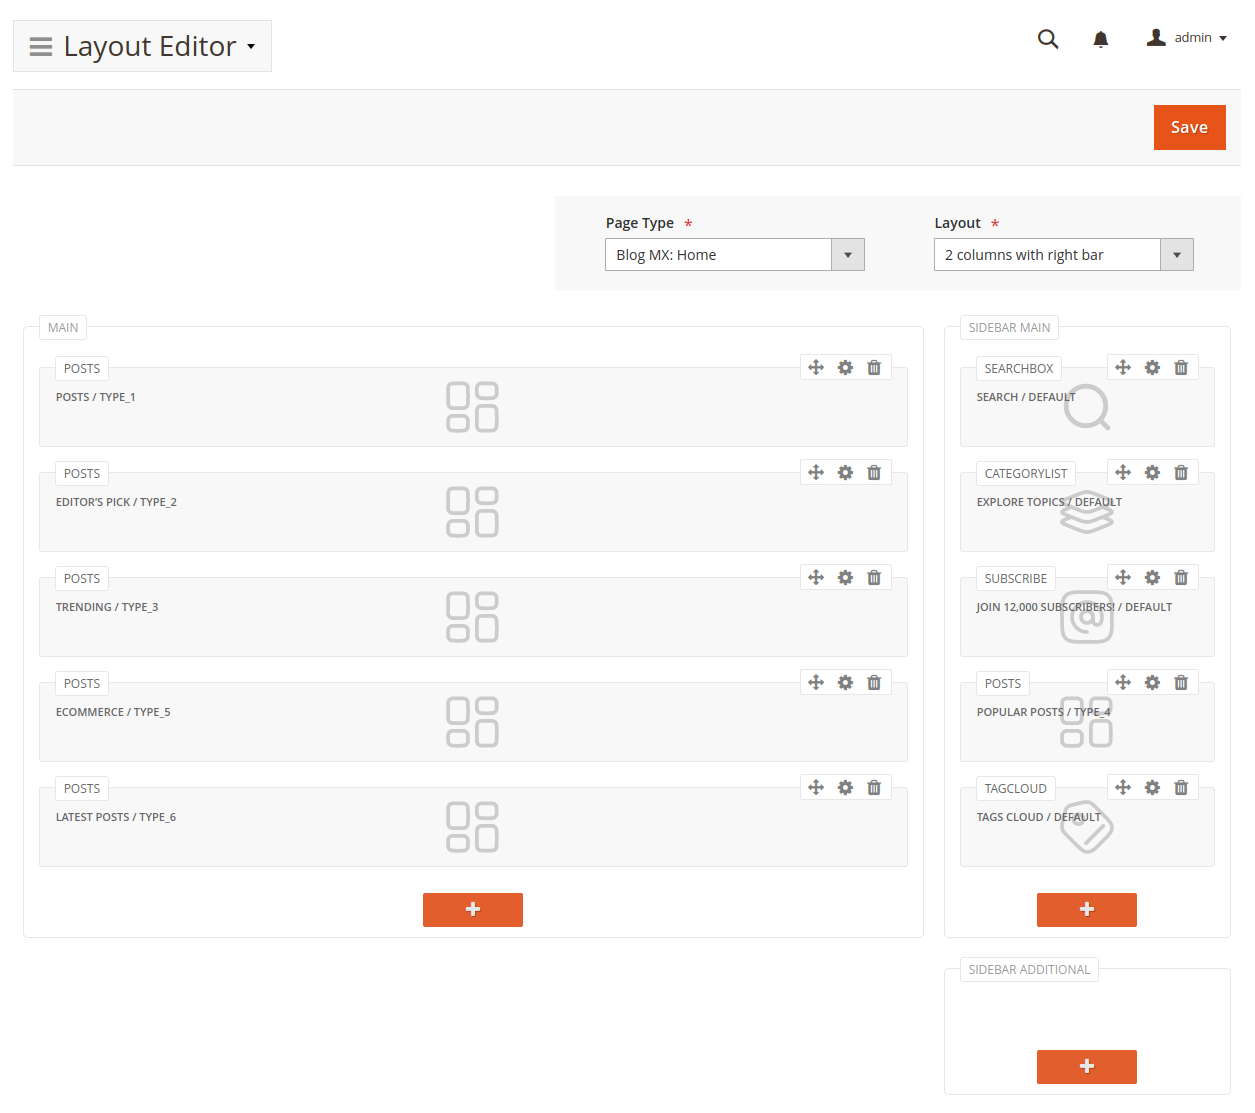
General settings
- Page type – select the type of blog page you want to configure (e.g., post view, author page, category page).
Make sure to save your changes before switching page types to avoid losing unsaved work.
-
Layout – choose the page layout structure:
- 1 column
- 2 columns with left sidebar
- 2 columns with right sidebar
- 3 columns
Layout structure editor
This section shows the layout containers, which vary based on the selected structure. Each container can hold blocks (widgets).
Managing blocks
Add a block
Click the + icon at the bottom of a container to insert a new widget block into that area.
Edit a block
Click the gear icon (⚙️) in the top right of a block to open its settings. You’ll first choose a widget type, then see the relevant configuration options based on your selection.
See Widgets for details on widget configuration.
Reorder blocks
Click and hold the drag icon (↕) to move a block to a different position or container.
Delete a block
Click the trash icon to remove a block from the layout.
Saving layouts
Once your layout is configured:
- Click Save to apply changes for the selected page type.
- Clear Magento’s cache for changes to appear on the frontend.
No layout changes will be visible until you click save and clear the cache.
Theme changes
Whenever a layout is saved, Blog MX generates corresponding widget instances for all active themes in the store.
If you switch to a new theme (or activate an unused one), you must manually regenerate layouts using the following CLI command:
bin/magento mirasvit:blog:update-layout
What it does:
This command updates Blog MX widgets for all currently active themes, ensuring layouts display correctly across all store views.