How to create prompt
A Prompt is a central point in our AI Assistant extension. It is used to specify how the extension will interact with AI provider, configure input/outputs, and bind prompts to Magento fields through Selectors. A prompt is created separately for different scopes and allows the use of Variables available for them.
You can create a new prompt by pressing the Add new button at System -> AI Assistant -> Prompts.
1. Set general settings
Specify a unique Code, add a Title, and set the prompts sort order (higher values are used first). Then enable your prompt.
2. Choose AI provider and model
By default, prompt will use extension or global config settings. But if you have a few providers or would like to use specified model for this prompt you can set own AI provider and AI model. Set Frequency penalty for your model (from 0 to 1) and Stop sequences.
3. Choose your scopes
Set the Scopes field to define the types of data the prompt will be used for. You can select multiple types at once. The extension currently supports default Magento products, categories, CMS pages, and is integrated with several Mirasvit extensions: Help Desk, Blog Mx, Knowledge Base. If you can't find your data type, please contact our Support team.
4. Set field selectors
Choose the field selector that the prompt will interact with. One prompt can be linked to several fields at once. Specify no more than one selector per line.
If you're using a custom field, you can obtain the selector by following these steps:
-
Open the Magento backend page with the custom field.
-
Open the browser's developer panel and locate the custom field.
-
Copy the selector name from the developer panel and paste it into the Selector field.
exampleFor the
URL Keyfield, the selector will beproduct[url_key]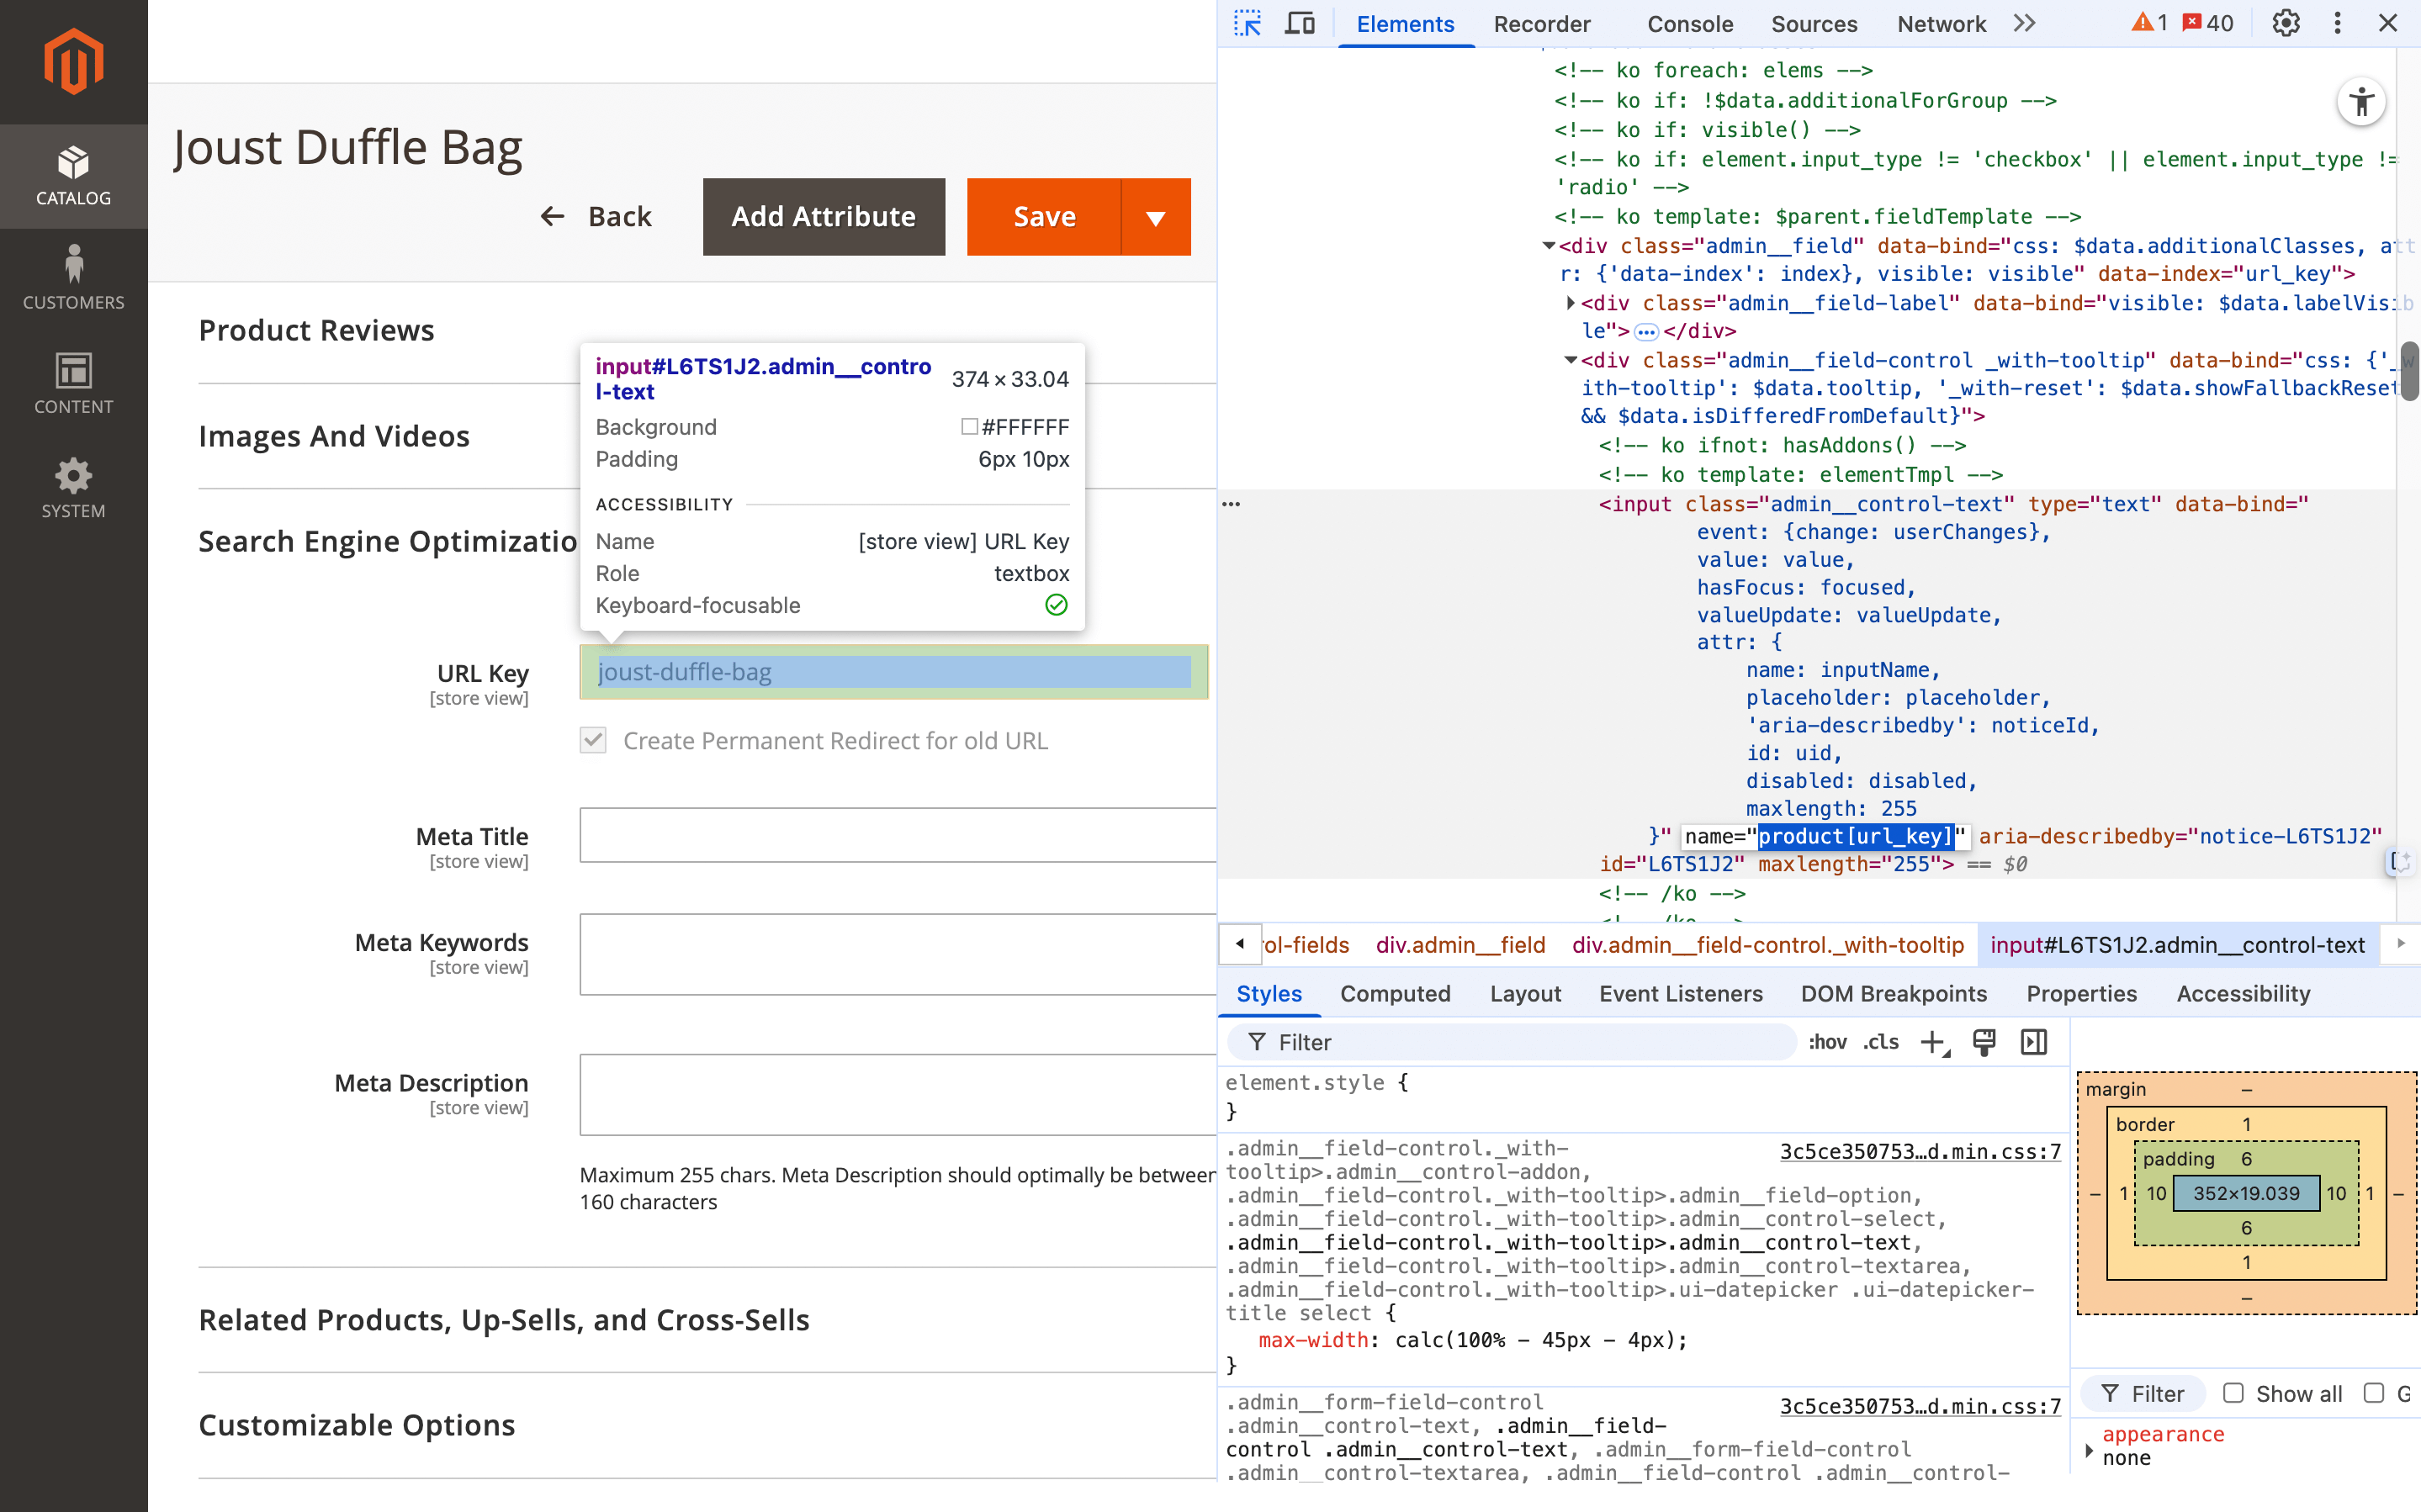
Selector for custom field After adding the custom selector to the prompt, the extension will be able to add its button to this field and work with it.
5. Select system message and create prompt
Select a system message from the dropdown if you need to provide additional instructions for the model. And compose your prompt, which usually consists of an instruction for AI provider, where you describe what needs to be done, and variables in the form of {{ variable_name }} that allow you to retrieve data from the selected scope.
A prompt for creating a Meta title for a product page might look like this:
  Write a meta title on the following product information:
  Product attributes:
  {{ product.attributes }}
  Write in the same language as the initial text.
  Meta Title:
When this request is sent to AI provider, the extension will retrieve the available product attributes and include them in the request.
The prompt uses a Liquid engine to process variables. If you're unsure whether some products have values for a specific attribute, you can use the IF condition, like this:
{% if product.color %}
  Color: {{ product.color }}
{% endif %}
6. Finish configuration
Fill in the remaining mandatory fields in the prompt and save the changes.
After saving the prompt, you should see the extension button near your field with your prompt.