How to configure Google ads
Connect Google Ads to your Google Tag Manager setup to monitor ad performance and track conversions directly from your Magento store. By integrating Google Ads, you gain access to real-time insights, allowing you to optimize your ad campaigns, attract more relevant traffic, boost conversion rates, and improve the efficiency of your ad spending.
Follow these steps to configure Google ads:
Create conversion
For more detailed guidance, refer to the official Google Ads documentation.
- Go to the Google Ads website.
- Click Sign in and log in using your Google account credentials.
- Once you're logged in, click on the Goals icon on the dashboard.
- Under the Conversions section, click on Summary.
- In the Conversions section, you will see a list of existing conversion actions if you’ve already set them up. If you don’t have any conversions set up, click the Create conversion action button and follow the prompts to create one.
- Select Website as the source for your conversion tracking if you're creating a new conversion action.
- Choose a goal category (e.g., purchases, leads, etc.) based on your tracking needs, and fill in the necessary details.
- Click Set up button and select Create a manual event. Enter the name for conversion and press Use event
- Click Save and continue then press Finish
Get Conversion ID and Conversion label
- After creating or selecting a conversion action, click on the conversion action you wish to use for tracking.
- Under the Tag setup section, choose Use Google Tag Manager.
- In the tag setup details, you will find:
- Conversion ID: a unique identifier for your conversion action.
- Conversion label: a specific identifier that tracks the type of conversion event.
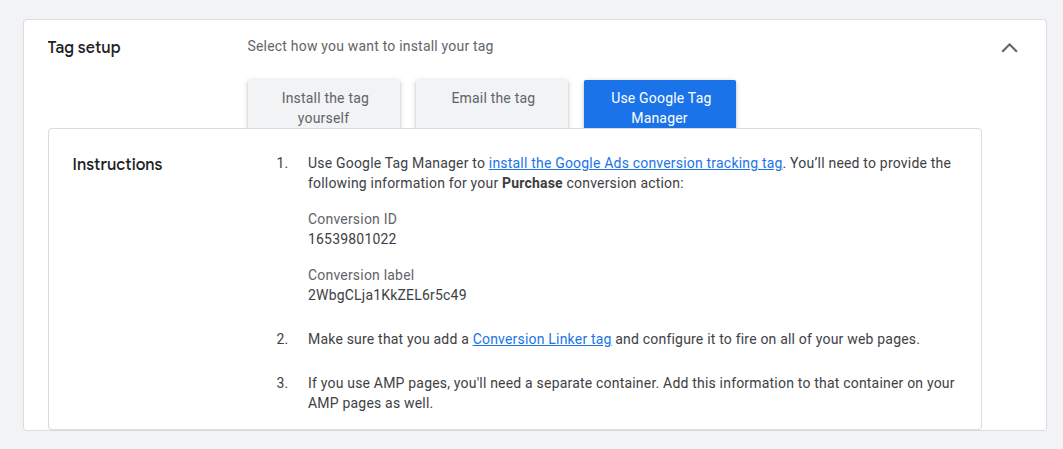
Conversion id and label - Copy both the Conversion ID and Conversion label for later use in your Magento store configuration.
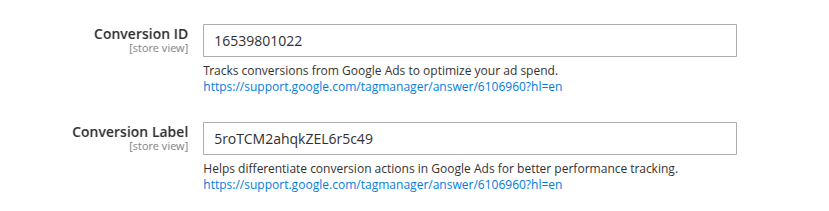
- Go to Store -> Configuration -> Google Tag Manager.
- Enter the Conversion ID and Conversion label to set up conversion tracking for Google Ads within your store.
Google ads configuration
Import file for Google ads conversion
- In your Magento 2 admin panel, navigate to Stores -> Configuration -> Google Tag Manager -> Google Ads.
- Press Download Import File for Google Ads Conversion to download the pre-configured container file.
- Go to your Google Tag Manager account.
- Select the GTM account and container where you want to import the pre-configured setup.
- In your GTM dashboard, click on the Admin tab in the top navigation bar.
- Under the Container column, click on Import container.
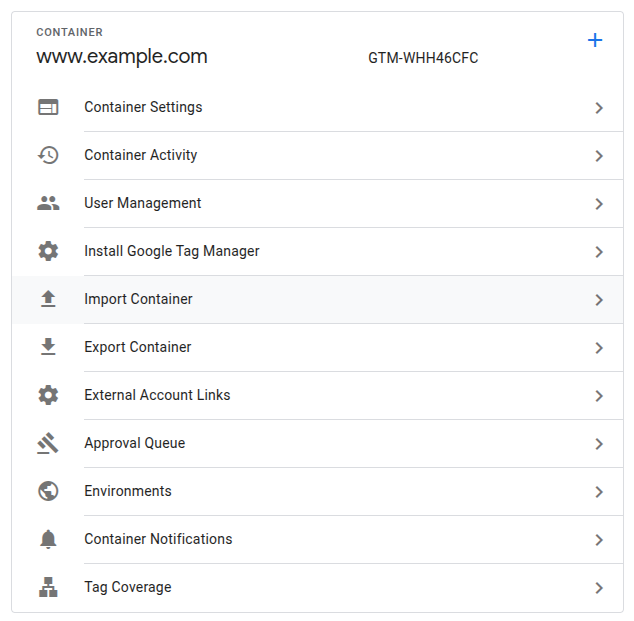
Admin section - In the Import container screen, click Choose container file and select the file you downloaded from your Magento store.
- Choose the appropriate workspace where the container will be imported.
- Select Merge to keep existing tags.
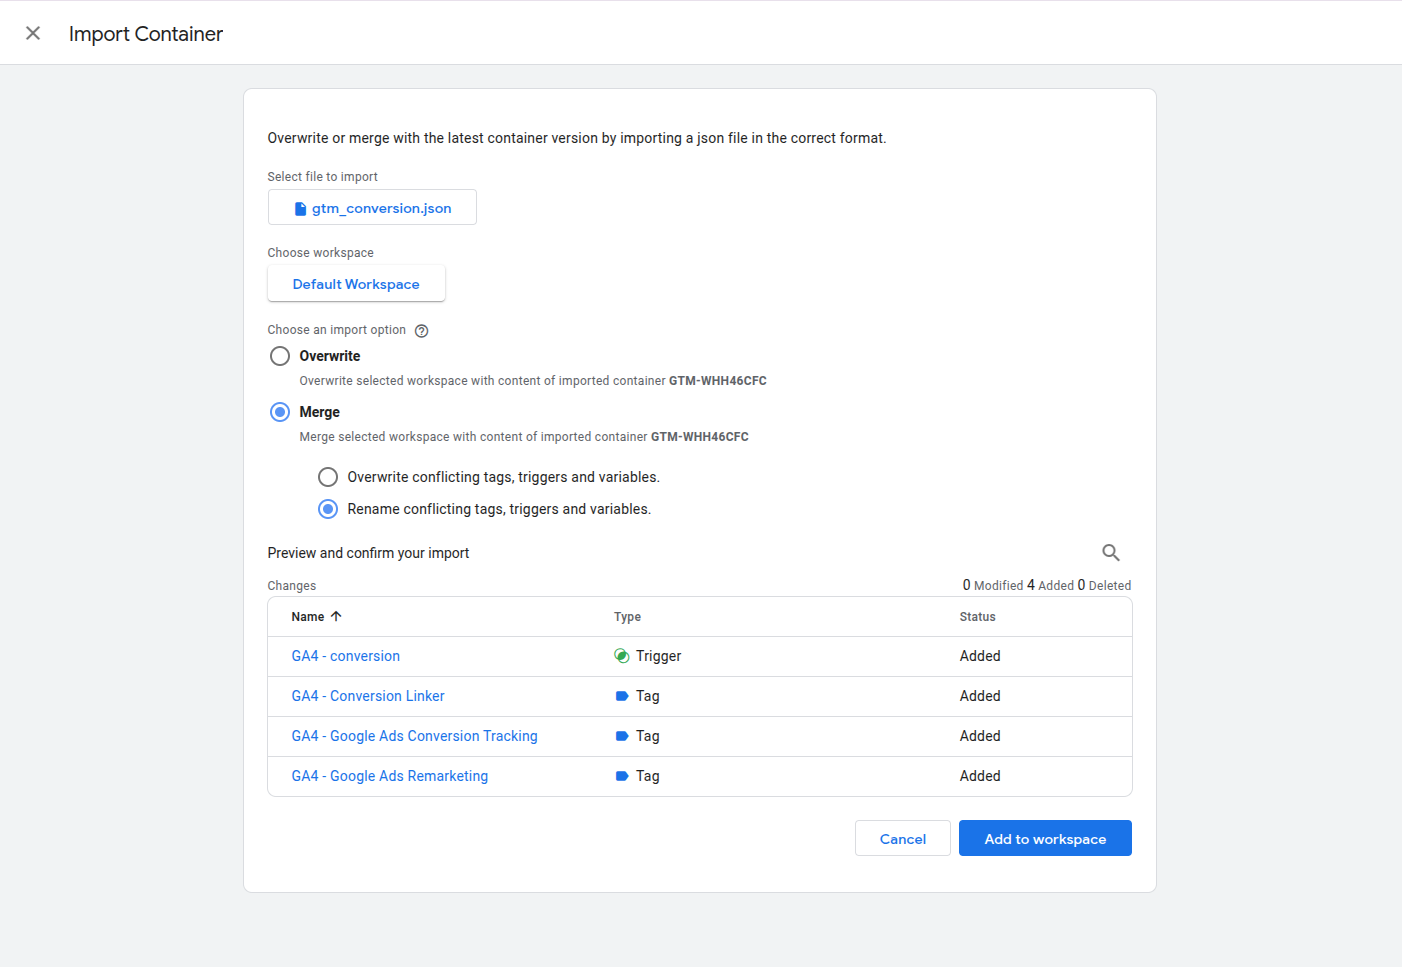
Google ads import - Click Confirm to proceed.
- Review the imported tags, triggers, and variables to ensure they meet your requirements.
- Once satisfied, click Submit to publish the container and make it active on your site.
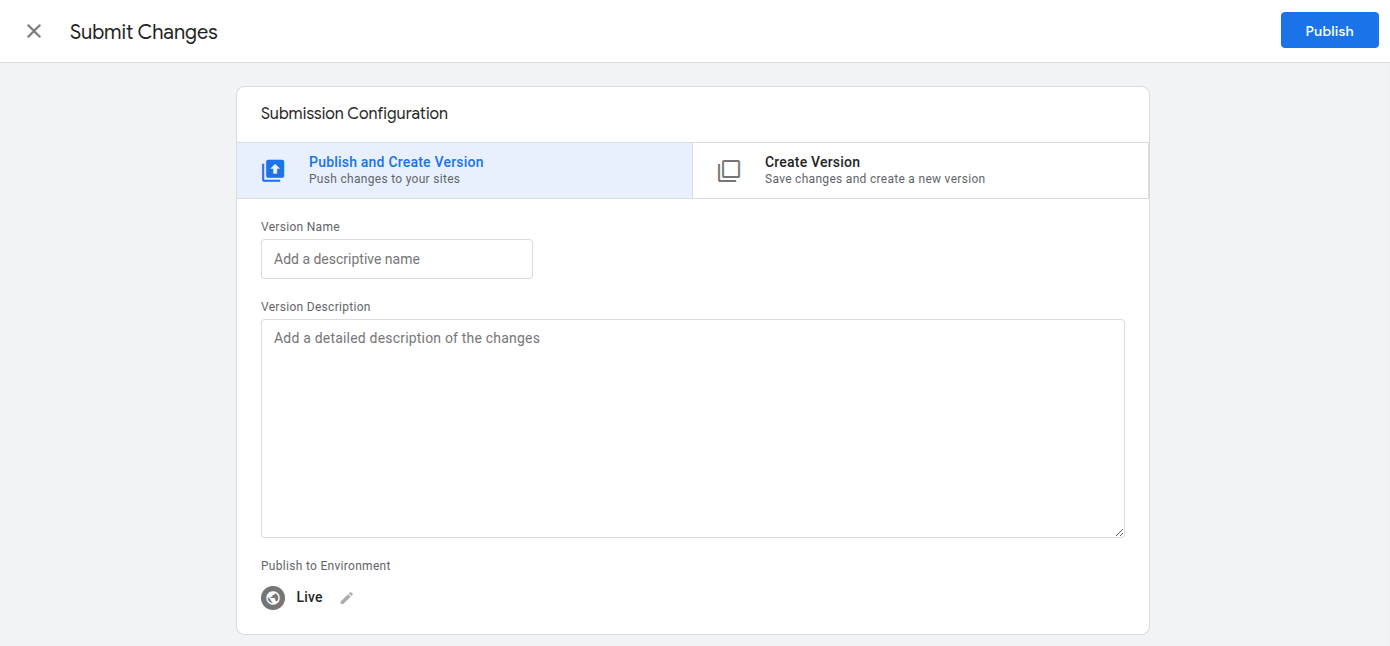
Submit changes