How to set up enhanced conversion
Enhanced conversions allow you to improve the accuracy of your conversion tracking by sending hashed first-party customer data (like email, name, and phone number) from your website to Google Ads. This helps attribute conversions more effectively and improve campaign performance.
Follow these steps to set up Enhanced conversions in Google Tag Manager (GTM):
Sign in to Google Ads and enable Enhanced Conversions
- Log in to your Google Ads account.
- Once you're logged in, click on the Goals icon on the dashboard.
- Under the Conversions section, click on Summary.
- Click on the conversion action to edit it.
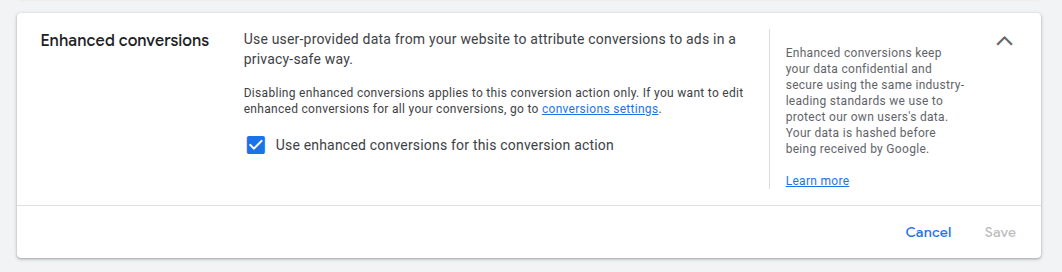
- Scroll down to the Enhanced conversions section, then click Turn on enhanced conversions.
- Click Save.
Set up enhanced conversion in Google Tag Manager
To set up enhanced conversion in Google Tag Manager, firstly you should configure Google ads in your GTM. Refer to How to configure Google ads section of our documentation to configure Google ads.
Then follow these steps:
- Go to Google Tag Manager and log in with your Google account.
- Select the container for the website where you want to set up Enhanced conversions.
- Go to Tags.
- Click New to create a new tag.
- In Tag configuration, select Google Ads User-Provided Data Event tag type.
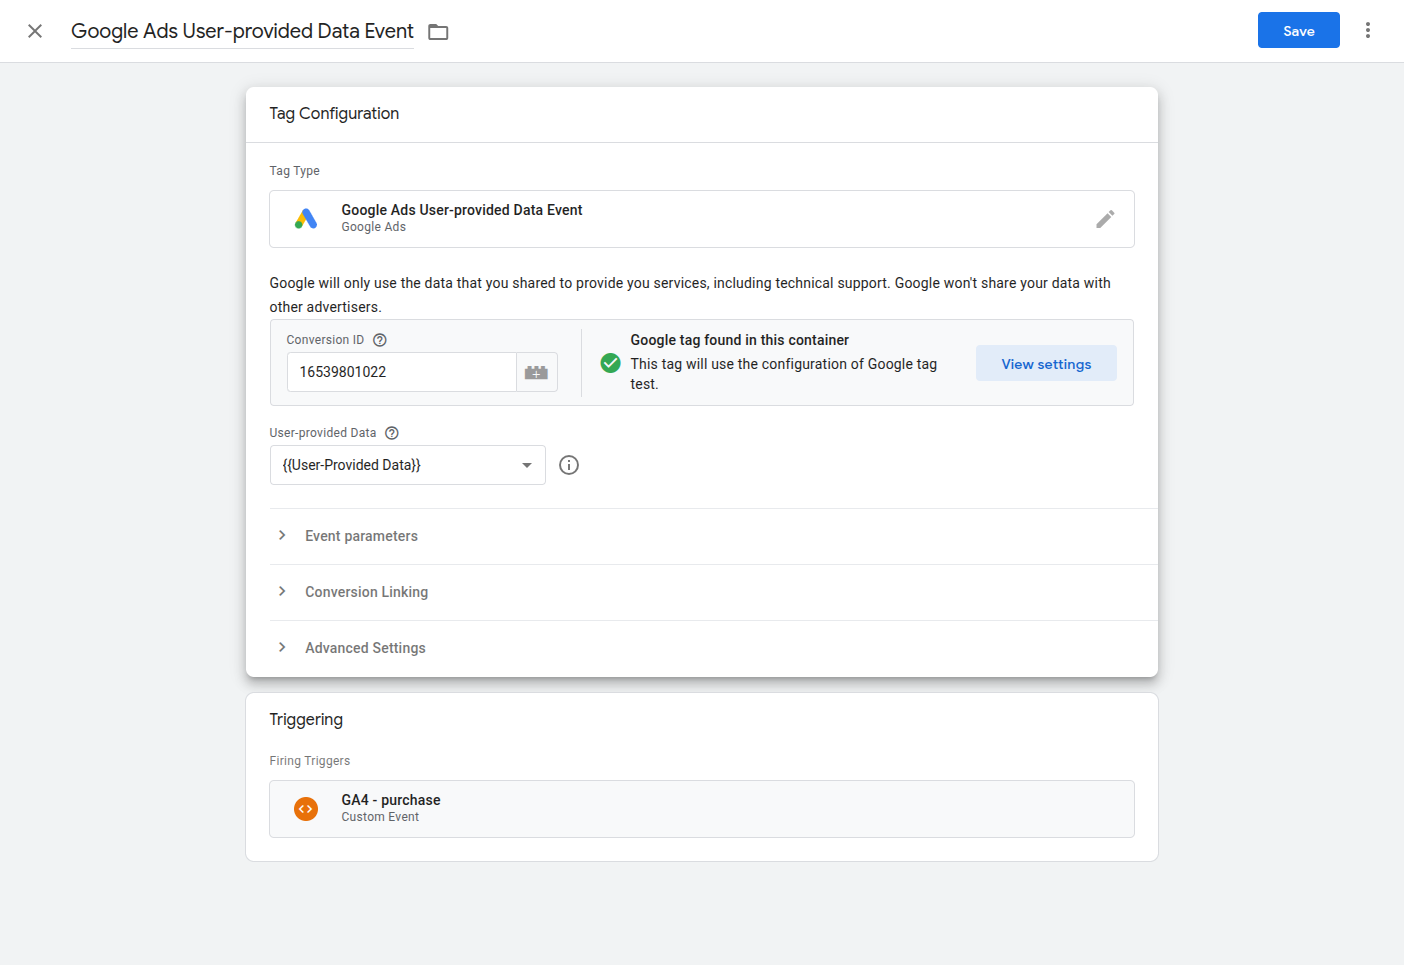
User-Provided Data Event tag - Enter your Conversion ID (the same ID that is used in your Google Ads conversion tracking tag).
- In the User-provided data section, click New Variable to create a User-Provided Data variable.
- Choose Manual configuration (Google recommends configuring this manually to ensure correct data mapping).
- Map your variables to the corresponding user data fields. For example:
- Email -
{{DL - ecommerce.email}} - Phone -
{{DL - ecommerce.phone_number}}
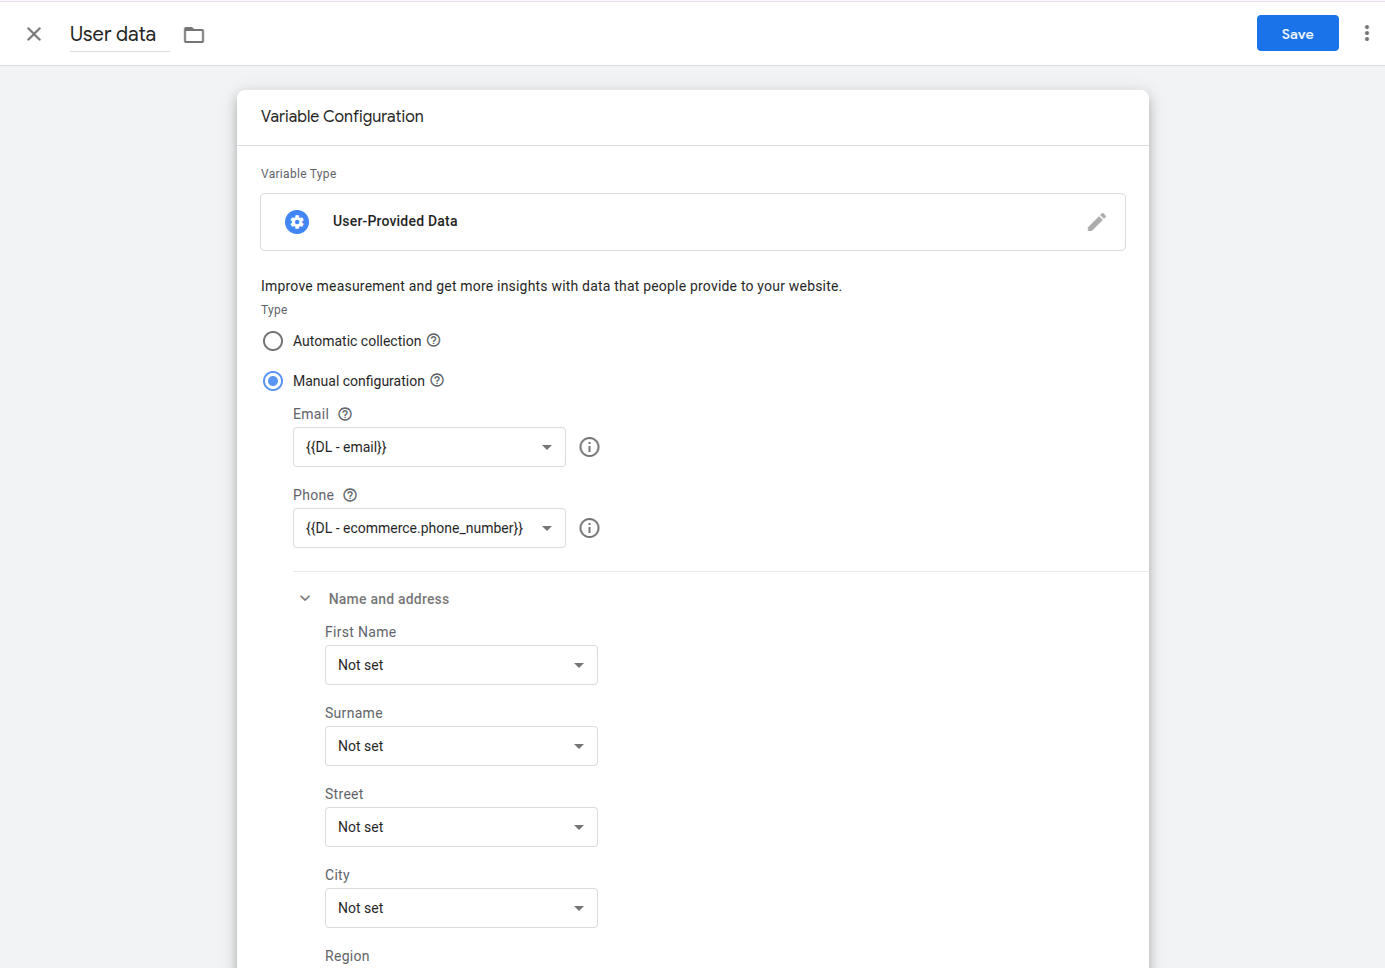
User-provided data configuration - Email -
- Save the User-Provided Data variable.
- In the Triggering section of the tag, select the purchase event.
- Save the tag.
- Click Submit and Publish your container to apply the changes.
- For other fields you should create variables and set them to corresponding fields. Refer to next section to set up variables.
Set up variables for customer data
- Go to the Variables section in GTM.
- Click New and select Data layer variable.
- Enter a name for the variable (e.g.,
DL - first name) - Set the Data layer variable name to match the data layer used on your website for the customer information. It should path to the variable in data layer. For example
ecommerce.first_name.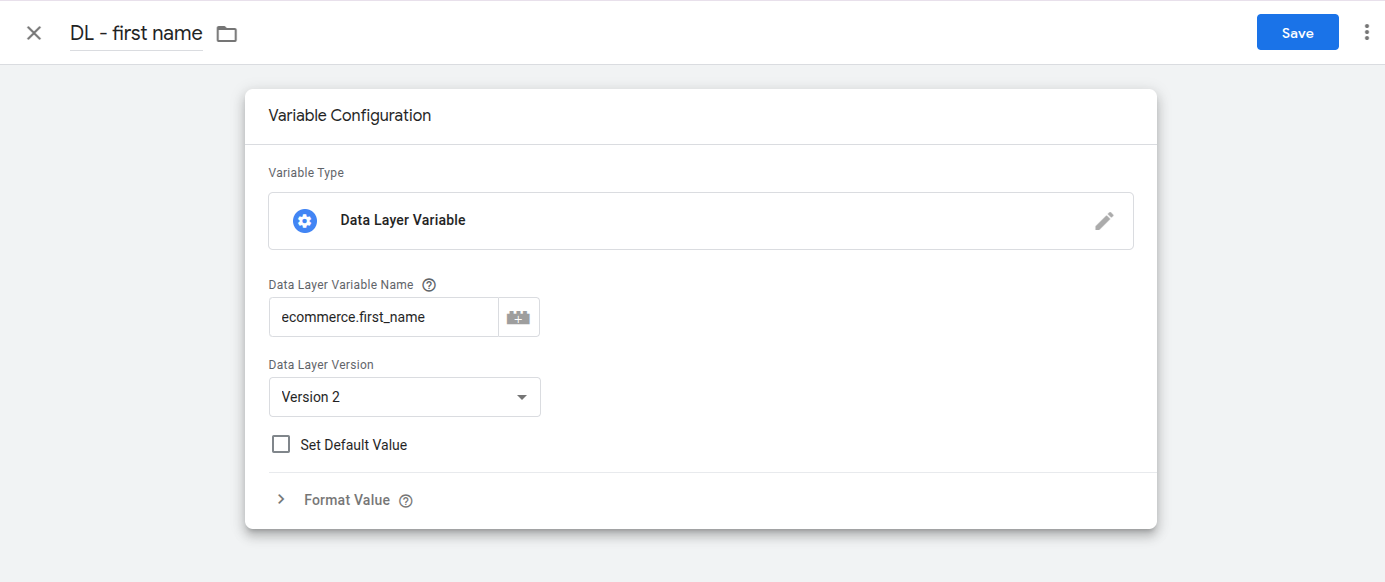
Data layer variable - Repeat this process for each field you need to use in user-provided data.
- Once the variables are set, go to the Variables section open User data variable and map the variables to the corresponding fields in the Enhanced conversions section.
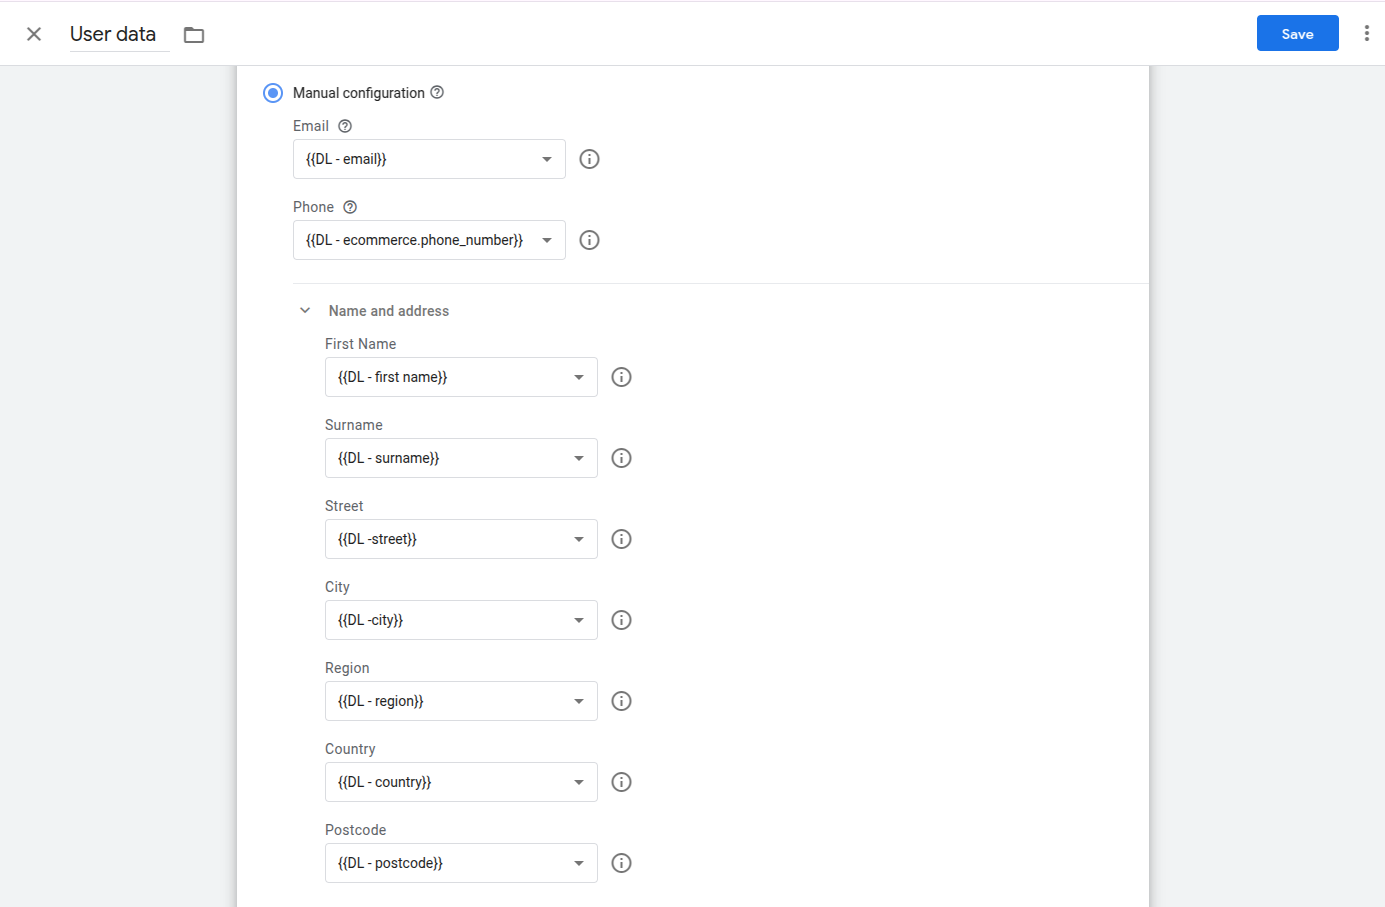
User data
Test your enhanced conversion data and publish changes
- In Google Tag Manager, click on Preview to enter Debug mode.
- Navigate to your website and trigger the conversion event (e.g., completing a purchase).
- In the debug panel, verify that the Google Ads conversion tag fires correctly, and check if the Enhanced conversions data is being sent.
- Once you’ve verified that the Enhanced Conversions tag works correctly, go back to your GTM workspace.
- Click Submit to publish your changes and activate Enhanced Conversions on your site.