How to use Tag Assistant in Google Tag Manager
Tag Assistant is a tool that helps you verify if your Google Tag Manager (GTM) tags are working properly on your website. It allows you to preview and debug your tags before publishing them, ensuring they fire correctly when users interact with your site.
Follow these steps to use Tag Assistant in Google Tag Manager:
Access Tag Assistant
- Sign in to your Google Tag Manager account.
- Select the container for the website you want to work on.
- From the workspace, click the Preview button in the top-right corner. This will open Tag Assistant in preview mode, allowing you to test your tags without affecting the live version of your website.
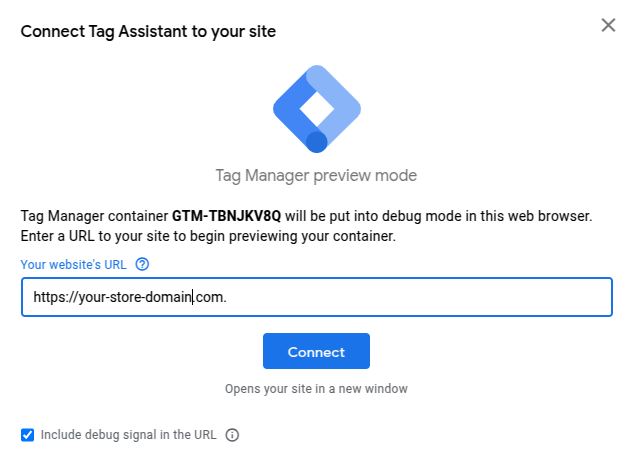
- After clicking Preview, you will be redirected to a new window for Tag Assistant. Enter the URL of the webpage where you want to test your tags (typically the homepage).
- Click Connect to load the website in preview mode. The website will open in a new tab, and Tag Assistant will start tracking the events and tags fired on the page.
Preview
View tag firing activity in Tag Assistant
- On the left-hand side of the Tag Assistant window, you’ll see a list of Events that occur on the page as you interact with it.
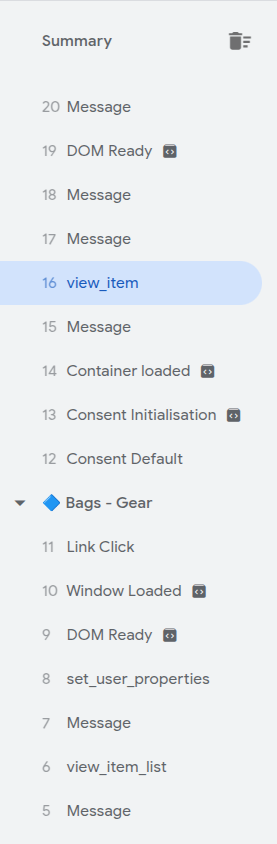
Events list - As you perform actions on the website (e.g., clicking a button, submitting a form, or completing a purchase), Tag Assistant will record the tags that are triggered for each event.
- For each event, you’ll see a breakdown of:
- Tags fired: tags that successfully fired during the event.
- Tags not fired: tags that were set up but didn’t meet the conditions to fire.

Tags tab
Check variables and data layer
-
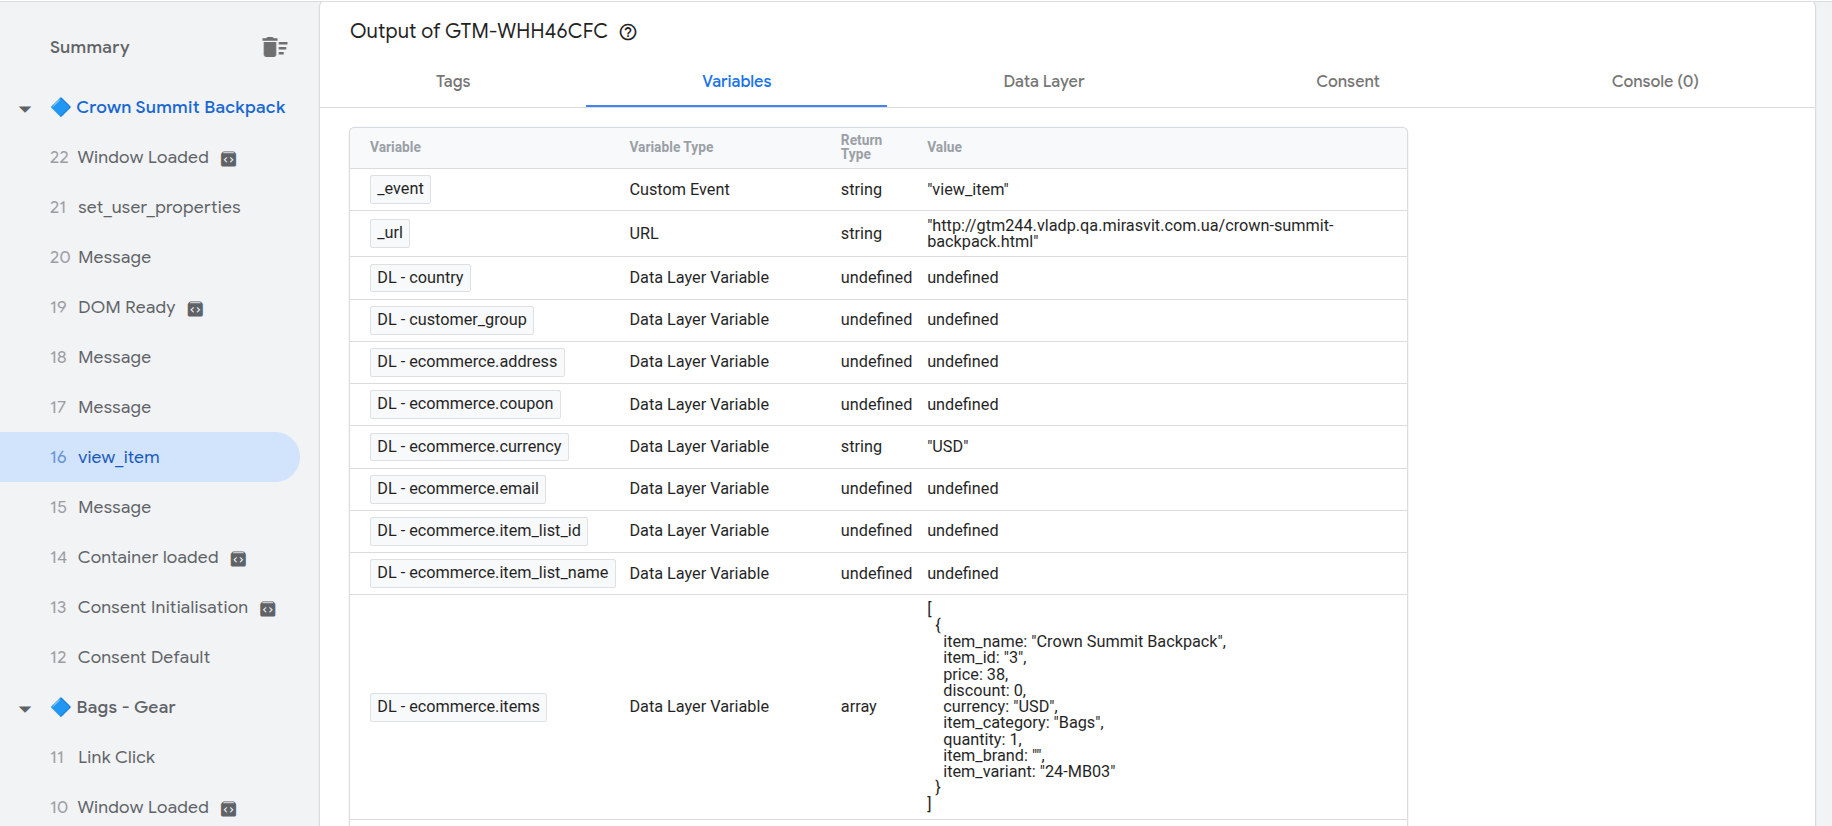
In Tag Assistant, you can also inspect the Variables and Data layer for each event.
- Click on the Variables tab to view the values being passed to Google Tag Manager (e.g., page URL, form ID, conversion value, etc.).
Variables tab - Click on the Data layer tab to see the raw data that Google Tag Manager is processing for the current event.
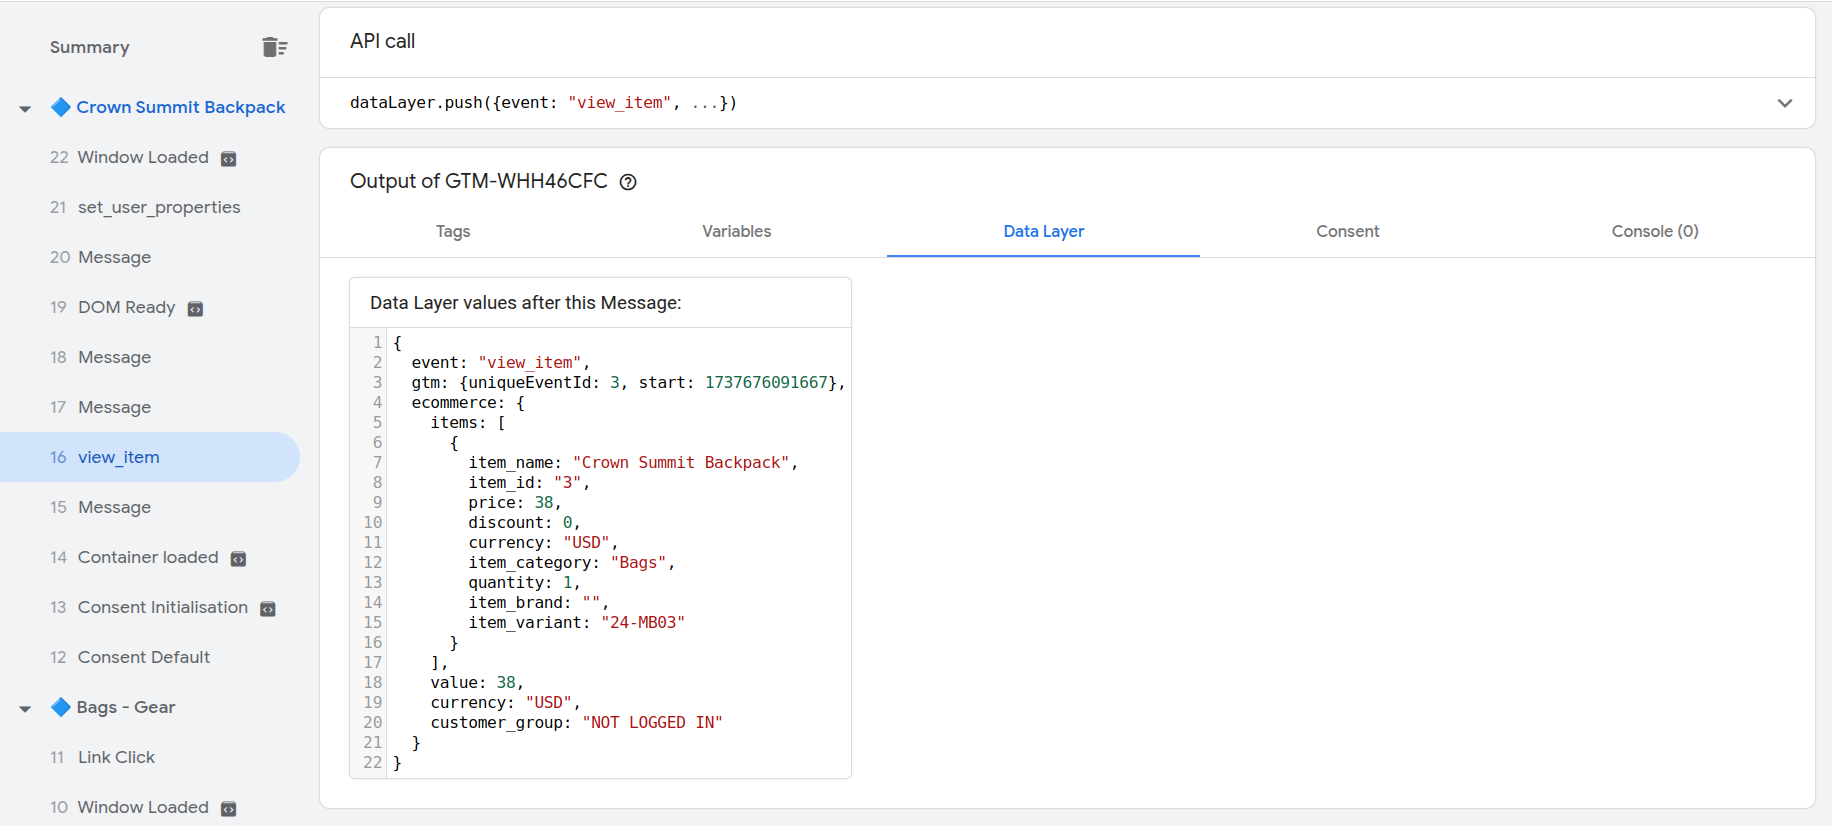
Data layer tab -
Ensure that the correct data (e.g., user email, transaction ID, product details) is being passed to your tags.
Test your tags
- As you test different user interactions on the site, monitor how the tags behave for each event. For example, view product, add item to cart or complete a purchase.
- Verify that the tags you’ve configured are firing correctly.
- For each tag, you can check the Tag type, the Trigger that caused the tag to fire, and the Data layer values passed to Google Tag Manager.
- If a tag isn’t firing, check the trigger conditions and the data being passed in the Data layer to troubleshoot the issue.
- If you identify any issues with tags not firing or incorrect data being passed, return to the Google Tag Manager workspace and make the necessary adjustments to your tags, triggers, or variables.
- After making changes, return to Tag Assistant by clicking Preview again and test the updated configuration.