Setting Up an Email Trigger
A Trigger is an event or sequence of events that, as a result, generates a chain of emails.
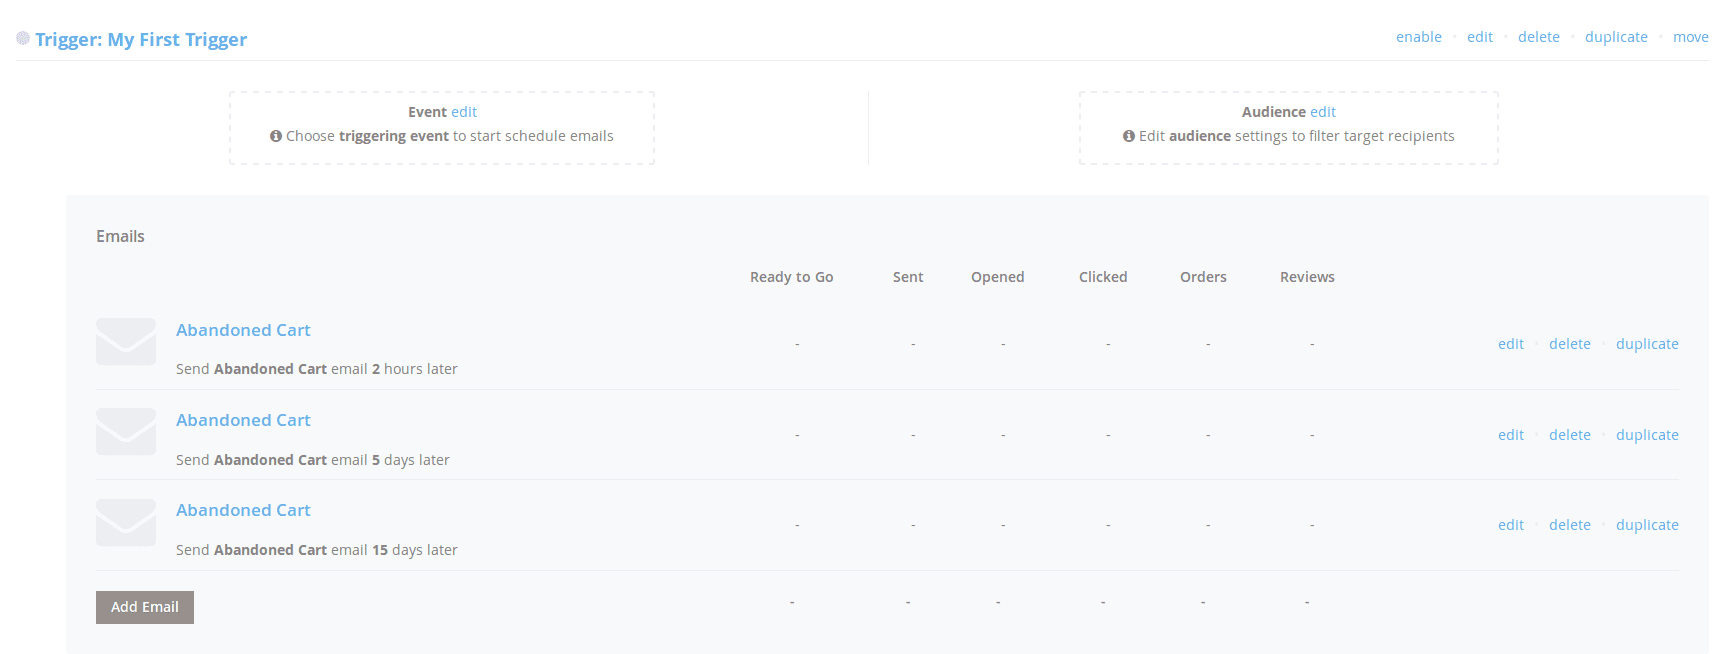
Each campaign has at least one trigger attached to it. To edit the trigger, you need to proceed to Marketing -> Follow-Up Email -> Manage Campaigns and select a Campaign, or directly click on the corresponding button on the Trigger Pane.

Each trigger has its own sub pane on the Campaign edit page.
It has two basic parameters that are required for proper work:
- Event - the action that will trigger email sending;
- Audience - the customers' group who are eligible to receive emails.
Assigning an Event
Event - a certain action of a visitor (e.g., login, registration, placing an order) or action of a system (e.g., change order status, change of price).
To assign an event to Trigger, press the edit link on the Event block. You will be asked for two parameters:
- Triggering Event - the event that launches a campaign;
- Cancellation Event - the event that will stop sending emails.
Both parameters use the same Event List which can be seen here.
Example
If you need to send follow-ups for tracking order status, then:- Triggering Event:
Sales / Order obtained Pending status - Cancellation Event:
Sales / Order obtained Completed status
Marking an Audience
The audience is defined as the group of customers who are eligible to receive emails during the current campaign.
This block can be empty: in this case, all of your customers will be eligible for the campaign and email sending. However, if you wish to have different email flows for different groups of customers, you need to mark Audience.
You need to press the edit link on the Audience block to view the audience's conditions.
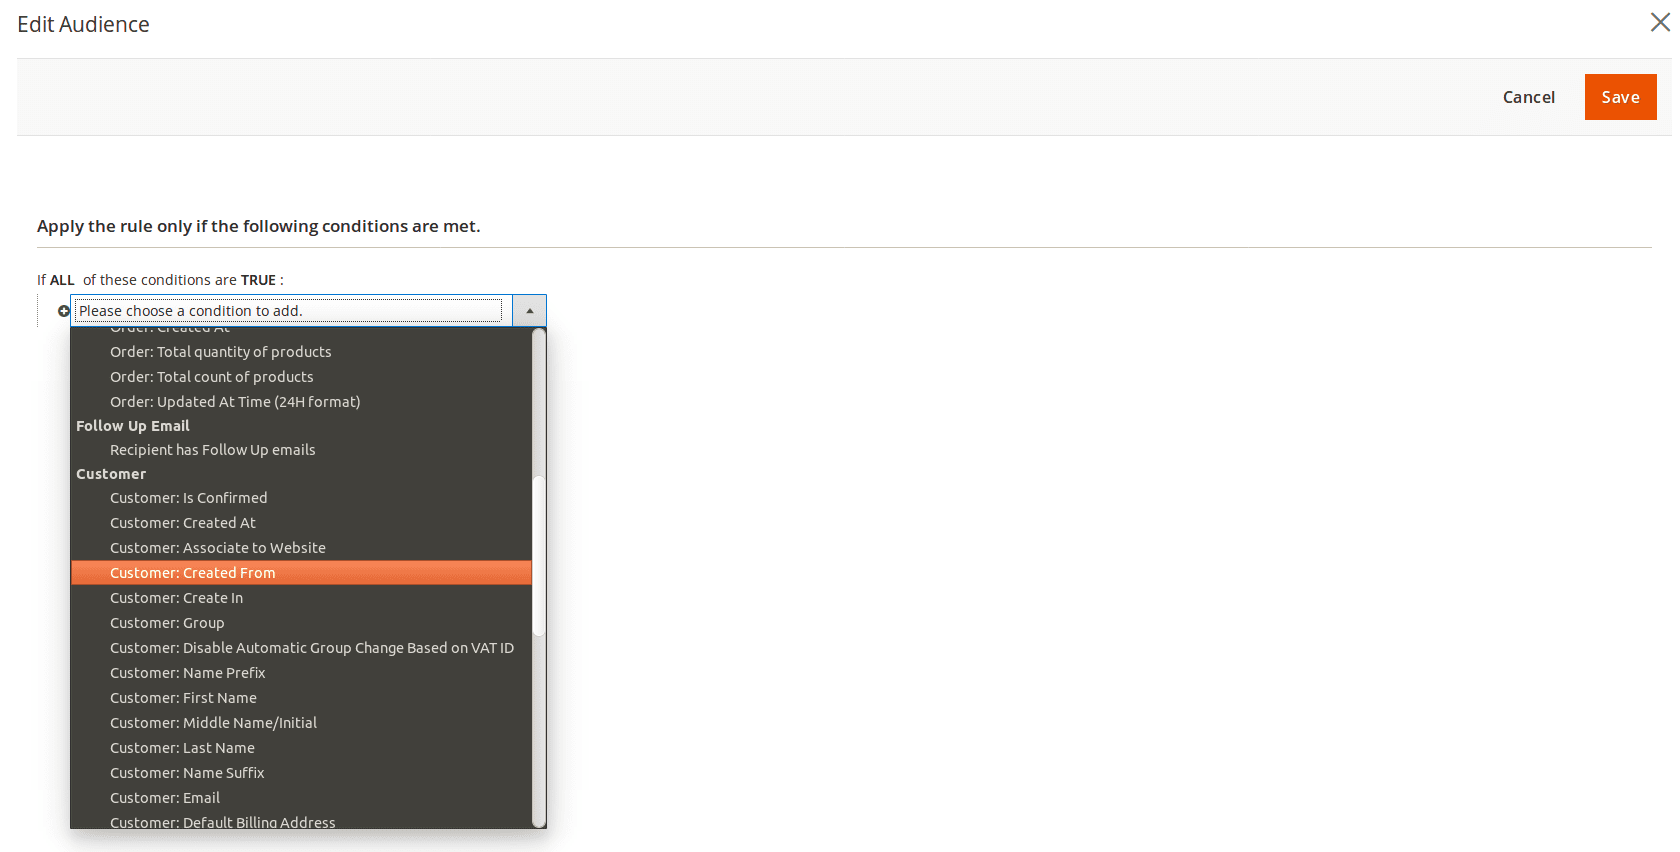
This rule allows you to use the following conditions to limit the campaign audience, which are grouped to categories:
- Store
- Lifetime Sales
- Number of Orders
- Products
- Products Subselection - allows you to analyze the current cart or order (this condition is used on Order-connected events). It spawns condition sub-block
If ALL/ANY products in cart/order matching these conditions, which can contain one or more product's properties, which should trigger an email. - Products Attribute Value Comparison - allows for comparing elements of a cart or order, also spawning a sub-block with one or more conditions.
- Products Subselection - allows you to analyze the current cart or order (this condition is used on Order-connected events). It spawns condition sub-block
- Order
- Grand Total
- Shipping Method
- Shipping Created
- Payment Method
- Invoice Created
- Status
- Created At - should use the format YYYY-MM-DD
- Updated At - should use the format YYYY-MM-DD
- Total Quantity of Products - the total quantity of ordered products.
- Total Count of Products - a count of unique product titles in the ordered quote.
- Updated At Time
- Follow-Up Email
- **Recipiend has Follow-Up Emails
- Customer contains the customer's properties, such as Name, Email, Gender and so on.
- Shipping Address contains the address properties, such as Country, City, Street, and so on.
After configuring the Event and Audience, you can add email to the chain and test the new trigger.
-
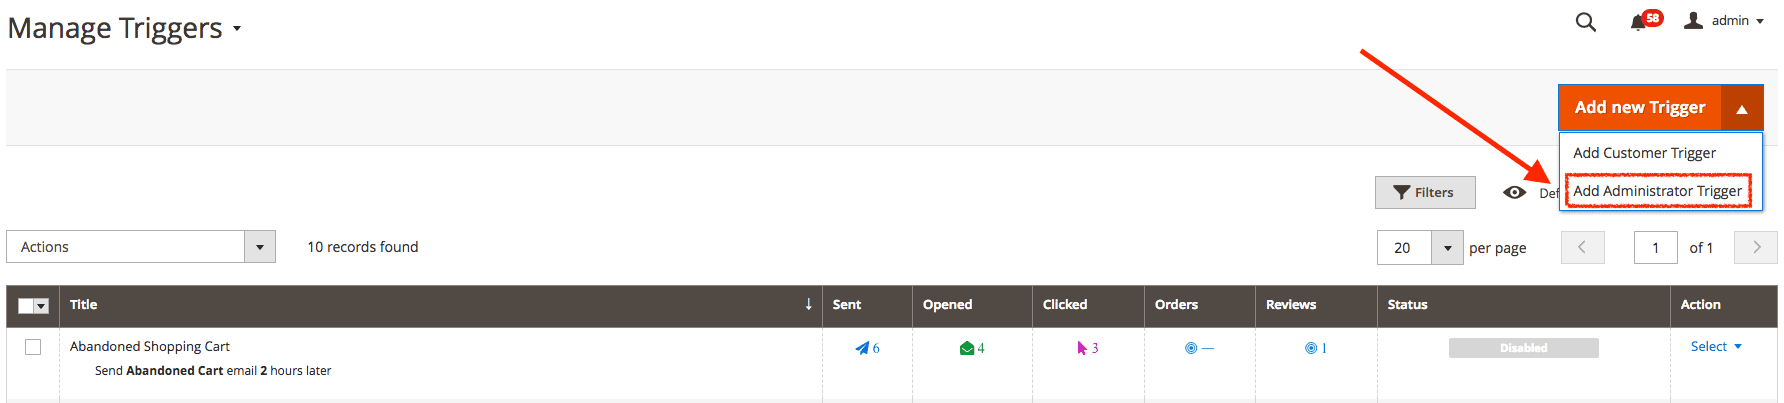
(DEPRECATED) Administrator Trigger
In older versions in addition to simple triggers, there were also Administrator Triggers.
The benefit of the Administrator Trigger is that you can use it to send an email to yourself when a particular event is triggered in your store, meaning that it serves just like a notifier or reminder about certain events which occurred in your store.
Here are some examples of situations when you may want to send a message to yourself:
- someone places an order for a large quantity
- a customer leaves a review for your products
- a new customer from a specific country is registered
- a customer adds some specific product to the wishlist
- customer's lifetime sales exceed some designated level, ensuring that you remind yourself to contact them individually
If you still use the old version, you can create an Administrator Trigger with Add New Administrator Trigger at the Trigger edit page.
After that, you should complete one additional field in the trigger's settings:
- Recipient Email - specify target email addresses, separate e-mails by commas.