SEO Onboarding Checklist: Your First Steps
-
 Yulia Goncharova
- SEO
- Jan 10, 2017
- 3 min read
Onboarding Advanced SEO Suite checklist will be posted like series of a few blog posts and here you may view its entire content:
Part 1. What to check right after installation?
Part 2. How to tweak your sitemap?
Part 3. How to tweak Advanced SEO Suite extension?
Part 4. Check Advanced SEO Suite Extended settings.
Part 5. Check if your rich snippets are ready.
Part 6. Check your store SEO-friendly URL settings.
Part 7. Check Product Images settings.
Part 8. Check Info section settings.
Part 9. Check / Create SEO templates.
Part 10. Check Rewrites section settings.
Part 11. Check Redirects management section.
In this post I’ll help you with your first steps in setting up Advanced SEO Suite.
What to check right after installation?
Part 1. Check if Google Sitemap generating active and its settings fit your store:
1.1. Login to Magento backend and go to System -> Configuration -> Catalog -> Google Sitemap.
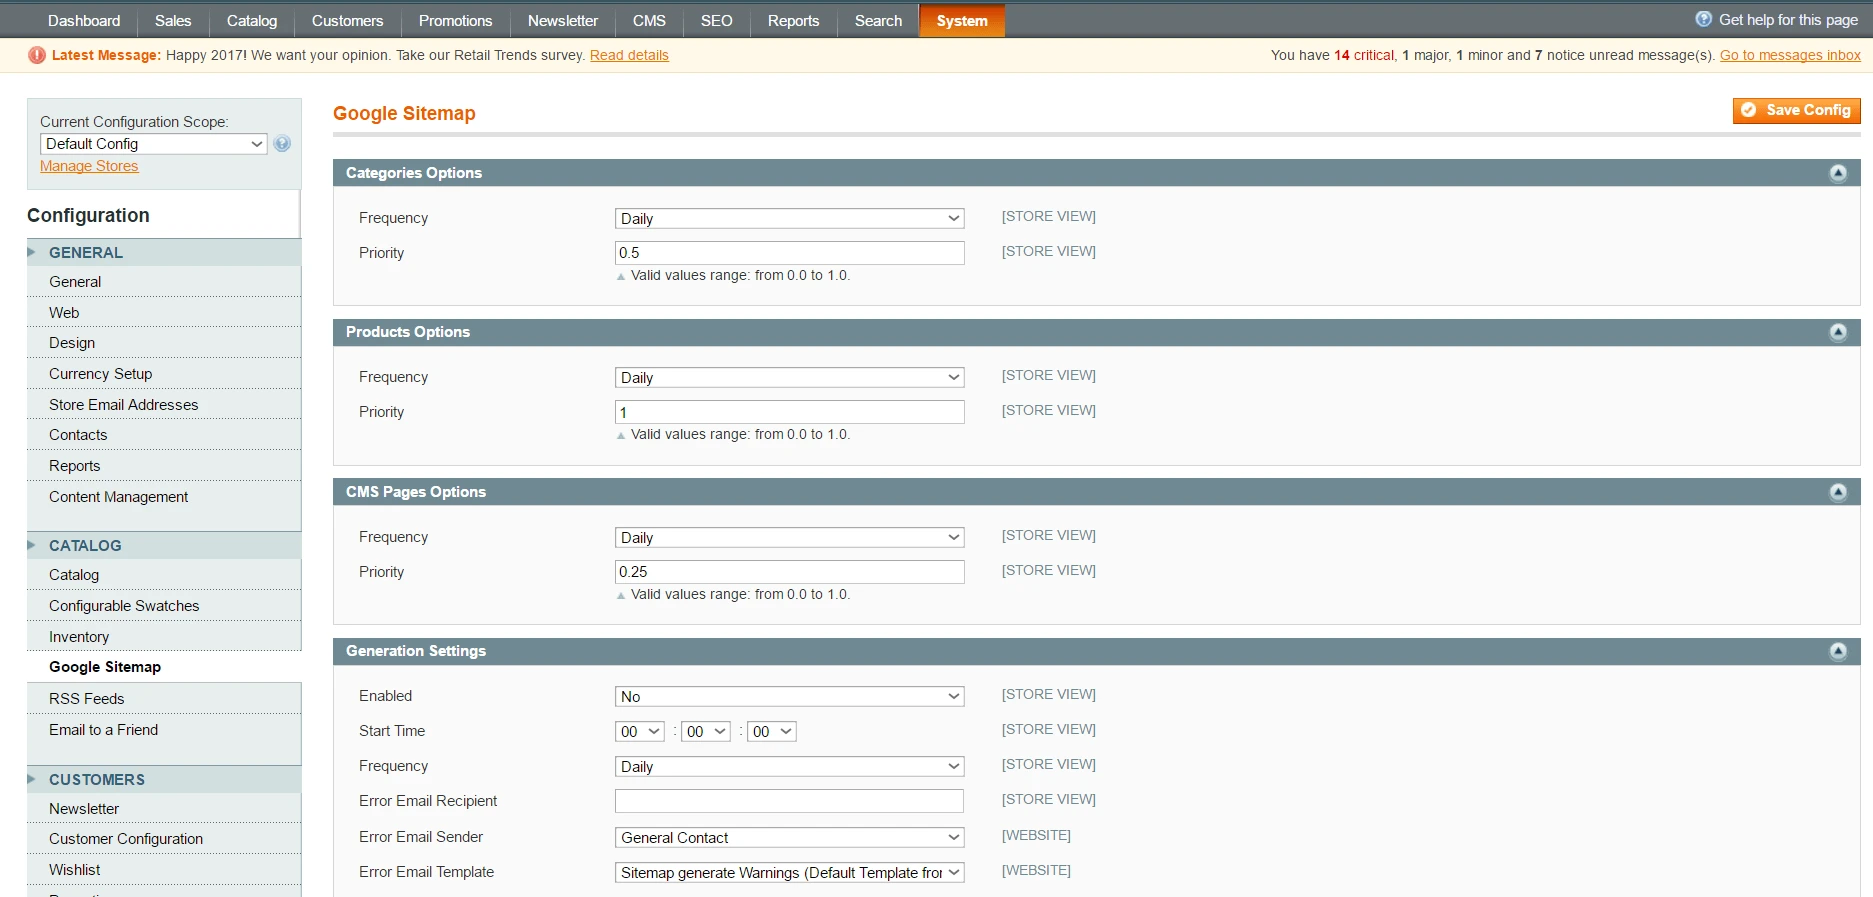
Image 1. Google Sitemap general settings.
1.2. Check if Cron Job is running, because it’s essential for automatic generating sitemaps. If it’s not running, you’ll see the warning message in the upper middle of your admin window, suggesting to follow the link and run it depending on your server type. Cron job in needed for many native Magento scheduled tasks, so it’s a good itea to set it up.
1.3. Go to System -> Configuration -> Catalog -> Google Sitemap -> Generation Settings. Check if automatic Sitemap generation is enabled and turn it ON if it’s not.
1.4. Set preferred time and frequency of automatic generation (daily / weekly / monthly depending on your store updating: the more frequently you add new items / pages the more frequently you should generate Google Sitemap).
1.5. Go to System -> Configuration -> Mirasvit Extensions -> Extended Site Map and scroll down to the section of Google Sitemap Extended Settings.
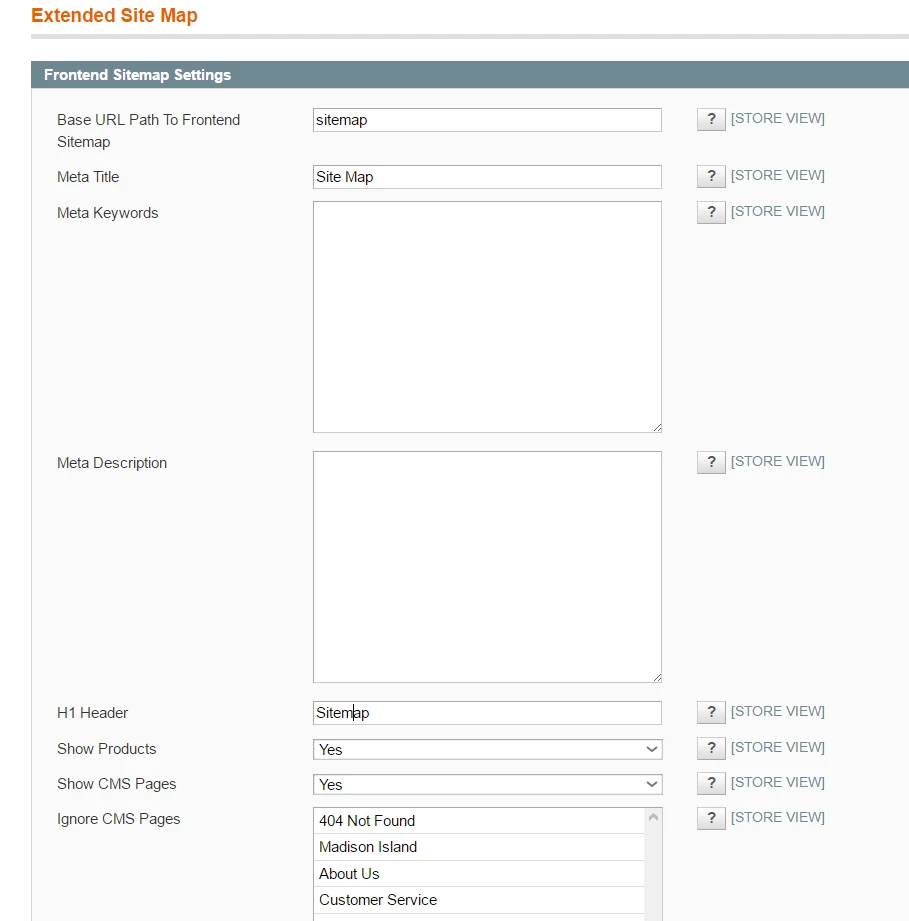
Image 2. Extended Sitemap settings.
1.6. Check if your store images are included into the sitemap in the field ‘Include Product Images’. It’s set ‘Yes’ by default. And Google recommends including all images into store sitemap to make them available in Image search results and drive more traffic to your store.
1.7. Check if SEO-friendly URLs for images are enabled in the like-named field. It’s recommended to enable this option in order to make your store images URLs more consistent and readable, thus SEO-friendly and more appropriate for Google.
1.8. Define the most suitable template for product image URL in the like-named field below in the format [product_attribute]. You may use all attributes as variables, for instance, [product_name] [product_sku] [by {product_manufacturer}] [color {product_color}] Please check that your template is identical with corresponding template for frontend product images in SEO > Settings section.
1.9. Check if product tags are included in the sitemap in the like-named field. They are included by default, but you may decline it any time by setting ‘No’.
1.10. Define product tags changes frequency below. Just choose the most appropriate option for your store in the drop-down field. For example, if you know administrators change / add product tags in your store once a month, then choose ‘Monthly’ option, etc.
1.11. Set the appropriate priority of tag’s link for Google in the field ‘Product tags priority’. This parameter shows the priority of the link relatively to other pages / links within your store. It just tells search engines which links are more important for crawlers, so you can use this parameter to increase the likelihood of presence your store most valuable pages in index. It’s a number between 0.0 and 1.0. And it’s 0.5 by default. The higher this number is the higher tag priority is and vice versa.
1.12. Define the Additional links frequency & priority in the next two fields. The options are the same as for p. 1.10 and 1.11 accordingly.
1.13. Check the Sitemap split size in kilobytes. This setting is supposed to limit your sitemap size to the defined size. In case the sitemap exceeds the defined limit it’ll be splitted into a few ones. Remember, Google can’t process sitemaps over 50MB (51200 KB) uncompressed and containing more than 50000 URLs (before November 30, 2016, the maximum sitemap size was limited by 10MB).
Checked!
Now your general and extended sitemap settings are ready!
Tomorrow, I’ll give you some tips on How to tweak your sitemap.