Advanced SEO Suite Onboarding Checklist (Part 2): How To Tweak Your Frontend Sitemap?
-
 Yulia Goncharova
- SEO
- Jan 11, 2017
- 3 min read

Part 2. Check if Extended Sitemap settings meet your store needs:
2.1. Go to System -> Configuration -> Mirasvit Extensions -> Extended Site Map. Now we’ll check the first block of settings.
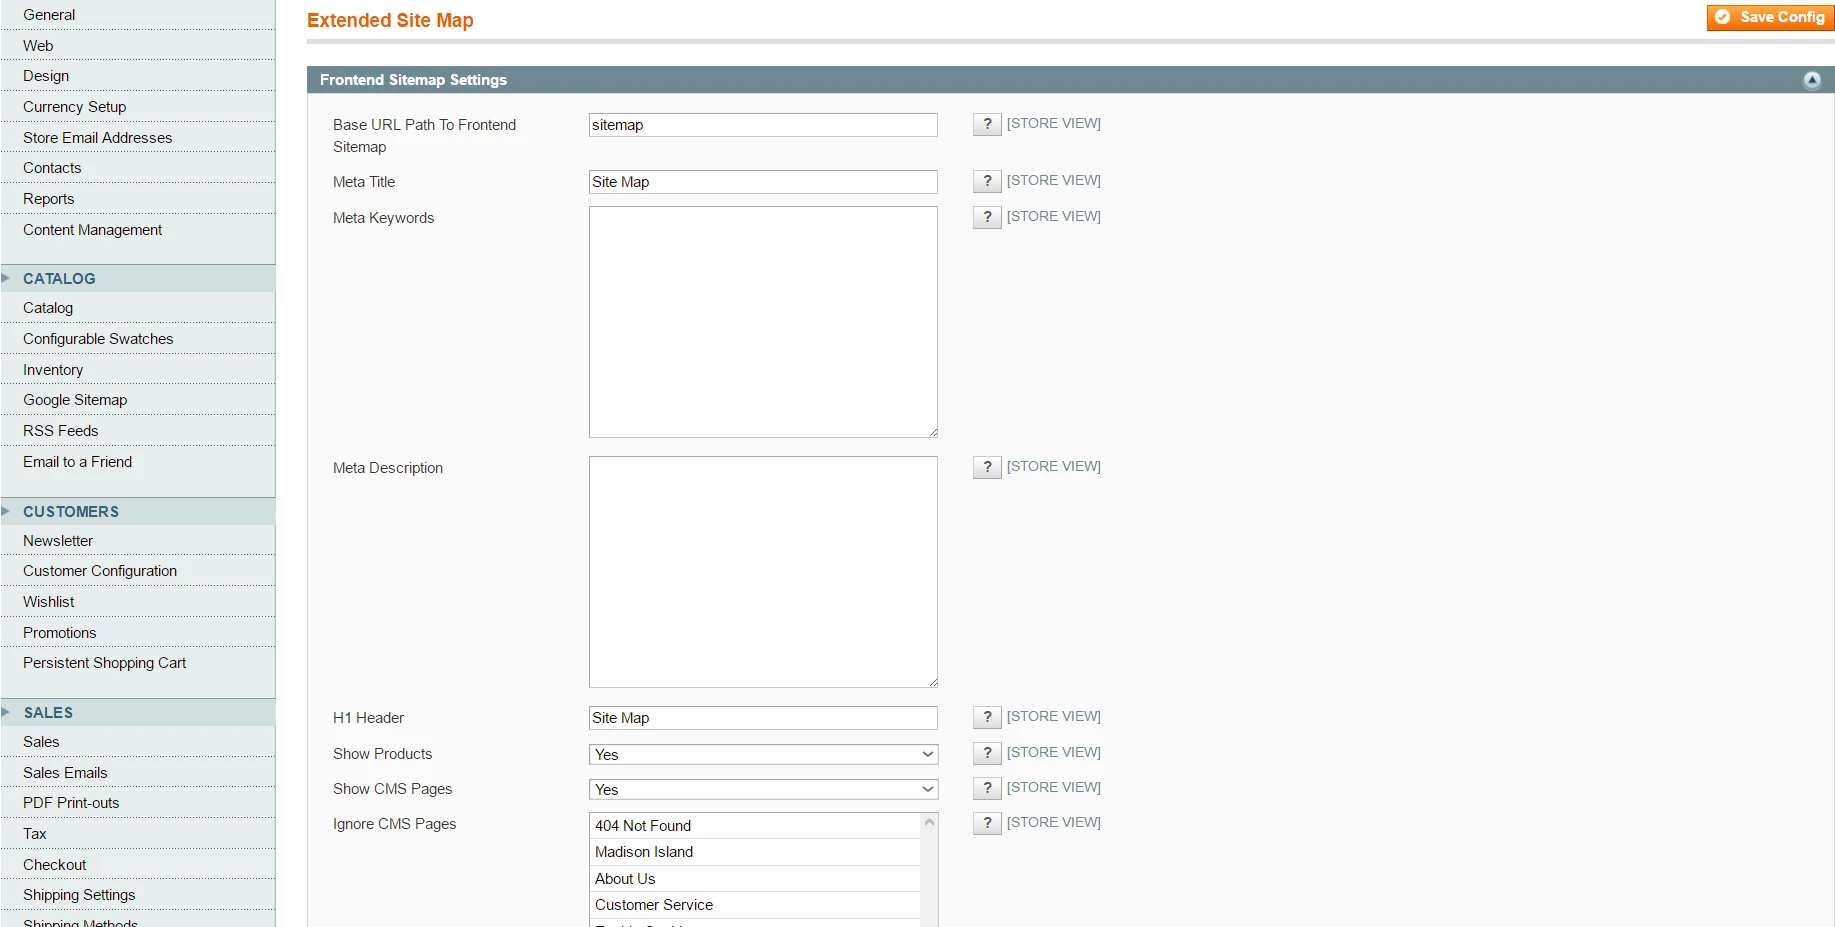 Image 1. Extended Sitemap settings.
2.2. Check if the default Base URL (sitemap) fits your store and change it in case you need.
2.3. Check if the default Meta Title (Site Map) serves its purpose well. Probably you wish to change it for ‘Sitemap’, for instance.
2.4. Set the appropriate Meta Tags for your sitemap (fill in the Meta Keywords and Meta Description fields).
2.5. Enter the H1 header for your extended sitemap HTML page. It’s ‘Site Map’ by default, but you are free to change it for the one you wish. For instance, ‘Sitemap’ or ‘Extended Sitemap’.
2.6. Check if showing products is set ‘Yes’. If it’s enabled, a list of all active catalog products will be included into extended frontend sitemap. But remember to break up large sitemaps into smaller ones and include into each no more than 50000 URLs, like Google recommends.
2.7. Check if showing CMS pages is set ‘Yes’. In case it’s enabled, a list of all store CMS pages will be included into frontend sitemap. You can always turn it off, but it’s preferable to leave it on, since there is a number of useful CMS pages to be indexed in Google and other search engines, like contacts, delivery and payment options etc.
2.8. Check if you chose the Ignored CMS pages in the next field. There are some pages you might be willing to be ignored by search engines, like 404-error page or privacy policy. Just choose ones from the list and they will never be shown in SERP.
2.9. Check the option of enabling / disabling store views displaying in the field ‘Show stores’. If you’ve got a few store views (like English, French and Spanish versions of it), you might turn this option to ‘Yes’ and the list of your store views will be displayed in the frontend sitemap.
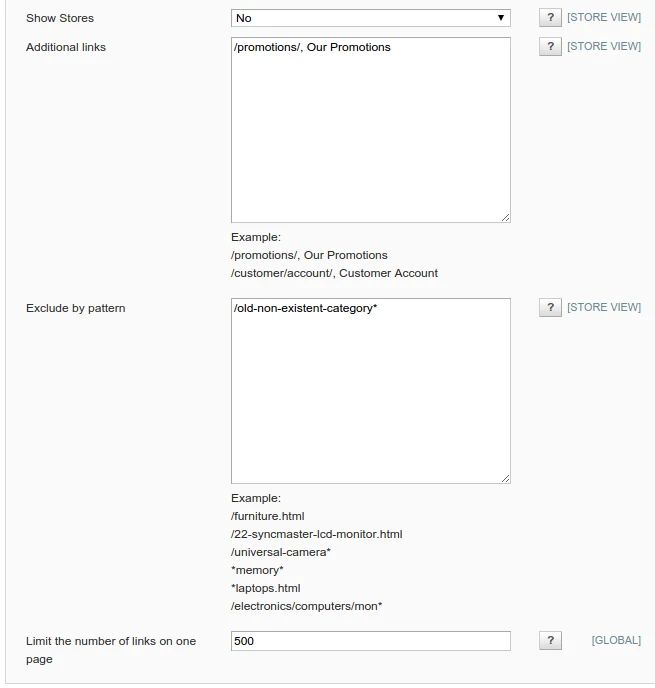 Image 2. Show stores and other additional settings.
2.10. Check if your store has got any additional non-standard pages, like Sale or Promotions, you wish to include in sitemap. If there are any, place them comma-separated into Additional links field, for instance, /promotions/, Our Promotions
/customer/account/, Customer Account
2.11. Check if your store has any pages / links, you wish to exclude from sitemap. And if there are any, fill in the field ‘Exclude by pattern’. As clear from its header, you may use patterns, for example:
/universal-camera*
*memory*
*laptops.html
/electronics/computers/mon*
OR it could be the full link, for instance:
/furniture.html
/22-syncmaster-lcd-monitor.html
2.12. Check if your sitemap is splitted into a few pages in the field ‘Limit the number of links on one page’. Each page is limited by 1000 links by default, and you may correct this number if you need. In case you leave this field empty, your sitemap will contain only 1 page, which is not really right for large stores with thousands links.
Checked!
Now your extended sitemap perfectly meets your store needs!
Tomorrow, I’ll give you some tips on How to tweak other extension settings.
Also you may read the previous part of checklist using the following link:
Part 1. What to check right after installation?
OR
wait a bit for the next one:
Part 3. How to tweak Advanced SEO Suite extension?
Part 4. Check Advanced SEO Suite Extended settings.
Part 5. Check if your rich snippets are ready.
Part 6. Check your store SEO-friendly URL settings.
Part 7. Check Product Images settings.
Part 8. Check Info section settings.
Part 9. Check / Create SEO templates.
Part 10. Check Rewrites section settings.
Part 11. Check Redirects management section.