How to setup Google Tag Manager in Magento 2 store
-
 Eugen Barilyuk
- Magento 2
- Aug 3, 2022
- 11 min read
Knowing what visitors do in your online store is essential for your profits. If you see a page where customers abandon their shopping cart, you can eliminate that bottleneck and increase your sales.
The gathering of user-generated events is widely executed via the Google Tag Manager service. This powerful tool allows tracking even small events on a customer's journey through the shopping funnel. Yet it is managed via an online web interface.
In order to track each step of your visitors via GTM, it must first be configured. This involves setting up your store, Google Tag Manager service, and your analytics service (Google Analytics 4, for example). Here is a detailed guide on setting up GTM in your Magento 2 store.
What is Google Tag Manager
Generally speaking, to track the activity on the website, a special piece of code is required. Each tracked event has to have an individual piece of code. This code for each event has to be deployed on each page whose activity is to be tracked. All of this makes tracking a complex task requiring significant website modification.
Google Tag Manager (GTM) is a system that greatly simplifies tracking on websites. It allows you to manage snippets of tracking code (tags) via a convenient web panel. And all of this without heavily modifying the code of your website.
To connect your Magento store to Google Tag Manager, you need to embed only two pieces of code from GTM. This can be done even without modifying any theme template of your store via a third-party Magento GTM module.
Do not confuse Google Tag Manager with Google Analytics
Google Tag Manager is often discussed in articles on Google Analytics, so someone may think both are the same. In reality, Google Analytics is completely different from Google Tag Manager.
GTM is a tool to collect information on user actions on a website. Google Tag Manager has no tools to analyze this data. GTM is used to transfer the data to any analytics suite. It can be Google Analytics, but it also can be Yandex.Metrica, AppsFlyer, and other analytic suits.
Conversion reports, e-commerce sales analysis, and engagement reports - are all done in analytics suites like Google Analytics. GTM only supplies data for the analytics.
Advantages GTM brings
The main goal of Google Tag Manager - is to save time and money for store owners and marketers on embedding tracking codes. This Google's service does this by offering the following advantages:
- No financial expenses; it is completely free to use
- Improves the website speed by executing tracking codes on its servers
- Offers convenient tools for creating and debugging the tracking tags
- Supports levels of access for easy delegating of work on tracking tags
- Saves the version history of tracking tags for easy return to the desired version
- Easily integrates with various content management systems
- A large community of Tag Manager experts may offer answers to important questions
Why a GTM extension for Magento is recommended
In order to use GTM in your Magento 2 store, you need to modify your frontend theme to add GTM code snippets.
Online businesses based on the Adobe Commerce edition of Magento can use the built-in interface for adding the Google Tag Manager code.
Stores on Magento Open Source can use a third-party extension, for example, Google Analytics 4 with GTM for Magento 2. This extension is compatible with the Hyva theme and provides preconfigured GTM tags. Read on how to install the extension in Magento.
Google Tag Manager basic principles
Google Tag Manager is relatively easy to use, but only after you spend some time getting familiar with it. The first steps with GTM may be cumbersome since you have to learn new terminology and get used to GTM work architecture.
GTM hierarchy looks as following: GTM account -> Container -> Tracking tag -> Tag triggers.
GTM account
Each Gmail address can have several GTM accounts. But if you work only with your site, one GTM account is usually enough.
GTM container
In a GTM account, you have to create a container. It is an object that stores all tracking tags from one data source.
A container can be configured for one of predefined target platforms: web pages, iOS app, Android app, AMP pages, or server side. Each account can include multiple containers for the respective target platform, and this article discusses only containers for web pages.
The container is connected to your store via special code snippets; adding them to your site is a container installation procedure. So basically, you need to embed two container code snippets in the header and body parts of your site's HTML layout.
Tags
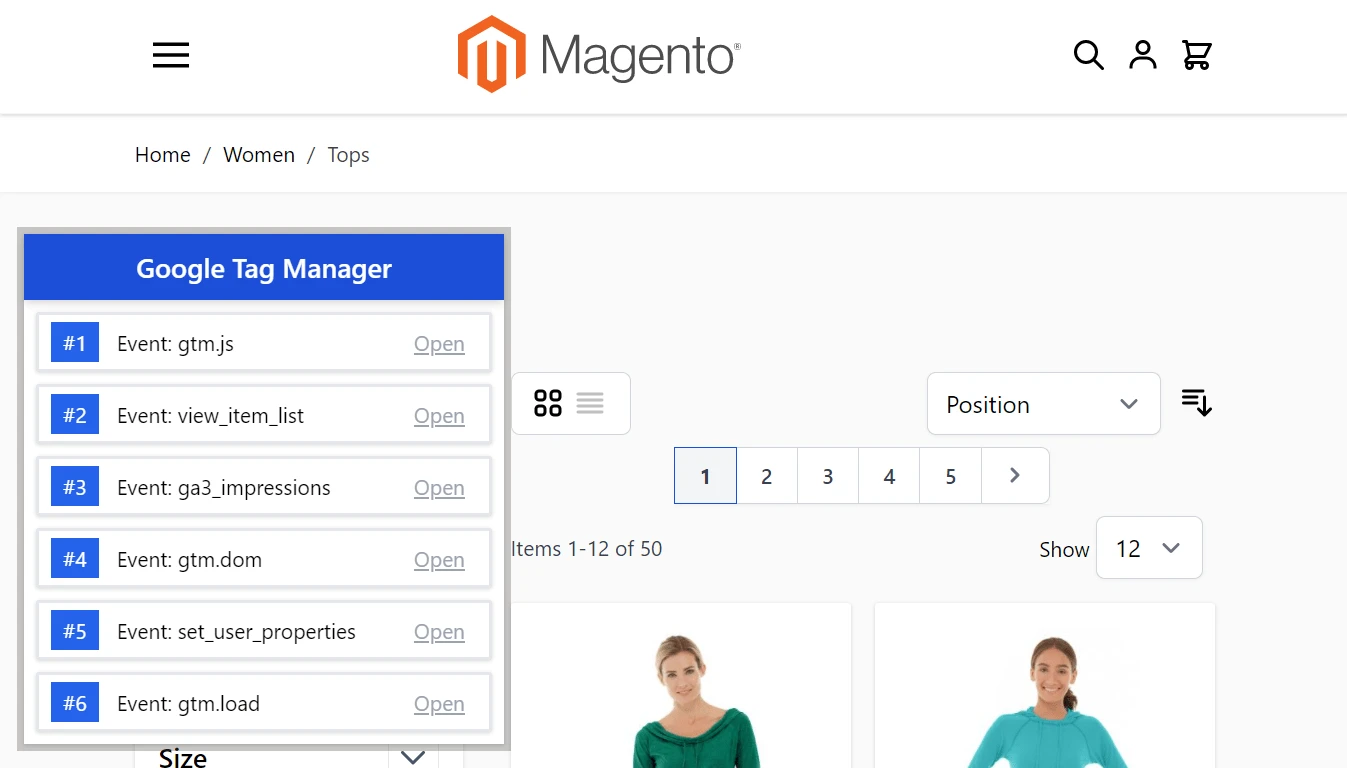
Having GTM code snippets placed in your store frontend, it becomes possible to configure tracking tags. Tags are configured within the Google Tag Manager interface.
A tracking tag is a piece of code that transmits data on an event configured to track. When such an event occurs, for example, a user clicks a button, the tag is triggered.
Tags collect the data using variables, and currently, websites can use 44 built-in variables GTM offers. With the ability to define custom variables using JavaScript and CSS, a website owner can track almost any action on their site.
GTM offers a library of predefined tag templates, or you can create your own templates.
Tag trigger
Tracking tags will not transmit data if they are not triggered. A trigger is a condition for firing a tag; for example, a user clicks a button.
Google Tag Manager offers groups of triggers:
- Page view. It activates the tag when a page has started to load or has fully loaded
- Click. Fires an event when a click on any element or link occurs
- Interaction with users. Allows tracking such events as video views, page view depth, form submission, etc.
- Other. Uncategorized set of triggers. For example, a trigger for tracking JavaScript errors.
How to setup GTM in Magento 2
The following guide covers the GTM setup for the Magento Open Source edition. In order to connect it to the Google Tag Manager service, the Google Analytics 4 with GTM for Magento 2 extension is used.
To use the GTM Magento extension, you need to provide three identifiers: GTM Account ID, GTM Container ID, Google Analytics 4 Measurement ID/Google Analytics 3 Tracking ID.
Step 1. Create a GTM account and GTM container
Navigate to the Google Tag Manager website and log in with your Gmail address and password.
Click the Create Account button, fill the Account Name field in the Account Setup block and select the country.
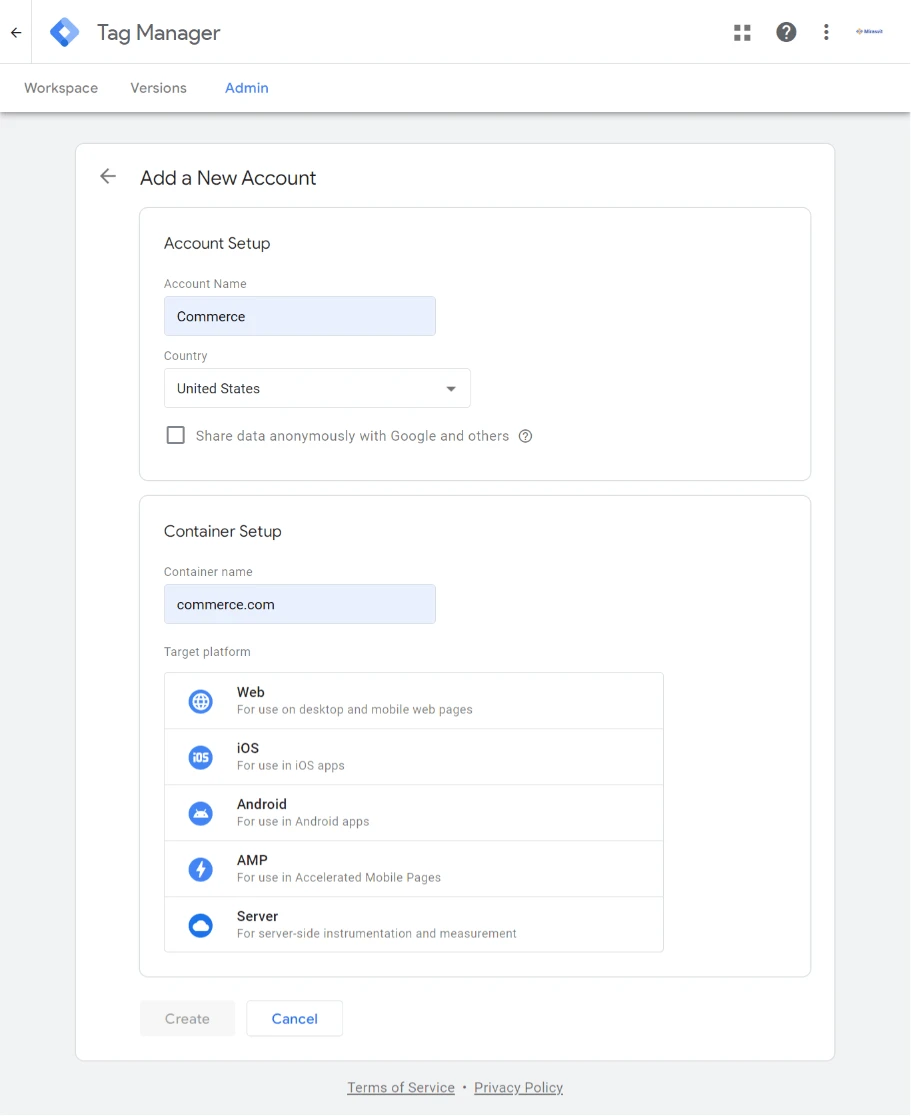
Configure the account container by setting the Container name and selecting the target platform. Choose Web if you want to collect data from a website.
Note: To delete a container click Admin -> Container Settings -> More menu (three vertical dots) -> Settings -> Delete. Google gives 30 days in case you want to restore the container. After that time, the container is permanently deleted.
Step 2. Get your GTM Account ID and GTM Container ID
Get GTM Container ID
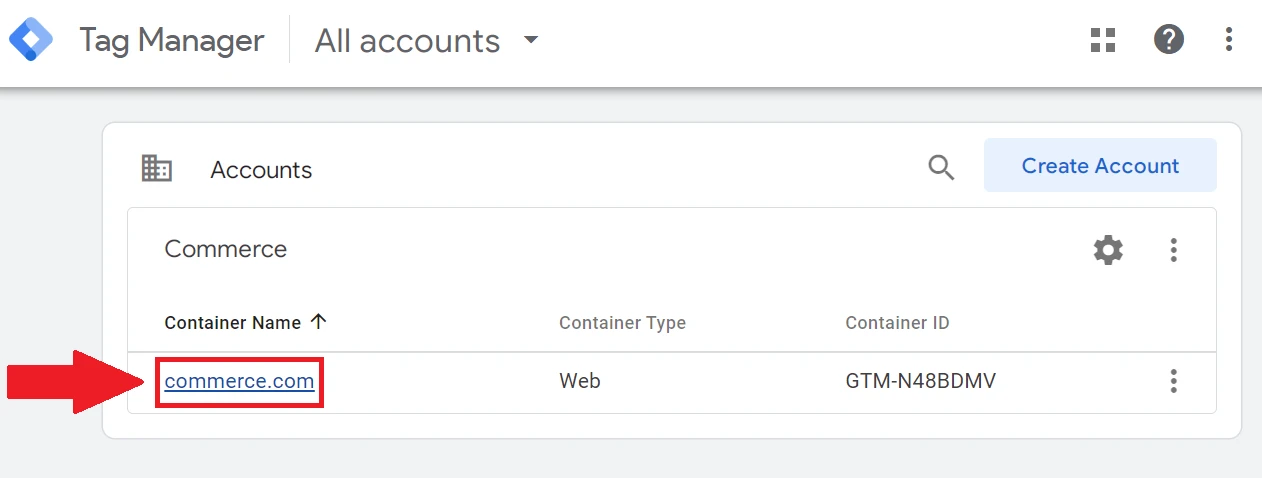
Navigate to the GTM homepage. Click on the container name, and locate the Container ID in the browser address bar after containerId=.
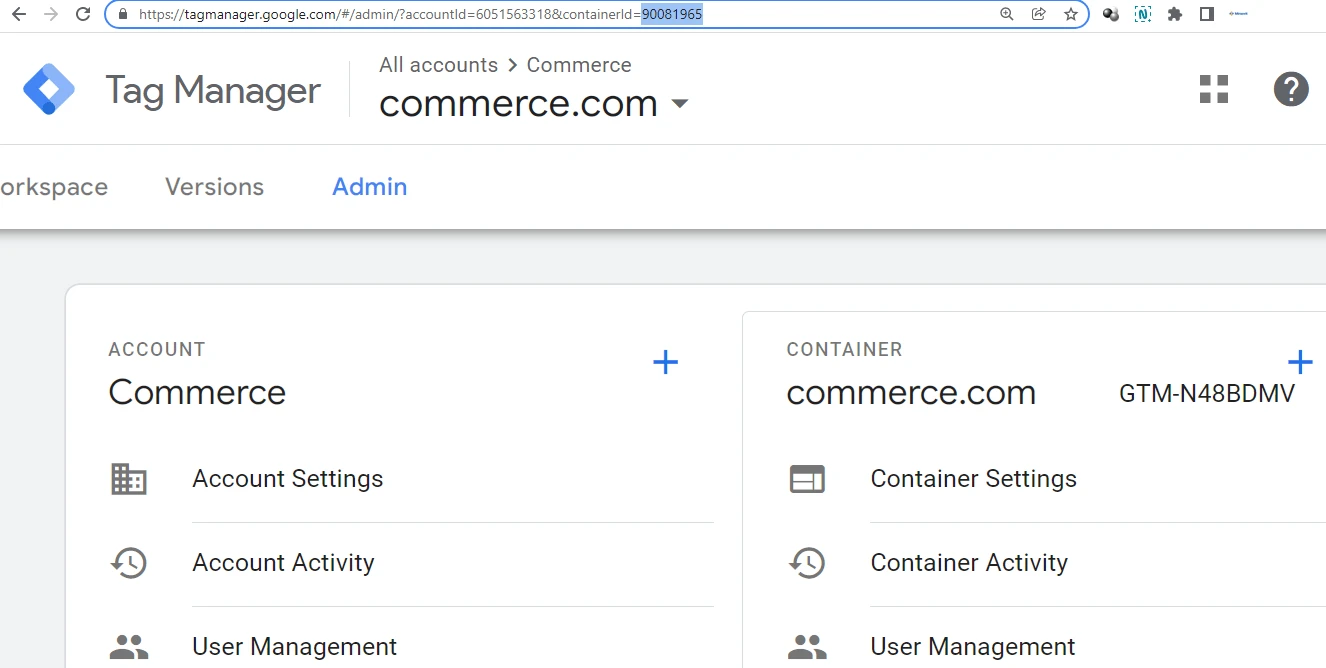
Write down the Container ID - you will need to paste it into your Magento store.
Note: The Container ID you need is a 10-digit number, not the Container ID formatted as GTM-N48BDMV, which you may see in the GTM interface.
Get GTM Account ID
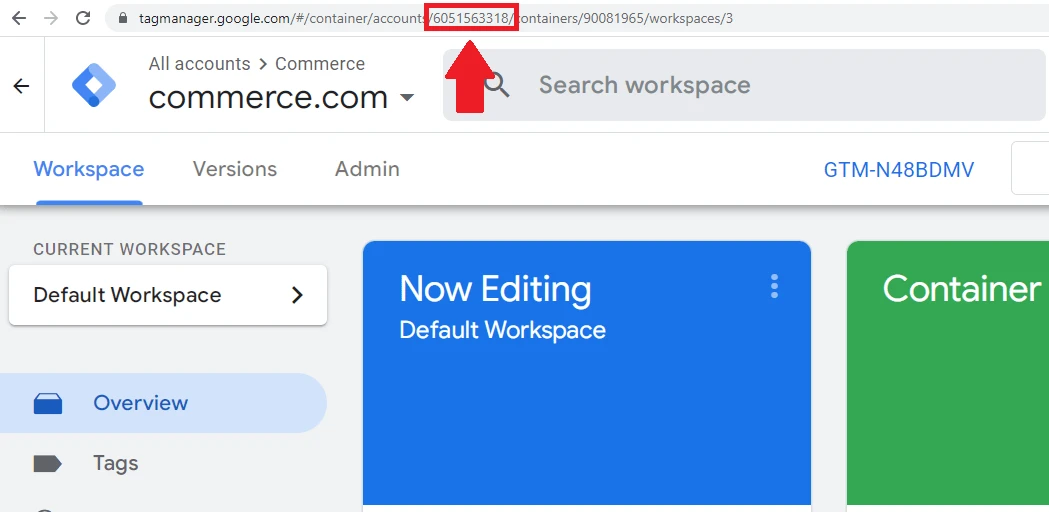
Click on your container to open it. In the address bar of your browser, look at the URL of the current page - it contains the GTM Account ID. Find the ID number after accounts and write it down - you will paste it into your store.
Step 4. Get Google Analytics 4 Measurement ID
GTM extension in your store needs to know where to send the gathered data. So you have to provide your analytics tracking ID. We will focus on Google Analytics 4 (GA4) since it will soon replace Analytics 3.
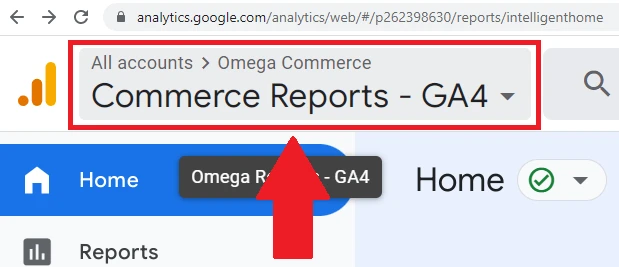
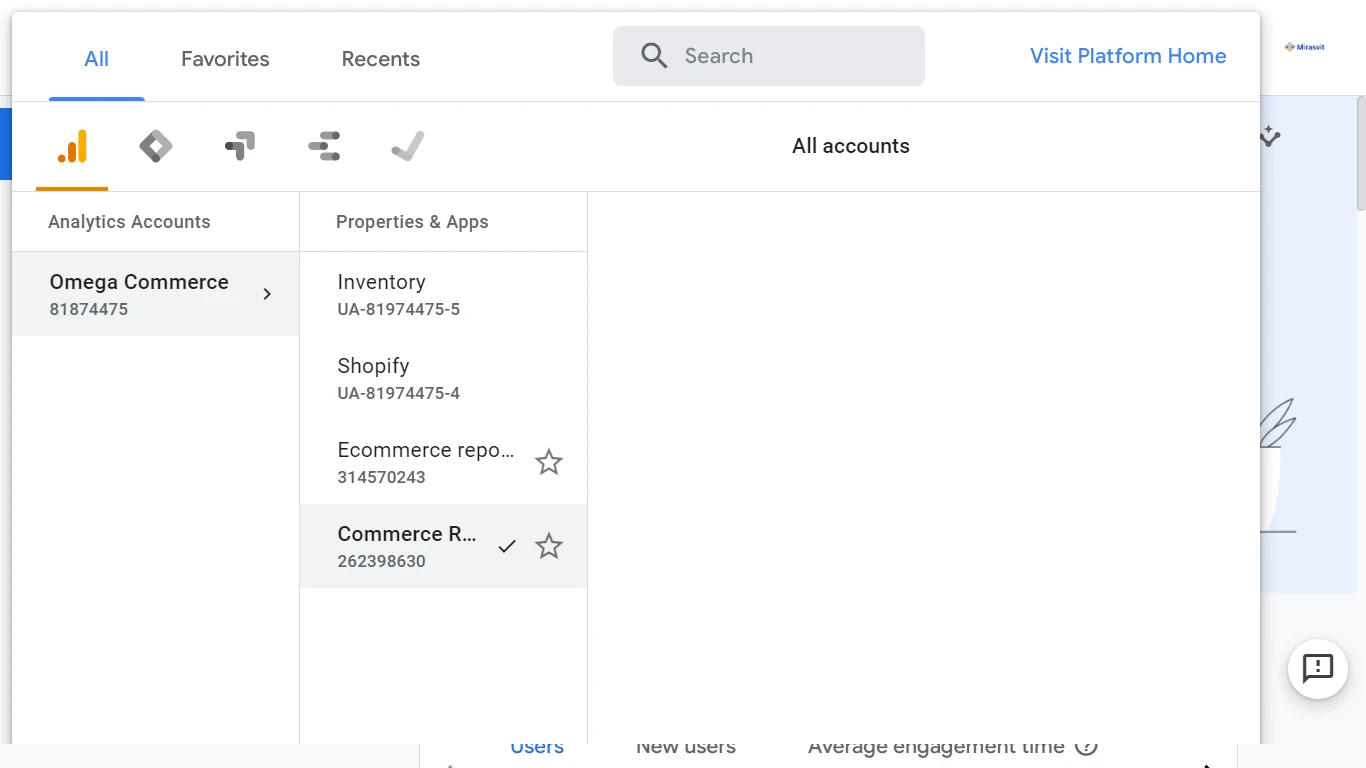
Open the Google Analytics homepage, and then click All Accounts in the top left corner of the screen.
In the Properties&Apps block, select the GA4 property you use to track events in your Magento store.
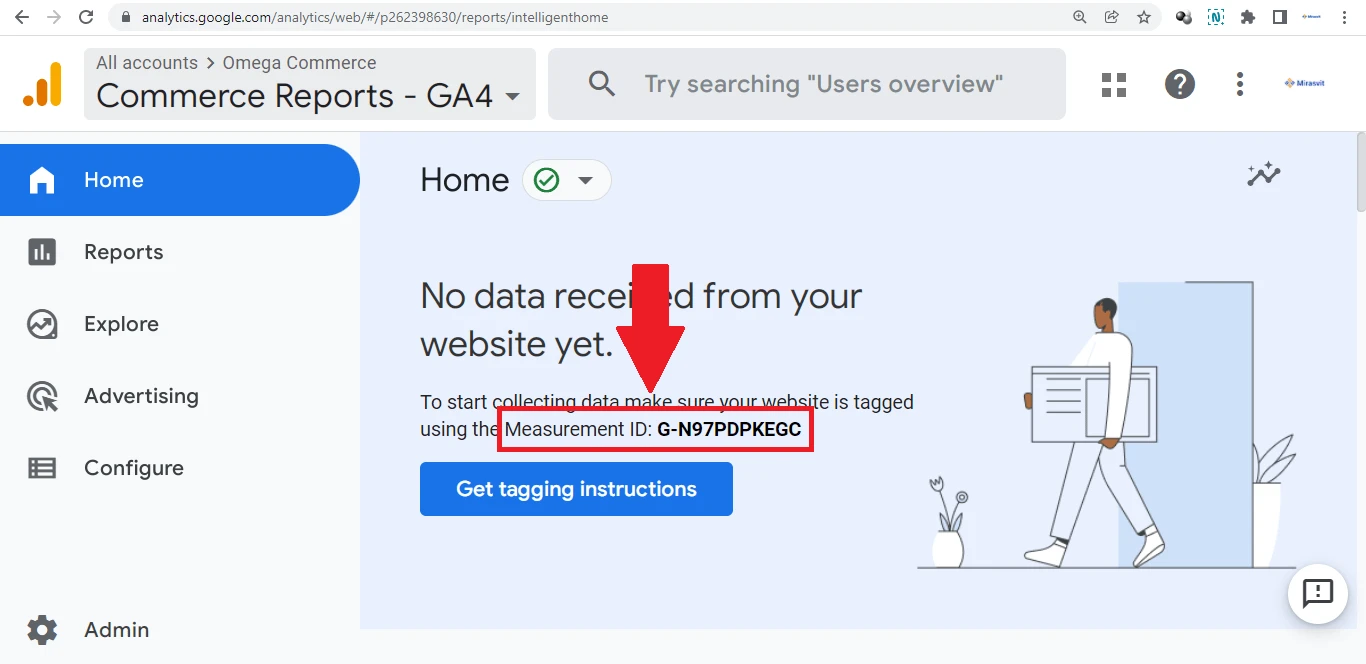
You will immediately see the measurement ID if your GA4 property has received no data.
If you are already gathering data, then navigate to Admin > Property column > Data Streams > Web data stream to get the Measurement ID.
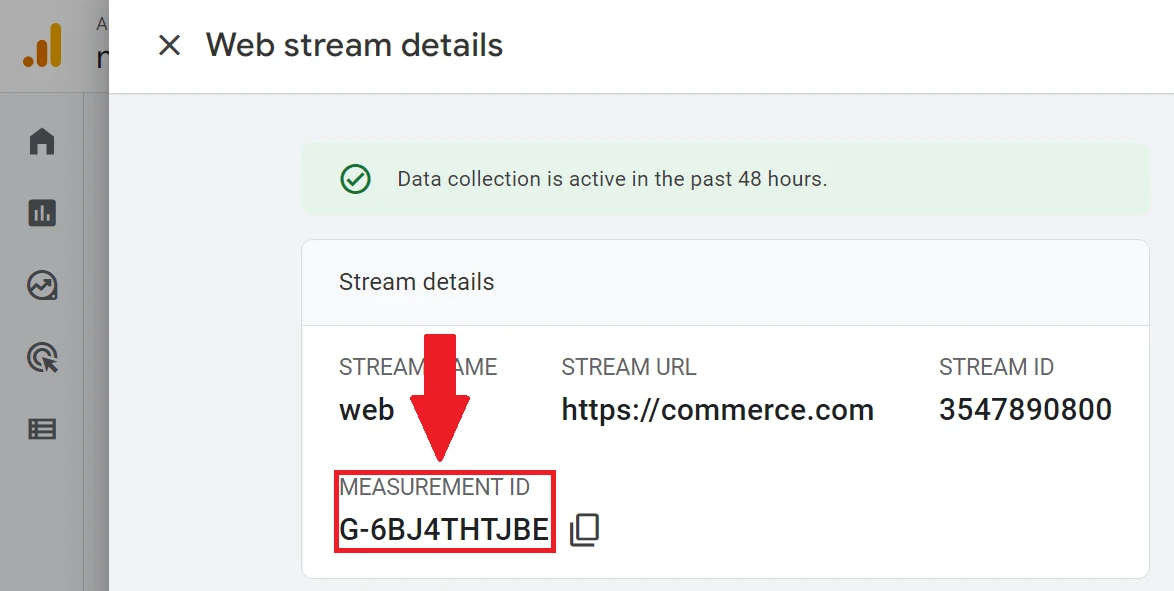
Write down the Measurement ID to paste it into your Magento store.
Step 5. Get GTM install code snippet
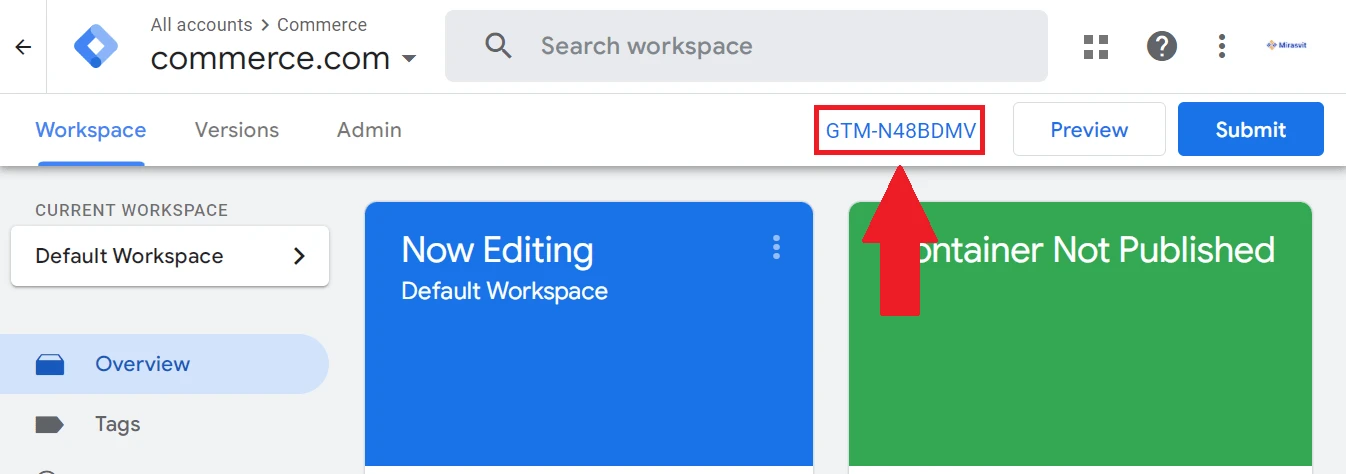
Open the GTM homepage and click on the GTM container name.
Click on the GTM container ID to bring up the container page to call the Install Google Tag Manager window.
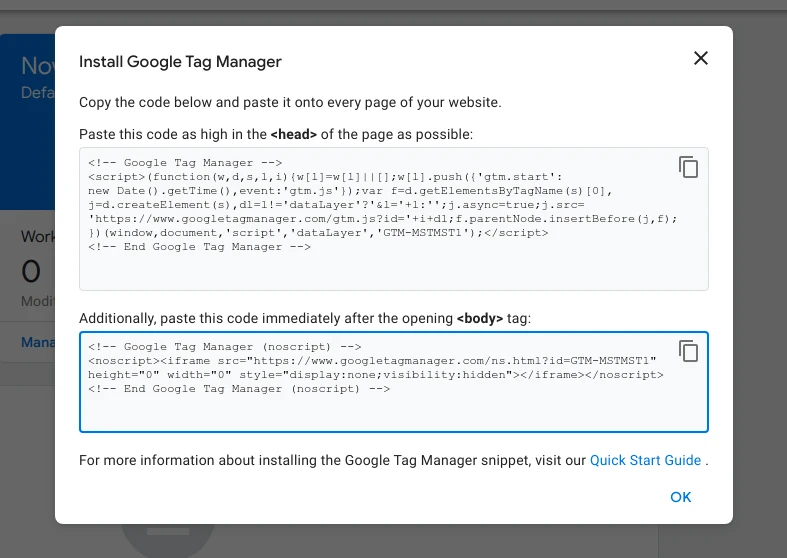
Copy the <head> and <body> code snippets the Install Google Tag Manager window offers.
Step 6. Paste GTM code snippets and IDs in the Magento store
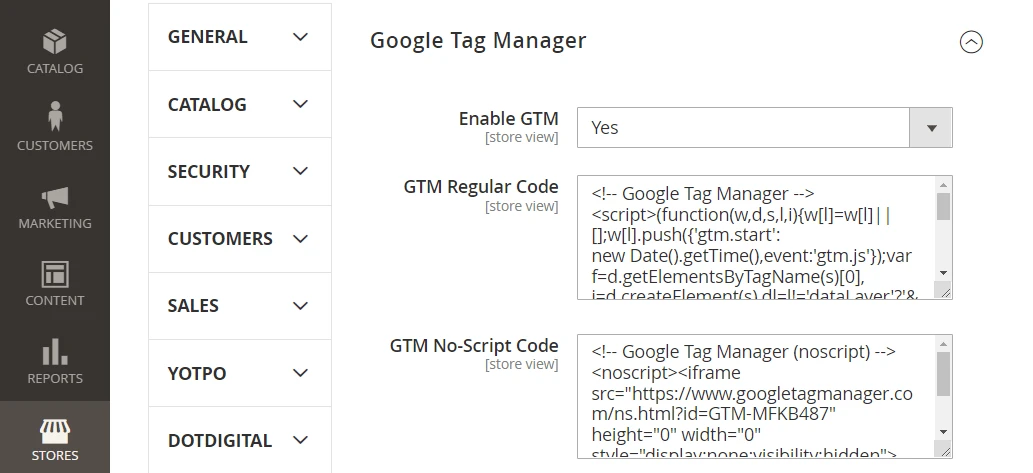
Navigate to Stores > Configuration > Mirasvit Extensions > Google Tag Manager and set Enable GTM to Yes.
Paste the <head> code snippet into the GTM Regular Code field, and <body> code snippert - into the GTM No-Script Code field.
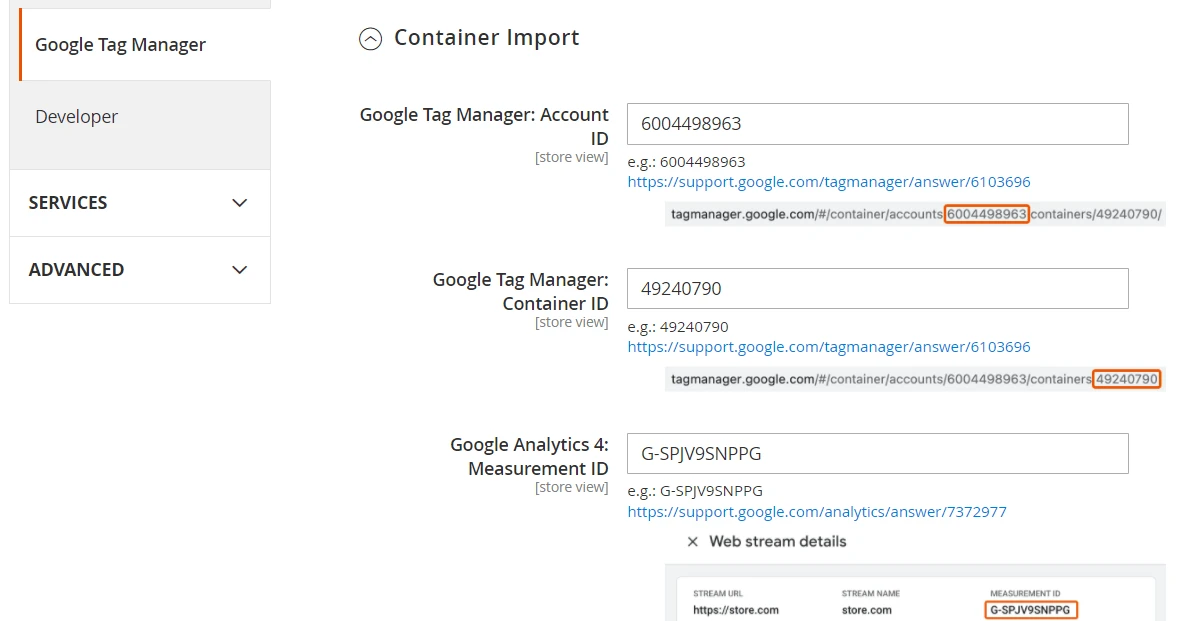
Locate the Container Import block on the GTM extension settings page and paste previously obtained GTM Account ID, GTM Container ID, and Analytics Measurement ID into their respective fields.
Step 7. Create GTM tags
In order to track events, you need to create separate tags and triggers for them within the GTM service.
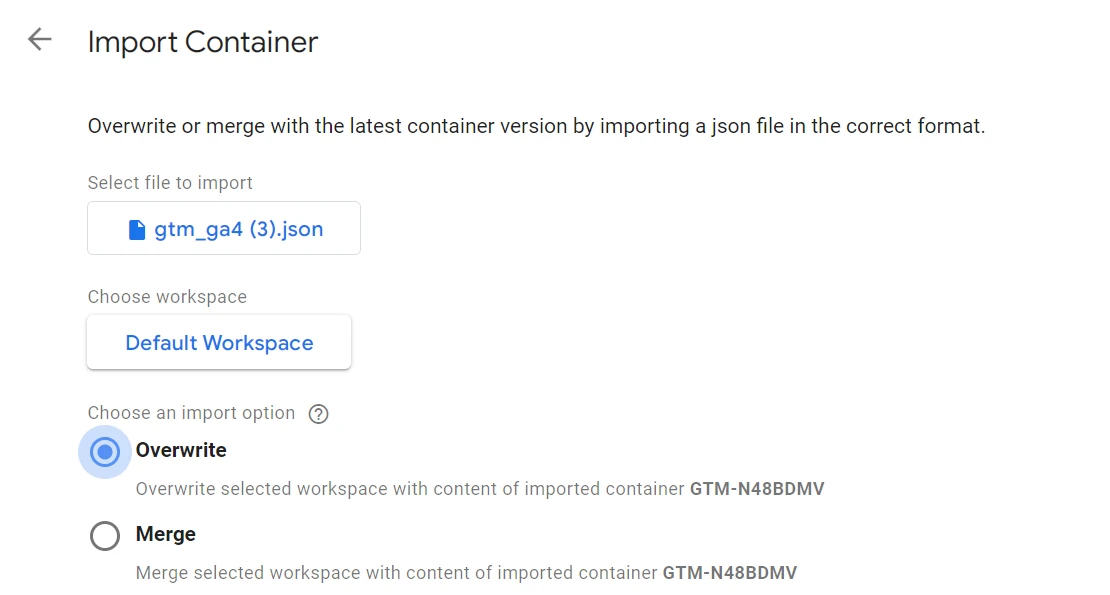
Easily get the main tracking tag set by importing container info from the GTM Magento extension into your GTM account. In your Magento, click Download Import File for Google Analytics 4 button and save the JSON file.
Navigate to the GTM homepage, and click on the gear icon. Choose Import container, and select the JSON import file, workspace (typically a Default Workspace), and how to import (overwrite or merge).
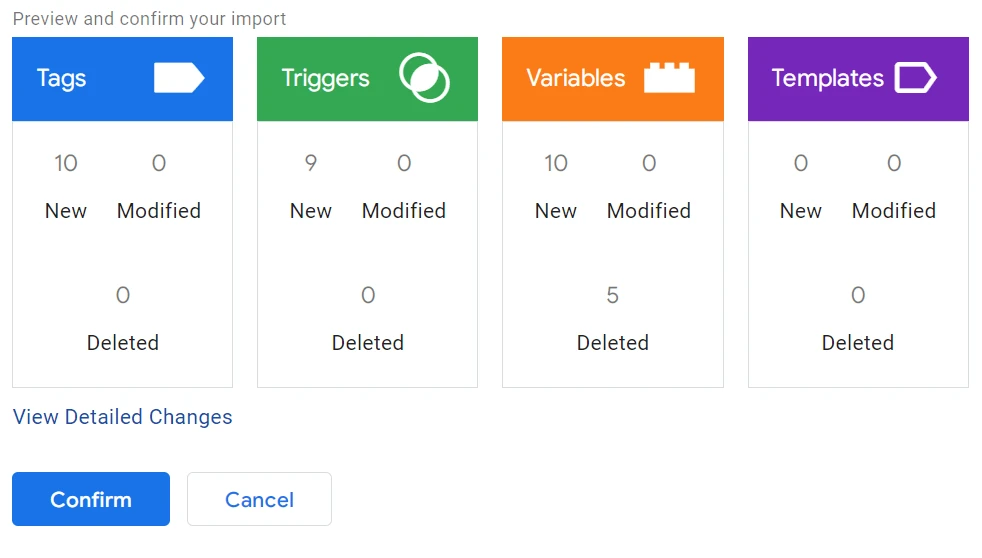
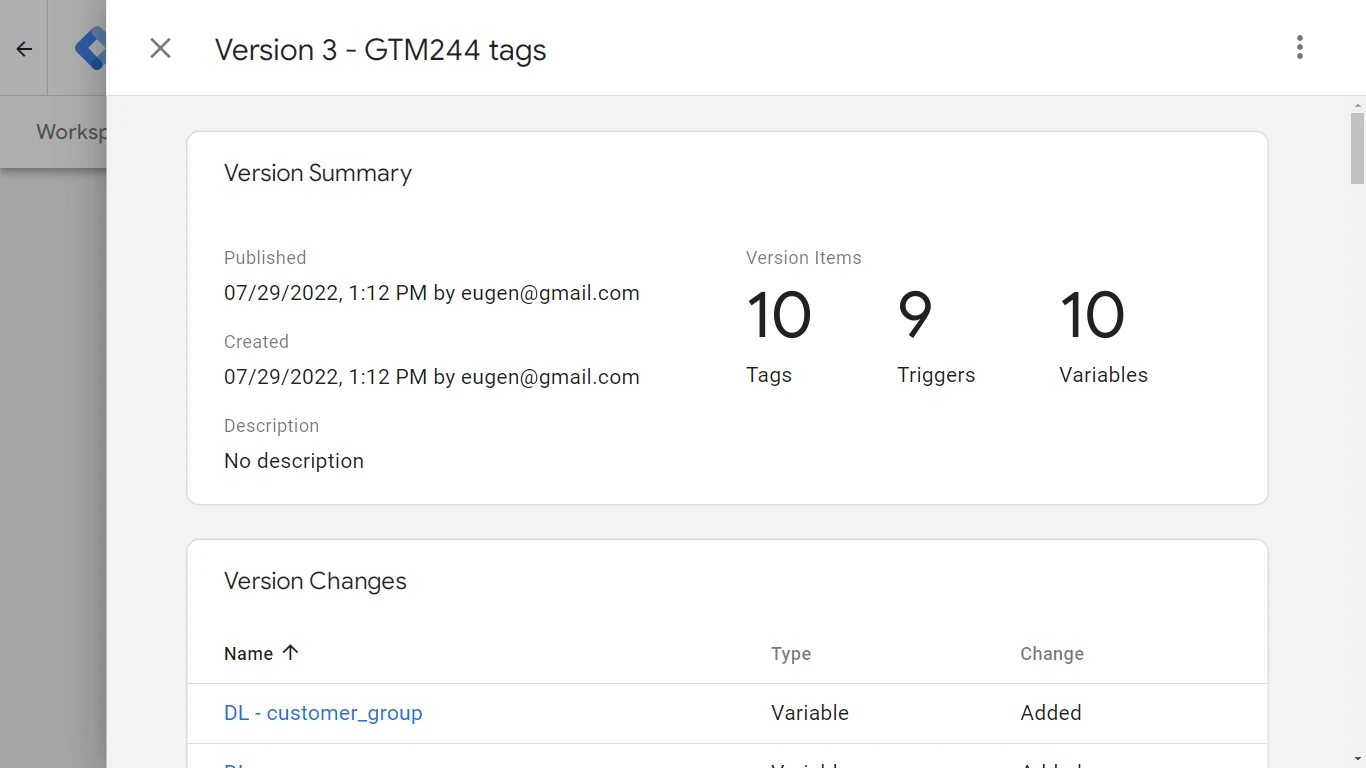
Preview and confirm your import. You will see the number of new GTM tags, tag triggers, and tag variables to be added to your container.
How to create a new GTM tag
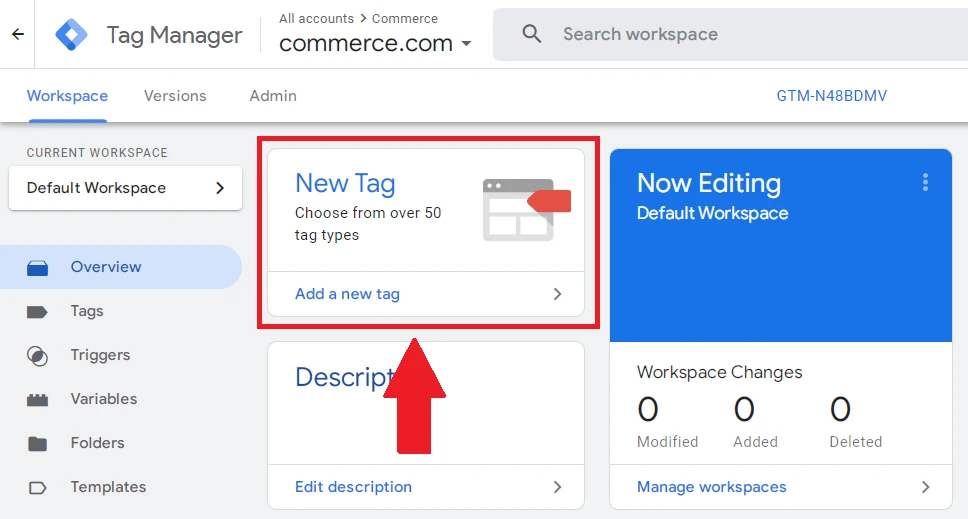
In your GTM container, navigate to Workspace and click on the New Tag card.
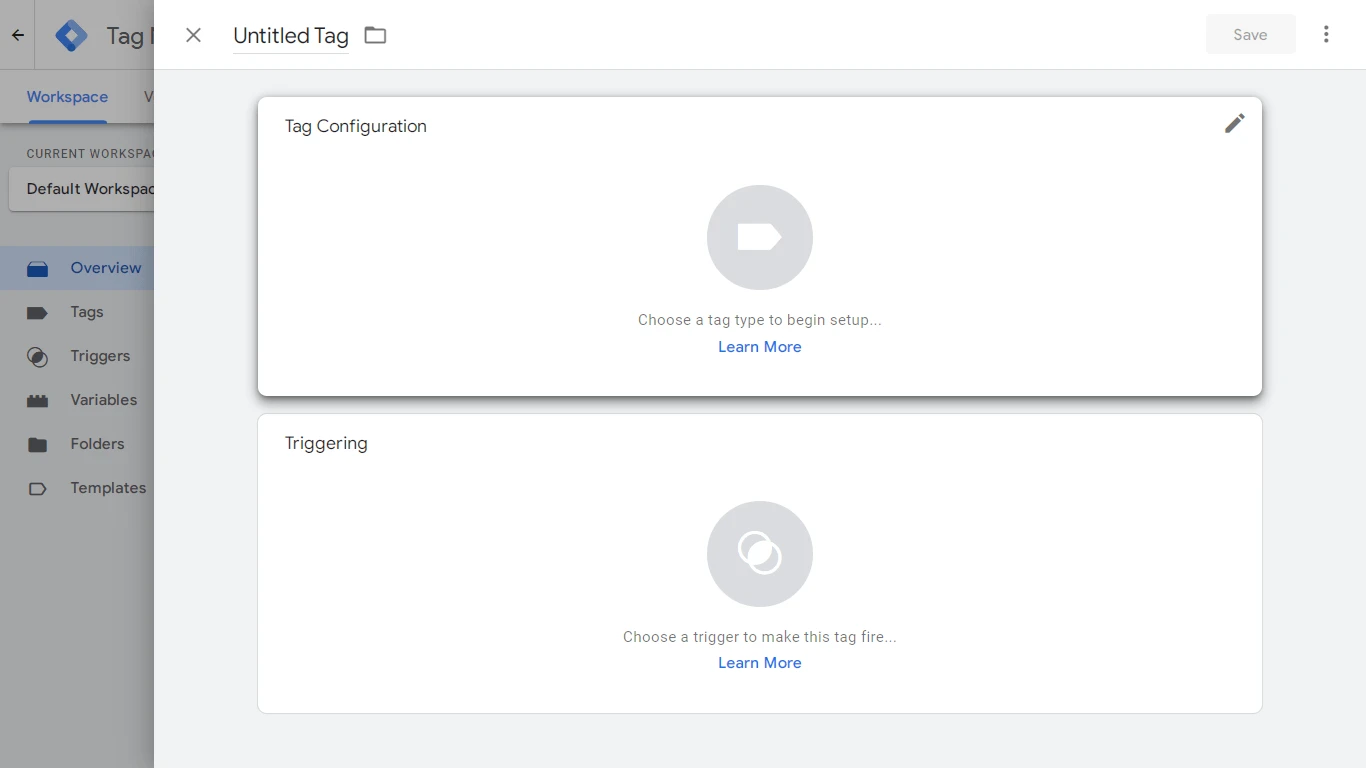
Configure a new GTM tag
Provide an easy-to-understand name for the tag. Google recommends naming tags as tag type - name of app - detail. Then click Tag configuration.
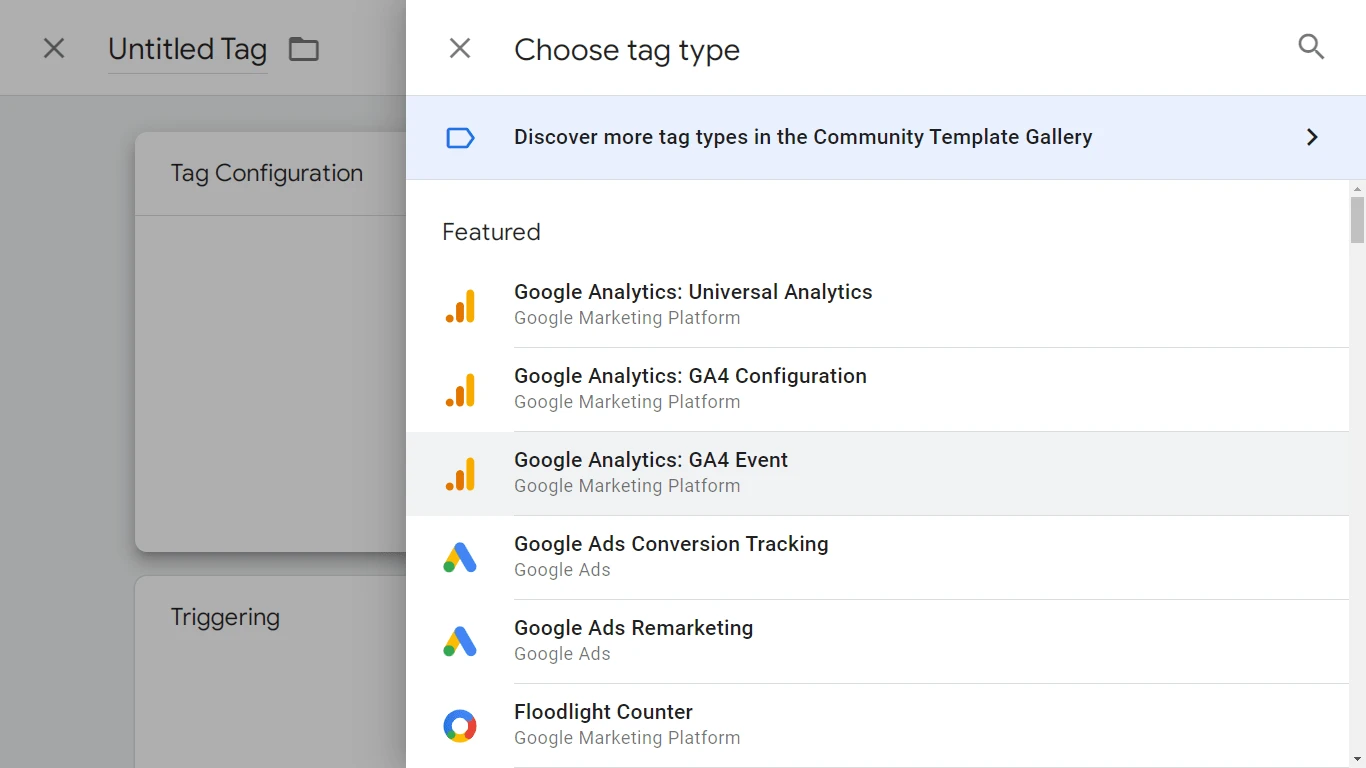
Choose the GTM tag type, for example, GA4 Event.
Set Configuration Tag, for example, GA4 - Configuration. Choose the Event Name from the list, and click Save. Add a tag trigger when a prompt appears.
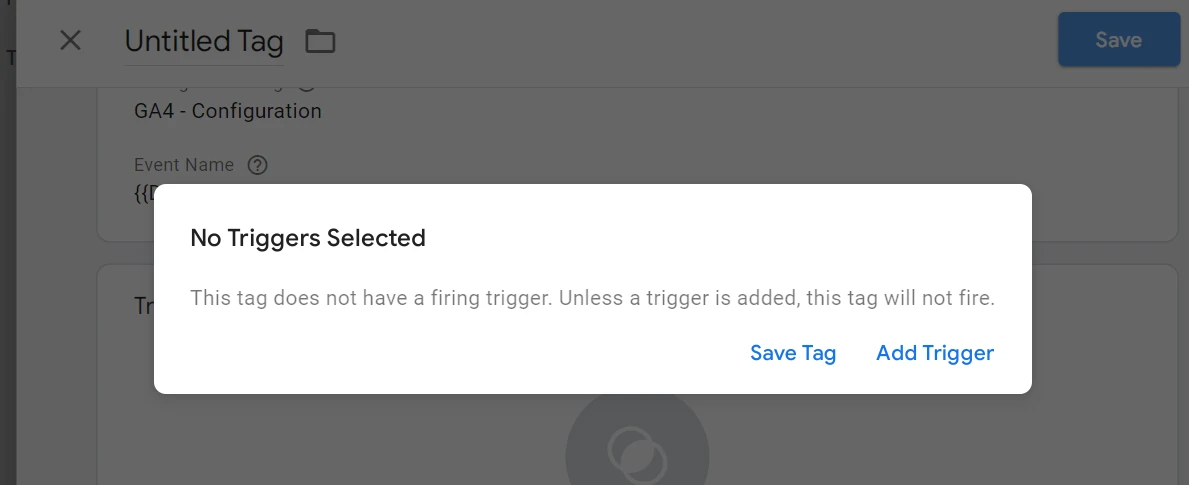
If you previously imported a set of triggers from the GTM extension in your store, you will have a list of available triggers. Otherwise, you have to create a new trigger by clicking the + sign.
How to create a new GTM tag trigger
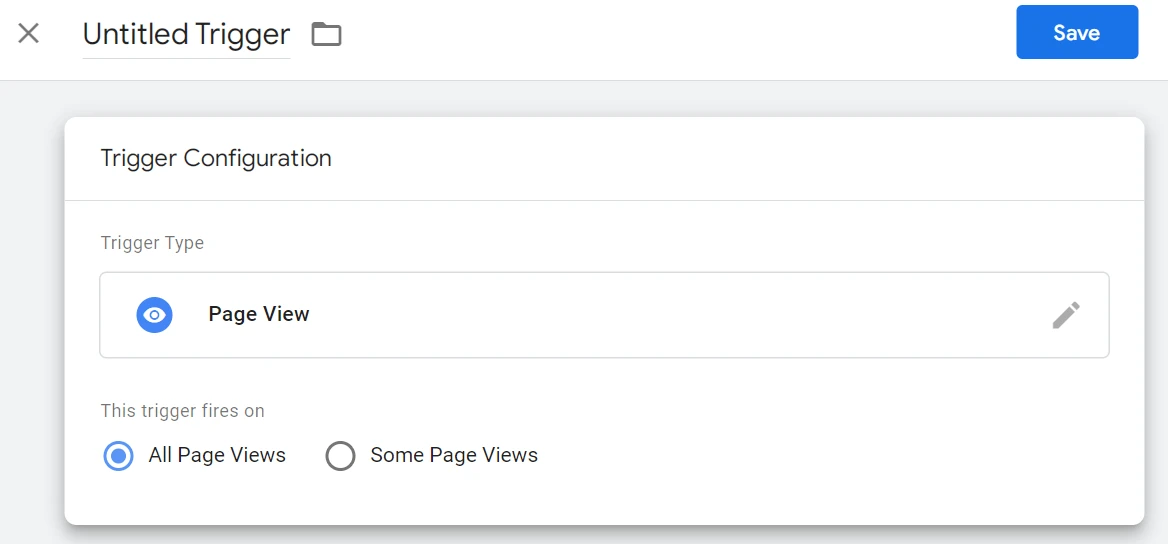
Click on + sign and then - on Trigger Configuration. Choose Trigger type.
You can select a trigger type from the list of four types:
- Page View
- Consent Initialization
- Initialization
- Page View
- DOM Ready
- Window Loaded
- Click
- All Elements
- Just Links
- User Engagement
- Element Visibility
- Form Submission
- Scroll Depth
- YouTube Video
- Other
- Custom Event
- History Change
- JavaScript Error
- Timer
- Trigger Group
Next, select where this trigger fires on. Each trigger type offers individual settings to fire. For example, a Page View trigger type can be selected to fire on All Page Views or Some Page Views.
Step 8. Submit GTM tags
Activate tags by clicking the Submit button. Choose Submission Configuration as Publish and Create Version. Provide a Version Name and optionally Version Description, and click Publish.
Click More (three vertical dots) and select Publish version. You will receive a message the published version is live.
Step 9. Verify GTM tags work correctly
Tags may not work properly when created due to mistakes in their configuration. Therefore, you need to verify each new tag works correctly after you create it.
Note: GTM Tags require some time for activation. It may take up to 48 for the GTM tag to start sending data to your Google Analytics account.
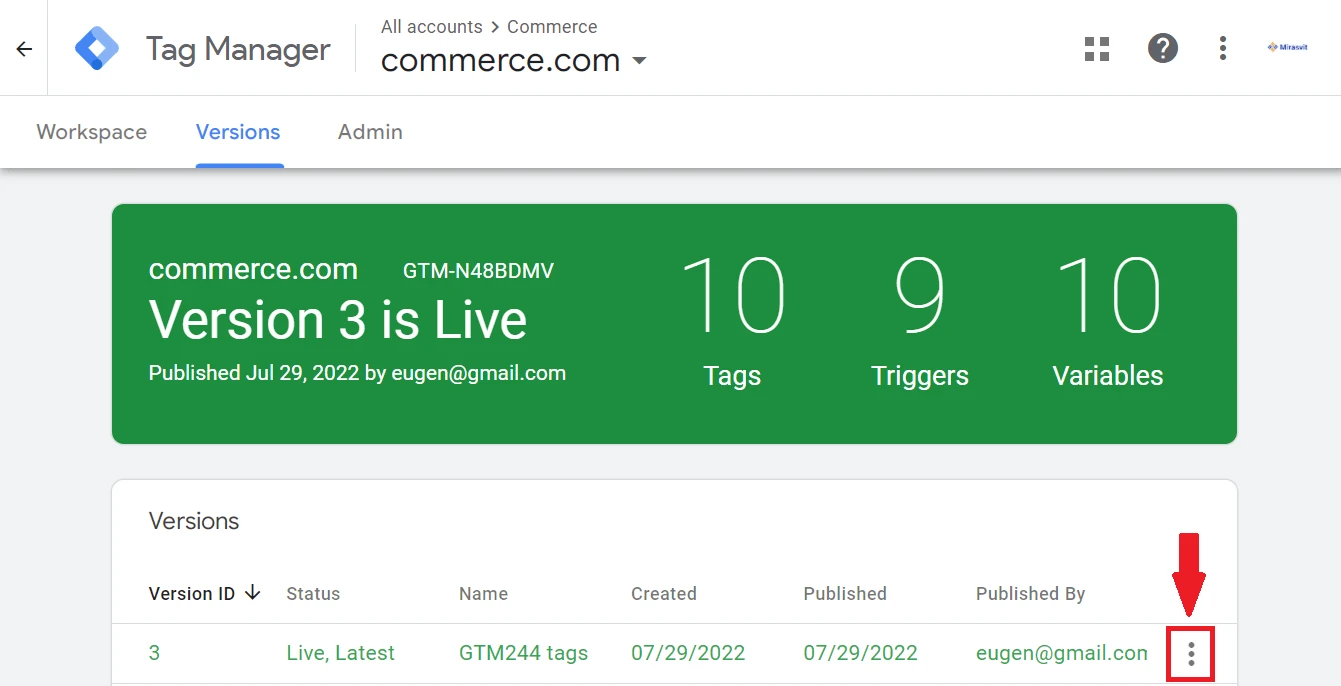
Locate the latest live tag version, click More (three vertical dots), and select Preview.
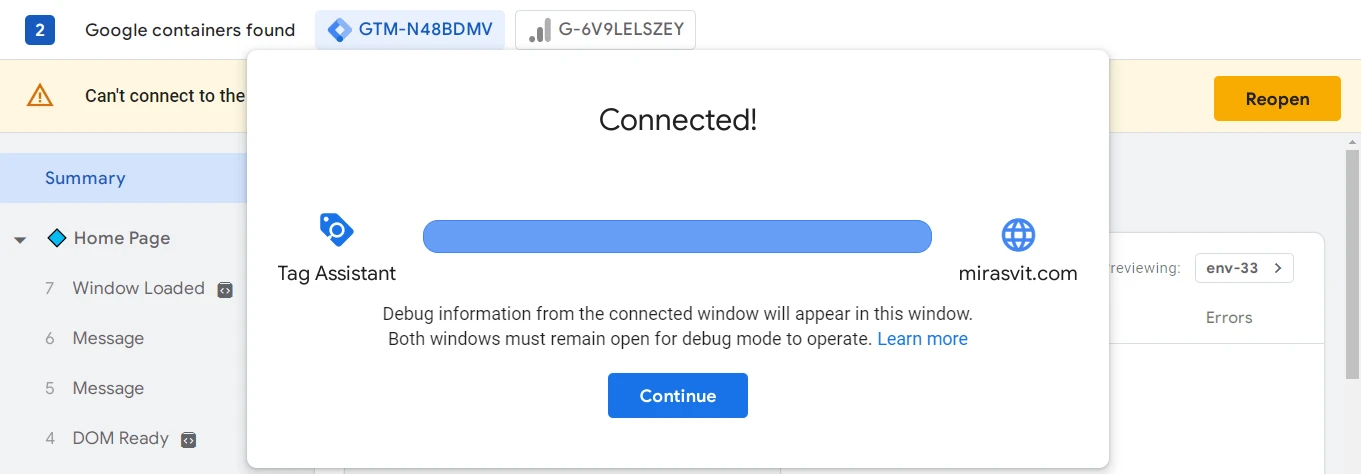
You will be transferred to the Tag Assistant web page. Provide the URL of your store and click Connect.
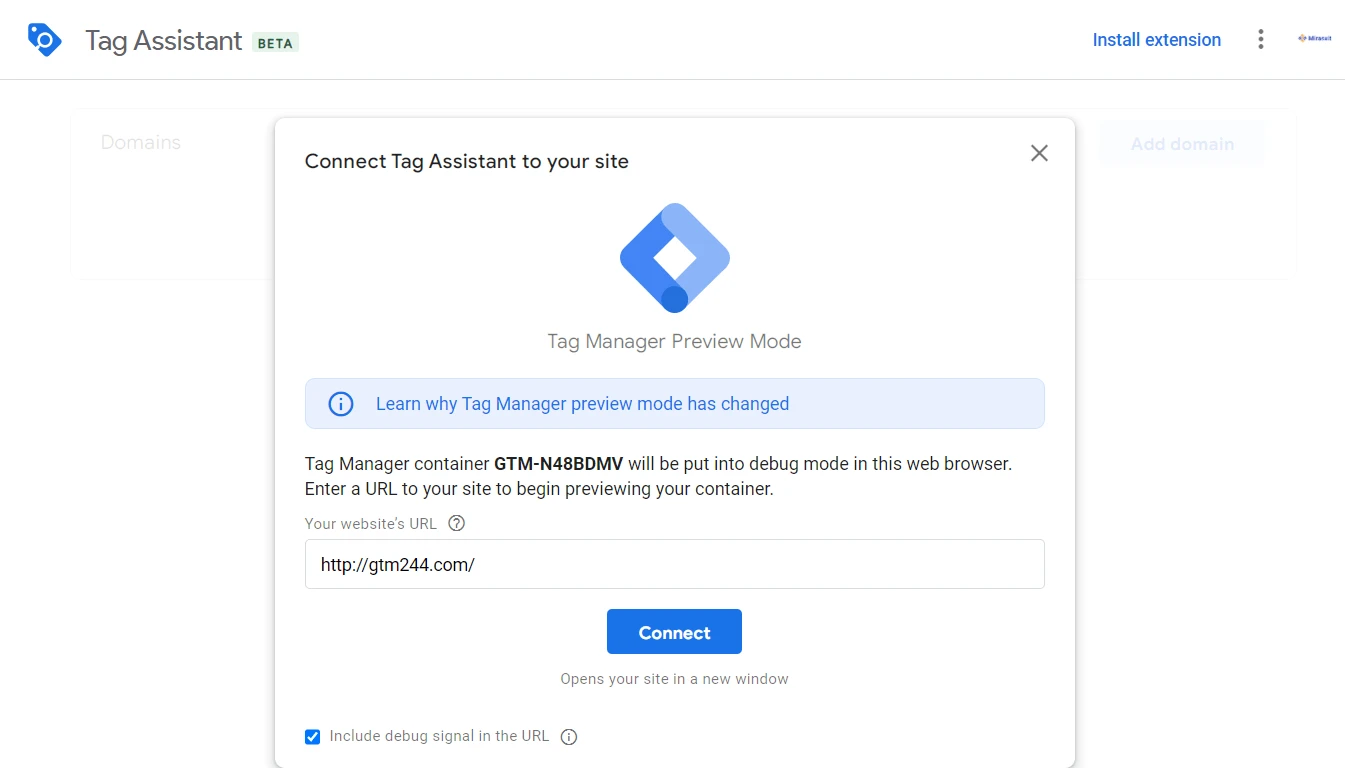
Your store automatically opens in a new browser window. The GTM service is successfully connected to your store and works if you see a Tag Assistant Connected window.
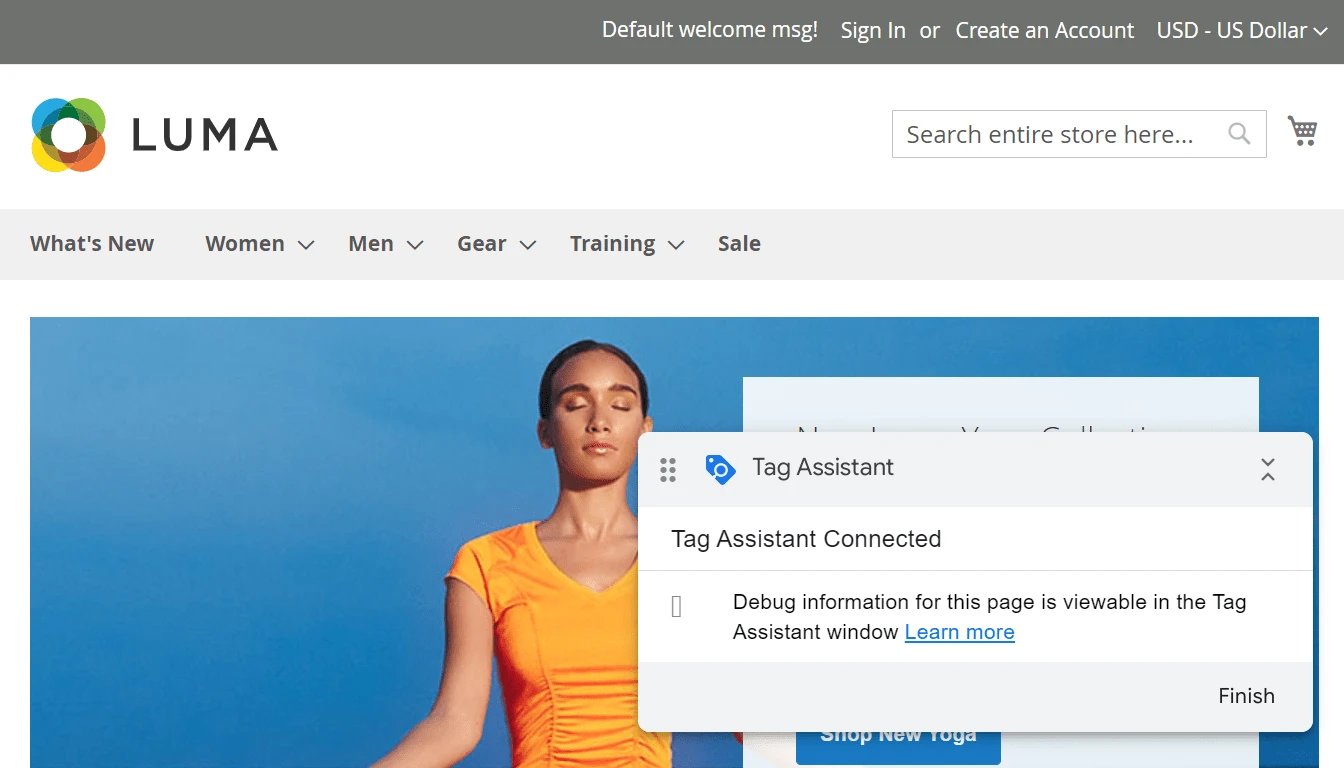
Click Continue in the Tag Assistant.
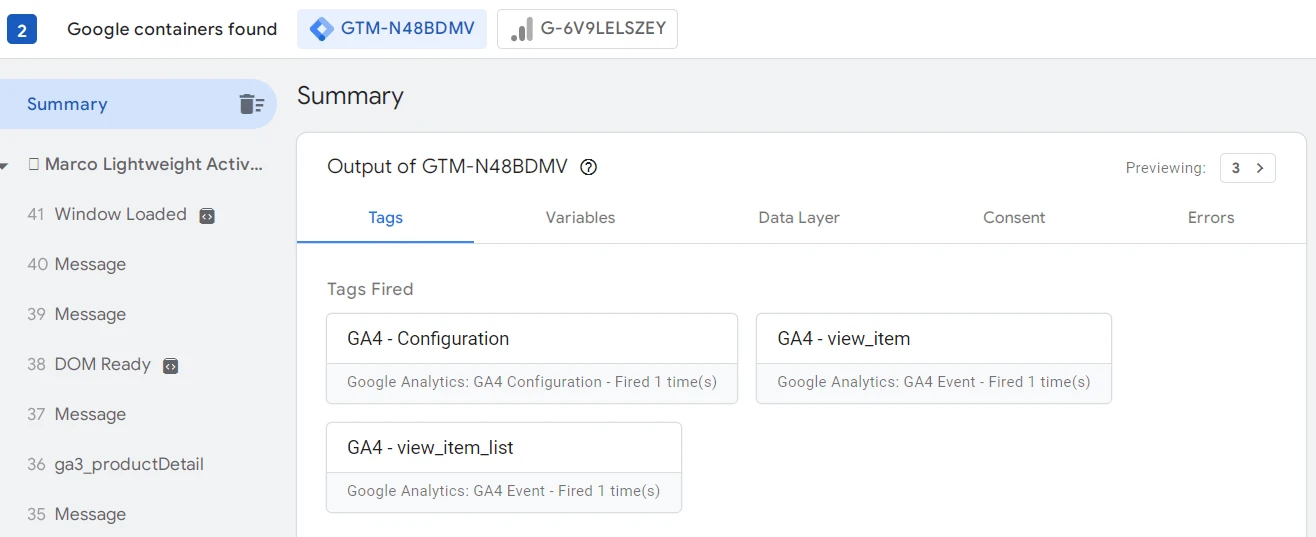
You will be presented with a page that monitors the work of your tags. In your store, do actions to fire the tag you want to check.
For example, you want to see if the view_item tag works. In your store, navigate to any product to fire the tag. The Tag Assistant should display that the tag has been run.
Verify that your Google Analytics 4 receives the tracking data. Simply navigate to the Realtime report to see the activity on the site for the last five minutes.

Summary
Managing tags with Google Tag Manager becomes easy and simple, but only after you take some time to learn this tool. It can be rather challenging to create your first tags, given the complex interconnection of GTM elements, like triggers, variables, tags, and containers.
You can speed up your GTM learning curve using a Mirasvit GTM extension for your Magento store. It requires only several IDs from you, offering you a rich set of default tags and triggers that you can simply import into your GTM account. This module will help you to launch user activity tracking over GTM almost in no time.
In conjunction with Google Analytics, Google Tag Manager is the powerful toolset to track almost any user activity in your Magento store. Additionally, you can extend your analytics and reporting stack by using Magento 2 Advanced Reports as an extra-powerful platform for e-commerce reporting.
Writer
Get in-depth reports on your customers' behavior while they are shopping using our Google Analytics 4 with GTM extension.
Utilize this module to integrate eCommerce Tracking with Google Analytics 4 and identify bottlenecks in the shopping process within your store.