Advanced SEO Suite Onboarding Checklist (Part 8): Check Info Section Settings
-
 Yulia Goncharova
- SEO
- Jan 19, 2017
- 1 min read
Part 8. Check Info section settings.
8.1. Go to System -> Configuration -> Mirasvit Extensions -> SEO. Look for the block of settings ‘Info (visible in frontend, will not work if FPC or Varnish enabled)’.
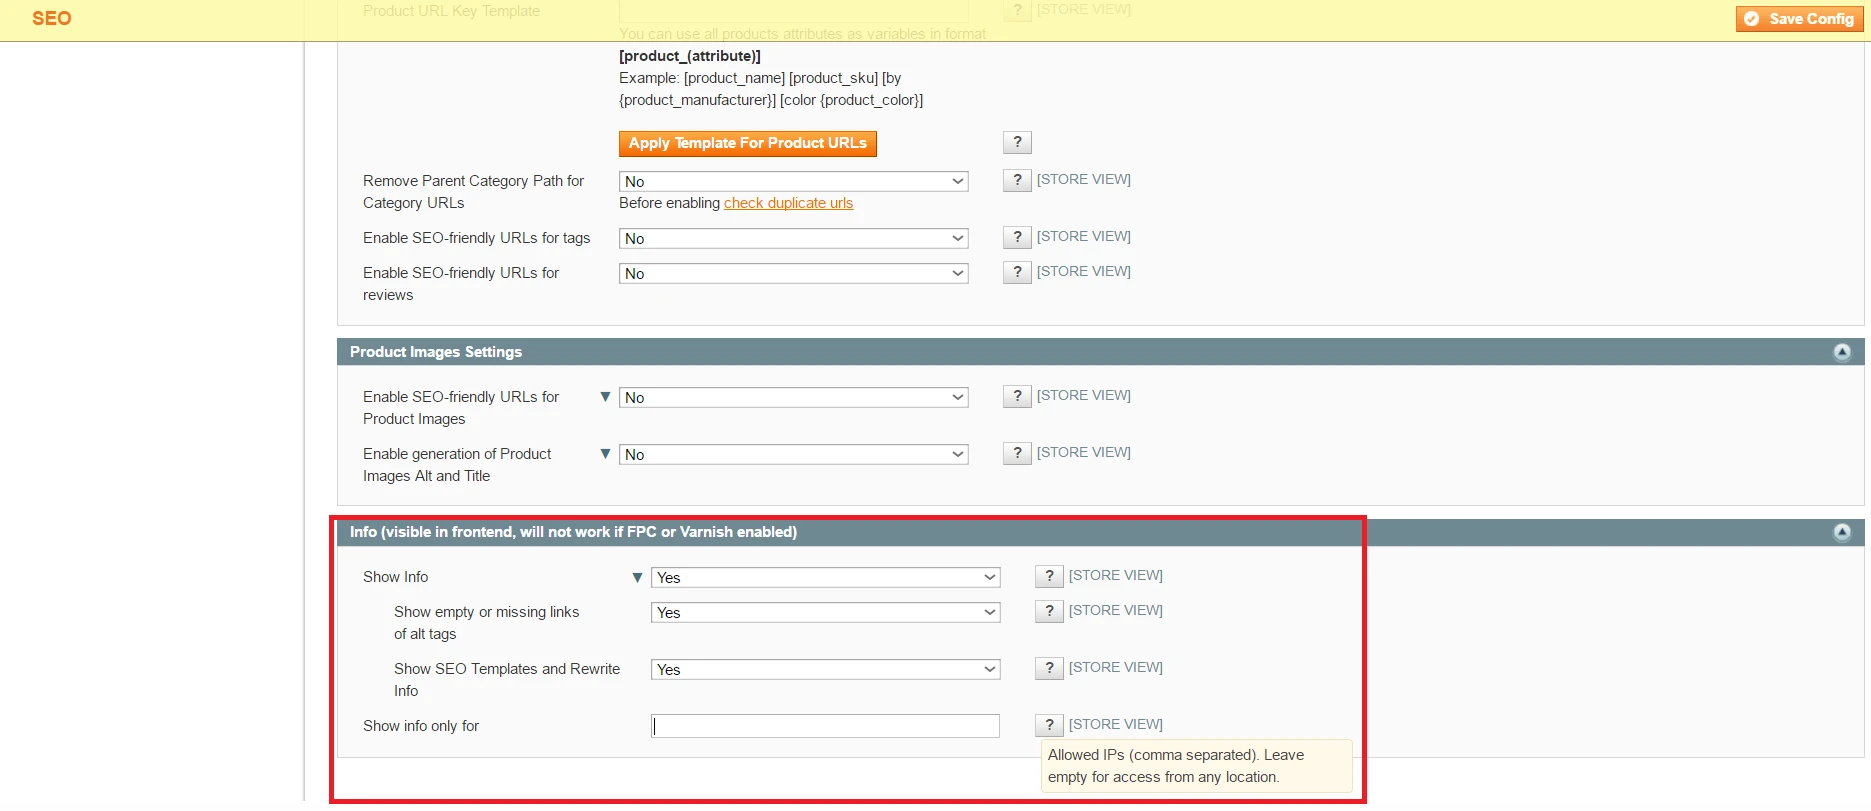
Image 1. Info Section settings in Advanced SEO Suite extension frontend.
8.2. Check the first field in this section ‘Show Info’. If you enable this feature, SEO toolbar containing short and important SEO information will be visible in your store frontend. Also, you’ll be able to configure showing (or Not) empty or missing links of alt tags and SEO templates and rewrites info.
8.3. Check, whom you want to show SEO toolbar in the frontend in the field ‘Show info only for’. If you leave it empty, every store visitor will be able to see it. But if you don’t want to show it everyone, you can enter IP addresses of those who should view SEO toolbar.
That’s it! Checked!
Now you’ve handled SEO toolbar settings and can display it for the chosen visitors.
Next time we’ll create your store first SEO template.
Also you may read previous parts of our onboarding checklist using the following links:
Part 1. What to check right after installation?
Part 2. How To Tweak Your Frontend Sitemap?
Part 3. How To Tweak SEO Suite Extension settings?
Part 4. Check Extended settings.
Part 5. Check if your rich snippets are ready.
Part 6. Check SEO-friendly URL Settings.
Part 7. Check Product Images settings.
OR
wait a bit for the next one:
Part 9. Check / Create SEO templates.
Part 10. Check Rewrites section settings.
Part 11. Check Redirects management section.